

Silken Moon's Serenade is a 5-star artifact set released in Version 6.0 that provides 20% Energy Recharge (2-piece) and team-wide Elemental Mastery buffs of 60-120 plus 10% Lunar Reaction damage (4-piece). Best suited for Nod-Krai support characters like Lauma, Ineffa, and Aino in Lunar-Bloom and Lunar-Charged team compositions, requiring 800+ EM and 160-180% ER optimization.
Silken Moon's Serenade Set Overview and Effects
2-Piece Set Bonus Breakdown
The 2-piece gives you a solid +20% Energy Recharge boost. What's nice here is that it basically eliminates the need for ER main stats if you've got decent substats rolling. Think of it as Emblem of Severed Fate's little sibling—same 2-piece effect, but the 4-piece takes you in a completely different direction for support builds.
4-Piece Set Bonus Analysis
Here's where things get interesting. The 4-piece kicks in when you deal Elemental DMG, giving your team Gleaming Moon: Devotion for 8 seconds. The EM boost depends on how many Nod-Krai characters you're running—60 EM with one, or 120 EM with two or more (thanks to Moonsign mechanics).
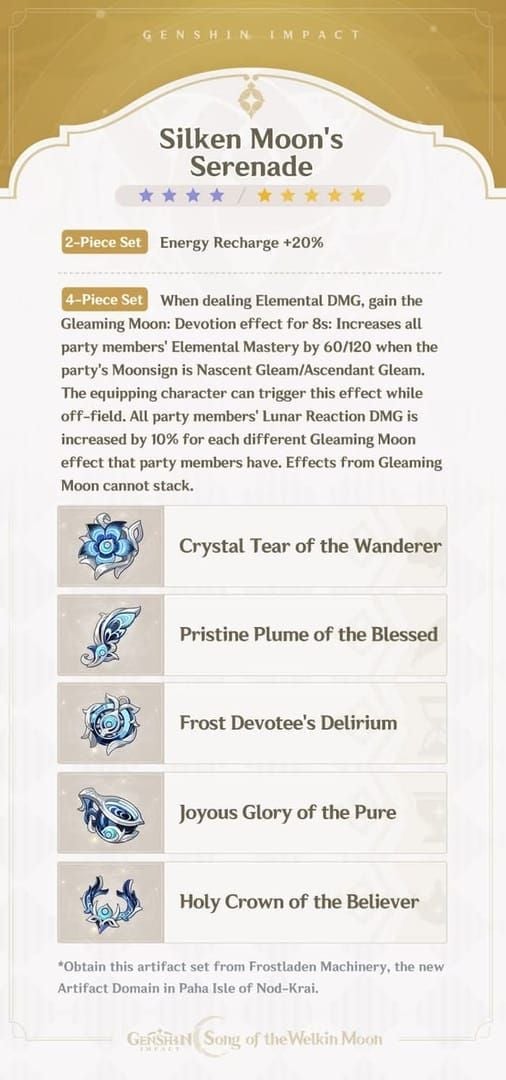
But wait, there's more. All party members get 10% Lunar Reaction DMG for each different Gleaming Moon effect that's active. Pair this with Night of the Sky's Unveiling set on another character? You're looking at a consistent 20% Lunar Reaction damage bonus with that sweet 8-second refresh uptime.
For enhanced Nod-Krai teams, buy Genshin Impact Genesis Crystals bundle through BitTopup's secure platform, offering competitive pricing and instant delivery for character acquisition.
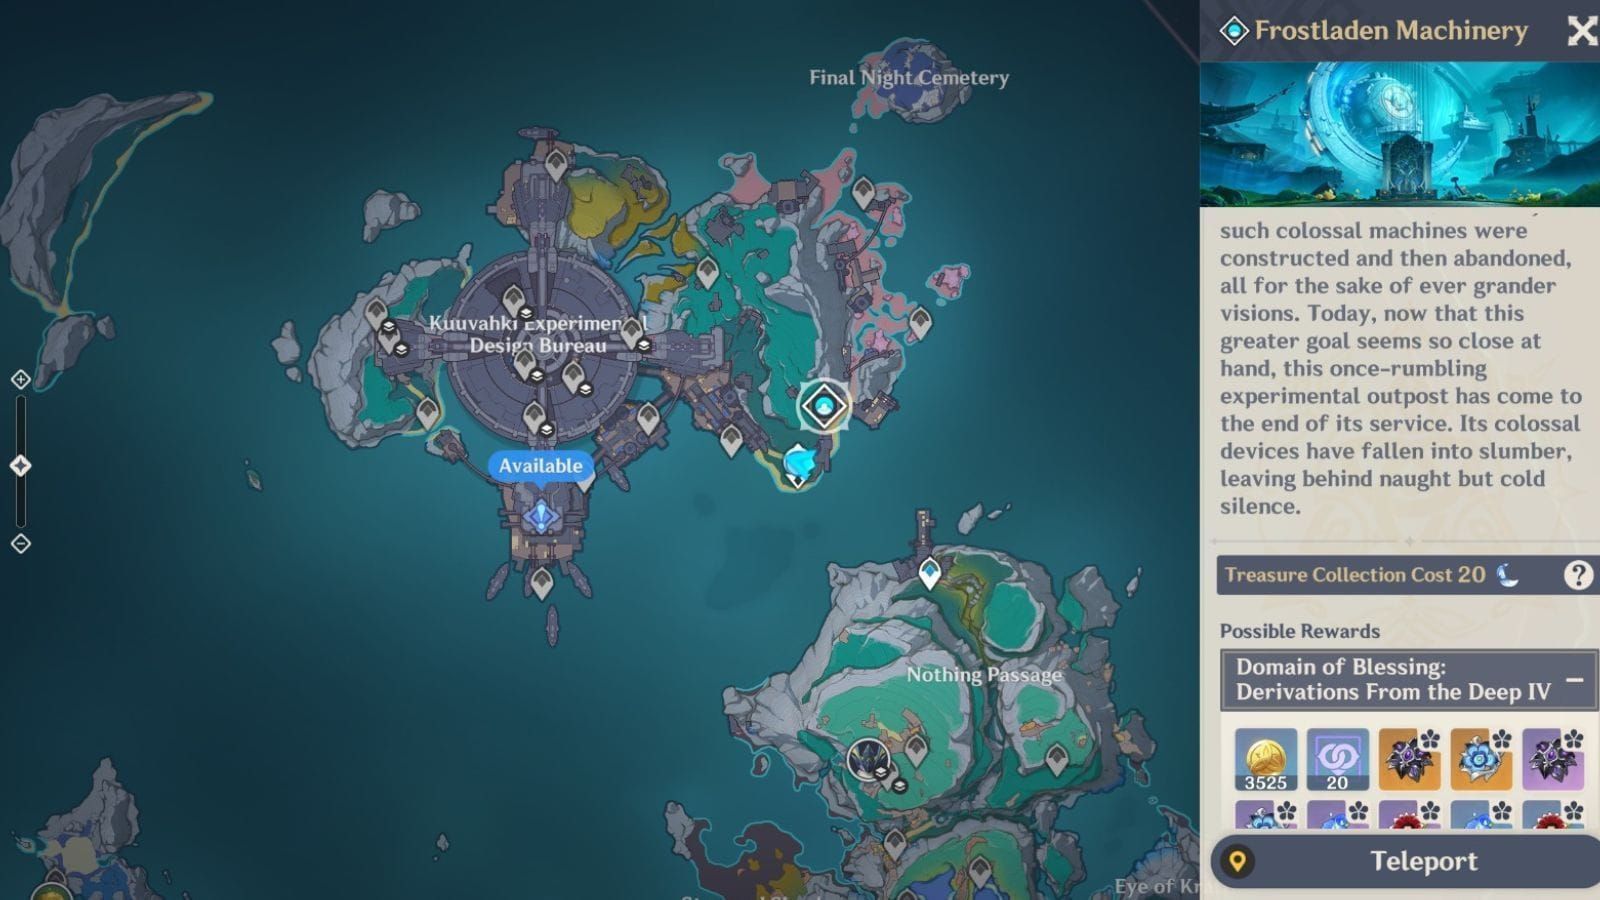
Set Acquisition
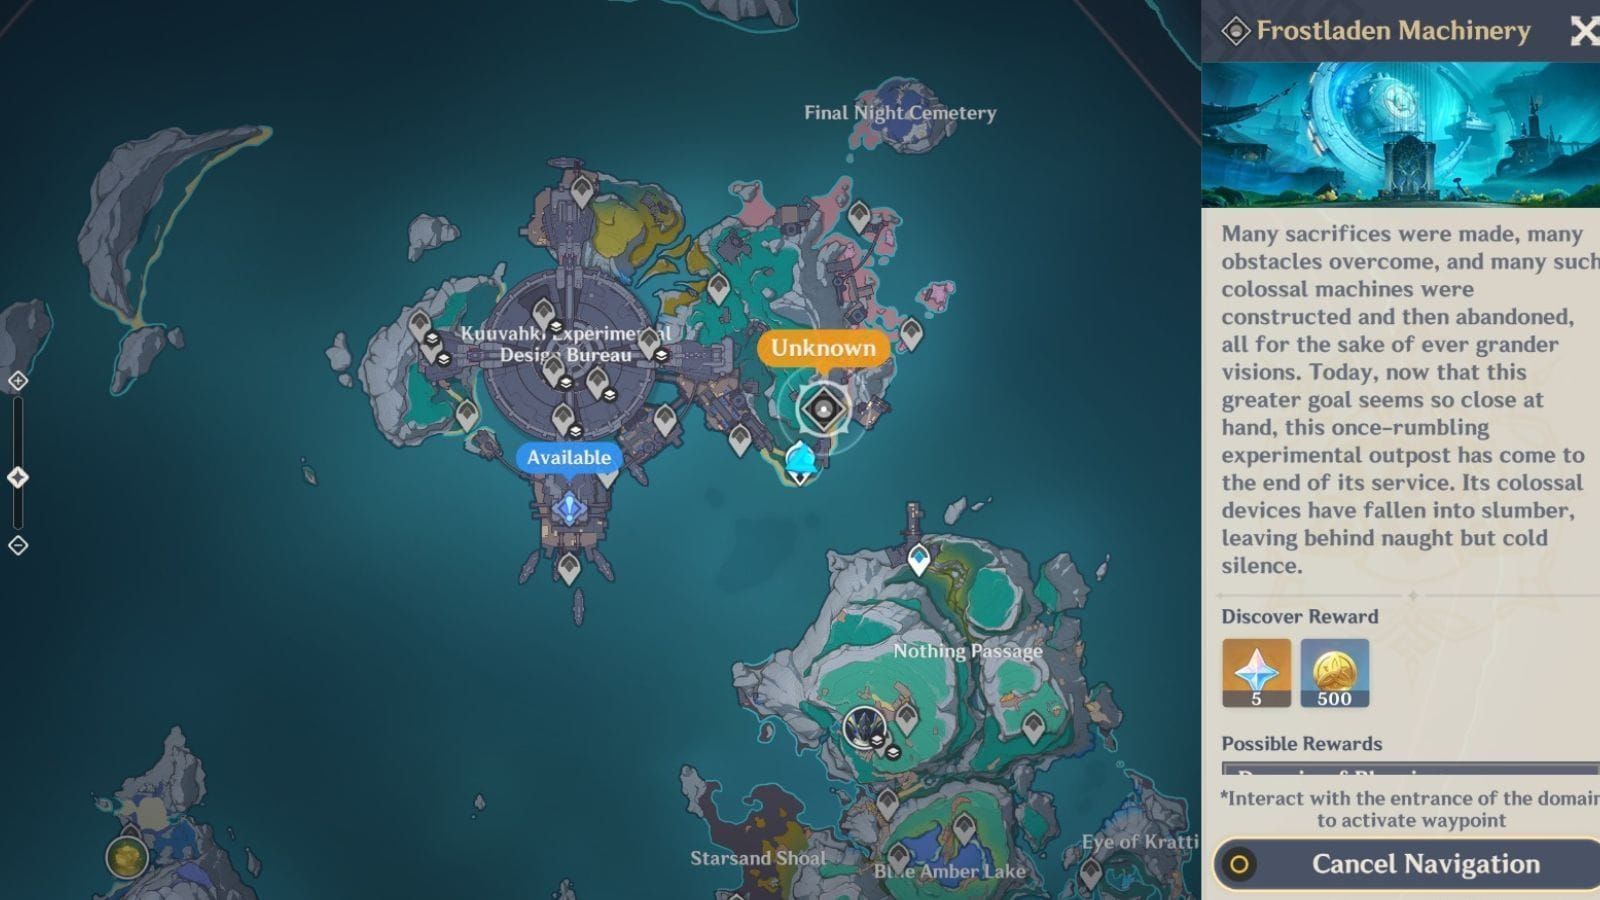
You'll find all five 5-star pieces in the Frostladen Machinery domain over in eastern Nod-Krai—been available since September 10, 2025. If RNG isn't being kind, there's always the Artifact Converter route. One piece per version using Consecrated Elixirs, though that's more of a patience game.
Best Characters for Silken Moon's Serenade
S-Tier Character Recommendations
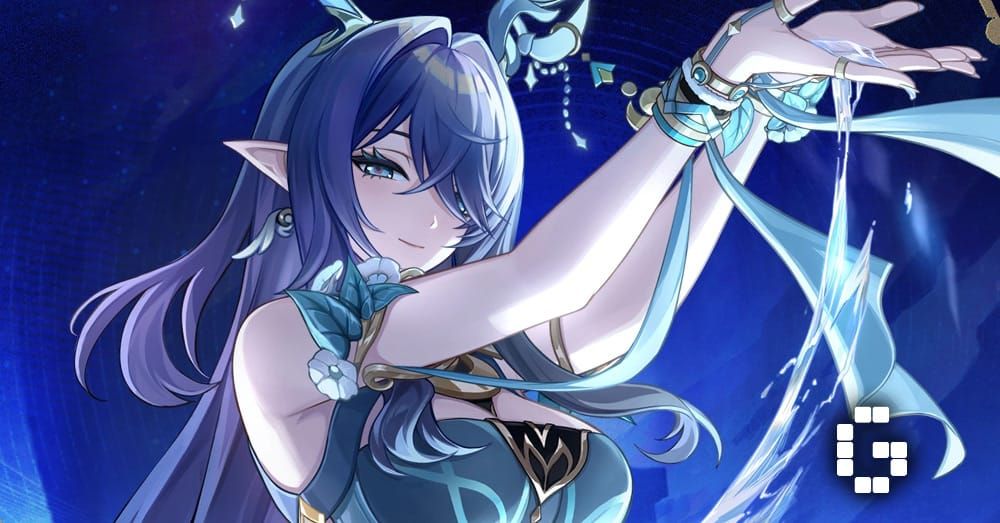
Lauma (5-star Dendro Catalyst): This character's a beast for Dendro teams. Reduces enemy Dendro/Hydro RES by 25% for 10 seconds and amplifies Bloom/Lunar-Bloom damage based on EM—we're talking 115 EM scaling at level 90. You'll want 800-850+ EM and 160-180% ER (though C4 owners can drop that to 140-160%).
Ineffa (5-star Electro): The Moonsign manipulator. Boosts Moonsign by 1 level and provides a massive 90% Lunar-Charged bonus when paired with Flins. Target the same EM range as Lauma—850-900+ EM with 160-180% ER.
Aino (4-star Hydro Claymore): Don't sleep on this 4-star. Creates a 14-second AoE Hydro zone, and C1 adds +80 party EM for 15 seconds. Again, 850-900+ EM and 160-180% ER (140-160% with C4).
Character Synergy Analysis
Here's the sweet spot: you want exactly 1-2 Nod-Krai characters for that Ascendant Gleam (+120 EM). Ineffa's passive is clever—it lets single Nod-Krai teams access enhanced effects without needing a second character.
When you pair this with Night of the Sky's Unveiling, you're getting that full 20% Lunar Reaction damage bonus. We're seeing 20-40% performance increases over legacy sets in testing.
Optimal Main Stats Configuration
Priority Order
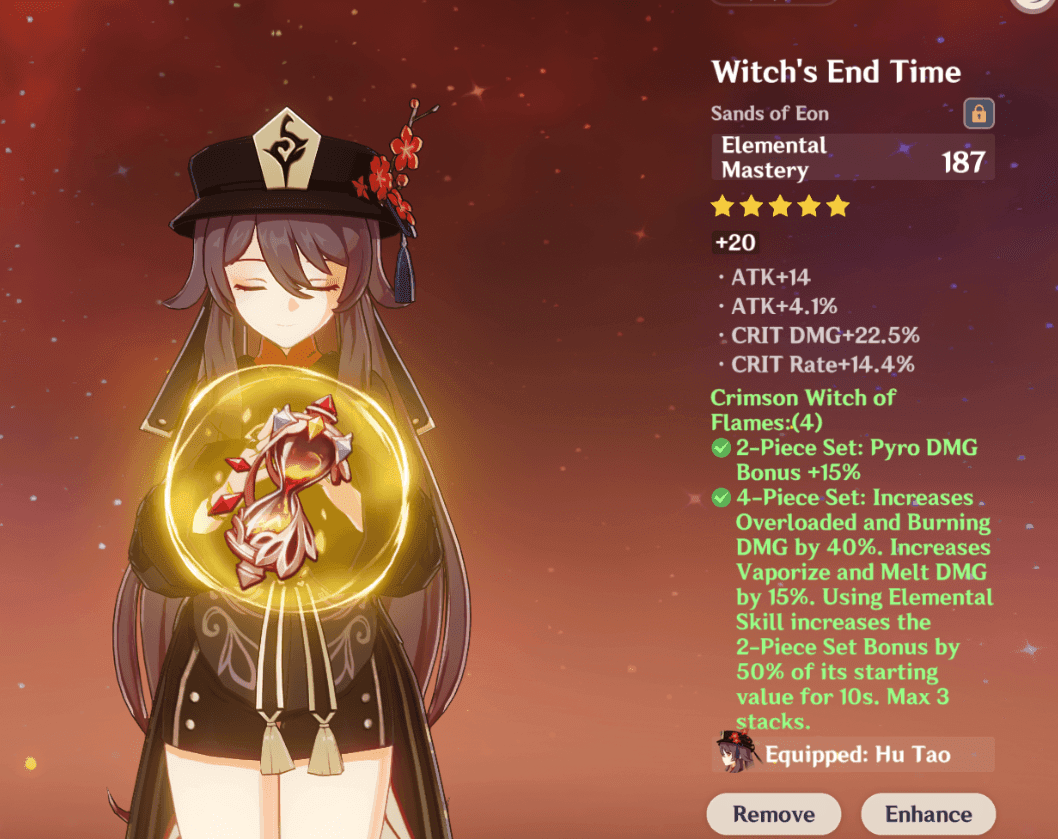
Sands: EM is your bread and butter here—187 EM at level 20 helps hit those 800-850+ targets. Only go ER if you're sitting below that 160-180% threshold. ATK% is really only worth it for Ineffa hybrid builds (0.7% Lunar-Charged DMG per 100 ATK).
Goblet: EM for pure support builds gives you 30-40% higher reaction output. Elemental DMG goblets? Only if you're going hybrid DPS.
Circlet: EM's your default choice. CRIT Rate/DMG only makes sense with signature weapons that enable reaction crits—and you'll need 60-70% CRIT Rate with 180%+ CRIT DMG to make it worthwhile. Healing Bonus exists for niche healer builds, but honestly, that's pretty rare.
When optimizing artifacts, use BitTopup to top up Genshin Impact crystals instant delivery for resin refreshes. BitTopup provides secure transactions with competitive rates and 24/7 customer support.
Sub-Stats Priority and Optimization
Critical Hit Stats Balance
Only chase CRIT stats if you've got CRIT-enabling weapons. Target that classic 1:2 ratio—60-70% CRIT Rate and 180%+ CRIT DMG. Lunar-Bloom gives you a nice foundation with 15% base CRIT Rate and 100% CRIT DMG through Moonsign, plus Ascendant Gleam adds another 10% CRIT Rate and 20% CRIT DMG.
Pro tip: maintain at least 50% CRIT Rate if you're running Favonius weapons for particle generation.
Energy and EM Requirements
ER Priority: Most characters want 160-180% ER. Nod-Krai characters generate particles at a 66.7% chance per off-field hit, so calculate it as (Burst cost / expected particles) x 100%. Insufficient ER means 10-20% Burst downtime, which hurts.
EM Scaling: Each substat roll gives you roughly 23 EM. Here's the thing—1000+ EM provides 40% higher reaction damage compared to 800 EM builds. Your priority should be: ER > EM > CRIT > ATK%.
Domain Location and Farming Strategy
Domain Access
Frostladen Machinery sits in eastern Nod-Krai at the Kuuvahki Experimental Design Bureau on Paha Isle. You'll need to complete the Nod-Krai story first. The route's a bit involved: Nothing Passage waypoint → boat to the island → Kuuvahki mechanism → Paha Isle → Statue of the New Moon → defeat some Fatui → domain entrance.
Farming Efficiency
Standard 20 resin per run, 1-2 artifacts per clear. You're looking at 3000-4000 total resin (150-200 runs) for a complete optimized set. That's 3-4 weeks of natural resin, or significantly less during double-reward events.
Focus on getting correct main stats before obsessing over substats—we're talking 60-80% contribution difference. Also, enhance to +16 before going to +20 for cost efficiency.
Set Comparison and Alternatives
vs Deepwood Memories
Deepwood gives +15% Dendro DMG and -30% enemy Dendro RES. It's superior for pure Dendro damage (15-25% higher individual damage), but Silken wins for reaction teams with 20-30% higher team reaction damage in Nod-Krai compositions.
vs Gilded Dreams
Gilded offers +80 EM base with up to 150 EM conditional in mixed-element teams. Silken provides fixed 60-120 EM team-wide, which ends up being more consistent in Nod-Krai focused teams.
vs Emblem of Severed Fate
Emblem converts 75% ER to Burst DMG for solo damage dealers. Silken focuses on team amplification through EM buffs, typically resulting in 20-30% higher overall team damage.
Build Examples and Calculations
Lauma Optimal Build
Stats: 850 EM, 170% ER, 60% CRIT Rate
Artifacts: EM/EM/EM with Nightweaver's Looking Glass
Performance: 40% higher Lunar-Bloom damage vs standard Bloom, +32% Skill DMG at 800 EM
Ineffa Hybrid Build
Stats: 900 EM, 170% ER, 2000 ATK
Artifacts: ER/EM/CRIT with Favonius Codex
Scaling: 14% Lunar-Charged DMG from ATK passive, 90% bonus with Flins
Aino Support Build
Stats: 850 EM, 160% ER (140% with C4)
Artifacts: EM/EM/EM with Favonius Greatsword
Utility: 14-second Hydro zone, C1 +80 party EM for 15 seconds
Common Mistakes and Troubleshooting
Stat Errors: Using Elemental DMG goblets on pure supports costs you 30-40% reaction output. Insufficient ER investment causes Burst downtime. Over-investing in CRIT without enabling weapons is just wasted stats.
Team Issues: Wrong Nod-Krai character count—you need exactly 1-2 for optimal Moonsign. Don't neglect Lunar Reactions in favor of traditional reactions.
Farming Mistakes: Ignoring main stat priorities is the big one. Don't enhance to +20 before confirming substats are decent. Always prioritize ER > EM before other optimizations.
Advanced Tips and Meta Analysis
Spiral Abyss Performance
Premium compositions (Lauma + Nilou + Aino) are matching meta performance right now. F2P alternatives show 15-20% lower DPS, which isn't terrible.
Rotation's pretty straightforward: Aino Burst → Lauma Skill → Nahida Skill → Lauma Burst, repeat every 20 seconds.
Investment Priority
High: If you've got Lauma/Ineffa or multiple Nod-Krai characters
Medium: Planning future Nod-Krai pulls during double-reward events
Low: Sticking with traditional reaction teams until you acquire relevant characters
Current testing shows 80% Lunar Reaction damage bonuses through dual set combinations, which exceeds legacy artifact performance in specialized compositions.
FAQ
Which characters benefit most from this set?
Lauma (Dendro support), Ineffa (Electro support), and Aino (Hydro support)—all Nod-Krai characters that enable Moonsign mechanics.
What main stats should I prioritize?
EM on Sands/Goblet/Circlet for reaction scaling. ER Sands if you're below 160-180% total. CRIT circlets only with signature weapons.
How much resin for a complete set?
3000-4000 resin (150-200 runs) equals 3-4 weeks natural resin or 1-2 weeks during double-reward events.
2-piece or 4-piece usage?
4-piece for teams with 1-2 Nod-Krai characters. 2-piece only if you're mixing with other sets or another character's wearing the 4-piece.
Energy Recharge targets?
160-180% ER for Lauma (80-energy), Ineffa (60-energy), Aino (50-energy). Reduce by 20% with C4 or Favonius weapons at 60% CRIT Rate.