

Master Miramar's challenging desert terrain through strategic vehicle selection, safe ridge navigation techniques, and optimal rotation timing. This comprehensive guide covers UAZ vs Dacia performance, ridge positioning tactics, and step-by-step rotation execution to significantly improve your survival rates on the 8x8 km desert battlefield.
Understanding Miramar Ridge Terrain and Vehicle Dynamics
Let's be honest—Miramar isn't everyone's favorite map. But here's the thing: once you understand how to work with those ridges instead of against them, this desert becomes your playground.
Ridge Types and What They Actually Mean for Your Game
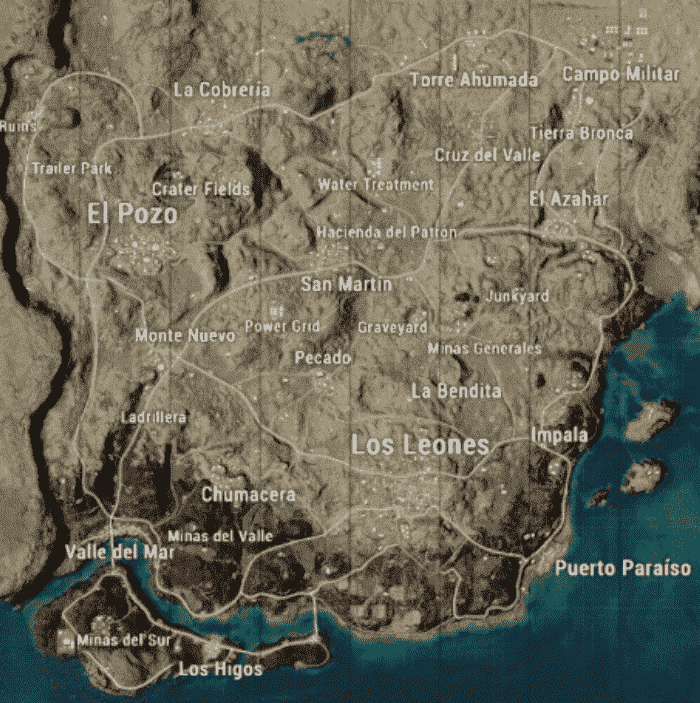
Miramar's 8x8 km desert features 80.59% land coverage with three distinct ridge types that'll either save your life or end your match. Primary Ridge Systems around Cruz del Valle and La Cobrería? These are your money spots. We're talking 360-degree visibility that turns any decent DMR player into a legitimate threat.
Then you've got Secondary Ridge Networks near Monte Nuevo and Minas Generales. Think of these as your pit stops—places where you catch your breath and plan your next move. Micro-Ridge Formations might look insignificant on the map, but trust me, when you're caught in the open with bullets flying, these little bumps become lifesavers.
Vehicle Physics on Slopes—this is where things get interesting (and where most players mess up). The game follows realistic mechanics, which means when your UAZ goes airborne, you're basically a sitting duck with zero steering control. Here's a pro tip that took me way too long to figure out: tap those directional buttons instead of holding them down. Sustained turns on rough terrain? Recipe for disaster.
Rocky surfaces grip better than sand—obvious when you think about it, but you'd be surprised how many players ignore this. Anything steeper than 30 degrees will challenge even the best vehicles.
Reading Terrain Like a Pro
Slope Assessment isn't rocket science, but it requires attention. Dark shadows usually mean sharp drop-offs that'll wreck your day. Lighter terrain suggests manageable grades. Cover Identification becomes second nature once you start actively looking for rocks, terrain folds, and elevation changes during every rotation.
Essential Vehicle Selection for Ridge Navigation
The Great UAZ vs Dacia Debate (Spoiler: It's Not Even Close)
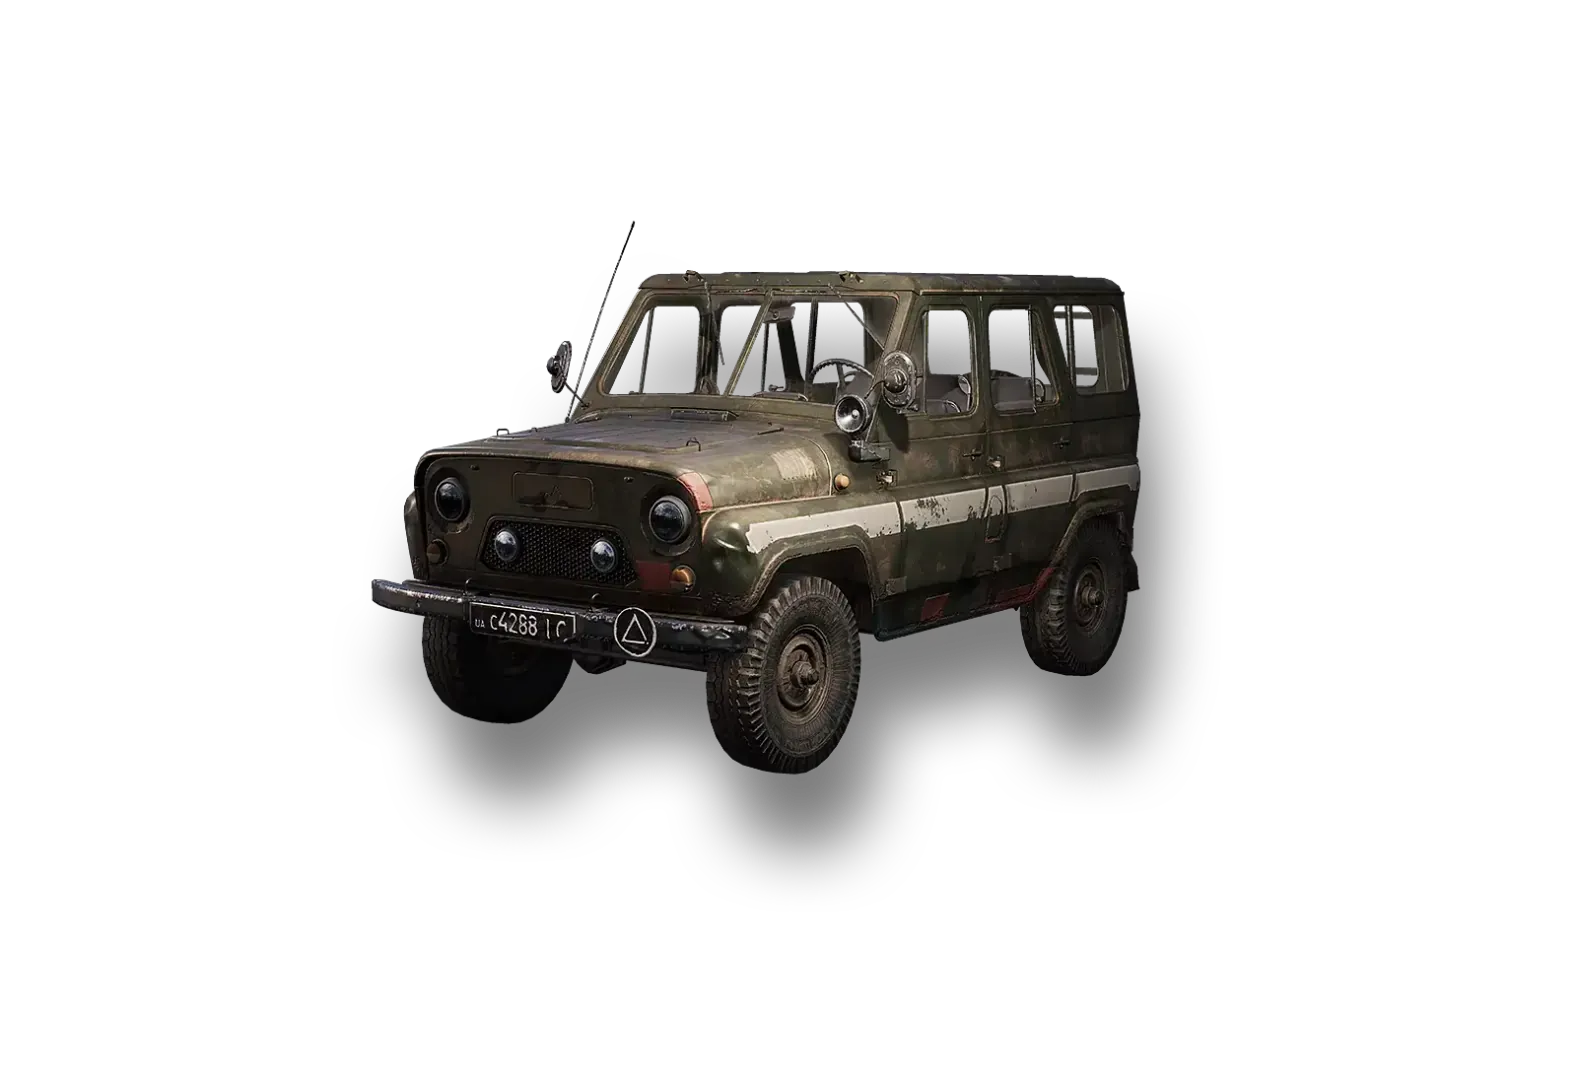
Look, I get it. The Dacia hits 139 km/h on roads and feels smooth as butter. But here's what the speed demons don't tell you about Miramar specifically:
UAZ Advantages are game-changing on this map. Superior off-road capability isn't just marketing speak—it's the difference between making it to the circle and becoming someone's easy kill. That robust frame handles impacts that would cripple other vehicles. Higher ground clearance means you're not getting stuck on every rock formation. Most importantly? The UAZ maintains 60-70% of its road speed on moderate inclines.
Dacia Limitations become painfully obvious the moment you leave pavement. Sure, 139 km/h sounds great until you're crawling up hills at 30-40% speed while that UAZ you passed earlier cruises by at 60-70%. Low clearance means you're constantly bottoming out, and the traction on loose surfaces is frankly embarrassing.
Motorcycle and Buggy: High Risk, High Reward
Motorcycles top out at 152 km/h—fastest rotation option available. But (and this is a big but) both riders are completely exposed. I've seen too many promising matches end because someone thought they could outrun a sniper on a bike.
Buggies excel at one thing: getting to places other vehicles simply can't reach. That uphill climbing ability opens up positioning options that can win matches. The downside? Light frame means you're sliding around like you're on ice, and that rear passenger might as well have a target painted on their back.
For enhanced equipment access, Miramar tips UC top up deals provide cost-effective solutions for premium vehicle skins and performance upgrades.
Safe Rotation Route Planning
The Three Corridors That Actually Matter
Northern Corridor runs from Cruz del Valle through La Cobrería to the central highlands. This route gives you consistent elevation and overwatch positions—perfect for teams that like to control the high ground. Central Ridge Network is your hub-and-spoke system connecting Monte Nuevo, Minas Generales, and the Power Grid. Maximum flexibility, but also maximum competition.
Southern Routes through Hacienda del Patrón and Valle del Mar's coastal ridges? Underrated. Most squads ignore these paths, which makes them surprisingly safe for repositioning.
Alternative Routes aren't just backup plans—they're survival tools. Valley floor corridors sacrifice elevation for speed when your ridge position gets compromised. Coastal alternatives via Valle del Mar bridge work when inland routes become contested. And yes, sometimes you'll need those emergency foot paths when your vehicle becomes scrap metal.
Circle-Based Route Selection (Because Timing Is Everything)
First Circle: This is your land grab phase. Identify the safest path to high-value ridge positions before enemy squads establish defensive positions. Speed matters here.
Mid-Game: Maintain central positioning while keeping escape options open. The worst thing you can do is box yourself into a corner with nowhere to run.
Late Circle: Cover maintenance becomes priority number one, but you still need to position for final zone advantages. It's a delicate balance.
Step-by-Step Ridge Rotation Execution
Pre-Rotation Prep (The Stuff That Wins Matches)
1. Circle Analysis isn't just looking at the map. Study that next boundary like your life depends on it—because it does. Mark primary and backup routes, note potential chokepoints, and calculate travel time with departure timing. Don't guess; plan.
2. Vehicle Assessment means more than just checking if it runs. Health and fuel levels, positioning for quick departure, optimal exit angles—these details separate good players from great ones.
3. Equipment Management gets overlooked until it's too late. Distribute healing and ammunition, assign smoke grenades (seriously, bring smokes), and verify those long-range weapon loadouts.
Navigation Techniques That Actually Work
Controlled Ascent means maintaining steady speeds and avoiding sudden acceleration that causes traction loss. I've watched countless squads wipe because someone floored it up a hill and lost control.
Ridge Crest Approaches require finesse. Minimize skyline exposure time and approach at angles that provide immediate far-side cover. Getting silhouetted on a ridge crest is basically asking to get sniped.
Descent Management is where physics becomes your enemy or your friend. Control that speed reduction and select paths that avoid steep drops and loose surfaces.
When Everything Goes Wrong
Under Fire: Deploy smoke grenades immediately, use your vehicle as mobile cover, and coordinate movement to minimize exposure. Panic gets you killed; preparation keeps you alive.
Vehicle Damage: Monitor those health indicators religiously. Abandon smoking vehicles before they explode—seems obvious, but adrenaline makes people do stupid things. Establish overwatch during transitions.
Route Compromise: Activate backup plans without hesitation. Adapt timing to avoid gatekeeping, and consider alternative objectives. Flexibility wins matches.
Vehicle Positioning and Ridge Combat
Defensive Positioning That Actually Protects You
Hull-Down Positioning places vehicles behind ridge crests with minimal visibility while maintaining escape capability. It's a classic military tactic that works just as well in PUBG.
Reverse Parking ensures your front end faces your planned retreat path. Trust me on this—backing out under fire is a nightmare.
Cover Integration combines vehicle positioning with rocks, terrain folds, and elevation changes. Layered defense isn't just for military strategists; it's for smart PUBG players.
Quick Escape Techniques use what I call the lead thumb method for 180-degree turns while managing throttle for control. Identify emergency descent routes before you engage. Establish squad coordination protocols for retreat signals and regrouping points.
Making Your Vehicle Work for You
Mobile Cover positions vehicles perpendicular to enemy fire, protecting squad members during repositioning. Vehicle Health Management means understanding the smoking, fire, and explosion phases. Here's something most players don't know: burning vehicles provide cover without secondary explosion risks.
Offensive Applications use vehicles for advancing protection during aggressive positioning. Sometimes the best defense is a good offense.
Timing Your Miramar Rotations
Early Circle Movements (When Speed Beats Caution)
Optimal Departure happens immediately after the first circle announcement. Give yourself 60-90 seconds for planning—any less and you're rushing; any more and you're wasting looting time.
Position Claiming means securing the highest value ridges before enemy squads establish defensive positions. First come, first served applies here.
Resource Gathering along planned routes maximizes preparation time. Don't just drive; collect equipment and vehicles that enhance your positioning.
Mid-Game and Late Circle Adaptations
Circle Edge Management maintains boundary positions while preserving flexibility. Avoid central complications until you absolutely have to commit.
Enemy Tracking uses kill feed and audio cues to time rotations around engagement patterns. When two squads are fighting, that's your window to move.
Final Position Selection requires commitment. Once walking distances exceed available time, your decisions become irreversible. Choose wisely.
Players seeking performance advantages can access premium content through Midasbuy UC top up to unlock sets for enhanced customization and competitive benefits.
Common Ridge Rotation Mistakes (Learn from Others' Pain)
Critical Errors That End Matches
Overcommitting to Risky Routes happens when players ignore vehicle limitations. Dacia and Mirado struggle on steep hills—even UAZ faces limitations. Single route dependency creates vulnerability, and late departures force dangerous selections.
Poor Vehicle Management kills more squads than enemy fire. Monitor fuel continuously and plan safe refueling stops. Abandon smoking vehicles before explosion risks become reality. Position vehicles facing escape routes using terrain to minimize targeting.
Timing Errors come in two flavors: too early wastes looting time; too late forces dangerous routes and increases gatekeeping vulnerability. Establish departure deadlines based on distance calculations that account for terrain performance variations.
Advanced Squad Coordination Tactics
Multi-Vehicle Formations and Communication
Convoy Formations provide destruction redundancy and enable rapid dispersal during contact. Leapfrog Patterns maintain continuous overwatch during vulnerable movement phases.
Role Assignments matter more than most teams realize. Navigator handles route planning and timing, overwatch provides long-range support, support manages healing and resources. Everyone knows their job; everyone executes.
Communication Protocols establish consistent callout terminology using compass bearings and landmarks. Priority hierarchies ensure immediate threats override routine updates. Emergency signals provide backup methods when voice communication gets compromised.
Settings and Controls Optimization
Vehicle Control and Audio Configuration
Sensitivity Adjustments balance responsive steering with rough terrain stability. Control Layout positions brake, acceleration, and steering for emergency access without finger conflicts. Auto-Acceleration improves long-distance consistency but may reduce technical navigation control—your choice depends on playstyle.
Audio Optimization monitors engine sounds that indicate performance and damage issues. Environmental balance ensures enemy detection while maintaining communication clarity. Directional audio maximizes threat localization during limited visibility phases.
For competitive advantages, Buy PUBG UC online rocket fast delivery enables quick access to premium content enhancing performance and tactical flexibility.
FAQ
How do you safely navigate ridges in PUBG Mobile Miramar? Use UAZ or Buggy for off-road capability, tap steering controls for precision, approach crests at angles that minimize skyline exposure, and maintain steady climb speeds.
What vehicles are best for Miramar ridge rotations? UAZ provides optimal off-road capability with 4-player capacity. Buggy excels at climbing but offers limited protection. Avoid Dacia and Mirado for serious off-road navigation.
When should you rotate in Miramar to avoid getting caught? Rotate immediately after first circle announcement. Mid-game: move during enemy firefights. Late-game: depart with 60-90 seconds remaining before closure.
How do you avoid vehicle damage on Miramar ridges? Control speed to prevent airborne situations, tap directional controls on rough terrain, approach steep sections at manageable angles, and abandon smoking vehicles before explosion.
What are the safest rotation routes in Miramar? Northern corridor through Cruz del Valle and La Cobrería, central network connecting Monte Nuevo and Minas Generales, southern approaches via Hacienda del Patrón. Always plan valley floor and coastal backups.
How do you coordinate squad rotations in Miramar? Assign navigator, overwatch, and support roles. Establish standardized callouts using compass bearings. Use convoy formations for multi-vehicle movements and practice emergency procedures.