

Master third-party tactics in PUBG Mobile's Sanhok map with proven strategies for Bootcamp and Paradise Resort. Learn positioning, timing, and execution techniques to dominate high-traffic areas and secure consistent eliminations through strategic third-party engagements.
Understanding Third-Party Mastery in PUBG Mobile Sanhok
What is Third-Partying
Here's the thing about third-partying – it's basically vulture tactics, but in the best possible way. You're positioning yourself at the edge of ongoing firefights, waiting for that sweet spot when both teams have burned through their meds and ammo. Think of it as strategic patience paying off.
The beauty lies in timing. You're not jumping into fresh fights where everyone's at full health with level 3 gear. Instead, you're swooping in when they're vulnerable, distracted, and probably arguing over who's going to revive their knocked teammate.

Why Sanhok is Perfect for Third-Parties
Sanhok is basically third-party paradise – and I mean that literally. This 4x4 kilometer map crams 100 players into half the space of Erangel, which means constant chaos. The math is simple: smaller map + same player count = non-stop action.
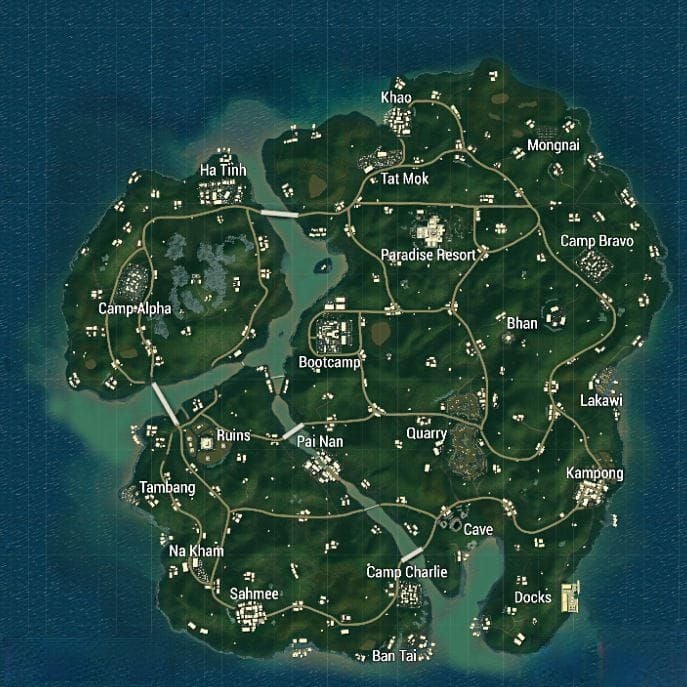
But here's what makes it special (from my perspective as someone who's spent way too many hours analyzing this map): the terrain actually works in your favor. Dense foliage everywhere. Natural cover that doesn't look suspicious. Sound carries perfectly across the compact layout – you'll hear gunfights from ridiculous distances.
Key advantages that actually matter:
Player density creates those beautiful chain reactions where one fight triggers three more
Cover options that don't scream sniper hiding here
Bridge chokepoints that make rotations predictable
Short distances mean you can actually reach fights before they're over
Bootcamp vs Paradise Overview
Let me break this down based on what I've observed across hundreds of matches. Bootcamp? Pure chaos. 3-4 squads drop there every single game, and it's immediate mayhem. Paradise Resort? More tactical, but the payoff can be huge if you position correctly.
Bootcamp rewards aggression and quick thinking. Paradise rewards patience and coordination. Choose based on your squad's playstyle, not just the loot.
Bootcamp Third-Party Fundamentals
Bootcamp Layout Analysis
The military compound is deceptively complex. Sure, there's that obvious main building everyone fights over, but the real action happens in the surrounding structures. Four distinct combat zones: central compound (where dreams go to die), eastern barracks (surprisingly good loot), western vehicle depot (often overlooked), and southern approach (your best entry point).
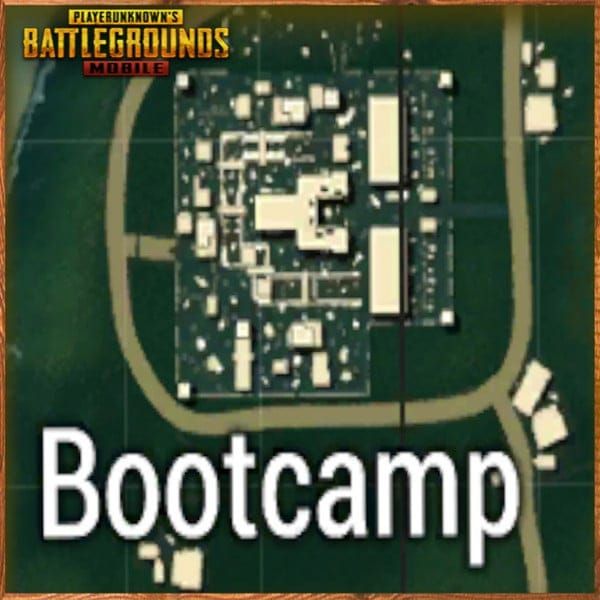
Here's something most guides won't tell you – the loot distribution actually supports more squads than you'd think. The main building gets all the attention, but those side structures? Often better risk-to-reward ratio.
Key Positioning Spots
Ruins. Northeast of Bootcamp. This is your staging ground, and honestly, it's almost unfair how good this position is. From Ruins, you can hear everything – Bootcamp fights, Pai Nan skirmishes, even some Quarry action if the wind's right.
The underground bunkers near Ruins? Chef's kiss. Perfect concealment with sight lines that let you pick your moments. Rock caves provide similar advantages but with better escape routes.
Pro tip from personal experience: Pai Nan outskirts offer some of the cleanest third-party angles you'll find anywhere on Sanhok. Elevated positions overlooking Bootcamp's southern approach are particularly nasty.
Entry and Exit Strategies
Diamond edge strategy – position yourself near the safe zone's edge so you've got natural protection from one direction. Wait for clear audio indicators (sustained automatic fire, grenade explosions) before making your move.
Exit routes are non-negotiable. Every position needs at least two ways out that don't lead directly into other compounds. I've seen too many squads nail the third-party only to get fourth-partied because they had nowhere to run.
Always – and I cannot stress this enough – maintain blue zone awareness. Getting trapped by the zone while third-partying is embarrassing and entirely preventable.
For players looking to enhance their Sanhok gameplay experience, Sanhok gamers UC top up discounts provide cost-effective ways to access premium content and seasonal passes that unlock exclusive weapon skins and character customizations for competitive advantages.
Paradise Resort Third-Party Tactics
Paradise Resort Map Breakdown
Paradise sits on a hill like some kind of fortress, which creates interesting dynamics. The symmetrical design with that central tower? It's both a blessing and a curse. Great visibility, but limited vehicle access means you're committed once you're up there.
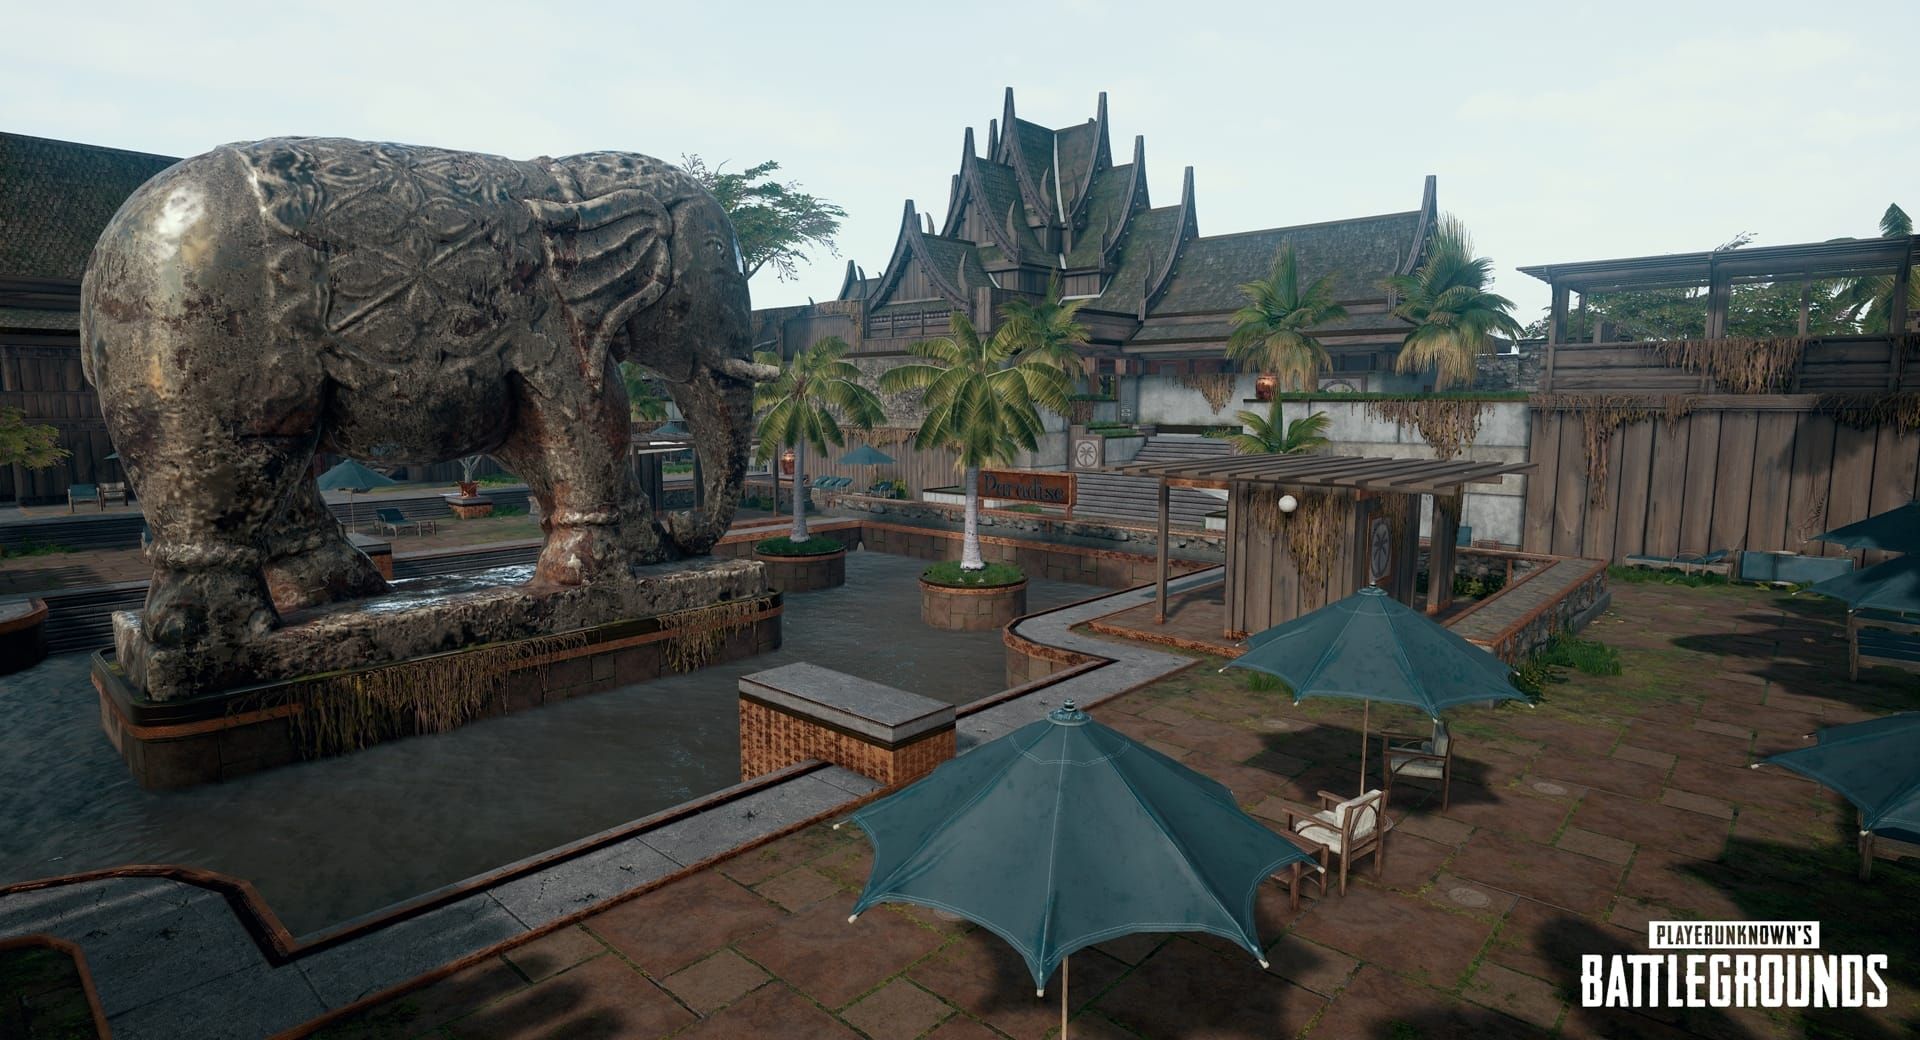
Multiple engagement levels create opportunities for creative positioning. Those terraced areas aren't just for show – they're tactical goldmines if you know how to use them.
Optimal Third-Party Positions
The terraced areas surrounding Paradise are where the magic happens. Excellent sight lines into the main compound without the exposure of being inside. The central tower offers the highest vantage point, but timing your access is crucial – go too early and you're trapped, too late and the party's over.
External rock formations around the perimeter? Underrated. Natural cover with protection from building-based defenders, plus multiple escape routes.
Building-to-Building Movement
Use those covered walkways and internal passages religiously. Stair positioning gives you third-person perspective advantages that can be game-changing.
Establish rally points before you start shooting. Chaos is inevitable once the bullets start flying, so having predetermined fallback positions keeps your squad cohesive.
Timing Your Third-Party Attacks
Audio Cue Recognition
Orange marks on your mini-map from gunshots are your bread and butter. But here's the nuance most players miss: automatic weapon fire patterns tell a story. Sustained bursts mean both teams are committed. Single shots suggest cleanup phase or sniper duels.
Grenade explosions? That's escalation. Teams are pushing hard, which means they're vulnerable to flanking. Vehicle sounds combined with gunfire usually indicate someone's trying to rotate under pressure – prime third-party material.
Visual Indicators
Green smoke from death crates is like a dinner bell. Recent eliminations mean loot opportunities and potentially weakened survivors. Player-deployed smoke suggests tactical movements or desperate revive attempts.
Muzzle flashes become surprisingly visible during low-light conditions. Building damage tells you about engagement intensity and duration.
Circle Phase Considerations
Early phases offer the most opportunities since teams are focused on looting rather than positioning. Mid-game circles create those beautiful chokepoints that concentrate team movements. Late-game circles require aggressive timing, but the ranking benefits for eliminating teams in final circles? Absolutely worth the risk.
Essential Equipment and Loadouts
Weapon Combinations
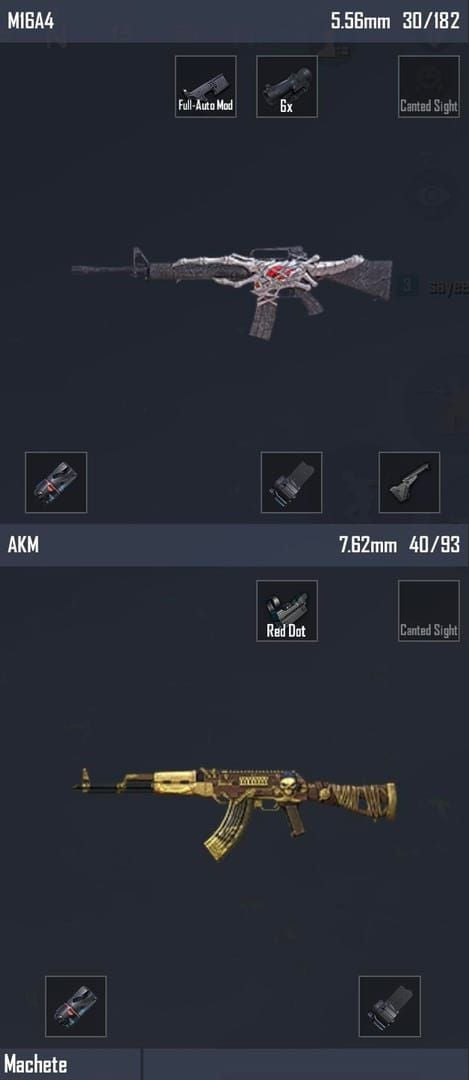
5.56mm ammunition is your friend for inventory efficiency. QBZ95 provides excellent damage with manageable recoil – and it's relatively quiet, which matters more than most players realize. M416 offers superior attachment compatibility for varied engagement ranges.
M24 remains the premier non-airdrop sniper option. High damage for quick eliminations of already-weakened enemies.
My personal meta loadout? M416 primary with UMP or DBS secondary. That DBS shotgun damage in close quarters is absolutely devastating against injured opponents.
Attachment Priorities
Suppressors aren't just nice-to-have – they're essential for third-party operations. Concealing your position and muzzle flash can mean the difference between a successful ambush and becoming someone else's third-party target.
Vertical Foregrip for optimal recoil control. 6x scope with 3x toggle provides the flexibility you need for varied engagement ranges.
Utility Items
My recommended loadout: 3 smokes, 2 frags, 1 Molotov. Frags force enemies from cover, exposing them to your fire. Molotovs provide psychological pressure and area denial against revive attempts. Smoke enables repositioning and crossing open areas safely.
Advanced Positioning Strategies
High Ground Advantages
Temple platform in Ruins serves as an excellent sniper position with commanding views of multiple approach routes. Paradise Resort's hilltop creates inherent advantages, but be aware – you can become vulnerable to third-party attacks from surrounding high ground.
Elevation is powerful, but it's not everything. Consider exposure angles and escape routes before committing to high ground positions.
Cover Utilization
Hard cover prioritization becomes essential due to rendering differences across devices. Rock formations, trees, and buildings provide reliable concealment regardless of graphics settings.
Understanding third-person perspective advantages and angle manipulation can give you significant tactical benefits. Natural terrain features offer concealment while maintaining mobility options.
Escape Route Planning
Every single position must include predetermined escape routes. The diamond edge strategy naturally provides escape options, but you need backup plans.
Plan primary and secondary routes leading to different terrain types. Pre-position vehicles near engagement zones for rapid extraction when possible. Always maintain zone timing awareness for safe rotation options.
Team Coordination for Third-Parties
Communication Protocols
Use the in-game Enemy ahead command while targeting specific threats – it automatically shares location data with your squad. Voice communication should prioritize immediate threats and tactical updates.
Share enemy positions, health status, ammunition levels, and zone timing. Pre-engagement communication should cover positioning assignments, target priorities, and escape routes.
Role Assignments
Assign a fragger for aggressive elimination with close-quarters weapons, support for covering fire and utility deployment, and an in-game leader for timing coordination. Ensure all members can fulfill multiple functions if needed.
The fragger maintains aggressive positioning, support carries sniper rifles, and the leader coordinates tactical movements with comprehensive map awareness.
Synchronized Attacks
Establish countdown protocols for simultaneous engagement. Prioritize eliminating the greatest threats first with coordinated target assignments. Create crossfire positioning with overlapping fields of fire.
Use standardized countdown procedures for precise attack timing to prevent enemies from identifying individual threats.
For competitive players seeking to maximize their third-party potential, Midasbuy UC top up secure channel offers reliable access to UC currency for purchasing advanced weapon skins and equipment that provide subtle competitive advantages through improved weapon handling and visual clarity.
Common Mistakes and Counter-Strategies
Third-Party Timing Errors
Premature engagement. This is the big one. Jumping in before enemy teams are sufficiently weakened is like showing up to a party too early – awkward and counterproductive.
Wait for clear indicators: casualties, depleted resources, obvious healing attempts. Late engagement isn't much better – you'll arrive to find one team eliminated and the survivors already looted up and ready for you.
Position revelation through unnecessary firing? That's how you become the third-partied instead of the third-partier.
Positioning Mistakes
Over-exposure during loot collection creates vulnerability to counter-attacks. Always go prone when looting death crates – minimize that target profile. Green smoke attracts attention from significant distances, so be aware of what you're advertising.
Inadequate cover assessment leads to positioning with insufficient protection from multiple angles. Predictable positioning patterns allow enemies to anticipate your movements.
How to Avoid Being Third-Partied
Assign team members to monitor flanks during engagements. Focus on rapid elimination rather than prolonged firefights. Use suppressors and avoid unnecessary equipment usage that creates audio signatures.
Choose positions that provide protection from various angles with escape route options. It's all about minimizing your vulnerability window.
Mobile-Specific Optimization Tips
Control Settings
Gyroscope sensitivity for each scope level: No Scope 300%, Red Dot 280%, 2x 270%, 3x 180%, 4x 160%, 6x 120%, 8x 100%. These aren't arbitrary numbers – they're based on optimal tracking speeds for different engagement ranges.
ADS sensitivity settings: No Scope 100%, Red Dot 50%, 2x 35%, 3x 25%, 4x 20%, 6x 15%, 8x 12%. Camera sensitivity: 3rd Person Free Look 120%, 1st Person Free Look 130%.
Audio Configuration
Quality headphones aren't optional – they're essential. You need to detect enemy movements, reloads, healing sounds. Adjust audio settings to enhance tactical sound recognition while reducing background noise.
Test your microphone sensitivity for clear team communication. Enable visual sound indicators to supplement audio cues, especially in noisy environments.
Performance Optimization
Lower graphics settings reduce foliage density and environmental effects that can obscure enemy positions. Stable frame rates provide responsive controls and better target tracking.
Monitor device heat levels and use cooling solutions to maintain optimal performance during competitive play. Thermal throttling can kill your performance at the worst possible moments.
For players serious about improving their Sanhok performance, Buy UC online for crate refreshes enables access to premium weapon skins and character outfits that can provide psychological advantages and improved weapon visibility during crucial third-party engagements.
Frequently Asked Questions
What's the best time to initiate a third-party attack in Sanhok? Listen for sustained automatic gunfire followed by a brief pause – that indicates one team gained an advantage but hasn't finished eliminating opponents. Audio cues like grenade explosions or knockdown sounds indicate committed teams vulnerable to attacks.
How do I choose between Bootcamp and Paradise Resort for third-party opportunities? Bootcamp offers frequent chaotic opportunities ideal for aggressive players seeking rapid eliminations. Paradise provides strategic scenarios with better positioning and escape routes for coordinated team play. Match your choice to your squad's strengths.
What weapons work best for third-party attacks in Sanhok? QBZ95 or M416 with suppressors paired with M24 sniper rifle. The 5.56mm compatibility simplifies inventory management significantly. Always prioritize suppressors over compensators for positional concealment.
How can I avoid being third-partied while fighting in hot zones? Assign team members to monitor flanks, resolve fights quickly, choose positions that protect from multiple angles, maintain escape routes, and avoid prolonged firefights that attract additional teams.
What are the most common third-party mistakes that get players eliminated? Engaging too early before teams are weakened, revealing position through unnecessary gunfire, failing to maintain escape routes, and standing while looting death crates – making yourself an easy target.
How do mobile-specific settings improve third-party performance? Optimized gyroscope and ADS sensitivity enable precise aim control. Lowered graphics reduce visual clutter, improving enemy visibility. Quality headphones provide directional audio for detecting both opportunities and threats.