Imaginarium Theater's January 2026 rotation introduces HP-Drain Arcana that ignores shields completely, creating survival crises for shield-reliant players. This guide explains why shields fail against percentage-based HP loss, provides three budget teams requiring minimal 5-star investment, and details healer rotations to sustain through constant damage. Learn optimal Energy Recharge thresholds, healing benchmarks, and Arcana selection strategies to clear all Acts and maximize Primogem rewards.
Understanding HP-Drain Arcana: The Mechanic That Changes Everything
HP-Drain Arcana applies constant percentage-based HP loss directly to active characters. Unlike standard damage that interacts with shields, DEF, and damage reduction, HP-Drain ignores shields completely—rendering traditional defensive strategies useless.
January 2026 Theater uses Luna III Lunar Mode, requiring 28-32 Level 70 characters using only Pyro, Hydro, and Electro elements. This restriction significantly impacts team composition, forcing players to prioritize healing within a limited character pool. The Fantastical Blessing increases Max HP, ATK, and DEF by 20% each, providing some survivability cushion but insufficient to counter sustained HP drain without dedicated healing.
For players expanding their character roster for optimal Theater performance, Genshin Impact Genesis Crystals top up through BitTopup provides fast, secure access to Primogems for pulling essential healers like Kokomi or Jean.
How HP-Drain Arcana Works
HP-Drain applies continuous HP loss calculated as percentage of maximum HP rather than flat damage. Characters with higher HP pools lose more absolute HP per tick, but proportional impact remains consistent. Critical distinction: HP loss from Arcana ignores shields completely, bypassing Zhongli's Jade Shield, Diona's Icy Paws, and all other shield mechanics.
This functions as true damage—unavoidable HP reduction that can't be mitigated through conventional defensive stats. DEF, Elemental RES, and Damage Reduction have zero effect on HP-Drain rates. The only counter is active healing that restores HP faster than drain depletes it.
HP-Drain vs Standard Damage: Key Differences
Standard damage follows calculation formulas incorporating ATK, DMG Bonus, CRIT, enemy DEF, and RES. Shields absorb this damage before reaching character HP. HP-Drain bypasses this entire system:
Shield Ineffectiveness: Shields provide zero protection; shield characters become purely utility-based
Stat Independence: Building DEF or RES offers no survival benefit; only HP pool size and healing output matter
Constant Pressure: Unlike burst damage that can be dodged, HP-Drain applies continuously, requiring sustained healing uptime
The No-Shield Trap: Why Zhongli Can't Save You
The no-shield trap refers to bringing shield characters to HP-Drain stages expecting traditional mitigation. Since HP loss ignores shields completely, characters like Zhongli, Diona, Layla, and Thoma provide no survival value against the core mechanic. Players accustomed to shield-based immortality face rapid team wipes when HP drains through defenses.
Shield Mechanics vs HP-Drain

Shields function as temporary HP barriers absorbing incoming damage before affecting character HP. HP-Drain contradicts this by directly reducing character HP regardless of active shields.
Testing shows a character with Zhongli's shield at full strength loses HP at identical rates to an unshielded character under HP-Drain. The shield remains intact while HP depletes, creating false security. Players watching shield bars stay full while HP drops to critical levels often react too late.
When Shields Still Have Value
While shields can't prevent HP-Drain, they retain utility against standard enemy attacks occurring simultaneously. Theater bosses like Act 3 Perpetual Mechanical Array Level 90 and Act 8 Knuckle Duckle Level 95 deal conventional damage alongside Arcana HP-Drain. Shields mitigate this standard damage, reducing total HP loss and easing healing requirements.
Crystallize shields from Geo reactions provide minor supplementary protection without requiring dedicated shield characters. However, pure shield characters without healing capabilities remain suboptimal for HP-Drain stages.
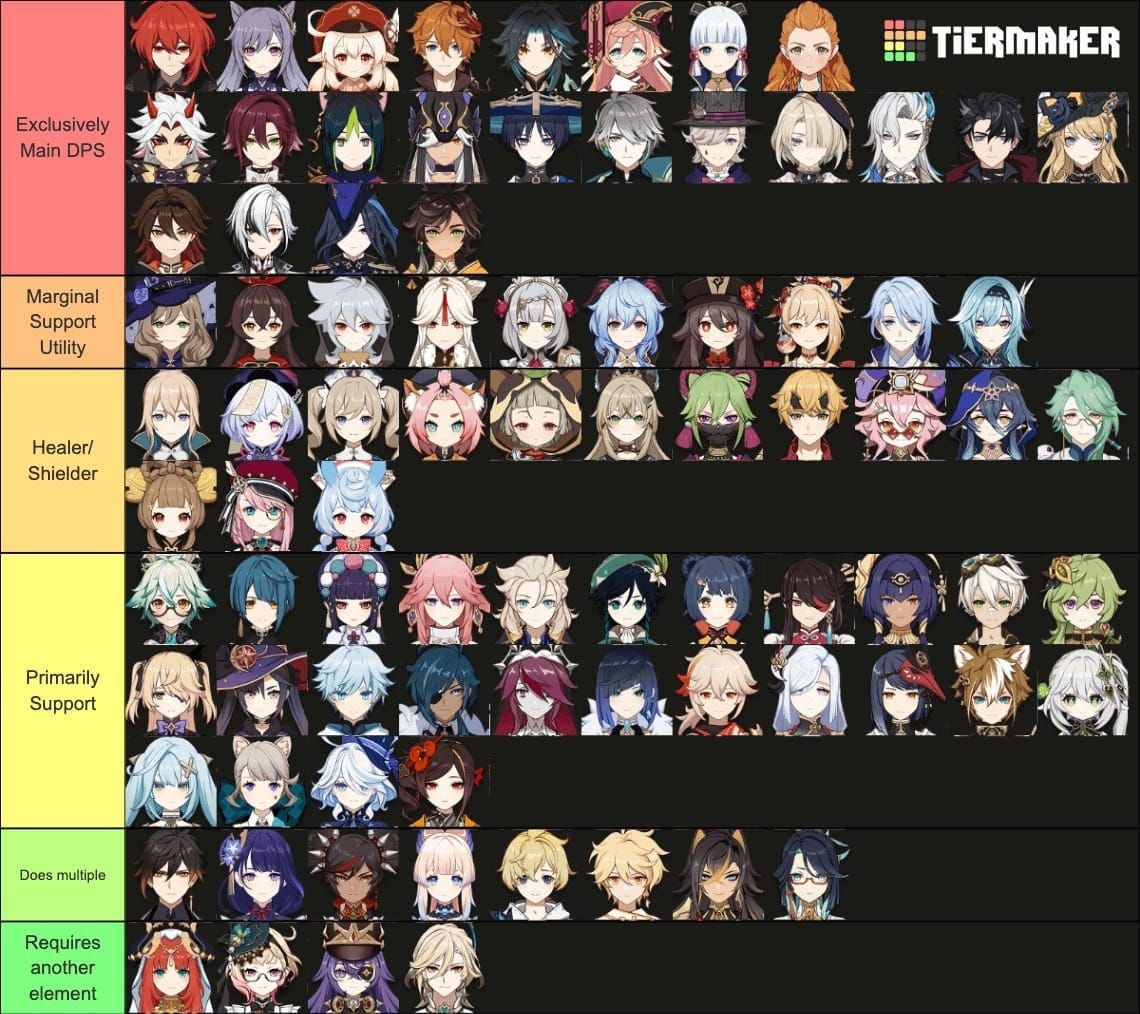
Complete Healer Tier List (January 2026)

Healer effectiveness depends on healing output per second, uptime percentage, and Energy Recharge requirements. January 2026 Lunar Mode restrictions limit healers to Pyro, Hydro, and Electro characters.
S-Tier Healers
Jean (Anemo - character trials): Dandelion Breeze Burst heals up to 18k HP instantly with additional field healing. Elemental Skill provides on-demand healing with short cooldown. Dual healing sources create exceptional uptime; Anemo element works universally despite Lunar Mode restrictions.
Baizhu (Dendro - limited availability): Healing benchmark with 20% team HP heals every second when built with 36k HP and 180% Healing Bonus. This rate exceeds most HP-Drain tick rates.
A-Tier Budget Options
Bennett (Pyro - free from events): Fantastic Voyage Burst heals characters above 70% HP with rapid tick rates. At talent level 8, 4pc Noblesse Oblige, ER/HP focus, Bennett sustains teams while providing ATK buffs. Pyro element aligns with Lunar Mode requirements.
Yaoyao (Dendro - Lantern Rite): Radish bunnies heal 15% max HP per tick with excellent uptime through Skill and Burst. Healing scales with HP, making her easy to build. Dendro application enables Hyperbloom teams combining damage and sustain.
Barbara (Hydro - free character): Burst heals up to 20k HP instantly. Elemental Skill applies Hydro while healing, creating consistent uptime. Most budget-friendly option, requiring only HP% and Healing Bonus investment.
B-Tier Situational Picks
Qiqi (Cryo - standard banner): Talismans heal 8k HP every 0.5 seconds. Cryo element excludes her from Lunar Mode Pyro/Hydro/Electro restrictions in January 2026.
Dori (Electro - limited banner): Provides healing through Burst with challenging ER requirements. Healing output falls below A-tier, but Electro element offers team utility.
Healing Output Requirements
Effective HP-Drain healing requires restoring 15-20% of team max HP per rotation. For 20,000 HP characters, this translates to 3,000-4,000 HP every 15-20 seconds. Target these benchmarks:
Healing Bonus: 80-120% minimum
HP Pool: 25,000-35,000 HP for percentage-based scalers
Energy Recharge: 180-200% for Burst-dependent healers
Best Healer Rotations: Frame-Perfect Sustain
Healer rotation optimization balances healing uptime with damage window maximization. Core principle: maintain HP above 70% while allocating sufficient field time for DPS. Supports require 180-200% ER in Lunar Mode for Burst availability every rotation.
Rotation Framework
Optimal structure: DPS Skill → Applicator Burst → Core Skill → Healer sequence. This ensures:
DPS characters generate energy particles early
Support Bursts apply elements for reactions before main damage
Healer abilities activate before HP drops critically
Energy funneling maximizes particle collection
ER thresholds determine rotation consistency. Characters with 180% ER achieve Burst uptime every 18-20 seconds with proper funneling; below 160% ER creates rotation delays and healing gaps.
Single Healer Rotation

Single healer rotations demand precise timing. Using Bennett:
0-2s: Bennett Skill (generates Pyro particles)
2-4s: Swap to DPS, use Skill for energy
4-6s: Support Burst for elemental application
6-8s: Bennett Burst (healing field)
8-18s: DPS rotation within Bennett field
18-20s: Bennett Skill, restart
This 20-second rotation maintains 12 seconds active healing (60% uptime) while generating sufficient energy. The 8-second gap requires HP pool buffer.
Dual Healer Rotation
Dual healer compositions eliminate healing gaps. Using Bennett + Barbara:
0-2s: Bennett Skill
2-4s: Barbara Skill (Hydro, begins healing)
4-6s: Support Burst
6-8s: Bennett Burst
8-14s: DPS rotation in Bennett field
14-16s: Barbara Burst (emergency heal)
16-20s: Continue DPS with Barbara Skill healing
Provides near-continuous healing coverage with overlapping windows, improving survival at cost of one team slot.
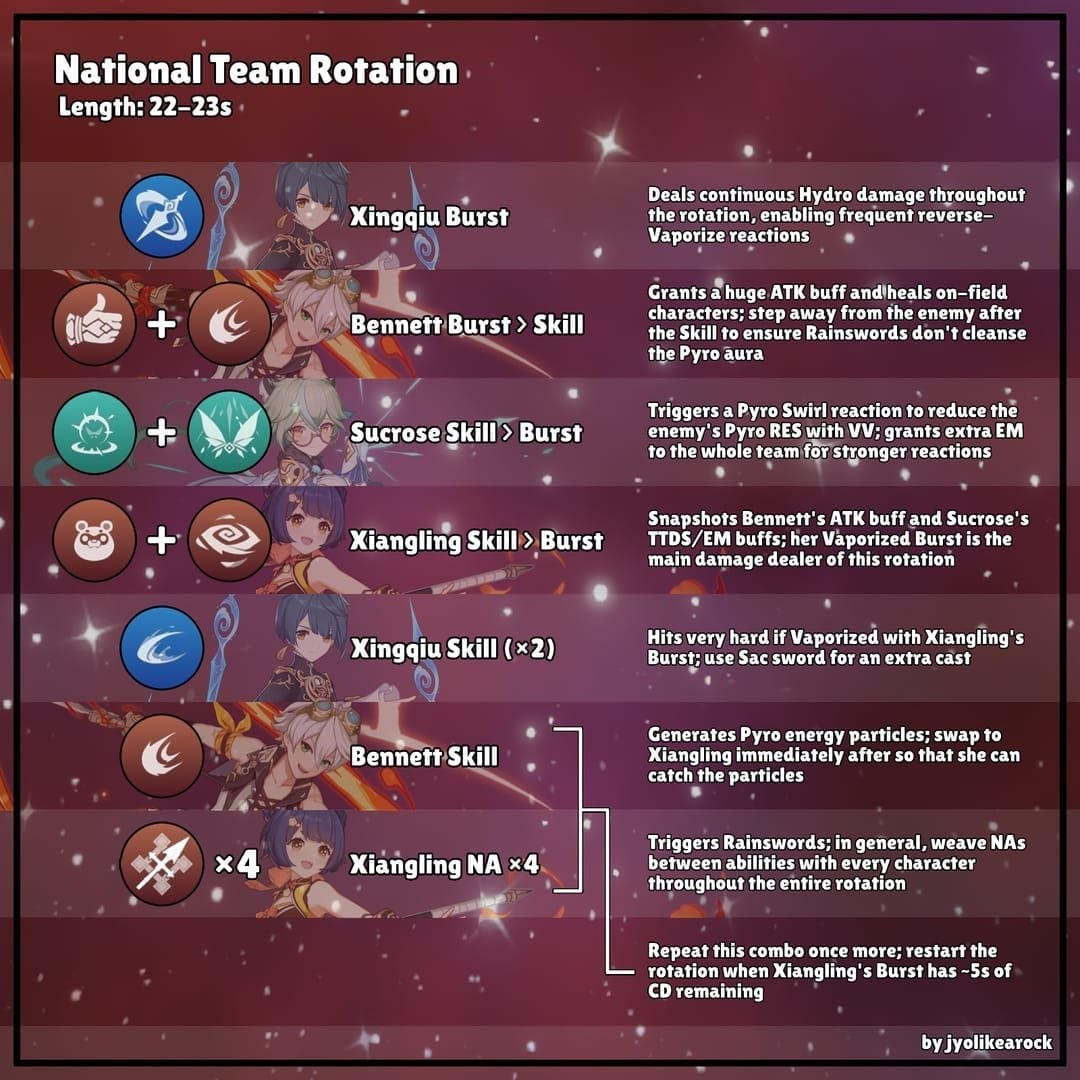
Budget Team #1: Xiangling National Variant (Zero Limited 5-Stars)

Most accessible budget team leverages free and 4-star characters. Clears HP-Drain stages through sustained damage and consistent healing without limited 5-stars.
Team Composition
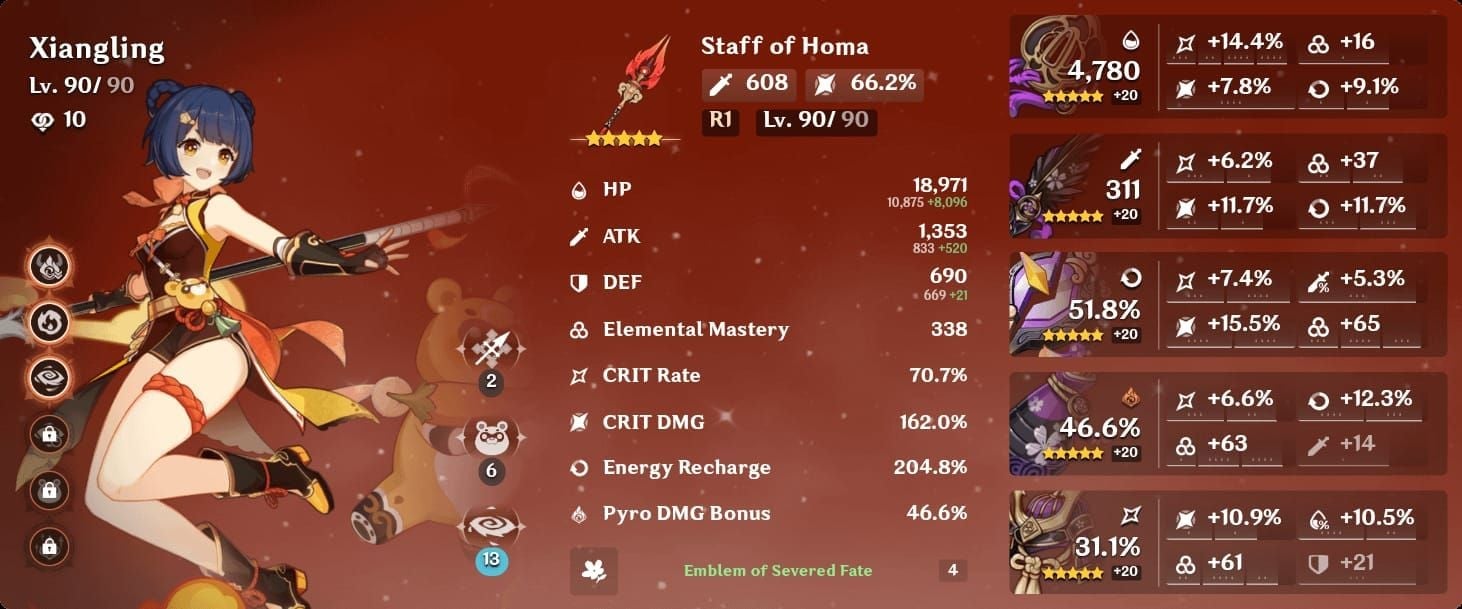
Xiangling: Lv80/90, 8/8/8 talents, 4pc Emblem, 60/120 Crit, 180% ER, The Catch R5
Xingqiu: Lv80/90, 8/8/8 talents, 4pc Emblem, 60/120 Crit, 180% ER, Sacrificial Sword
Fischl: Lv70/80, 6/6/6 talents, 2pc ATK%/Electro DMG/Crit, Stringless
Bennett: Lv70/80, Burst talent 8, 4pc Noblesse, ER/HP focus
Requires approximately 2-3 months artifact farming, focusing on ER substats for Xiangling and Xingqiu while prioritizing Bennett's Burst talent.
Rotation Breakdown
Bennett Skill → generates Pyro particles
Xingqiu Burst → applies Hydro, damage reduction
Fischl Skill → summons Oz for Electro
Xiangling Burst → Pyronado for main damage
Bennett Burst → healing field and ATK buff
Xiangling Skill → Guoba for additional Pyro
Normal attacks → trigger Xingqiu Rain Swords and reactions
Repeat after 18-20 seconds
Maintains continuous elemental application for Vaporize and Electro-Charged while keeping team HP stable.
Why This Team Survives
Bennett's healing field restores approximately 4,000-5,000 HP per tick at talent level 8 with HP-focused artifacts, sufficient to counter HP-Drain rates. The 12-second field duration covers 60% of rotation, while Xingqiu's damage reduction and minor healing provide supplementary sustain.
Off-field damage from Xiangling's Pyronado, Xingqiu's Rain Swords, and Fischl's Oz continues during healing windows, maximizing DPS uptime. This damage-while-healing approach clears stages faster, reducing total HP loss.
Budget Team #2: Neuvillette Fischl Flex (1 Limited 5-Star Max)
For players with Neuvillette, this team provides ranged safety and self-sustain ideal for HP-Drain stages. Neuvillette's charged attack healing combined with dedicated healer support creates exceptional survival margins.
Team Composition
Neuvillette: Main DPS with self-healing through charged attacks
Fischl: Off-field Electro for Electro-Charged
Flex 1: Xingqiu for Hydro Resonance and damage reduction
Flex 2: Bennett for healing/ATK buffs, or Barbara for pure healing
Works particularly well for Act 10 Maguu Kenki Level 100, which blocks bow attacks requiring melee or catalyst DPS. Neuvillette's catalyst range provides safe damage while self-healing reduces pressure on dedicated healers.
Energy Recharge and Healing Windows
Neuvillette's self-healing occurs during charged attack sequences, creating natural healing windows integrated into DPS rotations. Combined with Bennett or Barbara, team maintains HP above 80% consistently. Fischl requires 120-140% ER for Oz uptime; Xingqiu needs 180% ER for Burst-every-rotation.
Rotation:
Fischl Skill (summon Oz)
Xingqiu Burst
Bennett Burst
Neuvillette charged attacks (15-20s)
Repeat
Budget Team #3: Ayato Fischl Xingqiu Bennett (Ranged Electro-Charged)
Combines ranged safety with dual Hydro healing potential and consistent Electro-Charged reactions. Ayato's Skill provides rapid Hydro application while maintaining distance, reducing incoming standard damage.
Team Composition
Ayato: Main DPS with Skill-based damage windows
Fischl: Off-field Electro for Electro-Charged
Xingqiu: Hydro Resonance, damage reduction, supplementary healing
Bennett: Primary healing and ATK buffing
Excels in ranged clear scenarios where maintaining distance reduces total damage taken. The Electro-Charged Blessing boosts Electro-Charged DMG 250% and Lunar-Charged 70% for 3 seconds, significantly amplifying damage output.
Rotation Optimization
Maximizes Ayato's Skill uptime within Bennett's healing field:
Bennett Skill + Burst (healing field)
Fischl Skill (Oz summon)
Xingqiu Burst (Rain Swords)
Ayato Skill (6s rapid Hydro slashes)
Normal attacks to trigger reactions
Repeat after 18s cycle
This 18-second rotation maintains high healing uptime while maximizing Electro-Charged reaction frequency. Ayato's Skill duration aligns perfectly with Bennett's field.
Investment Priority
For players building from scratch:
Bennett (Burst talent 8, ER 180%, HP artifacts) - healing foundation
Xingqiu (Burst talent 8, ER 180%, Sacrificial Sword) - damage reduction and reactions
Ayato (Normal Attack and Skill 8, Crit 60/120) - main damage
Fischl (Skill 6, basic ATK/Electro/Crit) - supplementary damage
This priority ensures functional healing before optimizing damage output.
Arcana Selection Strategy: Maximizing Survival Odds
Arcana buff selection significantly impacts run success rates. Some buffs synergize strongly with healing-focused teams while others create additional challenges.
Which Arcana Buffs Synergize with Healing Teams
Vaporize Blessing: Reduces resistance by 25% for 6s, amplifying damage from Hydro-Pyro teams using Bennett and Xingqiu. Increases clear speed, reducing total HP loss from shorter combat duration.
Electro-Charged Blessing: Boosts Electro-Charged DMG 250% and Lunar-Charged 70% for 3s, making Fischl-based teams significantly more effective.
Healing-focused Arcana buffs that increase healing effectiveness or reduce healing cooldowns provide direct survival benefits. Prioritize these when available.
Arcana Combinations to Avoid
Arcana buffs that increase enemy damage or reduce character max HP compound HP-Drain pressure. Avoid:
Buffs reducing max HP percentage (reduces absolute healing per tick)
Buffs increasing enemy ATK (increases standard damage alongside HP-Drain)
Buffs reducing healing effectiveness (directly counters survival strategy)
When forced to select from unfavorable options, choose buffs affecting damage types your team can mitigate through reactions or positioning.
Advanced HP-Drain Survival Techniques
I-Frame Timing
Elemental Burst animations provide invincibility frames during which characters can't take damage—including HP-Drain. While HP-Drain typically resumes after i-frames end, strategic Burst timing during high-pressure moments provides brief respite for healing to catch up.
Coordinate Burst animations with healing activations: activate healer Burst, immediately swap to DPS for their Burst animation, then return to healing field. This maximizes i-frame duration while ensuring healing begins before HP drops critically.
Recognizing HP-Drain Intensity Patterns
HP-Drain intensity varies across Theater Acts. Act 10 boss Maguu Kenki Level 100 features highest HP-Drain rates, requiring optimized healing rotations and minimal mistakes. Earlier Acts like Act 3's Perpetual Mechanical Array Level 90 apply gentler HP-Drain, allowing more forgiving rotations.
Adjust healing frequency based on Act difficulty: Acts 1-5 can function with single healer compositions; Acts 8-10 benefit from dual healer setups or characters with self-healing capabilities.
Common Mistakes That Lead to Failed Runs
Mistake #1: Relying on Shields Instead of Heals
Most common mistake stems from muscle memory where shields provide sufficient protection. Players bringing Zhongli, Diona, or Layla to HP-Drain stages waste team slots on characters providing zero survival value.
Solution: Replace all pure shield characters with healers or hybrid sustain units. Verify team includes at least one dedicated healer before starting Arcana Challenge stages.
Mistake #2: Insufficient Energy Recharge on Healers
Healers with inadequate ER fail to generate Burst energy within rotation timelines, creating healing gaps. A Bennett with 140% ER might achieve Burst every 25-30s instead of required 18-20s, leaving 10s windows without healing coverage.
Solution: Prioritize ER substats on healer artifacts until reaching 180% minimum. Use ER sands if necessary. Consistent moderate healing outperforms inconsistent strong healing.
Mistake #3: Poor Arcana Buff Selection
Selecting Arcana buffs that sound powerful but contradict healing strategies undermines team composition advantages. Buffs increasing damage at cost of max HP or healing effectiveness create unwinnable scenarios.
Solution: Read all Arcana buff descriptions completely before selection. When uncertain, choose buffs affecting damage types rather than those modifying HP or healing mechanics.
Mistake #4: Ignoring Healing Bonus Stat Priority
Players often build healers with ATK or Crit stats, expecting them to contribute damage while healing. This split investment results in insufficient healing output while providing negligible damage contribution.
Solution: Commit fully to healing stats—HP%, Healing Bonus, and ER. A healer's primary function is sustaining team survival; damage contribution remains secondary.
Building Your Healer: Investment Guide
Artifact Sets Ranked
Ocean-Hued Clam (4pc): Converts healing into damage through bubble explosions. Best for healers with high healing frequency like Barbara or Qiqi. Damage output helps clear stages faster, reducing total HP loss.
Maiden Beloved (4pc): Increases healing effectiveness by 15%. Optimal for healers struggling to meet healing output thresholds or in extremely high HP-Drain scenarios.
Noblesse Oblige (4pc): Provides 20% ATK buff to team after Burst. Best for Burst-dependent healers like Bennett who maintain high Burst uptime. ATK buff accelerates clear speed.
Priority: Noblesse for Bennett (ATK buff value), Ocean-Hued Clam for Barbara/Qiqi (damage contribution), Maiden Beloved as fallback.
Weapon Choices: 4-Star Options
Prototype Amber (Catalyst - craftable): Provides HP% main stat and restores 18 energy to wielder after Burst at R5, solving ER requirements while boosting healing through HP scaling. Exceptional for Barbara.
Favonius weapons (gacha 4-star): Generate energy particles on Crit hits, supporting team energy needs while providing ER main stat. Favonius Sword on Bennett improves team rotation consistency.
Sacrificial weapons (gacha 4-star): Reset Elemental Skill cooldown, doubling healing frequency from Skill-based healers. Sacrificial Sword on Xingqiu provides additional Rain Sword healing instances.
Talent Priority
Healing output scales directly with talent levels. Priority sequence:
Elemental Burst (Burst-dependent healers like Bennett, Barbara): Level to 8 minimum, 9-10 if resources available
Elemental Skill (Skill-based healers like Jean, Yaoyao): Level to 6-8 depending on healing frequency
Normal Attack: Leave at level 1 unless healer contributes on-field damage
Bennett's Burst talent at level 8 provides significantly more healing than level 6, often making the difference between sustainable and insufficient healing.
Recharging for Character Pulls
Building optimal healer teams often requires pulling specific characters from limited banners. For players seeking to acquire Kokomi, Jean constellations, or other premium healers, buy Genshin Genesis Crystals recharge online through BitTopup offers competitive pricing with fast delivery and secure transactions. BitTopup's high user ratings and excellent customer service make it a trusted platform for expanding your character roster efficiently.
Act-Specific Boss Strategies with HP-Drain Active
Act 3: Perpetual Mechanical Array Level 90
Summons 4 Ruin Sentinels below 50% HP. Damage the marked Ruin Sentinel to stun main body, creating DPS windows. With HP-Drain active, prioritize stunning boss quickly to minimize combat duration. Use AoE healing like Bennett's Burst to sustain team HP while dealing with multiple enemies.
Act 6: Emperor of Fire and Iron Level 92
Generates Pyro shields on horns requiring Hydro characters to deplete. Neuvillette, Yelan, Furina, Xingqiu, or Ayato excel here. Destroy glowing cores to remove resistance buffs, accelerating clear speed. Vaporize Blessing reduces resistance by 25% for 6s, synergizing perfectly with Hydro-Pyro teams.
Act 8: Knuckle Duckle Level 95
Summons 5 Stamping Devices with shields requiring Electro-Charged reactions to break. Hit Stamping Devices with Electro-Charged to fill gauge and break shields. Dodge purple radar circles and arm slams to minimize standard damage alongside HP-Drain. Fischl-based teams excel, triggering Electro-Charged frequently while maintaining healing uptime.
Act 10: Maguu Kenki Level 100
Blocks bow attacks, requiring melee or catalyst DPS. Neuvillette, Ayato, or catalyst users provide optimal damage output. This Act features highest HP-Drain intensity, demanding optimized healing rotations and minimal mistakes. Act 10 clear rewards 120 Primogems, 50,000 Mora, 10 Sanctifying Unction, and 5 Sanctifying Essence; first clear rewards 250 Primogems, 80,000 Mora, 5 Hero's Wit, and 1 Crown of Insight.
Future-Proofing: Preparing for Next Theater Rotations
Imaginarium Theater rotates monthly with changing elemental restrictions, boss lineups, and Arcana types. Building versatile healer rosters prepares players for future rotations.
Healer Investment That Pays Off Long-Term
Invest in healers from multiple elements for coverage across all Lunar Mode restrictions:
Pyro: Bennett (universal value, ATK buffing)
Hydro: Barbara (free, accessible) or Kokomi (premium)
Electro: Dori (limited availability but functional)
Cryo: Qiqi or Diona (for non-restricted slots)
Anemo: Jean (universal element, works in any restriction)
Building at least one healer from Pyro, Hydro, and Electro guarantees options for Lunar Mode rotations like January 2026.
How HP-Drain Arcana May Evolve
HP-Drain mechanics may appear in future Spiral Abyss cycles or overworld events as Genshin Impact expands endgame content difficulty. Players with established healer rosters adapt more easily, while those relying exclusively on shield-based strategies face significant challenges.
Future Theater rotations may combine HP-Drain with other Arcana types, creating compound challenges requiring both healing and specific elemental reactions. Versatile team building skills developed through current HP-Drain stages transfer directly to these future scenarios.
FAQ
What is HP-Drain Arcana in Imaginarium Theater? HP-Drain Arcana applies constant percentage-based HP loss directly to characters, ignoring shields, DEF, RES, and damage reduction. It functions as unavoidable true damage countered only through active healing, fundamentally changing survival strategies from shield-based to heal-based approaches.
Why don't shields work against HP-Drain Arcana? HP-Drain bypasses shield mechanics entirely by directly reducing character HP rather than dealing damage shields can absorb. Shields remain at full strength while character HP depletes underneath, providing zero protection. Only healing restores HP lost to HP-Drain effects.
Which healers are best for HP-Drain Arcana in January 2026? Jean and Baizhu provide S-tier healing with maximum output and uptime. Bennett, Yaoyao, and Barbara offer A-tier budget options with accessible builds and sufficient healing for most stages. Bennett particularly excels due to Pyro element alignment with Lunar Mode restrictions and ATK buffing utility.
Can you clear Imaginarium Theater HP-Drain with 4-star characters only? Yes, teams using Xiangling, Xingqiu, Fischl, and Bennett clear HP-Drain Arcana stages successfully with proper investment. These characters require Level 80/90, talent levels 8/8/8 for DPS, 180% ER on supports, and appropriate artifact sets, but remain fully accessible without limited 5-star pulls.
How much Healing Bonus do you need for Theater HP-Drain? Dedicated healers should target 80-120% Healing Bonus minimum. Combined with 25,000-35,000 HP on percentage-scaling healers and 180% ER for Burst consistency, this stat allocation provides sustainable healing against HP-Drain rates in Acts 1-10.
What Arcana buffs counter HP-Drain mechanics? Buffs increasing healing effectiveness or reducing healing cooldowns directly counter HP-Drain. Damage-amplifying buffs like Vaporize Blessing (25% RES reduction) and Electro-Charged Blessing (250% damage boost) indirectly help by accelerating clear speed, reducing total HP loss from shorter combat. Avoid buffs reducing max HP or healing effectiveness.

