

Chiori's all about dishing out that Tamoto construct damage through her Elemental Skill, which scales off 82% ATK plus a hefty 103% DEF. Go for the 4pc Golden Troupe set—it bumps up off-field Skill DMG by 25%, and you'll want 100-130% ER in mono-Geo setups. Grab the Uraku Misugiri weapon if you can, and pair her with teams like Chiori + Itto + Gorou + Zhongli to trigger Geo Resonance. She's solid at C0 with those constructs in play; C1 opens doors to Navia comps. Push her to level 90 using 1 Prithiva Topaz Sliver, 9 Fragments, 9 Chunks, 6 Gemstones, 168 Dendrobium, 46 Artificed Spare Clockwork Components, and 420,000 Mora.
Chiori's Off-Field Geo DPS Role: Kit Overview and Unique Mechanics
Ever wonder why Chiori feels like a breath of fresh air in Geo teams? She summons her Tamoto construct with the Elemental Skill, pumping out Geo DMG every 3.6 seconds for a full 17 seconds—and it scales with 82% ATK + 103% DEF per hit. At level 90, her base stats hit HP 11,438, ATK 323, DEF 953, and CRIT Rate 24.2%. Drop her into a mono-Geo squad, and that Skill sweep clocks in at 149% ATK + 187% DEF, especially when you position her near Geo constructs like Zhongli's pillar for an extra Tamoto summon.
Here's how it plays out: Tap the Skill (Fluttering Hasode, 16s CD) to dash in and call up Tamoto, then swap her out quick. At C0, get her close to an ally's Geo construct for that second Tamoto—boom, damage doubled. Follow up with her Burst (Hiyoku: Twin Blades, 13.5s CD, 50 Energy cost) for a solid 256% ATK + 320% DEF AoE after any buffs land, assuming you've got that 100% ER baseline sorted.
Tamoto doesn't just sit there; it dishes AoE Geo DMG and kicks in a +20% Geo DMG Bonus for 20 seconds thanks to the Finishing Touch passive. It even triggers Seize the Moment, cranking party NA/CA/Plunge swaps to 100% sweep DMG. Hold the Skill for a targeted sweep, then tap in a Normal Attack for 5 seconds of Geo infusion via Tailor-Made—pre-C6, of course.
To make it stick: Deploy the Skill right near enemies so those every-3.6s hits land consistently. Team her with Zhongli or Albedo for bonus summons, which can amp your output by 50% AoE on C1. Just refresh that 17-second uptime before it fades—easy enough in a good rotation.
Her kit layers in triple Geo DMG sources through Burst scalings and on-hit passives. Those low Normal Attack multipliers (49.4-75.1% ATK at level 1)? Mostly irrelevant off-field until C6. Focus on DEF-heavy builds to push past 2,000 DEF, and watch Tamoto shine.
Get her ascended to 90 with those materials I mentioned. Aim for a 70:160 CRIT ratio through substats. Swap her out after the Skill drops, and she'll handle about 70% of the damage in long fights—trust me, it's satisfying.
What sets Chiori apart? That Skill range, indestructible turret-style damage, and C1 flexibility without needing constructs every time—unlike Albedo's more bursty flower setup. (Editor's take: Albedo's great, but Chiori feels more reliable in drawn-out scraps.) At C0, she leans hard on constructs for peak performance; on-field? Not her strong suit pre-C6.
Run her in sustained Geo Abyss floors where Albedo might falter without C2. Stack DEF with Gorou for those +25-46% buffs at C6. Steer clear of non-Geo teams sans C1, or you'll see Tamoto uptime tank.
For players looking to enhance their Genshin Impact experience, recharge Genesis Crystals through BitTopup offers competitive pricing and instant delivery, ensuring secure transactions with 24/7 support for seamless progression without interruptions.
Best Artifact Sets for Chiori: Complete Comparison and Rankings
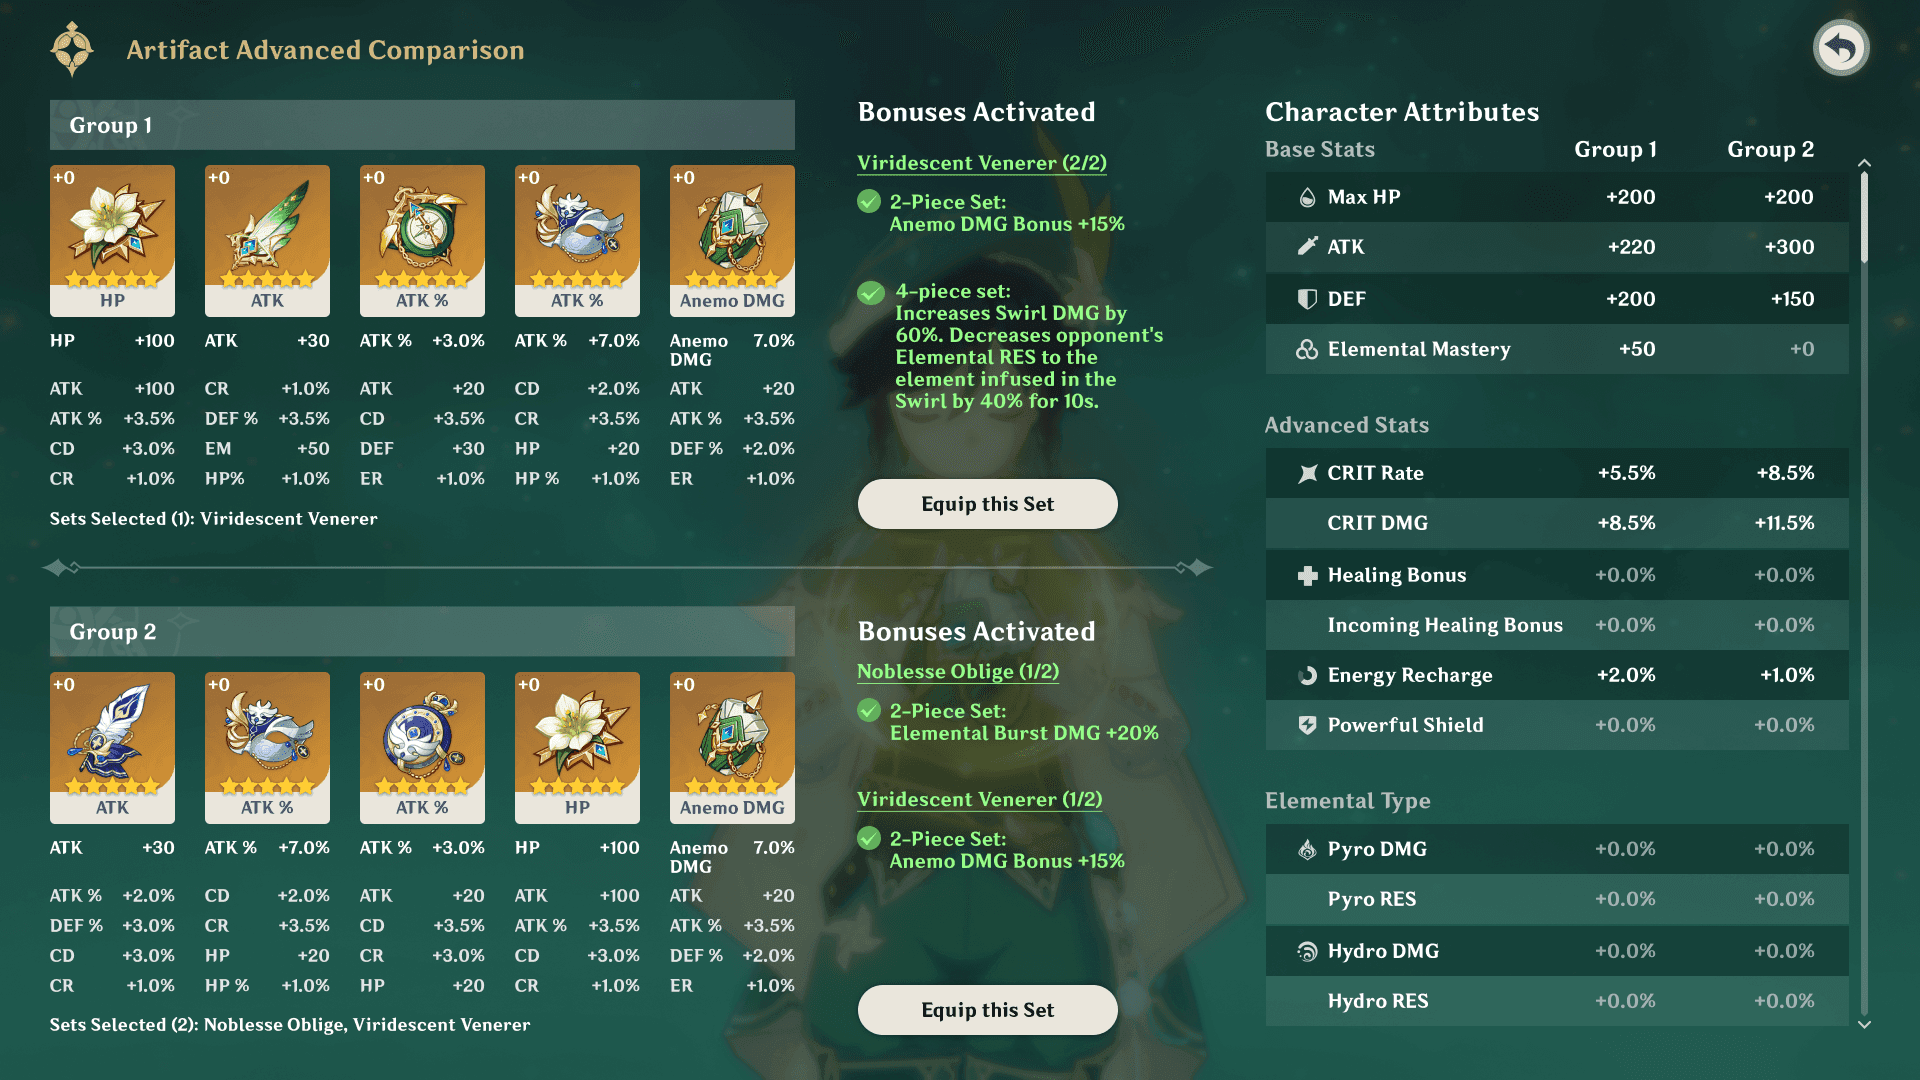
Let's cut to the chase: 4pc Golden Troupe is your go-to. The 2pc gives +20% Skill DMG, and the 4pc adds +25% to off-field Skill DMG—plus it clears that pesky 2-second on-field requirement. It edges out Husk by focusing purely on Tamoto without needing stacks, jacking up Skill output by 70% in mono-Geo.
Farm it from the Denouement of Sin domain in Fontaine—Wednesdays, Saturdays, Sundays. Upgrade to +16 every four levels, chasing CRIT and DEF substats. Pit it against Husk in tests; that +25% off-field boost shines in those 17-second Tamoto windows.
Husk of Opulent Dreams? Solid 2pc for +30% DEF, and the 4pc Curiosity stacks (up to four: +6% DEF +6% Geo DMG Bonus each) build on-field every 0.3 seconds or off-field every 3 seconds, but they drop one every 6 seconds inactive. Pair it with Gorou, hit 2,400 DEF for +24% Geo per stack—yet swaps kill the momentum.
Save Husk for C6 or mixed ATK/DEF builds. Time your Skill after buffs to hold stacks. Or mix 2pc Husk (+30% DEF) with 2pc Golden Troupe for a balanced start.
Golden Troupe dodges Husk's stack hassles entirely, outperforming by 10-15% in fast-swap Navia teams where Tamoto stays consistent. Research on available data backs this—it's not just hype.
Set main stats to DEF% Sands, Geo DMG Goblet, CRIT Circlet. If drops are slow, craft via AR 45 Strongbox. Balance it with 70% CRIT Rate for that 160%+ DMG ratio.
Archaic Petra's 2pc (+15% Geo DMG) teams nicely with 2pc Golden Troupe for +35% Geo/Skill in budget off-field roles. Toss in 4-star Defender's Will for +30% DEF and +30% Elemental RES per element—handy for Abyss survival.
Use Petra in non-Geo teams to share that +15% team-wide Geo DMG. Switch to full Golden Troupe once you've farmed enough. Prioritize RES shred with Xilonen in flexible comps.
Early on, 2pc Husk (+30% DEF) + 2pc Golden Troupe (+20% Skill) gets you to 2,000 DEF with a +20% DMG baseline—no sweat.
Prioritize CRIT DMG/Rate substats first, then DEF%. Upgrade the Flower (fixed HP) and Plume (fixed ATK) with CRIT/DEF rolls. Check your 1:2 CRIT ratio in an in-game calculator.
Energy Recharge Requirements: Exact Breakpoints by Team Composition
Chiori's Burst costs 50 Energy, so 100% ER is the baseline—her Skill generates particles to help. In mono-Geo with Gorou or Zhongli, 100-130% covers it thanks to Resonance; no need to overinvest.
Start with 100% from level 90 and weapon. Add 10-30% from Favonius procs on supports. Test Burst uptime in practice mode to dial it in.
Breakpoints depend on team particles; her Skill self-batteries that 50 Energy need. A Favonius on Gorou (built for ER/DEF/CRIT) shaves off 20%.
Only grab ER% Sands at C6. Push to 130% in low-particle teams. Geo Resonance gives +15% DMG without draining ER extra.
With Gorou: 100-130%, since his Burst buffs DEF/Geo for free. Without: 130-150%.
Equip Favonius Warbow on Gorou for those procs. Position Chiori after Gorou to funnel particles. Monitor in Abyss to match that 13.5s CD.
In double Geo like Xiao + Zhongli, 130-150% handles the sparse particles; Archaic Petra sneaks in minor ER.
Skip the Burst if under 130% ER. Use Yelan or Xiangling for Crystallize without ER hits. Test swaps for 100% uptime.
At C1+, 100% does the trick sans dedicated battery; Navia's no-construct vibe gets offset by the extra Tamoto.
Build 100% ER while focusing DEF. Funnel from Bennett or Xiangling particles. Prioritize Skill over Burst.
Enter a domain, roll out your team, and track Burst readiness after Skill. If you're short 50 Energy post-16s CD, slot in 20% ER substats.
To Genshin Impact recharge online via BitTopup ensures fast, affordable top-ups with robust security and excellent user ratings, supporting all regions for hassle-free account enhancement.
Artifact Main Stats and Substat Priority Guide
Main stats? Sands in DEF% (or ATK% for some balance), Goblet Geo DMG Bonus, Circlet CRIT Rate or DMG. Substats go CRIT Rate/DMG > DEF% > ATK%, aiming for 70-80% CRIT Rate and 160%+ DMG. With Uraku Misugiri, DEF% Sands pushes total DEF over 2,000 for Tamoto's peak.
Farm domains for those Geo Goblet drops. Upgrade to +20, honing in on CRIT pieces. Split ATK/DEF to max that 103% DEF scaling.
DEF% Sands amps Tamoto by 103%; Geo DMG Goblet at +20 adds 46.6%; CRIT Rate Circlet nails the 1:2 ratio.
Ditch ER Sands for off-field play. Switch to CRIT DMG Circlet if Rate tops 70%. Verify 75%:150% in your calculator.
Hit 2,000-2,400 DEF with 70% Rate/160% DMG; Gorou's buffs crank DEF by 46%.
CRIT subs first. Cap DEF at 2,400—diminishing returns kick in. Tweak for Jade Cutter's HP scaling.
Substats: CRIT > DEF% > ATK% > ER (keep it minimal); pieces pick up 3-4 subs, upgrade after +16. Hunt CRIT DMG rolls (19.2% each); get at least 50% Rate pre-buffs. Flat DEF/ATK for low levels.
Calculators confirm: 2,000 DEF + 70:160 CRIT nets 20-30% more Tamoto DMG than Albedo—based on solid data runs.
Input team buffs like +20% Geo from her passive. Breakpoint at 160% CRIT DMG for mono-Geo. Recalc after upgrades.
Weapon Recommendations: Tier List for Off-Field Performance
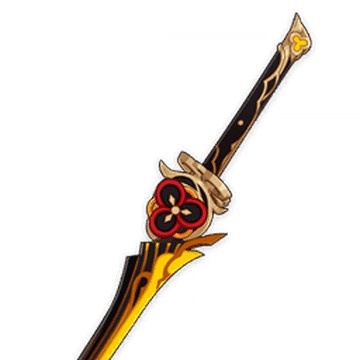
S-Tier kicks off with Uraku Misugiri: Base ATK 542, CRIT DMG 88.2%, +16-24% NA/Skill DMG, +100% after Geo DMG for 15s, and +20% DEF. It boosts Skill by 20-30% in Geo teams. R1 lets you ignore artifact CRIT pressure for pure DEF focus.
Pull it from the banner (October 9-29, 2024, Version 5.1 Phase 1). Refine to +24% Skill. Pair with Golden Troupe for off-field max.
Uraku beats Jade Cutter by 20-30% in Geo; Jade (Base ATK 542, CRIT Rate 44.1%, +20% HP/1.2% Max HP ATK) fits hybrid builds better.
Use Uraku in mono-Geo. Jade if your artifacts skimp on CRIT Rate. Test the DMG in rotations.
A-Tier: Cinnabar Spindle (Base ATK 454, DEF 69%, +40-80% DEF to Skill once/1.5s)—F2P best-in-slot for DEF scalers. Harbinger of Dawn (Base ATK 401, CRIT DMG 46.9%, +28% CRIT Rate >90% HP) thrives with shields.
Refine Cinnabar to R5 for +80% Skill. Keep >90% HP for Harbinger. Slot into budget teams.
Flute of Ezpitzal (DEF 69%, +16% DEF on Skill for 15s) and Wolf-Fang (Base ATK 510, CRIT Rate 27.6%, +16-32% Skill/Burst, +2-4% CRIT per stack) narrow the 5-star gap at R5. Cinnabar leads F2P with +80% DEF to Skill; refine Wolf-Fang for four stacks/10s CRIT. Grab event weapons like Cinnabar first.
Uraku's +100% Geo procs on Tamoto hits every 3.6s.
Swap post-Skill to trigger off-field. Use Peak Patrol Song for DEF support roles. Skip Festering Desire unless ER's tight.
Chiori Team Templates: Meta Compositions for Maximum Efficiency
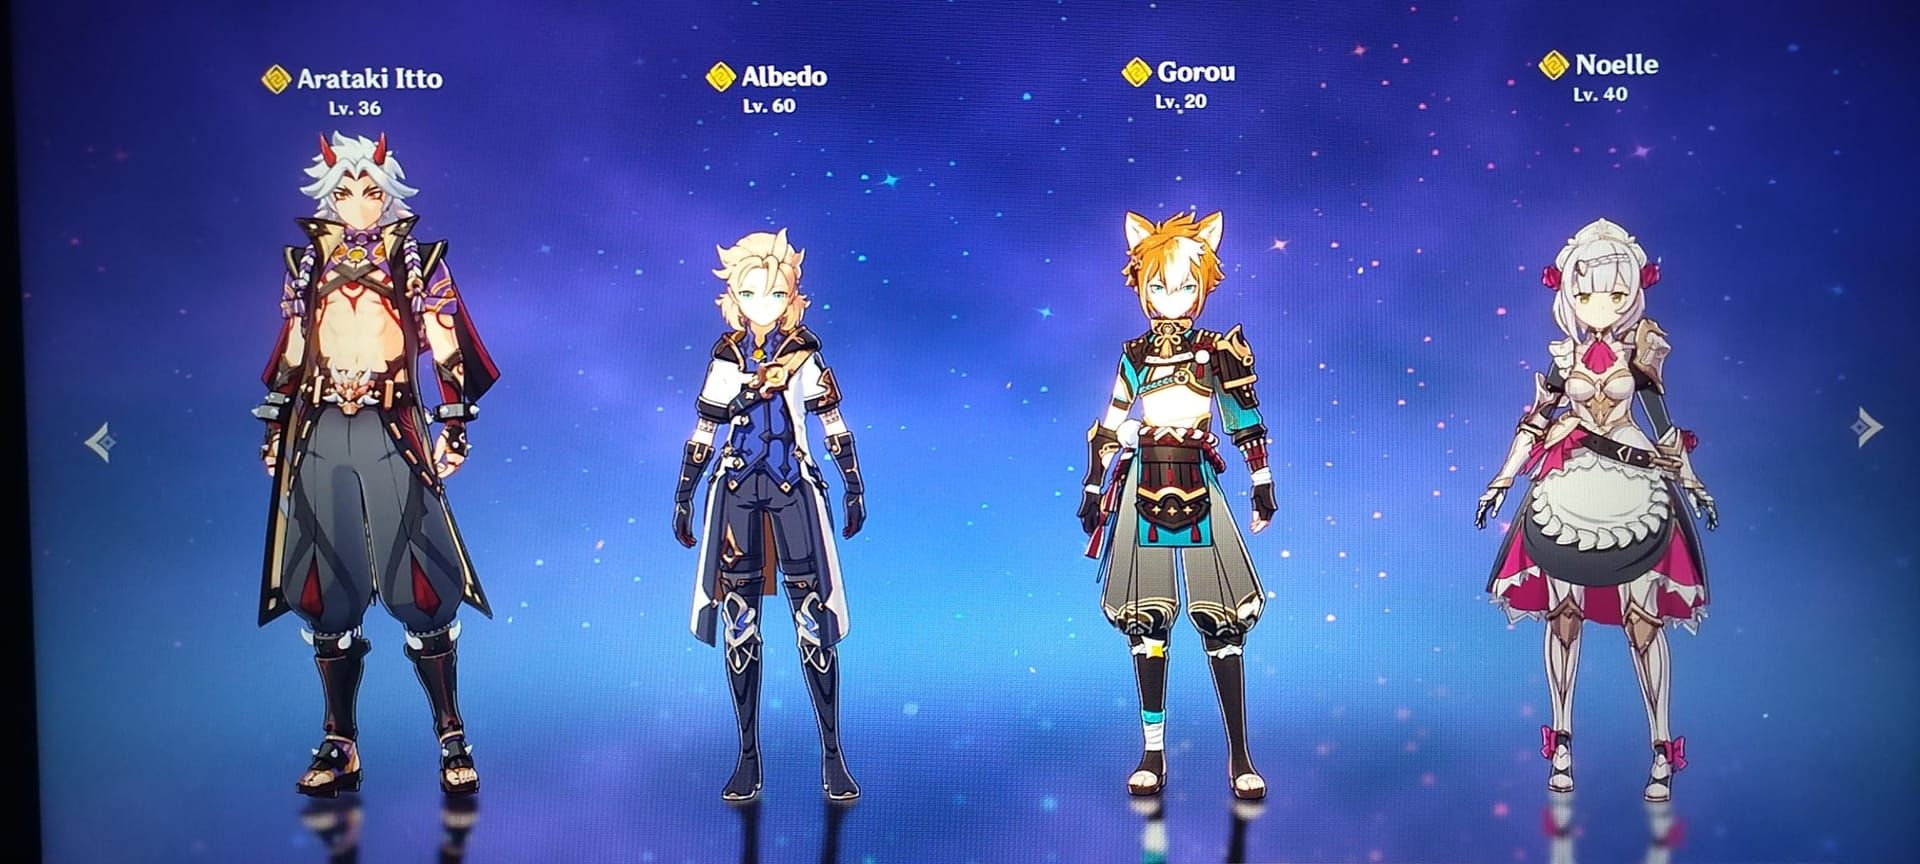
Mono-Geo: Chiori as sub-DPS, Itto main DPS, Gorou support, Zhongli support. It taps +15% Geo Resonance DMG and 50% shield strength, with multiple constructs spawning extra Tamoto. Gorou at C6 dishes +46% DEF buffs, letting Chiori hit 2,400 DEF peaks.
Gear Itto with Redhorn/4pc Husk. Gorou gets Favonius/4pc Exile. Zhongli: Black Tassel/4pc Noblesse for his construct.
Rotation: Zhongli Hold Skill. Gorou Skill then Burst. Chiori Skill twice, swap to Itto. Itto Burst/Skill, then N/CA. Chiori Burst. Loop it. Subs: Albedo over Zhongli, Noelle for Itto, Yun Jin for Gorou.
For C1+ Chiori + Navia (main DPS) + Xiangling or Furina (sub-DPS) + Bennett or Charlotte (support): Geo Resonance without construct limits. Rotation builds Crystallize for Navia's bursts, Tamoto adding 50% AoE.
Chiori Skill twice. Bennett Skill/Burst. Xiangling Skill/Burst. Navia Burst. Chiori Burst. Navia Skill/N/CA. Repeat.
Chiori + Xiao or Hu Tao (main) + Yelan or Xiangling (sub) + Zhongli: Crystallize shields, 130-150% ER. Flex options: Add Furina to Chiori + Itto + C6 Gorou + Furina for buffs. Xilonen for RES shred. Slot Chiori fourth in Raiden/Nahida/Yae for pure Geo.
Chiori + Ningguang + Furina + Bennett: Ningguang's construct amps Tamoto; budget it with Harbinger on Chiori. Alts: Collei over Furina. Geo Traveler for constructs. Lean F2P with Cinnabar weapons.
In Abyss, mono-Geo crushes Geo-heavy floors; Navia handles mixed elements. Tweak for C1 on non-construct floors 9-12.
Prioritize Zhongli shields. Test rotations for 36-star clears. Swap Furina for Jean in HP-drain brawls.
Optimal Rotations and Skill Mechanics
Off-field standard: Skill, then swap. Burst after buffs for AoE punch. C0 needs constructs; C1+ doubles Tamoto sans them. 16s Skill CD syncs with 17s duration for seamless loops.
Deploy after Gorou for buffs. Tap Skill twice for extra summon on swap. Hold for aimed AoE.
Mono-Geo flow: Zhongli Hold. Gorou Skill/Burst. Chiori Skill (double for switch). Itto Burst/Skill/N/CA. Chiori Burst. Keeps Tamoto humming during DPS.
For Navia: Chiori Skill twice. Bennett/Xiangling setups. Navia Burst/Skill/N/CA. Stacks Crystals for her.
Funnel Gorou particles; Resonance boosts efficiency. Favonius procs cut ER needs by 10-30%.
Position Chiori last for particle gen. Skip Burst if ER's low. Self-battery from Skill at 100%.
Place her near the active character for C0 extra Tamoto; it's non-destructible for full 17s.
Use Zhongli's pillar central. Refresh before expiry. C1 frees up placement.
Chiori snapshots buffs on Skill cast; 20s Finishing Touch from constructs.
Burst Gorou pre-Skill. Align +20% Geo in that window. No ICD on Tamoto—consistent hits.
Common Mistakes and Build Misconceptions
Don't dump heavy ER investment; 100% baseline frees up for DEF/CRIT. Husk isn't always king—Golden Troupe owns off-field without stack drama. ER Sands? It guts DEF by 46%, tanking Tamoto 20%.
Skip ER subs. Use C1 for non-construct runs. Level Skill to 10 first.
200% ER? Slot waste; cap at 100-130% with batteries.
Test Burst post-rotation. Push DEF to 2,000+. Calc your thresholds.
Husk for C6 on-field only; Golden Troupe for swaps.
Farm Golden for BiS. Mix 2pc during transition. Ditch full Husk off-field.
C0 demands constructs—pair Zhongli. C1 flexes to Navia.
Add Albedo for dual Geo. Use in rainbow for Crystallize. Avoid solo sans battery.
Prioritize Skill > Burst > NA; NA's meh pre-C6. Level Skill to 10 with 114 Philosophies of Light; Crown it. NA to 6-8 at C6.
Chiori vs Albedo: Off-Field Geo DPS Comparison
Chiori's Tamoto ticks every 3.6s for sustained output, edging Albedo's bursty flower by 20% in mono-Geo—especially with constructs for extra summons. Albedo fits quickswaps; Chiori thrives in DEF-focused teams with Gorou. (My two cents: If you're Gorou-pilled, Chiori's your girl.)
Use Chiori for that turret range. Pair 'em for dual off-field madness. Chiori's simpler, no C2 grind.
Tamoto's steady vs Albedo's dip without C2; Chiori +50% AoE on C1. 2,000 DEF Chiori hits harder in Resonance.
Both low ER; Chiori's Skill particles self-battery smoother.
Albedo gens more for quick teams. Chiori leans on supports. Share 100% ER.
Chiori C1 stretches beyond mono; Albedo's easier entry.
Chiori with Navia post-C1. Albedo in double Geo. Both love Zhongli.
Chiori C0 works in constructs; Albedo's F2P-friendly.
Chiori needs DEF artifacts. Albedo lower talent push. Her banner: October 9-29, 2024.
Constellation Value Analysis for Off-Field Build
C0 holds strong in construct teams; C1 unlocks extra Tamoto AoE +50% and non-construct summons for Navia. C2 tosses in Kinu (170% Tamoto every 3s for 10s)—meh impact. Skip C2/C4; grab C1/C3/C5.
C0 shines with Zhongli; doubles Tamoto for steady DMG.
Run mono-Geo. 100% ER focus. Skill to 10.
C2's single hit every 13-15s? Underwhelming AoE.
Low pull value. C1's flex wins. Ignore for off-field.
C6 flips on-field NA +235% DEF loop (13s field)—niche for Geo mains.
High if you've got C6. Otherwise, off-field. C1's the sweet spot.
Talent Priority and Resource Allocation
Elemental Skill > Burst > Normal Attack. Pump Skill to 10 with 114 Philosophies of Light, 18 Spectral Husk, 66 Hearts, 93 Nucleus, 18 Lightless Silk String, 3 Crowns of Insight, and 4,957,500 Mora. Burst to 10 for AoE; NA to 6-8 post-C6.
Farm Light books Wed/Sat/Sun domains. Hunt Specters for Spectral, All-Devouring Narwhal for Silk. Ascend to unlock passives at A1/A4.
Skill first for 149% ATK + 187% DEF sweep; Burst secondary at 256% ATK + 320% DEF.
Skill L10. Burst L10. NA low.
Crown on Skill ups Tamoto 10-15%.
Use post-ascension. Save for C3/C5 pulls. Total: 9 Teachings, 63 Guide.
Phases: 20-40: 1 Sliver, 3 Dendrobium, 3 Husk, 20k Mora. 80-90: 6 Gemstone, 60 Dendrobium, 24 Nucleus, 20 Coppelia, 120k Mora.
Daily commissions for Dendrobium. Weekly bosses for Silk. 200 Resin per domain run.
Frequently Asked Questions About Chiori Off-Field Build
What is the best artifact set for Chiori off-field DPS?
4pc Golden Troupe: +20% Skill DMG (2pc) and +25% off-field Skill DMG (4pc), pumping Tamoto by 10-15% over Husk in quickswaps. Farm Denouement of Sin in Fontaine Wed/Sat/Sun, chasing DEF% Sands, Geo DMG Goblet, CRIT Circlet for 2,000+ DEF and 70:160 CRIT ratio.
How much energy recharge does Chiori need?
100% ER baseline for 50 Energy Burst; 100-130% in Mono-Geo with Gorou/Zhongli funneling, 130-150% in rainbow like Xiao + Zhongli. Test: Skill and swap; Favonius on supports cuts 10-30%, skip ER Sands for DEF/CRIT.
Is Chiori better than Albedo for off-field Geo damage?
Chiori's 20% higher sustained with Tamoto every 3.6s over 17s vs Albedo's bursty flower—tops mono-Geo with extra summons. Albedo for quickswaps, but no C1 Navia flex; pair 'em for dual Geo, Chiori wants more DEF but same 100% ER.
What are the best teams for Chiori?
Mono-Geo (Chiori + Itto + Gorou + Zhongli) for +15% Resonance and extra Tamoto via constructs; C1+ Navia (Chiori + Navia + Xiangling + Bennett) for Crystallize freedom. Rainbow like Chiori + Hu Tao + Yelan + Zhongli at 130-150% ER; buffer first, double Skill swap, Golden Troupe for Abyss.
Should I use Husk or Golden Troupe on Chiori?
Golden Troupe for off-field sub-DPS: +25% Skill DMG boosts Tamoto sans stack loss on swaps—BiS for C0. Husk (2pc +30% DEF, 4pc +24% Geo/DEF) fits Gorou C6 or on-field, but lags 10% off-field; 2pc mix for newbies' +30% DEF +20% Skill in mono-Geo.
What weapon is best for Chiori F2P?
Cinnabar Spindle (Base ATK 454, +69% DEF, +40-80% DEF to Skill/1.5s at R5) amps Tamoto's 103% DEF by 20% over base, rivals 5-stars. Harbinger of Dawn (+46.9% CRIT DMG, +28% CRIT Rate >90% HP) with shields; refine Cinnabar events, 100% ER in construct teams for 2,000 DEF.
Key Differentiators from Other Geo Sub-DPS Characters
Chiori stands out with solid Skill range, non-destructible turret damage, and C1 flexibility ditching construct needs—unlike Albedo's bursty flower. Downsides: C0 ties to constructs, weak on-field pre-C6.
Use her for sustained Geo Abyss without Albedo C2. Stack DEF with Gorou +25-46% at C6. Skip non-Geo sans C1—uptime drops.