

Understanding CRIT DMG probability on Woodpecker Electro disks is crucial for optimizing DPS builds in Zenless Zone Zero. Partition 4 offers CRIT DMG as one of six possible main stats, with S-Rank disks reaching 48% CRIT DMG max. The tuning system guarantees S-Rank every five Intermediate tunings, with level 3 Bardic Needle unlocking main stat selection. This guide breaks down exact probabilities, resource costs, and optimization strategies.
Understanding ZZZ Disk Drive Tuning Mechanics
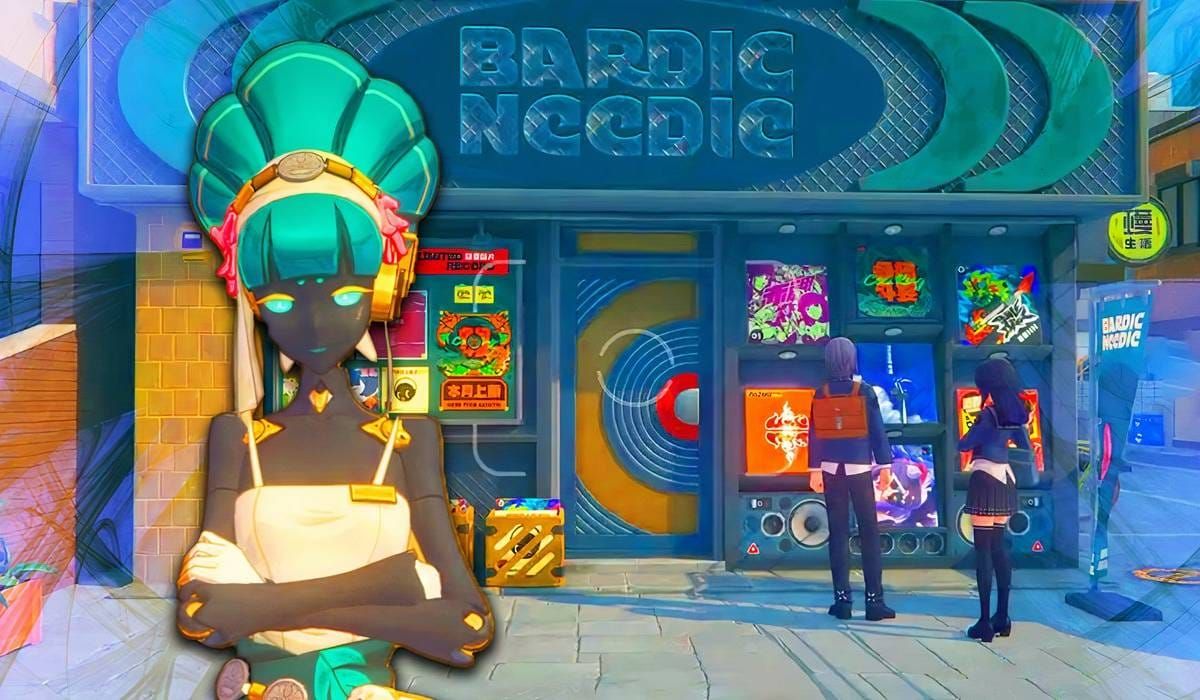
Disk tuning operates through Bardic Needle, letting you reroll disks using Master Copies and currencies. Level 2 Bardic Needle enables Intermediate Tuning for A/S-Rank disks, while level 3 unlocks main stat selection via Tuning Calibrators on partitions 4, 5, and 6.
Tuning maintains disk set type—Woodpecker Electro always produces Woodpecker Electro—but rerolls main stats and substats completely. Every five Intermediate tunings guarantees S-Rank, making tuning mathematically superior to pure RNG farming once you've accumulated Master Copies.
S-Rank disks unlock at Inter-Knot level 35. Below this, farm naturally through Routine Cleanup stages like Scott Outpost and Tower and Cannon.
For efficient Zenless Zone Zero Monochromes top up, BitTopup provides fast access to stamina refills and tuning materials with secure transactions.
Tuning Currency Requirements
Intermediate Tuning requires Master Copies (same disk set) and Dennies. Tuning Calibrators enable main stat selection on partitions 4/5/6 before tuning, eliminating one RNG layer.
Partition 4 has six main stat options (16.67% each), partition 5 has nine options (11.11% each), partition 6 has six options. Calibrator efficiency varies by slot—partition 4 offers best value with smallest pool and highest CRIT DMG value (48%).
Resource priority: partition 4 CRIT DMG for DPS characters. The 48% can't be replicated through substats efficiently.
Main Stat Selection Through Bardic Needle Level 3
Level 3 Bardic Needle introduces deterministic main stat selection. Using Tuning Calibrators on partitions 4/5/6, you select desired main stat before tuning, guaranteeing that outcome.
For partition 4 (six options: HP%, ATK%, DEF%, CRIT Rate%, CRIT DMG%, Anomaly Proficiency), selecting CRIT DMG eliminates the 83.33% failure rate. Combined with five-tuning S-Rank pity, you guarantee S-Rank partition 4 CRIT DMG within five attempts max.
Strategy: accumulate Tuning Calibrators specifically for partition 4 CRIT DMG on Woodpecker Electro. This maximizes calibrator value—highest CRIT DMG percentage, smallest main stat pool.
Woodpecker Electro Set Overview
Woodpecker Electro specializes in critical-hit focused characters. 2-piece bonus: 8% CRIT Rate (permanent). 4-piece bonus: 9% ATK for 6 seconds when Basic Attacks, Dodge Counters, or EX Special Attacks crit. Each skill type maintains separate buff durations, allowing stacking.
Best Characters
Grace Howard: Ideal user. Rapid attack chains and EX Special Attack benefit from 4-piece bonus. 2-piece CRIT Rate helps achieve consistent crits without over-investing in CRIT Rate substats.

Anby Demara: Secondary candidate in Stun-focused teams. Frequent Dodge Counter usage triggers 4-piece bonus. Alternative sets may provide better team utility depending on role.
Anton Ivanov: Benefits in pure DPS builds. Anomaly-focused playstyle sometimes favors alternatives. Decision hinges on team composition.
Slot Priority
Partition 4: Highest priority. CRIT DMG main stat offers 48% at max level—largest single CRIT DMG source, can't be replicated through substats.
Partition 5: Nine possible main stats (11.11% probability). For Woodpecker users, typically prioritize Electric DMG Bonus% over CRIT DMG.
Partition 6: Six options. Rarely uses CRIT DMG main stat for crit builds—prioritize ATK% or Energy Regen% instead.
Complete Main Stat Probability Breakdown
Partition 4 contains six possible main stats with equal distribution (16.67% each): HP%, ATK%, DEF%, CRIT Rate%, CRIT DMG%, Anomaly Proficiency. Without Tuning Calibrators, approximately one in six partition 4 disks rolls CRIT DMG naturally.
Slot 4 Main Stat Pool
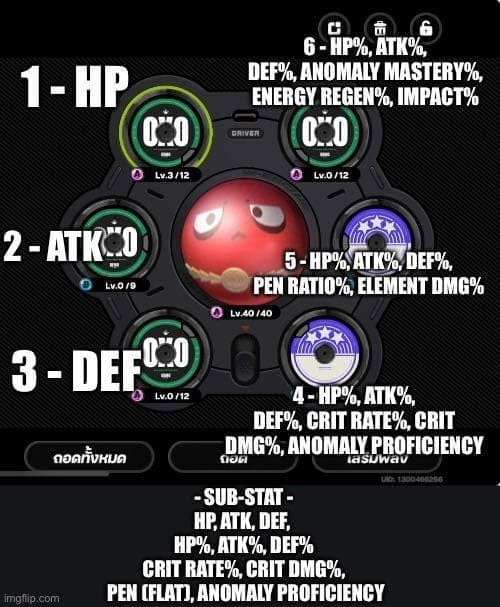
Partition 4 offers percentage-based stats only (unlike partitions 1/2/3 with flat stats):
HP%: Max 30% at S-Rank +15
ATK%: Max 30% at S-Rank +15
DEF%: Max 48% at S-Rank +15
CRIT Rate%: Max 24% at S-Rank +15
CRIT DMG%: Max 48% at S-Rank +15
Anomaly Proficiency: Max 92 at S-Rank +15
48% CRIT DMG equals 1.6 to 10 substat rolls (substats range 4.8-28.8%), making it irreplaceable.
Statistical Expectations
16.67% probability means one CRIT DMG every six partition 4 disks on average. Actual results vary significantly due to probability distribution.
Tuning pity mitigates variance: five Intermediate tunings guarantee S-Rank. With Tuning Calibrators, you guarantee S-Rank partition 4 CRIT DMG within five attempts max.
For buy ZZZ Inter-Knot Membership benefits, BitTopup offers instant delivery with no delays.
CRIT DMG Substat Ranges
Main stat CRIT DMG provides 48%. Substats offer 4.8-28.8% on S-Rank disks. Perfect disk (CRIT DMG main + max CRIT DMG on three substats): 134.4% total (48% + 28.8% + 28.8% + 28.8%).
Realistic expectation: average substat ~16.8% (midpoint). CRIT DMG main + two CRIT DMG substats = ~81.6% total.
Partition 4 CRIT DMG main stat is non-negotiable—48% alone exceeds two maximum substats. Substats can then diversify into CRIT Rate%, ATK%, or Flat ATK.
Natural Drop vs Tuning Analysis
Natural farming through Routine Cleanup offers random drops at standard stamina costs—purely RNG-dependent.
Tuning converts Master Copies into targeted attempts. Five-tuning S-Rank guarantee creates deterministic ceiling, contrasting with natural farming's unlimited bad luck potential.
Expected Stamina Cost for Natural Drops
16.67% probability for partition 4 CRIT DMG means ~six partition 4 disks needed. Not every run guarantees partition 4 drop—if equal distribution, ~16.67% chance per run. Roughly 36 total runs needed (6 partition 4 disks × 6 runs per partition 4).
Assumes average luck. Variance means some succeed within 10 runs, others exceed 100. No pity in natural farming creates frustration.
Average Tuning Attempts
With Tuning Calibrators on partition 4 CRIT DMG selected, only variable is S-Rank acquisition. Five-tuning pity guarantees S-Rank within five attempts max—worst case: five Master Copies + one calibrator.
Without calibrators: 16.67% CRIT DMG probability per attempt. Within 30 total tunings (six pity cycles), statistically obtain at least one S-Rank partition 4 CRIT DMG.
Optimal strategy: accumulate five Woodpecker Master Copies, use calibrator to select CRIT DMG, execute five tunings. Eliminates both rarity and main stat RNG.
Cost-Benefit Analysis
Early-game (35-45): Natural farming. Limited Master Copies and calibrators make tuning inefficient. Build Master Copy stockpile.
Mid-game (45-55): Hybrid. Farm until 10-15 Master Copies, then targeted tuning with calibrators.
Endgame (55+): Tuning exclusively. Stamina generates more value farming other resources. Use accumulated Master Copies for deterministic optimization.
Step-by-Step Tuning Guide
Before tuning, verify Bardic Needle level 3 (unlocks main stat selection). Accumulate at least five Woodpecker Master Copies to leverage S-Rank pity fully.
Prerequisites Checklist
Required:
Five Woodpecker Electro disks (any partition/rarity) as Master Copies
Sufficient Dennies for five Intermediate tunings
One Tuning Calibrator for partition 4
Bardic Needle level 3+
Inter-Knot level 35+
Optional:
Extra Master Copies for continued tuning
Plating Agents for immediate leveling
Backup calibrators
Tuning Process
Navigate to Bardic Needle → Intermediate Tuning
Choose Woodpecker Electro disk as Master Copy (will be consumed)
Select Use Tuning Calibrator → partition 4 → CRIT DMG%
Execute tuning
If not S-Rank, repeat with another Master Copy
Fifth tuning guarantees S-Rank partition 4 CRIT DMG
When to Stop
After obtaining S-Rank partition 4 CRIT DMG, evaluate substats. Ideal: CRIT Rate%, ATK%, Flat ATK. If two+ of these appear, consider success.
Substats upgrade five times (+0 to +15). One good substat at acquisition might develop excellently through favorable rolls.
Continue tuning only if substats include HP%, DEF%, or completely misaligned stats. Even then, 48% CRIT DMG main stat often justifies temporary use.
Resource Optimization Strategies
Daily stamina regeneration provides farming foundation. Prioritize based on bottlenecks—lacking Master Copies, farm Routine Cleanup; lacking Dennies, focus Dennies stages.
Weekly resets (Hollow Zero, Combat Simulation, Shiyu Defense) offer burst material accumulation supporting disk tuning.
Daily/Weekly Farming Routes
Routine Cleanup (Scott Outpost, Tower and Cannon): daily stamina until Master Copy inventory reaches 15-20. Enables multiple tuning sessions without interruptions.
Dennies farming: calculate total cost for planned tunings, farm 20-30% above that amount.
Tuning Calibrators: event rewards, battle pass, occasional shop. Reserve exclusively for partition 4 CRIT DMG on primary DPS characters.
Priority System
Primary DPS (consistent Shiyu Defense use): first priority for partition 4 CRIT DMG.
Secondary DPS/sub-DPS: optimize only after primary DPS achieves satisfactory sets.
Support/defensive: avoid CRIT DMG entirely. Never waste calibrators on these characters.
F2P Budget Management
Limit tuning to one character at a time. Fully optimize their partition 4 before moving to next.
Avoid tuning partition 5/6 CRIT DMG—larger main stat pools create worse odds. Partition 5: target Attribute DMG Bonus%. Partition 6: ATK% or Energy Regen%.
Stockpile 3-5 calibrators for major releases or meta shifts.
Character-Specific Recommendations
Grace Howard
Target minimum 200% total CRIT DMG. Partition 4 CRIT DMG (48%) provides ~25% of this from one disk.
CRIT Rate: 60-70%. Woodpecker 2-piece (8%) contributes meaningfully.
Substat priority: CRIT Rate% > ATK% > Flat ATK > PEN Ratio%
Anby Demara
Target 180-200% CRIT DMG with 50-60% CRIT Rate. Lower attack frequency means higher individual crit damage needed.
Partition 4 CRIT DMG optimization depends on team composition. If Grace/Anton is primary DPS, Anby's priority drops—invest in primary DPS first.
Alternative sets (defensive, Stun-focused) may provide better team utility. Evaluate damage contribution before committing calibrators.
Anton Ivanov
With crit-focused weapons in teams lacking Anomaly applicators: Woodpecker delivers superior damage.
In Anomaly-focused teams: alternative sets emphasizing Anomaly Proficiency and Attribute DMG Bonus% outperform.
Avoid hybrid builds—commit fully to either crit-focused Woodpecker or Anomaly alternatives.
Advanced Statistics
Binomial probability for partition 4 CRIT DMG without calibrators: P(success in N attempts) = 1 - (0.8333)^N
10 attempts: 83.5% probability
20 attempts: 96.4% probability
Expected Value Calculations
With calibrators + five-tuning pity: five Master Copies + one calibrator = guaranteed S-Rank partition 4 CRIT DMG
Without calibrators: ~30 tunings expected (six pity cycles × 16.67% success rate) = 30 Master Copies
Calibrator value: saves 25 Master Copies per guaranteed CRIT DMG disk
RNG Mitigation
Five-tuning S-Rank guarantee is true pity—hard cap activating deterministically on fifth attempt.
Each tuning maintains identical 16.67% CRIT DMG probability regardless of previous outcomes (except S-Rank pity counter).
Gambler's fallacy creates poor decisions—previous failures don't increase future success probability.
Tracking Results
Maintain tuning log: rarity, partition, main stat, substats. Over 50+ tunings, results should approximate theoretical probabilities.
Significant deviations likely reflect small sample variance, not mechanical anomalies. Probability distributions require hundreds of attempts to converge.
Use data to refine strategies. Above-average natural drop luck: reduce tuning, farm more. Below-average: prioritize tuning with calibrators.
Common Misconceptions
Myth: Tuning at specific times increases success rates False. Game code doesn't incorporate time-based RNG manipulation. Probabilities remain constant. Belief stems from confirmation bias.
Myth: Previous results influence future outcomes False. Each tuning is independent probability event. No hidden pity beyond documented S-Rank guarantee.
Higher Rarity = Better Main Stat Rates?
False. Main stat probability identical across rarities within same partition. A-Rank and S-Rank partition 4 both have 16.67% CRIT DMG probability.
Rarity affects maximum stat values and substat quality, not main stat distribution.
True Random Distribution
True randomness produces clustering and streaks feeling non-random. Three consecutive CRIT DMG disks or 20 attempts without CRIT DMG both fall within normal probability.
Community-aggregated data validates equal-distribution model—partition 4 main stats appear at ~16.67% frequency each.
Endgame Optimization
Target total CRIT DMG for Shiyu Defense: 200%+, with top builds reaching 220-250%. Partition 4 CRIT DMG (48%) provides foundation.
Optimal CRIT Rate:CRIT DMG ratio approximates 1:2. 200% CRIT DMG pairs with 100% CRIT Rate, though practical builds achieve 60-70% CRIT Rate with 180-200% CRIT DMG.
Balancing CRIT Rate and CRIT DMG
Partition 4 offers CRIT Rate% (max 24%) and CRIT DMG% (max 48%). Doubled value makes CRIT DMG mathematically superior for partition 4. Accumulate CRIT Rate through substats and Woodpecker 2-piece (8%).
Calculate total stats including weapon bonuses before finalizing priorities. Character with 30% CRIT Rate weapon needs 30-40% additional from disks.
Substat Priorities
After partition 4 CRIT DMG main stat: CRIT Rate% > ATK% > Flat ATK > PEN Ratio%
CRIT Rate% substats: 2.4-14.4% on S-Rank. Disk with CRIT DMG main + three max CRIT Rate% substats = 48% CRIT DMG + 43.2% CRIT Rate (theoretical).
Realistic target: two relevant substats per disk (e.g., CRIT DMG main + CRIT Rate% + ATK% substats).
Long-Term Investment
Prioritize by usage frequency and investment level. Fully built characters with signature weapons deserve optimization before under-invested characters.
Maintain 20-30 Master Copy stockpile per disk set before optimization.
Re-evaluate priorities quarterly as meta shifts. Current top-tier characters may become less relevant in future patches.
FAQ
What's the exact probability of CRIT DMG on Woodpecker partition 4? 16.67% per disk without Tuning Calibrators (six equal options). With calibrators + five-tuning S-Rank pity, guaranteed within five attempts.
Which partitions can have CRIT DMG main stat? Only partition 4. Provides 48% max at S-Rank +15—highest CRIT DMG value.
How much does tuning cost? One Master Copy (same set) + Dennies per attempt. Tuning Calibrators for main stat selection consume one per attempt. Max five Master Copies + one calibrator for guaranteed S-Rank partition 4 CRIT DMG.
Tuning or farming more efficient? Tuning with calibrators for endgame players with Master Copies—guarantees S-Rank partition 4 CRIT DMG within five attempts. Natural farming benefits early-game building stockpiles.
Which characters benefit most? Grace Howard (ideal), Anton Ivanov (pure DPS builds), Anby Demara (damage-focused teams). Depends on team composition.
Can you guarantee CRIT DMG through tuning? Yes. Tuning Calibrators on partition 4 with CRIT DMG selected + five-tuning S-Rank pity = guaranteed S-Rank partition 4 CRIT DMG within five attempts max.