

Withering Garden Intensity 11 is Hollow Zero's toughest challenge in Zenless Zone Zero, unlocked at Inter-Knot Level 45. This guide covers proven Resonium combinations for no-hit clears against Nineveh, including the Freeze build's 134,765,000 score with 50 seconds remaining, Ether/Shock anomaly strategies, and Critical damage stacking. Master Resonium synergy, character optimization, and floor selection to dominate this zone where all enemies get comprehensive buffs.
Understanding Intensity 11 and Resonium Mechanics
Withering Garden is Hollow Zero's fifth zone, ending with Nineveh boss. Exploration Ether Activity 11 boosts enemy health, damage, resistance, and aggression significantly.
Floor 1 exit requires defeating two bosses simultaneously. Floor 3 demands victory over Nineveh plus minions. Blitz mode escalates: Wave 1 has Normal Mob → Elite → Gatekeeper+Elite. Wave 2 features dual Elites → Gatekeeper → Nineveh Final Boss.
For progression support, Zenless Zone Zero Monochromes top up at BitTopup provides fast, secure premium currency access.
Resonium System Basics
Resoniums are temporary power-ups collected during runs. They stack with Agent base stats and W-Engines.
Rarity tiers:
S-rank: Transformative effects (Ice Thermos stack preservation)
A-rank: Solid advantages (Freezing Spray's 30% Ice Anomaly Buildup)
B-rank: Foundation bonuses (Cutie Cold Pack's 15% Ice DMG)
Synergy thresholds:
4 same-type: Triggers Resonium Reaction
8 same-type: Unlocks Advanced Resonium cards
Stacking Mechanics
Sniper Scope: Each crit adds 4% CRIT DMG for 10s, caps at 10 stacks (40% total).
Dynamic Sensors: Perfect Assists grant 48% CRIT DMG for 30s. Acuity stacks add 10% Stun DMG Multiplier per stack, max 5.
Unstable Tranquilizer: Base 50% Ether DMG and Attribute Anomaly DMG for 10s. Additional stacks add 15% Ether DMG and 10 Anomaly Proficiency each, max 4 stacks.
S-Tier Resonium Combinations
Freeze Build: Ellen/Lycaon/Soukaku

Achieved 134,765,000 score, 5 Nineveh defeats, 50s remaining.
Core S-ranks:
Freezing Gloves: Ice Mark trigger +40% Ice DMG
Ice Maker: Freezing enemies grants squad +40% CRIT DMG for 15s
Icicle Shooter: Shatter leaves icy mist for 10s, +80% CRIT DMG inside
Ice Thermos: Ice Mark trigger doesn't consume stacks, +50% Ice DMG and CRIT DMG for 10s
Support picks:
Freezing Spray (A): +30% Ice Anomaly Buildup Rate
Ice Bucket (B): 8 Ice Mark stacks per EX Special
Cutie Cold Pack (B): +15% Ice DMG
Lycaon needs 4 Ice Resoniums for Resonium Reaction. Ellen handles DPS with multiplicative CRIT DMG. Soukaku provides Ice RES shred.
Ether/Shock Build: Zhu Yuan/Qingyi/Nicole
Maintains continuous anomaly pressure through Electric and Ether synergies.
Essential picks:
Unstable Tranquilizer (S): 50% Ether DMG and Attribute Anomaly DMG base, stacks add 15% Ether DMG and 10 Anomaly Proficiency (max 4)
Lightning Rod (S): Electric DMG triggers Jolt (1200% ATK). Stacks add 5% Decibel Generation and Ultimate DMG, max 20 stacks
Trashed Harpoon Gun (S): Corruption grants Activity stacks, reduces Corrupted enemy Ether RES by 20%
Complementary:
Suppressive Bracelet (A): Activity stacks from EX Specials
Lightning Trident (A): 6 Zap stacks per EX Special hit
Frozen Timer (B): +15% Ether DMG
Conductive Coil (B): 1 Zap stack every 3s from Electric DMG
Qingyi provides Stun windows. Nicole amplifies damage through debuffs. Effective against Nineveh's minion phases.
Critical Build: Billy/Anby/Nicole
Scored 26,170,175 with 25,000,000 damage in one attempt.
Primary picks:
Sniper Scope (S): Crits add 4% CRIT DMG for 10s, stacks 10x (40% total)
High-Explosive Grenade (S): +36% CRIT DMG, executes normal enemies below 75% HP every 6s via crits
Dynamic Sensors (S): Perfect Assists grant 48% CRIT DMG for 30s, Acuity stacks add 10% Stun DMG Multiplier (max 5)
Support:
Ice Shaver: +50% Shatter DMG, Shatter hits add 20% Ice Anomaly Buildup for 5s
Freezing Gun: Shatter inflicts 140% Impact Daze if target isn't Stunned
Billy handles Critical damage. Anby provides Stun setup and Electric application. Nicole debuffs amplify burst potential.
Character-Specific Optimization
DPS Agents
Ellen: Prioritize Freezing Gloves, Ice Maker, Ice Thermos. Rapid attacks trigger Ice Mark frequently. Ultimate maximizes damage in Icicle Shooter's icy mist.
Zhu Yuan: Unstable Tranquilizer's stacking suits her consistent Ether application. Maintains 4-stack bonus reliably (110% total Ether DMG). Trashed Harpoon Gun's Ether RES reduction amplifies damage vs Corrupted enemies.
Billy: Needs Critical Rate foundation first. Sniper Scope matches sustained damage pattern. High-Explosive Grenade eliminates weakened enemies. Dynamic Sensors rewards Perfect Assist timing.
Support/Stun Characters
Lycaon: Ice Maker's squad-wide 40% CRIT DMG outvalues personal Ice DMG bonuses. Dynamic Sensors' Perfect Assist trigger aligns with defensive assists.
For roster expansion, buy ZZZ Inter-Knot Membership through BitTopup for premium resources.
Qingyi: Dynamic Sensors' Acuity stacks directly increase Stun DMG Multiplier. Lightning Rod's Decibel Generation accelerates Ultimate availability.
Anby: Conductive Coil's passive Zap generation complements Electric application. Lightning Trident's 6 Zap stacks per EX Special create immediate value.
Anomaly Agents
Nicole: Unstable Tranquilizer's Attribute Anomaly DMG bonus amplifies team anomaly damage. Suppressive Bracelet supports energy-hungry rotation.
Soukaku: Freezing Spray's 30% Ice Anomaly Buildup accelerates team Freeze. Ice Bucket's 8 Ice Mark stacks per EX Special ensures consistent Freezing Gloves activation.
Floor-by-Floor Strategy
Early Floors (1-3)
Prioritize versatile Resoniums with unconditional benefits. B-ranks like Cutie Cold Pack (15% Ice DMG) or Frozen Timer (15% Ether DMG) offer reliable scaling.
Avoid hyper-specialized S-ranks unless they perfectly match your team. Resource generation picks (Suppressive Bracelet, Conductive Coil) establish energy loops.
Mid Floors (4-6)
Critical scaling phase. If you've got 2-3 Ice Resoniums by Floor 4, pursue the fourth for Resonium Reaction.
S-ranks gain priority once foundation supports conditions. Ice Maker becomes viable with Freeze-enabling Resoniums. Evaluate weaknesses—add defense if needed, or double down on offense.
Late Floors (7-9)
Specialize toward established strategy. Ice Thermos maximizes value with multiple Ice Mark generators (50% Ice DMG and CRIT DMG).
Lightning Rod reaches full potential in extended combat (100% Decibel Generation and Ultimate DMG at 20 stacks).
Prepare for Nineveh: prioritize burst damage during Stun windows. High-Explosive Grenade eliminates minions efficiently.
Advanced Synergy Mechanics
Multiplicative vs Additive Scaling
Ice Maker (40% CRIT DMG) and Icicle Shooter (80% CRIT DMG) multiply with base stats. Character with 50% base CRIT DMG reaches: 50% × 1.4 × 1.8 = 176% total CRIT DMG.
Freezing Gloves (40% Ice DMG) + Ice Thermos (50%) + Cutie Cold Pack (15%) = 1.4 × 1.5 × 1.15 = 2.415× multiplier.
Unstable Tranquilizer stacks additively within itself (50% base + 60% from 4 stacks = 110%), then multiplies with other Ether sources.
Timing Windows
Ice Maker's 15s duration requires coordination. Freeze enemy, then execute highest damage combo immediately. Ellen's Ultimate deals max damage during overlapping Ice Maker and Icicle Shooter zones.
Dynamic Sensors' 30s duration from Perfect Assists provides extended buffs. Missing Perfect Assists wastes Stun DMG Multiplier stacks.
Lightning Rod's Jolt triggers on Electric DMG application, not hit. Each damage instance can trigger Jolt independently.
Hidden Synergies
Ice Shaver + Freezing Gun: 50% Shatter DMG increase makes Shatter impactful. Freezing Gun's 140% Impact Daze from Shatter creates Stun-lock opportunities.
Trashed Harpoon Gun's Ether RES reduction on Corrupted enemies synergizes with controlled Corruption strategies. Accept Corruption to trigger debuff, cleanse before critical thresholds.
Suppressive Bracelet + Lightning Trident: Each EX Special grants Activity stacks and 6 Zap stacks simultaneously.
Diminishing Returns
CRIT DMG stacking plateaus beyond 200% total. Sniper Scope (40%) + Dynamic Sensors (48%) + Ice Maker (40%) = 128% bonus. Adding High-Explosive Grenade (36%) provides less value than diversifying.
Ice DMG with Freezing Gloves (40%) + Ice Thermos (50%) + Cutie Cold Pack (15%) saturates. Additional Ice DMG sources contribute less than Anomaly Buildup Rate.
Recognize when offensive scaling suffices and pivot to survivability. 300% damage means nothing if you fail no-hit requirements.
Common Mistakes
Over-Prioritizing Damage
Intensity 11 punishes glass cannons. Players chase S-rank offense while ignoring defense, resulting in one-shot failures.
Defensive Resoniums don't appear in top builds because skilled players avoid damage mechanically. For learners, shields or damage reduction provide room for improvement.
Ignoring Enemy Matchups
Withering Garden has diverse enemy types. Committing entirely to Ice vs Ice-resistant compositions wastes selections.
Blitz Wave compositions vary. Building exclusively for Nineveh while ignoring Gatekeeper requirements creates mid-run struggles.
Monitor enemy compositions early and adjust priorities. Heavy Elite presence favors burst damage and execution mechanics.
Wrong Team Composition Picks
Ice Resoniums provide zero value for non-Ice teams. Verify effects apply to your Agents before selection.
Squad effects benefit all members. Agent effects apply only to trigger character. Don't build around Bangboo synergies at Agent expense.
Wasting Rerolls
Resonium rerolls are limited. Rerolling mediocre A-ranks hoping for S-ranks often yields worse B-ranks.
Reroll when offered conflicting Resoniums or zero-value picks. Don't reroll adequate selections for marginal upgrades.
Late-floor rerolls (7-9) carry higher stakes. Exercise greater selectivity.
Boss-Specific Counters
Nineveh Mechanics
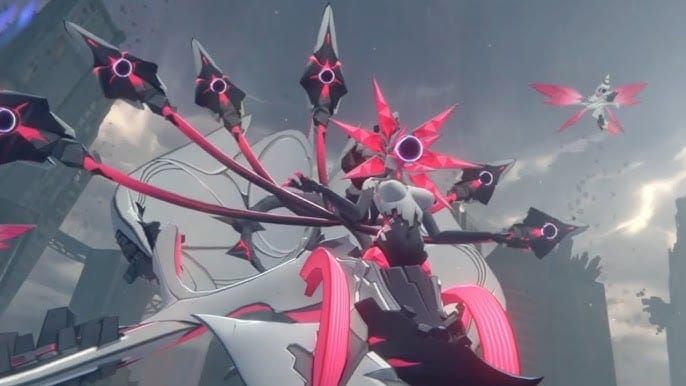
Nineveh features multiple phases with distinct patterns and vulnerability windows. Summons minions at health thresholds.
Floor 1's dual boss demands sustained multi-target pressure. Gatekeeper Bosses are enhanced elites with amplified stats but predictable patterns.
Counter Resoniums
High-Explosive Grenade trivializes minion phases by auto-executing weakened adds every 6s.
Freezing Gun's Daze through Shatter creates additional Stun opportunities (140% Impact Daze).
Lightning Rod's Jolt provides reliable damage during boss movement phases (1200% ATK).
Mid-Run Adaptation
Floor 1's dual boss reveal informs priorities. High mobility bosses favor area damage and Anomaly Buildup. Stationary bosses favor Critical stacking.
Monitor damage output mid-run. Excessive clear times warrant aggressive offensive Resoniums. Comfortable speeds allow defensive picks.
Resource Management
Maximizing Acquisition
Combat nodes guarantee Resoniums but consume resources. Event nodes offer Resoniums with lower combat requirements.
Corruption management impacts acquisition. Higher Corruption unlocks powerful options but increases difficulty. Maintain below critical thresholds.
Event vs Combat Nodes
Event nodes have variable outcomes. Combat nodes guarantee rewards but risk no-hit failure.
Early floors favor event exploration. Late floors warrant combat prioritization for specific acquisitions.
Calculate risk based on run success. Strong builds afford event RNG. Struggling runs minimize variance.
Account Preparation
Level 50+ Agents with upgraded Skills and invested W-Engines provide baseline stats.
Drive Disc optimization impacts performance significantly. Proper main stats and substats create foundation for Resonium amplification.
Team synergy matters more than individual strength. Cohesive teams outperform higher-rarity Agents with conflicting mechanics.
No-Hit Execution Tips
Mental Preparation
No-hit runs demand 15-20 minute concentration. Mental fatigue causes late-floor mistakes. Schedule attempts when alert.
Develop pre-run routines: review patterns, verify equipment, confirm rotations. Reduces mid-run decision paralysis.
Accept RNG influences outcomes. Poor offerings or unfavorable compositions sometimes prevent success. Maintain emotional equilibrium.
Restart vs Push Through
Floors 1-3 offerings that completely conflict warrant immediate restart. Zero synergistic Resoniums doom runs.
Mid-run restarts justified when critical selections fail repeatedly and power feels inadequate for remaining floors.
Push through suboptimal but functional selections. A-ranks with moderate value enable clears—execution compensates for imperfection.
Recording Runs
Recording enables pattern identification. Review footage for repeated mistakes, suboptimal selections, or execution errors.
Compare successful vs failed run Resoniums. Identify combinations that consistently enable progression.
Track clear times and damage metrics. Improving trends indicate mastery. Stagnant performance suggests fundamental problems.
FAQ
What are the best Resonium combos for Intensity 11?
Freeze (Ellen/Lycaon/Soukaku) with Freezing Gloves, Ice Maker, Icicle Shooter, Ice Thermos scored 134,765,000 with 50s remaining. Ether/Shock with Unstable Tranquilizer and Lightning Rod provides anomaly control. Critical with Sniper Scope and High-Explosive Grenade reached 26,170,175 via burst.
How does Resonium stacking work?
4 same-type triggers Resonium Reaction. 8 same-type unlocks Advanced cards. Individual limits: Sniper Scope caps at 10 stacks (40% CRIT DMG), Unstable Tranquilizer maxes at 4 stacks (110% Ether DMG).
Can you complete Intensity 11 without damage?
Yes. Freeze build demonstrated 5 Nineveh defeats, 50s remaining. Requires synergistic Resoniums, optimized team, and pattern mastery.
Which Resoniums have highest priority?
S-ranks with multiplicative scaling: Ice Maker (40% squad CRIT DMG), Freezing Gloves (40% Ice DMG), Unstable Tranquilizer (stacking Ether DMG), Lightning Rod (Jolt + Decibel Generation).
How do Resoniums synergize with characters?
Ellen's crit kit maximizes Ice Maker and Icicle Shooter CRIT DMG. Zhu Yuan's Ether application maintains Unstable Tranquilizer 4-stack. Billy's sustained damage matches Sniper Scope stacking. Lycaon benefits from squad buffs over personal damage.
What are common selection mistakes?
Over-prioritizing damage vs survivability causes no-hit failures. Taking non-matching Resoniums (Ice for non-Ice teams) wastes selections. Rerolling adequate options for marginal upgrades yields worse outcomes. Ignoring enemy matchups creates mid-run struggles.
Ready to dominate Withering Garden Intensity 11? Power up at BitTopup with fast, secure Polychrome and resource top-ups. Get the Agents and W-Engines for perfect runs—trusted worldwide with competitive pricing, instant delivery, and excellent service!