

Master Zhongli's shield mechanics in Genshin Impact 6.1 Phase 2 with comprehensive breakpoint analysis, optimal team compositions, and build optimization strategies. This guide covers HP scaling calculations, artifact selections, weapon comparisons, and advanced techniques to maximize Zhongli's S-tier support potential in the current meta.
Zhongli 6.1 Overview and Meta Position
Let's be honest—Zhongli's still absolutely broken in the best way possible. He's holding onto that S-tier support spot like it's his precious contract, and frankly, nothing in 6.1 has even come close to dethroning him.
The Gentry of Hermitage banner's running from November 11 through December 2, 2025 (9:00 AM server time, don't miss it). What makes him so ridiculous? That Jade Shield isn't just tough—it's got 150% absorption efficiency against literally everything. Physical damage, elemental damage, your feelings when you realize you've been playing without shields this whole time.
Here's where it gets spicy: the new Frostnight Herra boss throws around a Gloomveiled state that cranks enemy resistance up by 120%. Most characters just cry. Zhongli? He shrugs and applies his universal 20% resistance shred anyway. Stack that with Viridescent Venerer and you're looking at -46% total elemental resistance. Chef's kiss.
Need Primogems for his banner? Recharge Genesis Crystals Genshin Impact through BitTopup—they've got competitive pricing, instant delivery, and 24/7 support that actually responds (trust me, I've tested it at 3 AM).
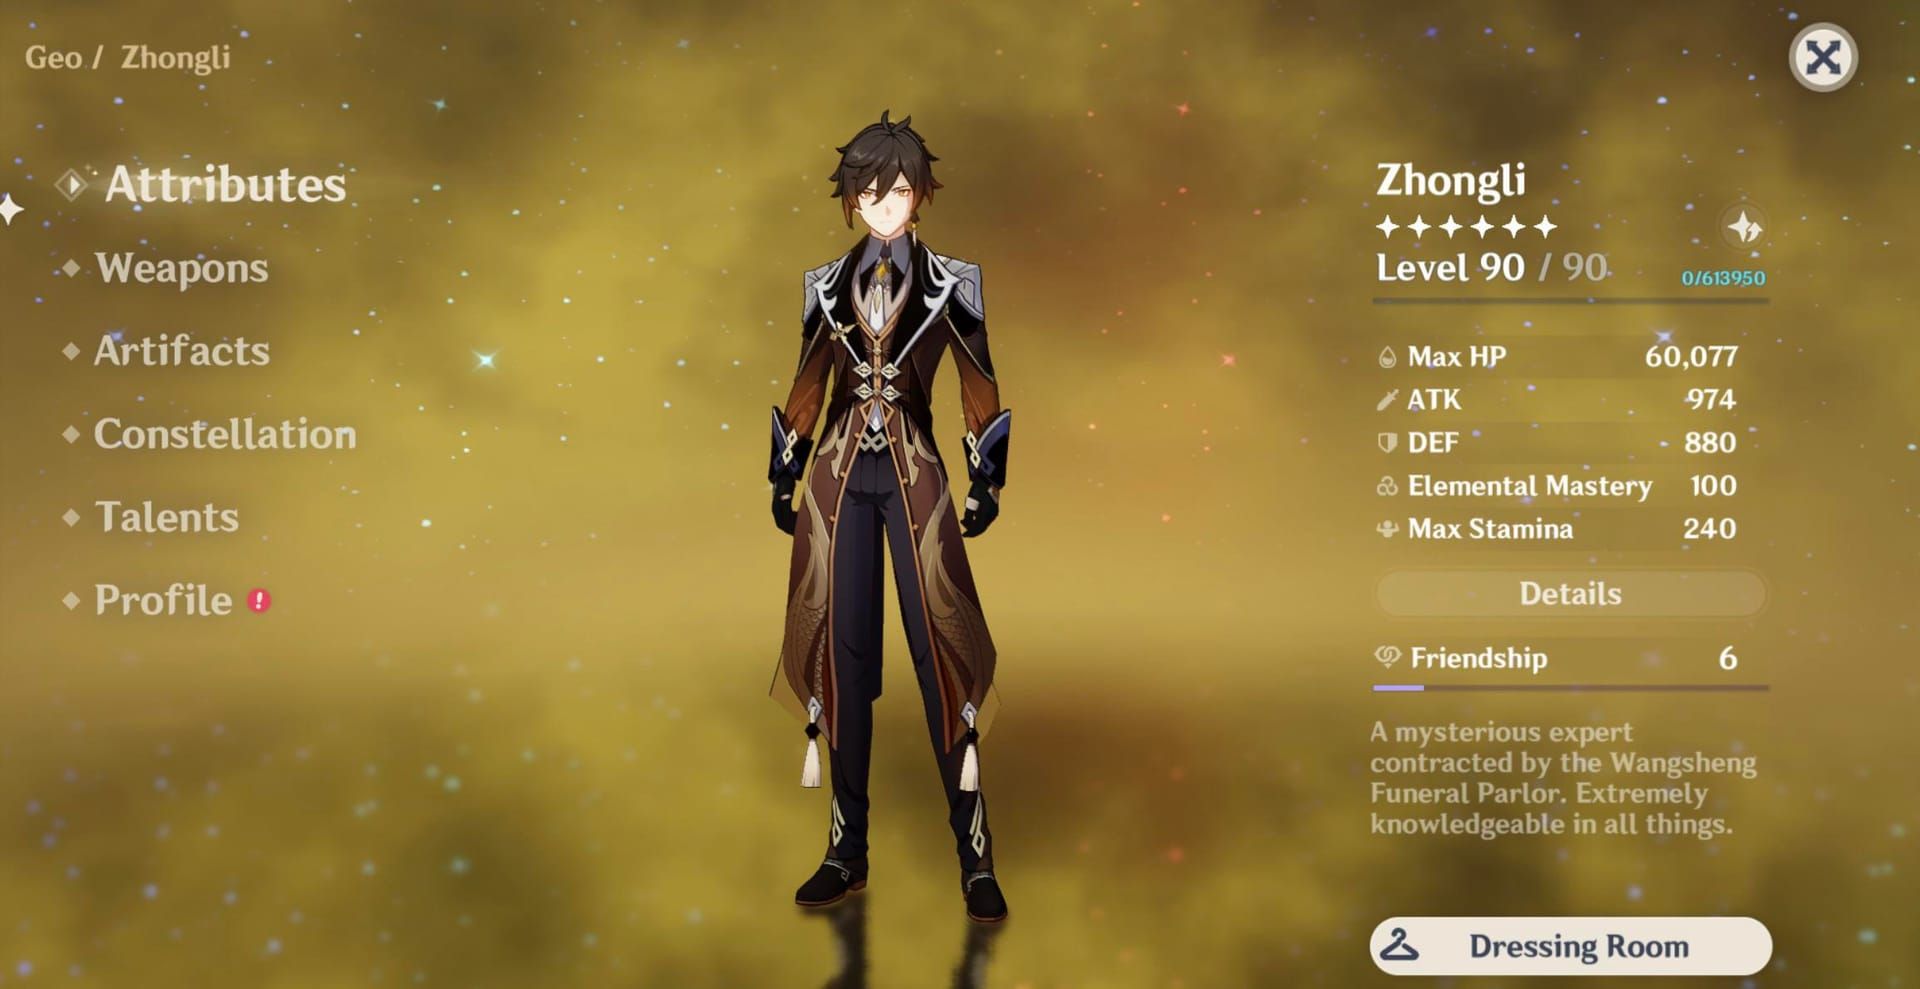
His Level 90 stats are solid: 14,695 HP, 251 ATK, 738 DEF, plus 28.8% Geo DMG Bonus. Whether you want pure shield support (SS-tier) or burst DPS (A-tier), he delivers.
Version 6.1 Changes Impact
Natlan's new bosses basically wrote Zhongli a love letter. These fights are brutal without proper shielding, and his petrification from Planet Befall? It straight-up skips immunity phases.
Take Frostnight Herra—normally you'd need to land 50 damage instances to break out of Gloomveiled state. Zhongli just freezes the thing solid instead. His shield's fortification mechanic (+5% strength per hit, caps at 25%) means he gets stronger the longer fights drag on.
Current Tier Ranking
Community's pretty unanimous here: SS-tier support. Diona's sitting at B-tier looking jealous, while Baizhu matches his survivability at S-tier but can't touch his damage amplification.
At C0, he's got 9/10 viability in Spiral Abyss. That's free-to-play friendly territory, folks.
Shield Mechanics Deep Dive
Time for some math (don't worry, I'll keep it digestible). Zhongli's Jade Shield scales with Max HP using this formula: (1232 + 12.8% Max HP) × 1.5 absorption efficiency at Talent Level 10.
That 150% efficiency? It's universal. Physical, elemental, emotional damage from missing your 50/50—it all gets the same treatment.
The Resonant Waves passive is where things get interesting. Each time something hits your shield, you gain 5% shield strength (maximum 5 stacks = 25% bonus). It triggers on contact and resets when the shield expires, so timing your refreshes matters.
HP Scaling Formula Breakdown
Here's the full calculation with all the multipliers:
Base absorption: 1232 + (0.128 × Max HP)
Efficiency multiplier: ×1.5 (always)
Fortification stacks: ×(1 + 0.05 × stacks)
Artifact bonuses: ×(1 + shield strength%)
Real example: 25,000 Max HP with full stacks and Tenacity 4-piece (+30% shield strength) gives you 8,200 damage absorption. That'll tank 2-3 hits from Spiral Abyss Floor 12 elites without breaking a sweat.
Damage Absorption Mechanics
The 20% resistance shred works in a small AoE around your shielded character—affects all nearby enemies for both elemental and physical resistance. This debuff combines multiplicatively with reaction damage, boosting your Vaporize and Melt multipliers by 15-20%.
Pretty neat for a defensive support, right?
Critical Shield Strength Breakpoints
These are the HP thresholds you actually need to care about:
18,000 HP: Overworld and domains (basically vacation mode)
25,000 HP: Spiral Abyss Floors 9-11
30,000+ HP: Floor 12 and Natlan bosses
35,000 HP: Achievable with buffs—basically god mode
Spiral Abyss Floor Requirements
Floor 12's where the rubber meets the road. You'll want 25,000+ Max HP minimum for reliable protection. At this threshold with full fortification, your shield absorbs 6,500+ damage per refresh.
The 20-second duration with 12-second cooldown gives you 100% uptime when managed properly. No more panic-dodging because you forgot to refresh.
Looking to maximize your Genshin experience? BitTopup's got you covered for purchase Genshin Impact crystals safely—multiple payment options, instant delivery, and competitive exchange rates.
Boss Fight Optimization
Natlan bosses like Frostnight Herra demand specialized approaches. During those nasty Gloomveiled phases (+120% resistance), Zhongli's 20% shred keeps your damage relevant. Planet Befall's petrification interrupts boss channeling abilities—it's crowd control and protection rolled into one.
Build Optimization Guide
Support builds prioritize HP for shield strength with enough Energy Recharge to keep that burst flowing. Your optimal setup uses HP% main stats across the board: Sands (46.6%), Goblet (46.6%), Circlet (31.1-35.9%).
This gets you 25,000-30,000 Max HP even with 4-star weapons. Talent priority's straightforward: Elemental Skill to Level 10 first, Elemental Burst to 8-10, Normal Attack stays at Level 1 (unless you're feeling spicy).
Energy Recharge Requirements
Context matters here:
Solo Geo teams: 140-150% ER
Geo Resonance teams: 130% ER
Teams with Raiden Shogun: 110-120% ER
Hybrid DPS Configuration
Want the best of both worlds? Target 30,000 HP with CRIT stats using HP% Sands, Geo DMG% Goblet, CRIT Rate/DMG Circlet (maintain that 1:2 ratio). Planet Befall scales with 33% Max HP through Dominance of Earth passive, so you're not sacrificing damage for survivability.
Artifact Set Analysis
Tenacity of the Millelith 4-piece is the gold standard. You get 20% HP from the 2-piece, plus the 4-piece triggers on Elemental Skill damage for 20% ATK and 30% Shield Strength team buffs lasting 3 seconds.
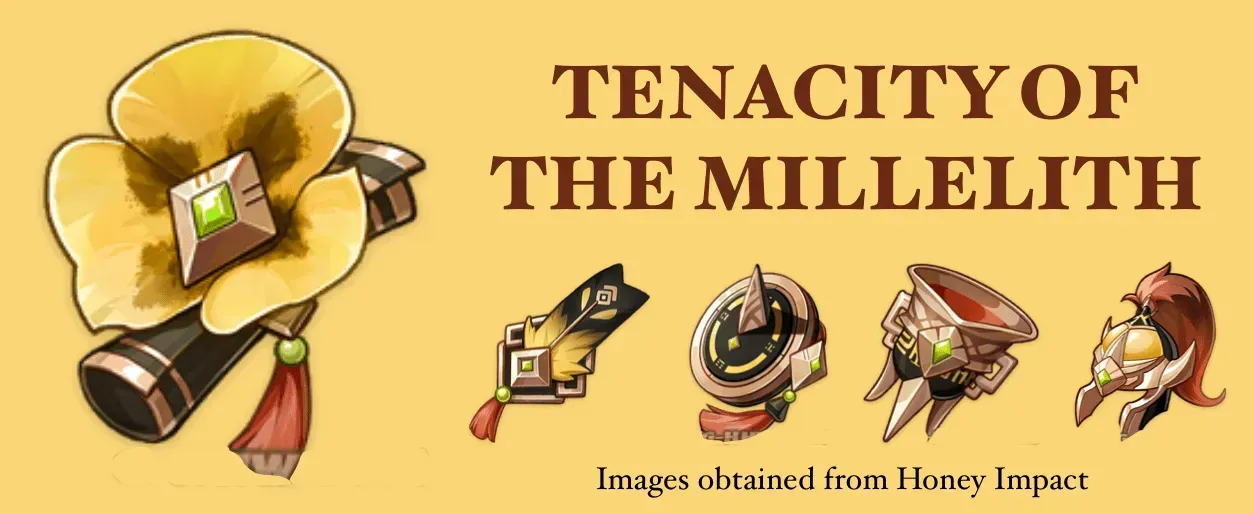
Stone Stele resonance triggers every 2 seconds, maintaining near-100% uptime. That translates to 15-20% team DPS increases—not bad for a defensive set.
Alternative Set Comparisons
Archaic Petra 4-piece: Offers 15% Geo DMG plus 35% elemental DMG bonus when you pick up Crystallize shards. Better for sub-DPS builds, but requires active management and gives weaker shields. Only consider this if you're really committed to the hybrid lifestyle.
Mixed 2-piece: Tenacity + Vourukasha's Glow grants 40% HP without any trigger dependency. Consistent passive bonuses, perfect for players who want to set-and-forget.
Substats Priority
HP%: Aim for 60-70% total from all pieces
Energy Recharge: 130-150% depending on team comp
CRIT Rate: 50%+ if you're running Favonius Lance
Flat HP: Secondary priority after HP%
Weapon Selection and Comparison
5-Star Options
Staff of Homa: The premium choice with 608 base ATK, 66.2% CRIT DMG, 20% HP increase, and 0.8-1.8% ATK scaling from Max HP. Perfect for hybrid builds where you want respectable burst damage alongside those chunky shields.

Engulfing Lightning: 608 base ATK, 55.1% ER, plus 28% ATK from excess Energy Recharge. Great for burst-focused builds in energy-starved teams, though it's overkill for pure support.
4-Star Budget Options
Black Tassel: The most cost-effective option with 354 base ATK and 46.9% HP at Level 90. R5 gives 80% damage bonus against slimes (surprisingly useful). Easily accessible and refinable—this is your budget king.
Favonius Lance: 565 base ATK, 61.3% ER, generates 6 energy particles on CRIT hits (60% chance at R5). Requires 50%+ CRIT Rate investment, but the energy generation helps the whole team.
The Catch: Free option with 510 base ATK, 45.9% ER, 32% burst damage, and 12% burst CRIT rate. Limited to one copy per account, so choose wisely.
Team Composition Strategies
Geo Resonance Teams
Mono-Geo leverages Enduring Rock resonance: 15% shield strength, 15% damage bonus when shielded, 20% Geo resistance reduction. The core setup runs Zhongli + Itto + Chiori + Gorou.
Rotation: Gorou Q + E → Zhongli Hold E → Chiori Q + E → Itto Q + charged attacks. Maintains 100% shield uptime with -40% total Geo resistance. It's like playing the game on easy mode.
Solo Geo Flexibility
Single Geo maximizes elemental diversity. Popular combinations include Zhongli + Arlecchino + Yelan + Bennett for Vaporize, or Zhongli + Neuvillette + Furina + Xilonen for hypercarry setups.
Vaporize rotation: Zhongli Hold E → Bennett Q → Yelan Q → Arlecchino combos. The shield enables Bond of Life mechanics by preventing interruption—crucial for Arlecchino's damage windows.
Combat Rotations and Techniques
Shield Refresh Timing
With 20-second duration and 12-second cooldown, you get an 8-second overlap window. Optimal refresh timing hits at 15-18 seconds—this maintains fortification stacks while ensuring continuous protection.
Don't be that player who refreshes at 19 seconds and loses all your stacks.
Energy Management
Zhongli generates 0.5 energy particles per Stone Stele creation/resonance. With a 40 energy burst cost, you need 80 particles without Energy Recharge investment.
Manage this through strategic Stele positioning, Favonius procs, team energy funneling, and burst timing. It's not rocket science, but it requires attention.
Animation Cancel Techniques
Hold E canceling: Release after shield creation to skip the drain animation
Burst canceling: Swap during meteor descent to reduce animation time
Normal attack canceling: For Favonius CRIT fishing without extended combos
These aren't game-breaking optimizations, but they add up over time.
Spiral Abyss Applications
Floor 12 Strategies
Current rotations heavily favor shield-based approaches due to the high damage output and complex attack patterns. Zhongli's petrification provides crowd control for burst setups, while his shields enable risky positioning for optimal DPS phases.
First half: Use with reaction teams to amplify elemental damage through resistance shred. You're looking at 15-20% clear time improvement just from the debuff.
Second half: Mono-Geo excels against single-target bosses with sustained damage and superior survivability. Sometimes the boring approach is the winning approach.
Enemy-Specific Adaptations
Mechanical enemies: Time petrification to interrupt channeled abilities (3.1-second base duration, 5.1 at C4).
Elemental enemies: Use Hold E to drain Geo constructs without dealing damage—useful for specific encounter mechanics.
Boss encounters: Position Stone Steles strategically, use backup placement (C1) against construct removal abilities.
Advanced Optimization Tips
Constellation Investment
C0: Fully functional and my recommended stopping point for cost-effectiveness. You get everything you need.
C1: Second Stone Stele doubles resonance damage and provides backup placement. Nice quality-of-life improvement.
C4: Extends petrification to 5.1 seconds and increases Burst AoE by 20%. Solid upgrade for crowd control.
C6: Converts 40% absorbed damage to HP healing (maximum 8% Max HP). Honestly? Skip this. It interferes with HP-scaling DPS characters and isn't worth the investment.
Talent Level Priorities
Elemental Skill: Maximum priority to Level 10 for shield scaling and resistance shred. Non-negotiable.
Elemental Burst: Level 8-10 for petrification damage and HP scaling through Dominance of Earth. Your call based on usage.
Normal Attack: Level 1 unless you're running main DPS (and why would you?).
Resource Allocation
Ascension: 420,000 Mora, 168 Cor Lapis, Prithiva Topaz gems, 46 Basalt Pillars from Geo Hypostasis. Standard stuff.
Talents: 3,305,000 Mora total, Tusk of Monoceros Caeli from Childe, Gold books from Taishan Mansion (Wed/Sat/Sun). Plan accordingly.
Artifacts: Farm Tenacity domain in Ridge Watch during artifact XP events with Condensed Resin. Your sanity will thank you.
FAQ
What HP threshold do I need for Spiral Abyss shields? Target 25,000-30,000 Max HP for Floor 12. This provides 6,500+ damage absorption with full fortification—enough to handle 2-3 elite attacks before needing a refresh.
Is Staff of Homa worth it for support builds? Homa improves both shield strength and burst damage through HP scaling, but Black Tassel provides 80% of the shield utility at zero cost. Prioritize Homa for hybrid builds or if you've got excess primogems burning a hole in your pocket.
Should I run Geo Resonance or solo Geo with Zhongli? Geo Resonance gives 15% shield strength and damage bonus but limits team flexibility. Solo Geo allows diverse reactions while maintaining core benefits. Choose based on your DPS requirements and roster depth.
What Energy Recharge do I need for consistent Burst uptime? 130-150% ER for solo Geo, 110-120% with Geo battery or Raiden. Use Favonius Lance with 50%+ CRIT Rate for reliable energy procs.
What's the optimal Vaporize team rotation? Zhongli Hold E → Hydro application → Bennett buff → Pyro DPS Vaporize. Refresh shield every 15-18 seconds for 100% uptime. Simple and effective.
Is Zhongli still meta-relevant in 6.1? Absolutely. S-tier support with universal resistance shred, unbreakable shields, and crowd control. New Natlan content actually favors defensive capabilities, increasing his value over previous versions. He's not going anywhere.