

This guide analyzes Zhongli's two primary builds in 2025: Shieldbot focusing on maximum HP and Tenacity of the Millelith for unbreakable shields, versus Burst Support emphasizing Geo damage and Noblesse Oblige for team utility.
Zhongli Role Overview: Shieldbot vs Burst Support Fundamentals
Let's be honest here – Zhongli's been the comfort pick for most players since his 1.3 buff, but 2025's meta has really crystallized which direction you should take him.
Role Definition and Core Functions
Shieldbot build is all about that HP stacking life. We're talking maximum survivability with universal 20% RES shred thrown in as a bonus. When you hit that sweet spot of 25k HP with full Resonant Waves stacks, you're looking at 6,500+ damage absorption. That's face-tank everything territory.
Burst Support build tries to have its cake and eat it too – decent shields (4,000-5,000 absorption) while actually contributing meaningful damage. You'll see 15-20% more personal damage through proper CRIT ratios and Geo DMG investment, but you're sacrificing that fortress-level protection.
The math here is pretty straightforward, but the choice? That depends entirely on what you're facing.
Meta Relevance in 2025
Here's where things get interesting. Natlan's endgame content hits like a freight train – we're talking 120% increased damage across the board. This shift has pushed Shieldbot builds into the spotlight because hypercarries like Neuvillette, Arlecchino, and Ganyu simply can't afford interruptions anymore.
The universal RES shred stacks additively with Viridescent Venerer for -46% total resistance reduction. That's a 15-20% team DPS boost right there – not bad for a defensive build.
For those looking to maximize their Zhongli's potential, genshin zhongli shield support top up primogems through BitTopup ensures you have sufficient resources for artifact farming and weapon refinements. BitTopup offers competitive pricing and instant delivery for all your Genshin Impact currency needs.
Burst Support hasn't disappeared entirely, though. Mono Geo teams still love it – that Geo Resonance provides +15% shield strength and damage bonuses when shielded, making the hybrid approach more viable.
Content Suitability Analysis
Spiral Abyss Performance: Shieldbot absolutely dominates Floors 9-12. We're seeing 100% shield uptime and an 80% reduction in team deaths when you hit that 30k HP threshold. The numbers don't lie.
Co-op Viability: This is where Burst Support gets its revenge. When you're in multiplayer and personal damage contribution actually matters, those bigger Planet Befall numbers start looking pretty attractive. C2 constellation owners get team-wide shielding through Elemental Burst, which is clutch in co-op scenarios.
Shieldbot Zhongli Build Guide: Maximum Shield Optimization
HP Stacking Strategy
Alright, let's talk breakpoints because not all HP is created equal. You need 18,000 HP for overworld content (honestly, overkill for most stuff), 25,000 HP for Spiral Abyss Floors 9-11, and 30,000+ HP if you want to laugh at Floor 12 and Natlan bosses.
The shield absorption formula is: (1232 + 12.8% Max HP) × 1.5 × (1 + 0.05 × Resonant Waves stacks) × (1 + Tenacity bonus). Yeah, it's a mouthful, but the takeaway is simple – more HP equals more survivability.
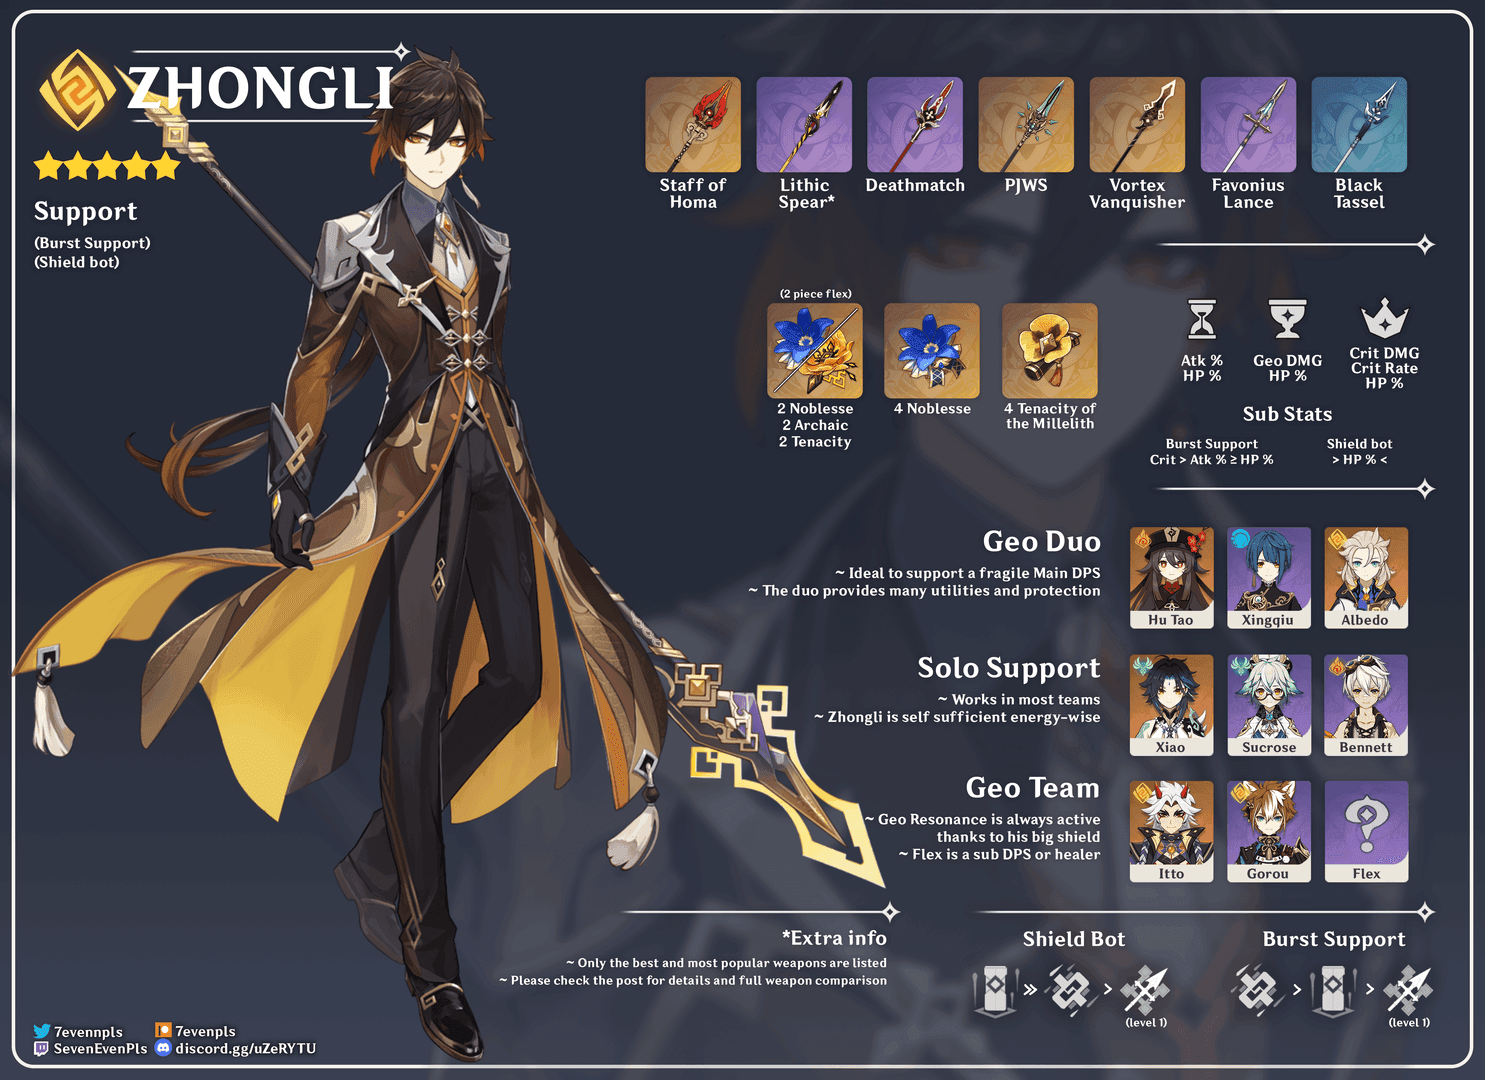
Artifact Main Stats Priority:
Sands: HP% (46.6% at +20)
Goblet: HP% (46.6% at +20)
Circlet: HP% (31.1% at +20)
You're hunting for 60-70% total HP% from substats. Each good HP% roll gives you 4.7-5.8% HP, so you'll need roughly 12-15 high-value HP% substats to reach those optimal thresholds. It's a grind, but it's worth it.
Tenacity of the Millelith Analysis
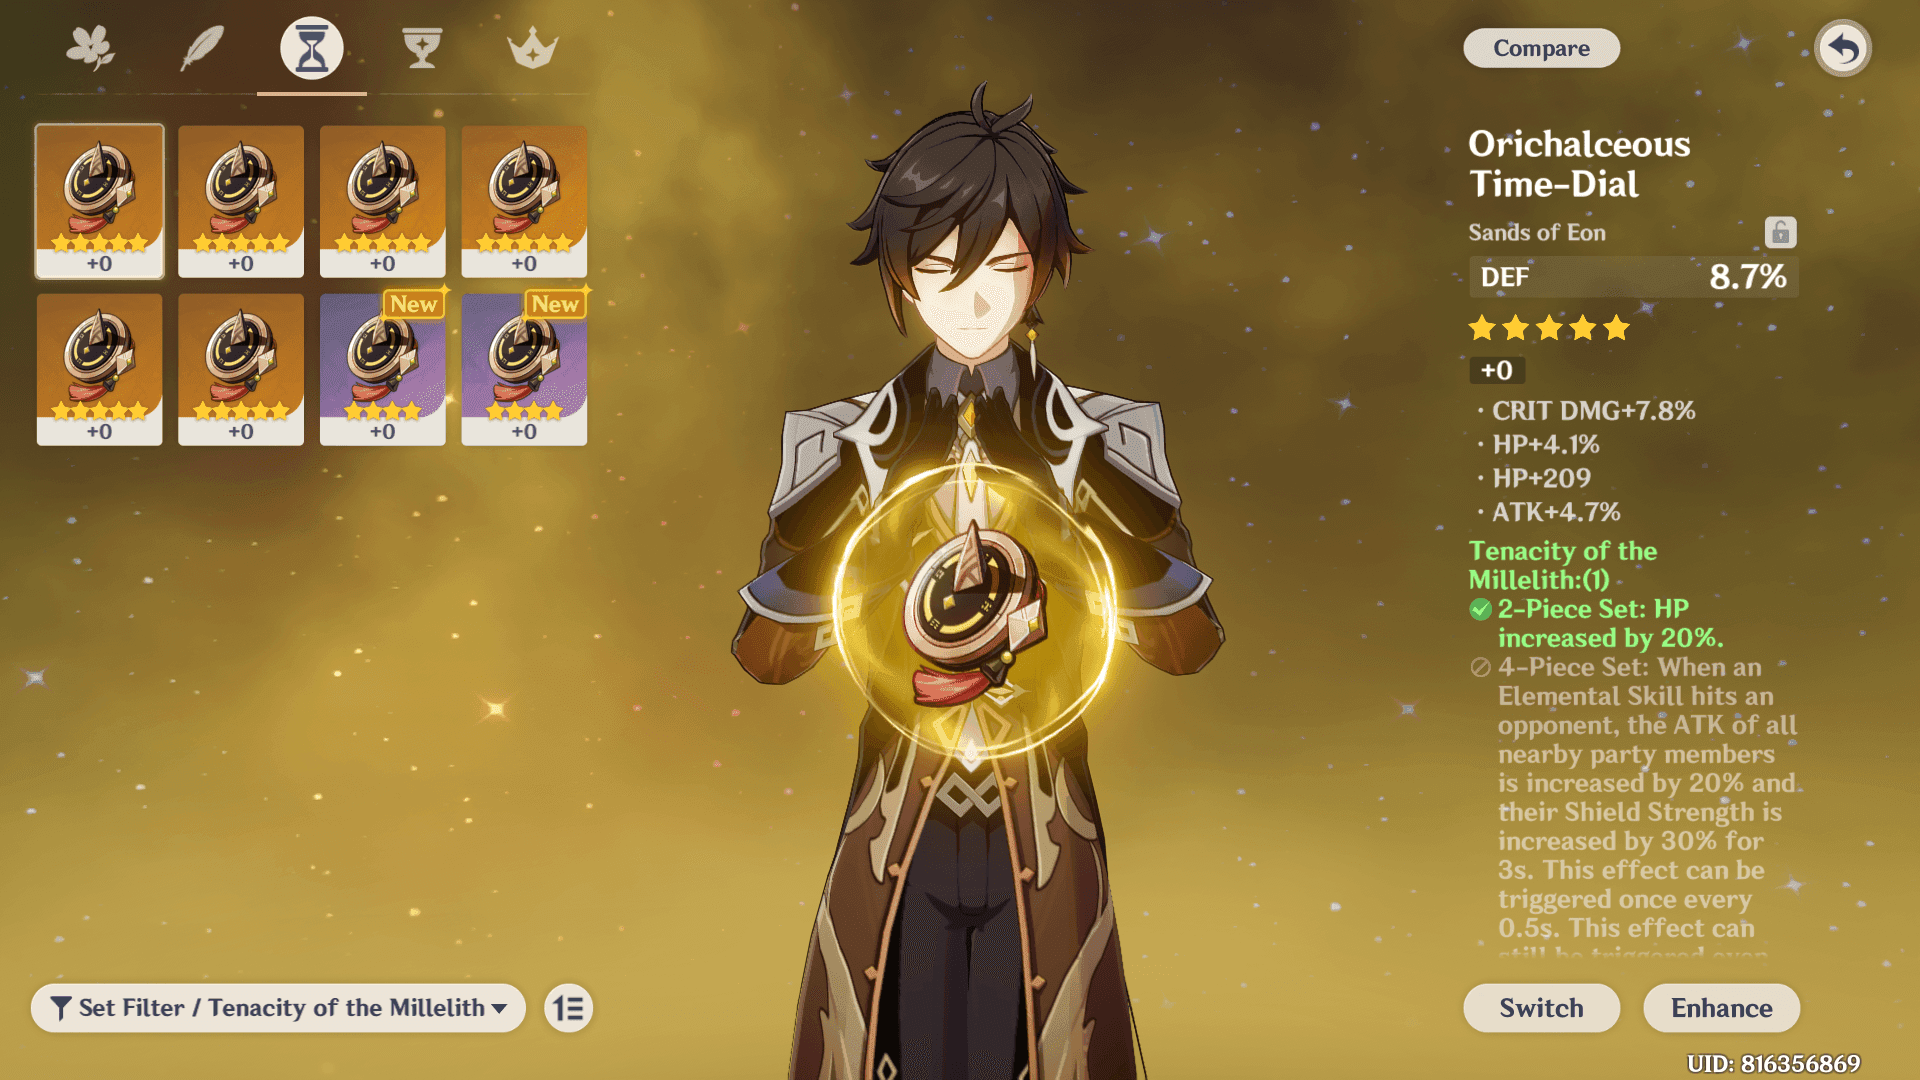
4-piece Tenacity is the bread and butter here. HP +20% from the 2-piece is nice, but the real magic happens with that 4-piece effect: +20% party ATK plus +30% shield strength for 3 seconds when Elemental Skill hits enemies.
Stone Stele pulses every 2 seconds, which means 100% uptime on these buffs during combat. That consistent +20% ATK buff translates to 15-20% more team damage in sustained fights. Combined with universal RES shred, you're providing more damage amplification than most traditional supports.
Weapon Recommendations
Black Tassel (3-Star): Don't let the 3-star rating fool you – this is the F2P king for pure shielding. 46.9% HP at Level 90 R5 with a measly 354 base ATK that honestly doesn't matter for this build.
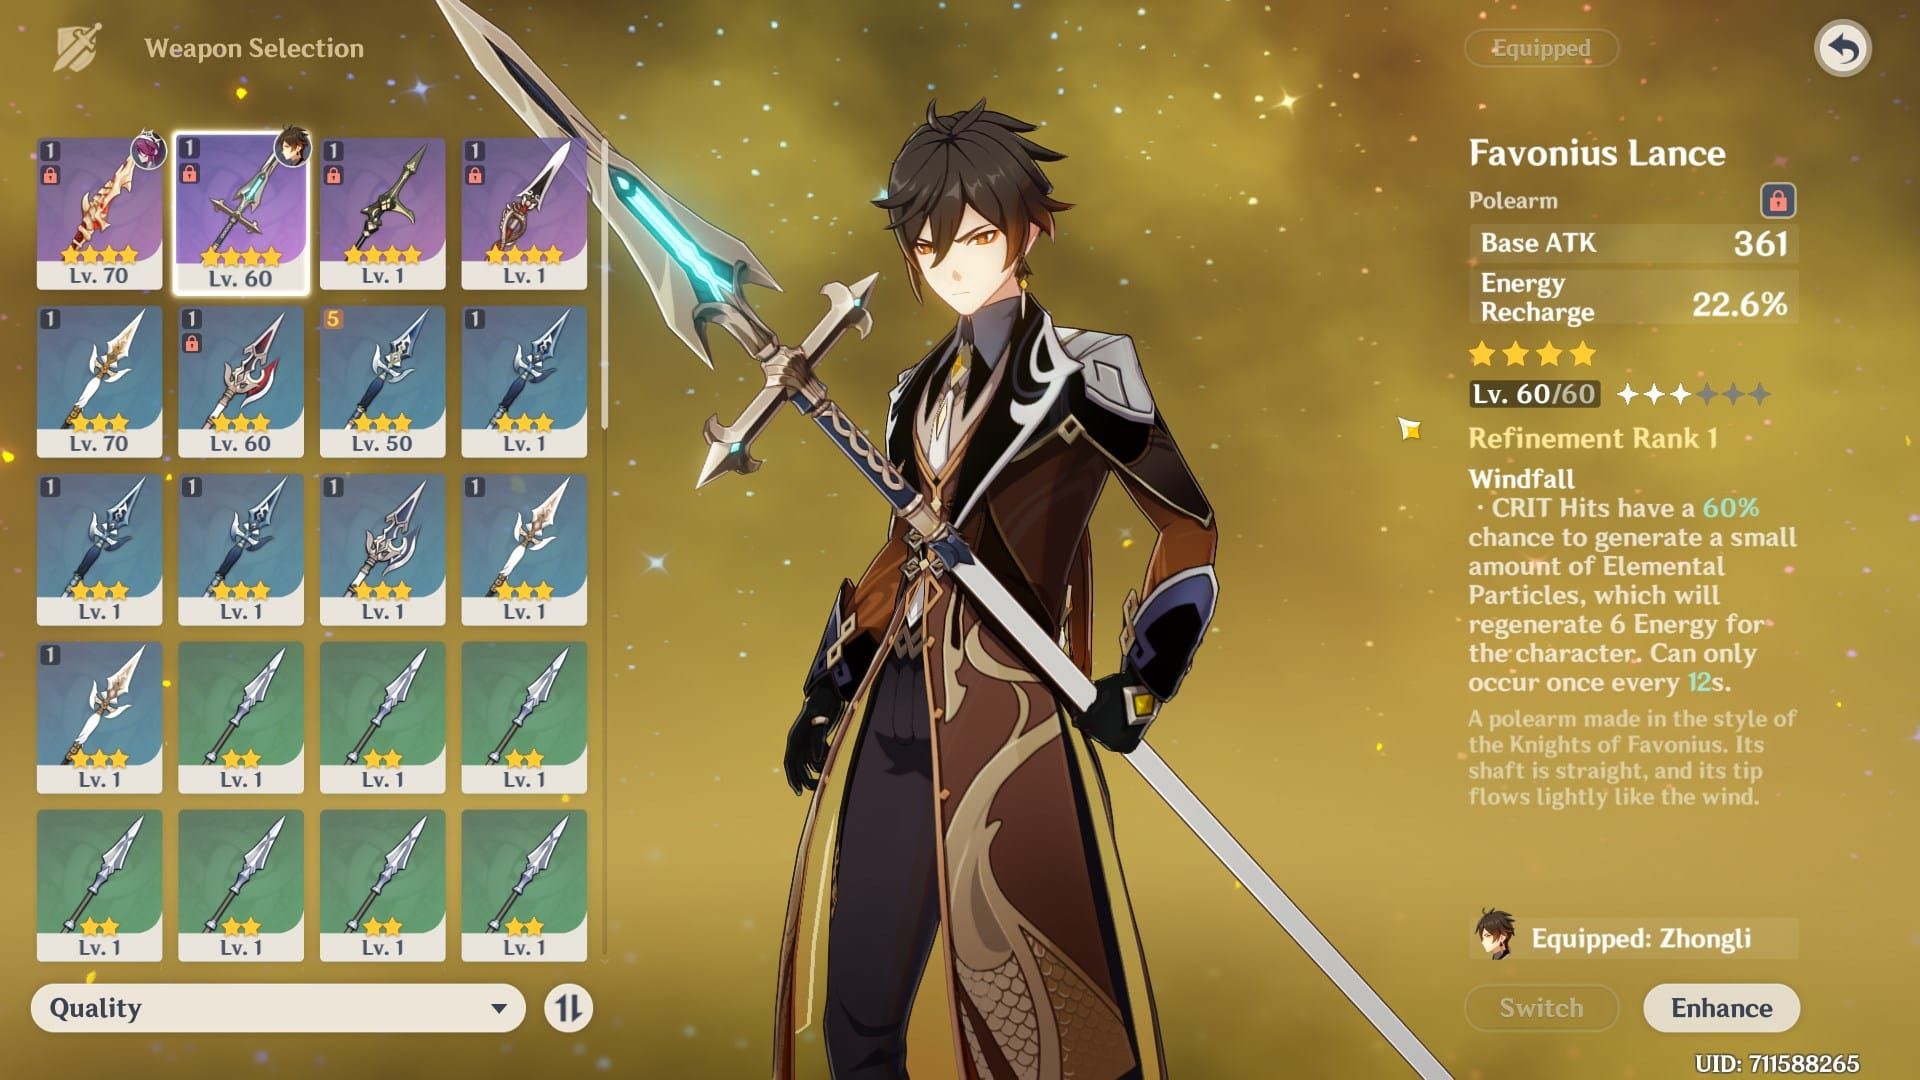
Favonius Lance (4-Star): Your best 4-star option with 30.6% Energy Recharge and particle generation on CRIT hits. You'll need 30%+ CRIT Rate from substats to keep those procs reliable.
Staff of Homa (5-Star): The premium choice that enables hybrid builds. 20% HP plus ATK scaling from Max HP means you can hit 30k HP while maintaining respectable CRIT stats. Expensive but effective.
Burst Support Zhongli Build Guide: Damage and Utility Balance
Noblesse Oblige vs Alternative Sets
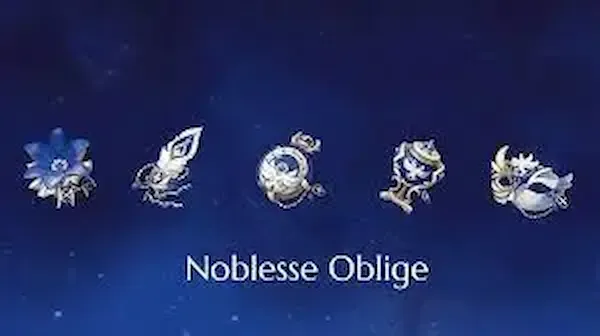
4-piece Noblesse Oblige gives you Elemental Burst DMG +20% and +20% party ATK for 12 seconds after using Elemental Burst. Perfect for quick-swap teams where that 12-second window covers most of your rotation.
4-piece Emblem of Severed Fate offers a different approach: Energy Recharge +20% plus Elemental Burst DMG +25% of Energy Recharge over 200%, capped at 75% bonus damage. Hit 220% ER and you're looking at 55% Burst DMG bonus.
Hybrid Combinations: 2-piece Tenacity + 2-piece Noblesse splits the difference – HP +20% and Burst DMG +20%. Sometimes the middle ground is the right ground.
Geo DMG vs HP Balance
Here's where Burst Support gets tricky. You're juggling Geo DMG Bonus, CRIT stats, and HP for optimal damage output. Don't forget that Dominance of Earth passive adds 33% of Max HP to Elemental Burst damage.
Optimal Stat Distribution:
20k-25k HP for adequate shield absorption
60%+ CRIT Rate, 120%+ CRIT DMG for consistent damage
46.6% Geo DMG Bonus from Goblet
130-150% Energy Recharge for Burst uptime
At 25k HP with optimal CRIT ratios, Planet Befall should hit for 80k-120k damage per cast against single targets. Not bad for a support, right?
When planning your Burst Support build, consider buy genesis crystals for zhongli rerun banner to secure constellations and signature weapons. BitTopup provides secure transactions with 24/7 customer support and competitive exchange rates for all Genesis Crystal purchases.
Burst Rotation Optimization
Energy Requirements: Solo Geo Zhongli is hungry – you'll need 175-220% ER for consistent Burst uptime. Add one Geo teammate and you can drop to 120-140% ER. Raiden Shogun battery? You can get away with 100-110% ER builds.
Planet Befall's 2-second animation can actually hurt team DPS by 8-10% in optimized rotations. But that 3.1-second petrification (5.1 seconds at C4) interrupts enemy channeling abilities and groups scattered enemies, so it's not all downside.
Artifact Set Deep Dive: Tenacity vs Noblesse Comparison
4pc Tenacity Benefits and Team Synergy
Stone Stele pulses every 2 seconds with 100% uptime when you position it properly. Each pulse refreshes that 3-second buff window, maintaining permanent +20% ATK and +30% shield strength during combat.
Team Synergy Examples:
Neuvillette Hypercarry: Tenacity enables uninterrupted Charged Attacks while boosting team ATK
Arlecchino Vaporize: RES shred amplifies reaction damage while shields prevent Bond of Life healing interference
Ganyu Freeze: Interruption resistance for Charged Shots with consistent ATK buffs
4pc Noblesse Team Utility
Noblesse shines in burst windows and quick-swap compositions. That 12-second ATK buff duration covers most team rotation cycles perfectly. Using Elemental Burst for Noblesse activation costs 40 Energy and 2 seconds of field time – that's an 8-10% damage loss unless petrification provides equivalent utility.
Optimal Team Contexts:
Mono Geo Teams: Geo Resonance and particle generation support frequent Burst usage
Bennett-less Compositions: Noblesse fills the ATK buffer role when Fantastic Voyage isn't available
Weapon Tier List and Recommendations
5-Star Weapon Analysis
Staff of Homa: The premium choice with 66.2% CRIT DMG, 20% HP, and ATK scaling equal to 0.8% of Max HP. At 30k HP, you're getting 240 bonus ATK while maintaining optimal shield strength. Expensive but worth it.
Engulfing Lightning: Specialized for Burst Support with 55.1% Energy Recharge and ATK bonus equal to 28% of ER above 100%. At 220% ER, you get 33.6% ATK bonus while solving energy requirements completely.
4-Star Budget Options
The Catch: Free weapon providing 45.9% Energy Recharge and +32% Elemental Burst DMG at R5. Excellent for Burst Support builds, but you can only get one per account.
Favonius Lance: Versatile support weapon with 30.6% ER and particle generation on CRIT hits. Requires 30%+ CRIT Rate for reliable procs, but it's solid.
Deathmatch: Battle Pass weapon providing 36.8% CRIT Rate and ATK bonuses based on nearby enemies. Strong for Burst Support but requires that monthly investment.
3-Star Specialist Picks
Black Tassel: The definitive Shieldbot weapon with 46.9% HP at R5. Despite being 3-star, it outperforms most higher-rarity options for pure shielding applications. Sometimes simple is better.
Team Composition Strategies
Shieldbot Team Examples

Neuvillette Hypercarry: Neuvillette (DPS) + Furina (Sub-DPS) + Kazuha (Support) + Zhongli (Shield). This comp maximizes Neuvillette's Charged Attack potential through interruption resistance and RES shred.
Arlecchino Vaporize: Arlecchino (DPS) + Yelan (Sub-DPS) + Bennett (Support) + Zhongli (Shield). Enables Bond of Life gameplay without healing interference while providing Pyro RES shred.
Ganyu Freeze: Ganyu (DPS) + Mona (Sub-DPS) + Venti (Support) + Zhongli (Shield). Replaces traditional healer with shield support for uninterrupted Charged Shot gameplay.
Burst Support Team Synergies
Mono Geo Core: Itto (DPS) + Albedo (Sub-DPS) + Gorou (Support) + Zhongli (Burst Support). Maximizes Geo Resonance benefits while providing petrification for enemy grouping.
Raiden National Variant: Raiden (DPS) + Xiangling (Sub-DPS) + Bennett (Support) + Zhongli (Burst Support). Raiden's energy generation enables consistent Zhongli Burst usage for Noblesse procs.
Investment Priority and Resource Allocation
Talent Leveling Priority
Shieldbot Priority: Elemental Skill Level 10 > Elemental Burst Level 8 > Normal Attack Level 1. Each Skill level increases shield absorption by roughly 200-300 points at 25k HP.
Burst Support Priority: Elemental Burst Level 10 > Elemental Skill Level 8 > Normal Attack Level 1. Each Burst level provides 50-70 additional scaling percentage.
Constellation Value Analysis
C0 Performance: Fully functional for both builds with 90% of maximum potential. You really don't need constellations.
C1 Value (★★★): Enables dual Stone Steles for better particle generation and area coverage. Particularly valuable for Burst Support builds requiring consistent energy generation.
C2 Value (★★★): Elemental Burst grants Jade Shields to nearby party members. Game-changer for co-op scenarios.
C4 Value (★★☆): Increases Elemental Burst AoE by 20% and petrification duration by 2 seconds. Nice but not essential.
Cost-Benefit Comparison
Shieldbot Investment: Low-cost, high-impact build requiring minimal resource investment. Black Tassel + Tenacity artifacts achieve 90% effectiveness for roughly 3-4 weeks of resin investment.
Burst Support Investment: High-cost, moderate-impact build requiring significant artifact farming and weapon investment. Optimal builds need 6-8 weeks of focused resin allocation plus premium weapons.
Performance Analysis: Spiral Abyss and Endgame Content
DPS Contribution Metrics
Shieldbot Team Damage: Contributes 15-20% team DPS increase through RES shred and Tenacity buffs while preventing damage loss from interruption. In Vaporize teams, that universal RES shred amplifies reaction damage by approximately 18%.
Burst Support Personal Damage: Contributes 8-12% of total team damage through optimized Planet Befall usage. At 25k HP with 60/120 CRIT ratios, each Burst deals 80k-120k damage. Not spectacular, but respectable.
Shield Uptime and Survivability
Floor 12 Performance: 30k HP Shieldbot maintains 100% shield uptime against elite enemies, absorbing 8,200+ damage per refresh with full buffs. Properly built shields reduce team deaths by 80% in challenging content.
Clear Time Comparisons: Shieldbot enables 10-15% faster clear times through consistent DPS uptime and RES shred amplification. Current Spiral Abyss rotations heavily favor Shieldbot builds due to high single-target damage requirements.
Common Mistakes and Optimization Tips
Build Pitfalls to Avoid
Over-Investment in Burst for Shieldbot: Cap Burst at Level 8 for pure Shieldbot builds and invest those saved resources in artifact optimization. The marginal shield improvement doesn't justify the Crown investment.
Poor Stele Positioning: Place Steles near enemy spawn points but away from boss movement patterns. Use terrain features to protect Stele placement when possible. (Trust me, watching your Stele get destroyed by a charging Mitachurl is painful.)
Mixing Build Philosophies: Commit to either Shieldbot or Burst Support philosophy for optimal results, or use dedicated hybrid sets with appropriate weapon investment. Half-measures lead to mediocre performance.
Advanced Optimization Techniques
Resonant Waves Management: Maintain shield uptime to preserve Resonant Waves stacks (+5% shield strength per stack, maximum 5). Refresh shields at 15-18 second intervals rather than waiting for expiration.
Stat Threshold Optimization: Target specific HP breakpoints (18k/25k/30k) rather than maximizing HP indefinitely. Excess HP provides diminishing returns while other stats like ER or CRIT Rate offer more practical utility.
Frequently Asked Questions
Should I use Tenacity of the Millelith or Noblesse Oblige on Zhongli?
Use 4pc Tenacity for Shieldbot builds focusing on maximum shield strength and consistent team buffs. Choose 4pc Noblesse for Burst Support builds emphasizing damage output and party ATK buffs.
What HP threshold should I target for Zhongli's shield?
Aim for 18k HP for overworld content, 25k HP for Spiral Abyss Floors 9-11, and 30k+ HP for Floor 12 and endgame bosses. These thresholds provide approximately 4k, 6.5k, and 8.2k damage absorption respectively.
Is Black Tassel better than 5-star weapons for Shieldbot?
Yes, Black Tassel R5 provides superior shield strength compared to most 5-star weapons for pure Shieldbot builds. The 46.9% HP bonus outweighs the benefits of higher base ATK when focusing solely on shield optimization.
Which Zhongli build performs better in Spiral Abyss?
Shieldbot generally outperforms Burst Support in current Spiral Abyss rotations due to high enemy damage and interrupt-heavy patterns. The consistent survivability and RES shred provide more team value than personal damage contribution.
How much Energy Recharge does Burst Support Zhongli need?
Solo Geo requires 175-220% ER, with one Geo teammate needs 120-140% ER, and with Raiden battery can use 100-110% ER.
Can I build Zhongli for both shield and burst damage effectively?
Yes, using 2pc Tenacity + 2pc Noblesse with Staff of Homa enables hybrid builds achieving 25k-28k HP while maintaining 50/100 CRIT ratios. This approach provides 80% of Shieldbot effectiveness with respectable Burst damage.