

Thoma steps up as a solid 4-Star Pyro Polearm user, acting as your off-field Burgeon trigger and tank with HP-based shields. Hit Level 90, and you're looking at 10,331 base HP, shields that absorb up to 35.28% of your Max HP plus 4,152, and Fiery Collapse dealing 2.2% Max HP damage. Shoot for 220-230% Energy Recharge without his C4 to keep that Burst humming—pair it with the 4pc Flower of Paradise Lost set and Kitain Cross Spear. Layer those shields to shrug off Burning in squads featuring Nahida, Xingqiu, and Kokomi. He'll pop up on the Version 5.6 Phase 2 banner, running from May 27, 2025, to June 17, 2025.
Getting Started with Thoma in the Burgeon Role
What Makes Him Tick as a Tank
Thoma's your guy for dishing out off-field Pyro without stealing the spotlight—his Elemental Burst costs 80 Energy and lasts 15 seconds, perfect for popping Dendro Cores into Burgeon explosions. No aggro pull, just reliable triggers. At Level 90, he packs 10,331 HP, 202 ATK, 751 DEF, and a 24% ATK bonus from ascension that juices up his shields and reactions. Getting him there? You'll need 420,000 Mora, 46 Smoldering Pearls, and 168 Fluorescent Fungus. Slot him into slower Pyro teams to dodge that pesky Burning status—trust me, it's a game-changer in drawn-out fights.
Why Thoma Fits Burgeon Like a Glove
Ever wonder why Burgeon clicks so well with him? It fires off when Dendro and Hydro mix into Cores, then Thoma's Fiery Collapse smacks them for AoE Dendro damage that scales off EM and a 3x level multiplier in a 5-meter radius. His Burst drops Pyro every second on the active character's Normal Attacks. That Skill at Level 10? It hits for 263.52% Pyro DMG and throws up a shield for 12.96% Max HP plus 1,525—stack it to 35.28% plus 4,152 at 250% Pyro effectiveness. Team him with Xingqiu's Burst to spawn those Cores; start with Nahida's Skill for Dendro, follow with Thoma's Burst, and boom—no overkill Pyro leading to Burning.
Is Level 90 Worth the Grind?
Absolutely, if you're building for longevity. Ascension pulls in 1 Sliver, 9 Fragments, 9 Chunks, and 6 Agnidus Agate Gemstones, all funneling into those sweet HP gains. His Level 10 Burst scales to 104.4% plus 2.2% Max HP, and Imbricated Armor tacks on +5% shield strength per stack (up to five). You get that full 24% ATK% bonus for off-field work too. Focus on ascension first for the HP pump—I've cleared Spiral Abyss reactions way smoother this way. Oh, and his utility passive? It bumps double fish chances by 20% in Inazuma waters. Nice perk for the grinders.
For players looking to enhance their Genshin Impact experience, top up Genesis Crystals safely through BitTopup ensures quick and secure access to in-game resources. With competitive pricing and instant delivery times under 5 minutes, BitTopup supports a wide range of currencies while maintaining full compliance with HoYoverse guidelines, backed by 24/7 customer support and a 4.9/5 user satisfaction rating.
Breaking Down the Level 90 Rewards
How Damage and Shields Stack Up
With 10,331 base HP, Blazing Barrier soaks over 4,000 damage per stack once artifacts kick in, and Fiery Collapse ticks 2.2% Max HP every second during Burst. Level 10 talents shine: Skill at 263.52% Pyro DMG, Burst starting at 158.4% plus 104.4% on procs. In Burgeon setups, those explosions lean hard on EM, ignoring much of his base ATK (202 plus that 24% bonus). For ascension materials, grab 18 Treasure Hoarder, 30 Silver Raven, and 36 Golden Raven Insignias. Peek at stat previews to lock in that ~35% Max HP shield total—crucial against Pyro-heavy foes.
Ranking Your Talent Upgrades
Lead with the Skill to Level 10—that's your 12.96% HP shield and 3.5 particles per cast—then pump the Burst for those procs. Normals can wait (133.14% on the 4-Hit combo). It'll run you 1,652,500 Mora, 6 Hellfire Butterflies, 1 Crown of Insight, plus the usual books and Insignias. Skill hangs around for 8 seconds on a 15-second cooldown, and it self-applies Pyro for some quick cleanses. For the Skill grind: 9 Teachings, 63 Guides, 114 Philosophies of Transience. Drop it on-field before swapping to your DPS—gets those Burst procs rolling right away.
How Constellations Amp the Payoff
C4's a lifesaver, restoring 15 Energy after Burst and slashing ER needs by 25% so you can chase EM and HP instead. C6? It slaps +15% party Normal/Charged/Plunge DMG on shield refresh (for 6 seconds). C1 trims CDs by 3 seconds on attacks (once every 20 seconds), C2 stretches Burst by 3 seconds, and C3/C5 add +3 levels (capped at 15). No C4? Stick to 220-230% ER. Got it? Drop to 110 EM minimum for better amps. Each one's 1 Stella Fortuna—F2P folks, snag C4 first. I've tested it in Thoma + Nahida + Xingqiu + Kokomi teams; uptime jumps noticeably.
Nailing ER for Peak Thoma Performance
The Bare-Minimum ER Targets
Without C4, aim for 220-230% ER to cover that 80-cost Burst without hiccups. C4's restore lets you ease off a bit. Kitain Cross Spear refunds 3 Energy every 2 seconds (over its 6-second window on a 10-second cooldown), knocking the benchmark down 5% per Refinement. Favonius Lance (30.6% ER) spits out 6 Energy on 60% CRIT hits every 12 seconds. If you're short, slap on an ER Sands—lean on Skill particles (3.5 each) and batteries like Raiden Shogun to fill the gap.
Tweaking ER for Your Squad
In Nahida/Xingqiu lineups, ER can creep higher since particles aren't always shared—Engulfing Lightning's ER substat and Burst buffs help C0 runs. C0 demands 230% for full uptime; C4 opens the door to 200% and more EM freedom. Wanderer teams? His speedy Normals proc Collapse easier, lightening the load. Build 20% CRIT Rate for Favonius in low-particle spots. Run rotations and check if Burst lands every 20 seconds—adjust from there.
How to Test ER In-Game
Clock your Burst casts in Abyss—zero 15-second gaps is the goal. Kitain at R5? Benchmark dips to 210% for that Level 90 sweet spot. Stat previews are your friend; grind three-cycle domains, track those 15-second Skill CD particles, and refine with C4 to pivot toward EM after ascension.
Essential Build Pieces
Top Weapons, Ranked for Impact
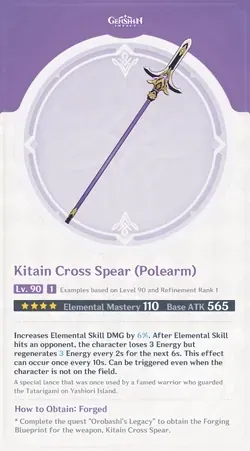
Kitain Cross Spear (565 Base ATK, 110 EM): +6% Skill DMG and ER refunds tailor-made for Burgeon's EM focus.
Staff of Homa (608 ATK, 20% HP): +20% HP-to-ATK conversion powers shields and damage alike.
Engulfing Lightning (608 ATK, 55.1% ER): ER substat plus Burst energy for C0 reliability.
Favonius Lance (510 ATK, 30.6% ER): CRIT-based particle gen shines as a battery.
Dragon's Bane (454 ATK, 221 EM): +20% DMG bonus against Hydro/Pyro reactions.
Kitain lets you hit C3 Burst sans C4, maximizing EM payoff. Refine it to R5 for a 5% ER shave; it pairs seamlessly with Flower of Paradise Lost for trigger heaven.
Artifact Sets and Stat Priorities
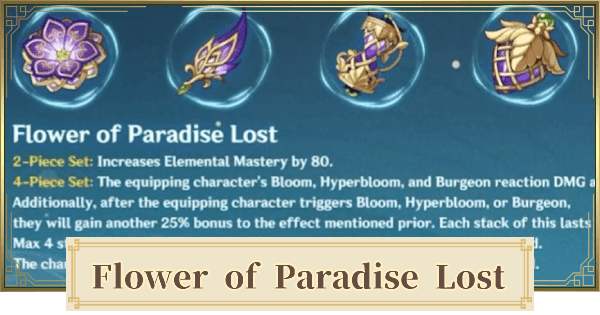
Go 4pc Flower of Paradise Lost (+80 EM, +40% Burgeon DMG that stacks 25% per hit up to four times every second off-field) to supercharge reactions. Main stats: Sands in EM or ER, Goblet EM, Circlet EM; subs prioritize EM > ER > HP%. On the fence? 4pc Gilded Dreams (+80 EM, team ATK/EM buffs on reactions) works too. Minimum 110 EM for damage ramps; HP% for beefier shields. Farm those domains hard for EM pieces—4pc FoPL nails 40% Burgeon boost from Core hits.
In the midst of optimizing your Thoma build, consider a Genshin Impact quick top up via BitTopup for efficient resource gathering. BitTopup offers the lowest market rates with transactions completing in seconds, ensuring secure, regulation-compliant service across all regions, complete with responsive after-sales support and high user ratings for seamless experience.
Step-by-Step Talent Leveling
Skill first (263.52% DMG, 12.96% HP shield) over Burst (158.4% initial, 104.4% Collapse), then Normals (87.75% 1-Hit). Total tab: 4,957,500 Mora, 18 Hellfire Butterflies, 3 Crowns. Level 10 Skill stacks to 35.28% HP absorption. Budget 1,625,500 Mora per talent to max—time it for the Version 5.6 banner (May 27, 2025–June 17, 2025).
Staying Safe: Tips and Threat Dodges
Mastering Shield Timing
Layer Blazing Barrier five times through Imbricated Armor for +25% strength, sucking up 250% more Pyro damage. Level 10 version holds for 8 seconds—refresh every 0.35 seconds for a 6-second window. It counters that 2% Burning self-damage after 6.0 patches. Cast Skill on-field to build stacks; weave in Burst Normals for refreshes, and team with Kokomi for heals.
Sidestepping Pitfalls
Hydro before Pyro, always—keeps Burning at bay. Thoma's 1-second procs won't interrupt Cores. Too much Pyro? Vaporize or Burning creeps in; cycle Hydro/Dendro pre-Burst. Chevreuse handles Overload knockback nicely. Stay off-field and position smart; Kazuha's Viridescent Venerer shreds 40% RES.
Thoma's Spot in Burgeon Lineups
Swap in post-Burst so your DPS Normals trigger Fiery Collapse. C6 throws in a 15% DMG buff on shield pickup. For Ayato + Nahida + Yelan, Hydro aura first—skip Dendro Traveler's Burst with Pyro to avoid auto-pops. Watch that 15-second Burst timer if Thoma goes down.
Squad Ideas Starring Thoma
Budget Burgeon Team for Everyone

Thoma (trigger), Dendro Traveler (Dendro), Xingqiu (Hydro), Kokomi (heals/Hydro). Swap in Nahida for Traveler if you want Deepwood debuffs. Cores spawn from Traveler Burst + Xingqiu Skill. Rotation: 1. Nahida/Traveler Skill for Dendro. 2. Xingqiu Burst for Hydro. 3. Thoma Burst/Skill. 4. Kokomi tops off heals; loop it.
High-End Twists
Alhaitham (DPS Dendro), Xingqiu (Hydro), Nahida (Dendro), Thoma (trigger).
Wanderer (DPS), Yelan (Hydro), Nahida (Dendro), Thoma (tank).
Ayato (DPS Hydro), Yelan (sub Hydro), Dendro MC (Dendro), Thoma (support).
Wanderer's quick Normals chew through Cores; Alhaitham locks in Dendro uptime. With Ayato, slather Hydro on Dendro MC's Burst—Thoma's shields protect the melee rush.
Sample Rotations
For hyperburgeon: 1. Nahida Burst (EM share). 2. Nahida Skill (mark target). 3. Xingqiu Burst + Skill (Hydro Cores). 4. Thoma Burst + Skill (Pyro ignite). 5. DPS hammers Normals for Burgeons. 6. Kokomi refreshes. Swirl Hydro early for spread sans Anemo. Sync to the 20-second Burst CD; Collei swaps for Nahida, Yelan for Xingqiu if needed.
Pitfalls to Dodge and Fixes
ER: Too Much or Too Little?
Dip below 220% ER, and Burst downtime kills your flow; over 250%? You're robbing EM potential. C0 at 230% with Favonius CRIT subs works. Kitain's refunds starve-proof you. Test in-game—C4 lets you hit 200% and stack 110+ EM.
Artifact Blunders
Skip 2pc mishmashes; 4pc FoPL outshines Crimson Witch for that 40% Burgeon edge. Gilded Dreams adds +50 EM party-wide in mixed teams. EM mains first; hunt ER > HP% subs to hit benchmarks.
Overlooking Resistances
Pyro Resonance with Bennett nets +25% ATK against Pyro RES. Anemo's Viridescent shreds 40%. Weave in Kazuha; those shields eat Abyss hits whole.
Pro Tips and Benchmarks
Balancing HP and ER
HP-heavy (Black Tassel at 46.9%) for tanky shields; EM push (Dragon's Bane 221) for Burgeon pops. Level 90 HP delivers 4,000+ absorption. C4 flips the script to HP/EM—220% ER baseline vs. 200% with refunds.
Teaming with Buffers
Nahida spawns Dendro Cores, Xingqiu keeps Hydro off-field; Chevreuse heals Overloads. Nahida's Deepwood Memories debuffs. Hydro lead in rotations; C6 Thoma buffs melee DMG by 15%.
Abyss Endgame Checks
Version 2.5 tunes Burst for 100% shield coverage in reaction floors. Post-6.0 nerfs actually boost his staying power. Tackle Burning-risk chambers; target full uptime, tweak ER for energy-thirsty groups.
Wrapping Up: Key Insights and Moves Forward
The Big Picture
Level 90 unlocks max HP shields and Burgeon triggers at 220-230% ER, using Kitain and FoPL. Stack 'em in Nahida/Xingqiu teams to play it safe.
Tools for Fine-Tuning
In-game optimizers help stat tweaks; eye the Version 5.6 banner for pulls.
Sharing Builds
Drop your Thoma configs in forums—rotation tips from the community are gold.
FAQ
What's the sweet-spot ER for Thoma in Burgeon?
220-230% without C4 keeps his 80-cost Burst up every 20 seconds. C4's 15 Energy restore drops it to 200%. Kitain refunds 3 Energy on the regular; Favonius adds 6 on 60% CRIT every 12 seconds for battery squads. Test in domains—ER Sands if those 3.5 Skill particles fall short.
How does Level 90 pay off for Thoma as a tank?
10,331 base HP means Level 10 Skill shields hit 35.28% Max HP +4,152, with Fiery Collapse at 2.2% Max HP DMG. Ascension's 24% ATK bonus scales the HP. Grind 420,000 Mora and 46 Smoldering Pearls for five-stack Imbricated Armor (+25% strength).
Best safety plays for Thoma?
Five-stack Blazing Barrier for 250% Pyro soak, beating 2% Burning self-damage post-6.0. Link with Kokomi heals and Xingqiu Hydro to skip over-Pyro woes. On-field Skill pre-Burst; C6 adds +15% party DMG on refresh—stay off-field for Overload.
Can C0 Thoma tank Burgeon reliably?
Yep, at 220-230% ER with HP/EM focus for off-field Pyro and 12.96% Max HP +1,525 shields. Kitain boosts uptime; 4pc Flower of Paradise Lost amps Burgeon 40%. Level 90 seals F2P viability in Dendro Traveler + Xingqiu, even with steeper ER.
Artifacts for max shields in Burgeon?
4pc Flower of Paradise Lost (+80 EM, +40% Burgeon stacking to 100% off-field) plus HP% subs for 35.28% Max HP shields. 2pc Noblesse for ATK in hybrids. HP% on Sands/Goblet/Circlet mains; farm EM/HP for tank-trigger balance at Level 90.
How does ER impact Burst uptime?
220-230% guarantees 100% 15-second Burst for Fiery Collapse, bridging the 20-second CD in Burgeon. Low ER starves reactions; C4 trims 25% needs with 15 Energy. Favonius adjusts Nahida teams; aim Burst per cycle, no Raiden funnel needed.
👉 top up Genesis Crystals safely 👈
✅ Official direct recharge, 100% secure
✅ No waiting – top-up arrives in 7 seconds
✅ Big discounts, low prices to save more
✅ 7×24-hour customer service, ready to assist anytime