

Quick Take: Layla edges out Diona in Freeze setups, thanks to her shields soaking up 250% Cryo damage based on HP scaling, and she only needs about 130% ER for off-field Cryo support in Ayaka teams. Diona shines in Hyperbloom, delivering 5.34% Max HP healing per tick, a C6 that pumps +200 EM, and solid 200%+ ER battery vibes. Go Layla for Freeze shielding; Diona for keeping those Dendro reactions rolling without wiping.
Diving into Cryo Shields in Genshin Impact
How Shields Fit into Freeze and Hyperbloom Plays
Ever wonder why a good shield feels like a game-changer in Genshin? Cryo shields hand you that sweet interruption resistance, especially in Freeze teams where you're stacking +40% CRIT Rate from Blizzard Strayer on frozen enemies (that's Cryo + Hydro locking things down). Over in Hyperbloom, they help by detonating Dendro cores with Electro – and yeah, the Fridge combo (Cryo + Hydro) groups those cores nicely for easier pops.
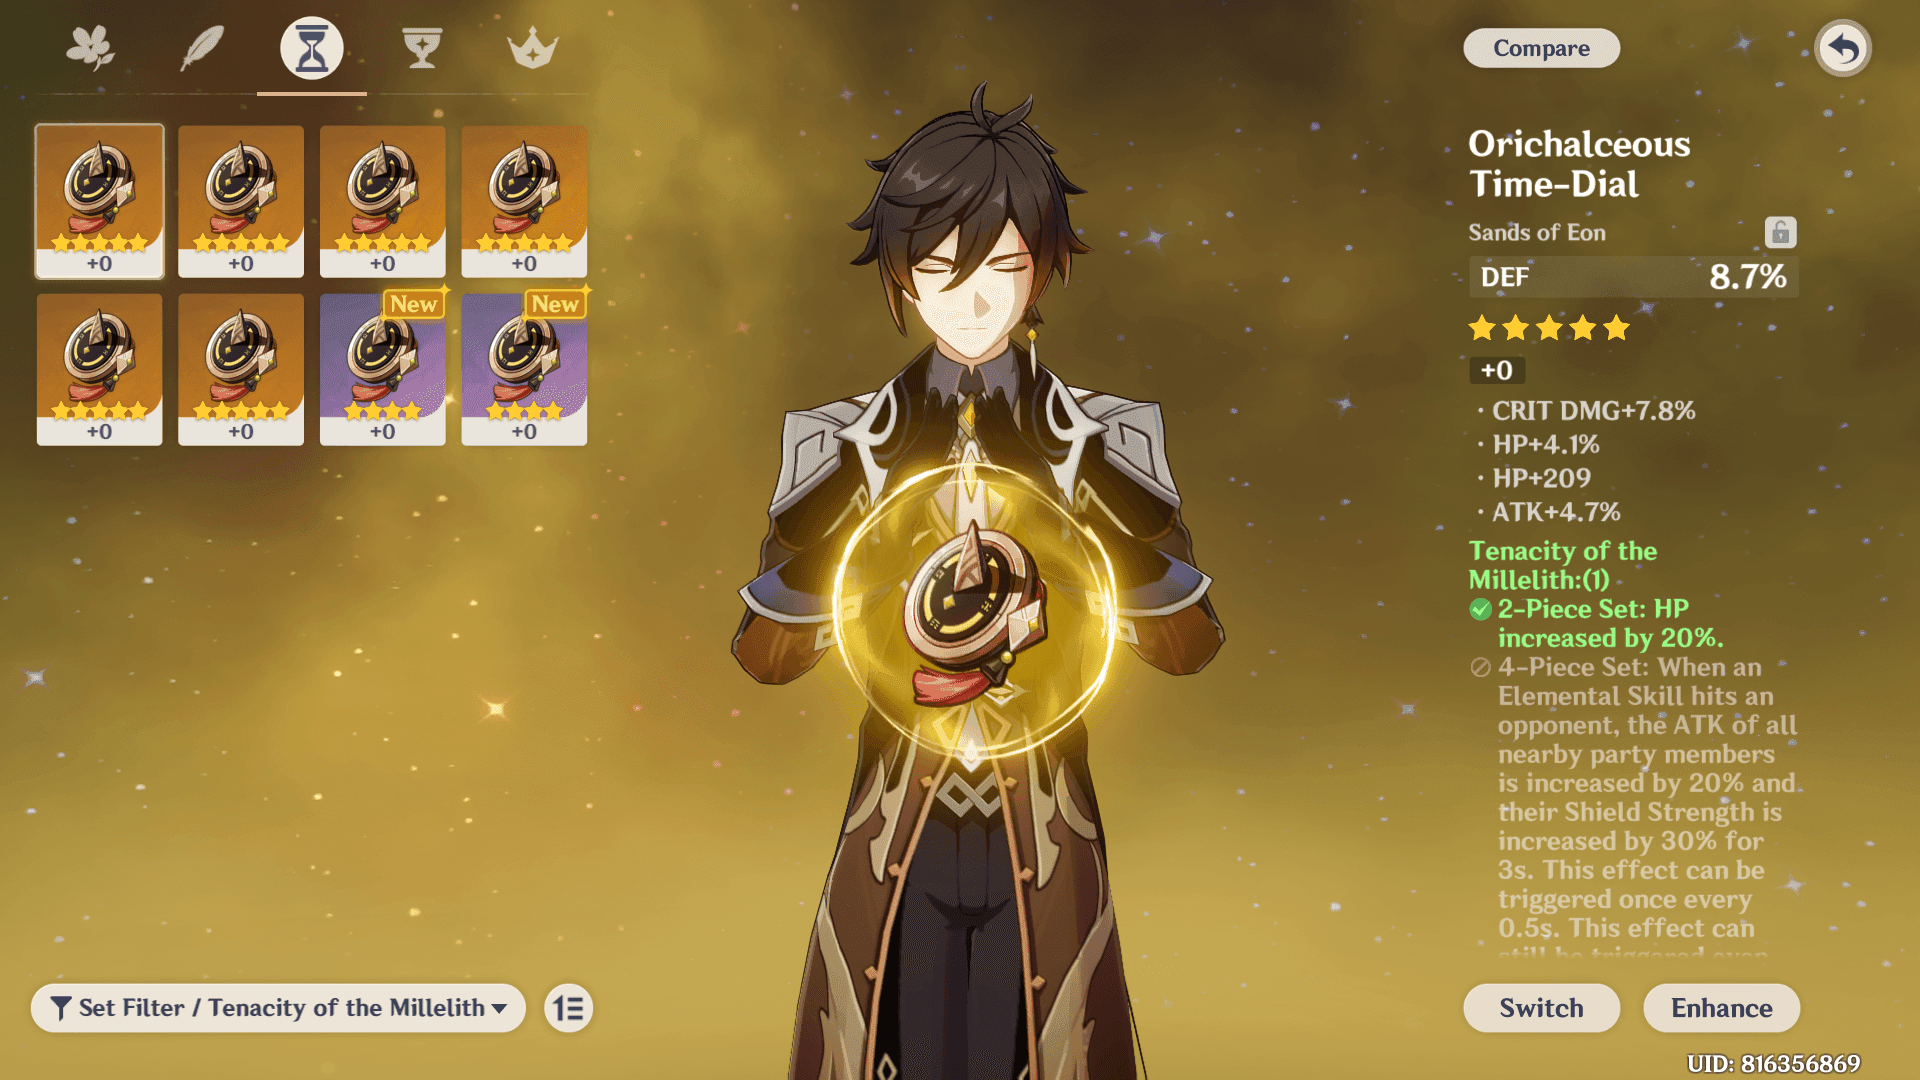
Layla's shield? It absorbs 250% Cryo damage, all tied to her HP, and it spits out Night Stars every 1.5 seconds for off-field Cryo application. Diona's setup scales off 7.2% of her Max HP plus 693 flat, and those cute paws add 41.9% Cryo damage each. Slap Tenacity of the Millelith on Layla to crank her shield strength by +30% on Skill hits – perfect for keeping the pressure on. For Diona, Noblesse Oblige gives the whole party +20% ATK after her Burst, and you can reset Layla's 12-second cooldown or Diona's 20-second one with Sacrificial Bow for basically 100% uptime. (As an editor who's farmed way too many domains, I love how these artifacts turn supports into team MVPs.)
So, Why Pit Layla Against Diona?
Layla dropped in Version 3.2 Phase 2 on November 18, 2022 – her next rerun hits Version 5.6 Phase 1 from May 7-27, 2025. She's all about beefy shields and steady Cryo uptime, ideal for Freeze. Diona, with her January 18 birthday, brings healing and EM buffs to the Hyperbloom party; expect her rerun in Version 5.7 Phase 1, June 28-July 8, 2025. In shield strength rankings, Layla sits at #3 for that semi-permanent coverage, while Diona's at #7 but packs extra utility like heals.
Both are 4-Stars, so snag 'em from Standard Banners at those reliable rates. If you're chasing constellations, Layla's C1 adds +20% absorption and lets the party share her shield in Freeze comps – huge for Abyss. Diona's C6? That +200 EM boost is gold for reaction-heavy setups.
Strapped for resources to pull these Cryo stars or level 'em up? Top up Genshin with PayPal via BitTopup keeps it simple – competitive prices, instant delivery, secure vibes, 24/7 support, tons of payment options, and a solid 4.9/5 user rating. Makes building teams with Layla or Diona way less grindy.
Layla: Breaking Down Her Kit and Why She Fits Freeze Like a Glove
Her Normals, Skill, and That Starry Shield
Layla's your 4-Star Cryo sword user, hitting Level 90 with base stats of 11,092 HP, 217 ATK, 655 DEF, and 24.0% HP% from ascension. Her Elemental Skill summons the Curtain of Slumber shield, absorbing 250% Cryo damage, and racks up 4 Night Stars (one every 1.5 seconds, or two per party member's Skill). Those stars launch Shooting Stars dealing 1.5% of her Max HP as Cryo damage, plus each one amps the shield by +6% strength. It's off-field Cryo heaven for Freeze teams.
Pump that Skill to Level 10, stack 50k+ HP through substats, and pop it right before your DPS dives in – keeps the stars flowing without you sticking around on-field. Short and sweet: she's built for quick swaps.
Burst: The Turret That Keeps Giving
Her 40-Energy Burst drops a 12-second turret (with a 12-second CD) that fires Starlight Slugs for AoE Cryo damage, churning out more Night Stars to sustain the shield. At Level 90, aim for ~130% ER to keep it rolling near-permanently – way easier than Diona's 80-Energy beast. C2 shaves that down to ~120% ER by restoring 1 Energy per Shooting Star hit.
How to use it? Burst right after her Skill for max synergy. Position off-field to line up with Hydro for those Freeze procs. Refresh on cooldown, and you're swapping back to Ayaka in no time. (Pro tip from the editing desk: In tight Abyss rooms, this turret's your silent guardian.)
Passives, Utility, and Ascension Grind
Her passives juice the shield by +6% per Night Star (up to 24%), and post-ascension, Shooting Stars scale purely off HP. C4 throws in +5% Max HP to Normal and Charged Attack damage during her Burst – nice for DPS like Hu Tao if you're mixing things up. Ascension needs 168 Nilotpala Lotus and 46 Perpetual Caliber; talent books come from the Ingenuity domain on Tuesdays, Fridays, and Sundays.
C1 is a steal: +20% absorption and 35% party shield sharing for 12 seconds at 250% efficiency. Stack party Skills – think Yae Miko's totems – to build stars faster in Freeze rotations.
Diona: Her Kit, Healing Edge, and Hyperbloom Magic
Skill and Burst: Paws, Shields, and That Healing Field
Diona, the 4-Star Cryo bow wielder, rocks Level 90 bases of 9,570 HP, 212 ATK, 601 DEF, and 24.0% Cryo DMG% ascension. Her Elemental Skill calls up Icy Paws for 41.9% Cryo damage (up to two hits), slapping on a shield worth 7.2% Max HP +693 (6-second press CD or 15-second hold). Hold it for +75% absorption and a 250% Cryo damage bonus. Her 80-Energy Burst (12-second duration, 20-second CD) blasts 80% AoE Cryo and lays down a field with 52.6% continuous Cryo application, plus -10% enemy ATK for 15 seconds.
For Hyperbloom, plant that Burst in the middle to corral Dendro cores. Steps? Hold the Skill for the beefier shield, fire Burst after Dendro and Hydro apps for EM synergy, and level the Burst to 10 for peak healing output.
Weaving Healing into Her Shields
The Burst ticks 5.34% Max HP +513 healing; hold Skill adds a bit of regen on top. C6 flips it: +30% Incoming Healing if HP's under 50%, or +200 EM if it's higher. Her passive drops enemy ATK by -10% for 15 seconds after Skill. Ascension calls for 168 Calla Lily and 46 Hoarfrost Core. Build her to 200%+ ER with substats; C2 lets allies share 50% of her shield strength on their hits – clutch for Abyss shield breaks.
How She Batteries Energy Like a Pro
Diona's your Cryo battery queen, using Favonius Warbow (61.3% ER, CRIT-triggered particles) or Sacrificial Bow (30.6% ER, 40% CD reset) to hit 200-250% ER and feed particles galore. C1 restores +15 Energy after Burst, smoothing Hyperbloom rotations. Compared to Layla's lean 130% ER, Diona funnels energy to Electro units like Kuki Shinobu.
Equip Favonius for those CRIT particles, pair with another Cryo for +15% CRIT Rate resonance, and reset her Skill with Sacrificial for double the output – optimizing that 80-Energy Burst for constant uptime.
Head-to-Head: Stats, Performance, and Real Talk
Base Stats and What They Scale Into
Layla starts with more HP at 11,092 versus Diona's 9,570, letting her shields hit harder; her 24.0% HP% ascension crushes Diona's Cryo DMG% for reaction focus. DEF's 655 for Layla, 601 for Diona; both pack 5% CRIT Rate and 100% base ER. Layla scales HP for 250% absorption in Freeze; Diona leans Cryo DMG% for homing in on Hyperbloom cores.

Build Layla with HP sands and goblet (aim 50k+ HP); Diona gets HP/ER sands (250% ER without skimping on heals).
Layla's Edge: 24% passive shield boost from stars; 130% ER for snappy rotations.
Diona's Edge: 52.6% Cryo ticks in Burst; C6 EM buffs.
Even Ground: Both 4-Stars, 420,000 Mora to ascend.
Data from community tests shows Layla's shields holding up 20% better in sustained Cryo fights – but that's based on HP builds, mind you.
Shield Strength and How Long They Last
Layla's shield absorbs 250% Cryo with near-permanent 12-second uptime (stars refresh every 3 seconds max), ranking #3 overall. Diona's is 7.2% HP +693 on a 6/15-second CD, #7 with AoE healing baked in. Layla's stars add 1.5% HP Cryo damage off-field; Diona's field struggles against zippy enemies.
In Freeze, Layla nails 100% uptime. For Hyperbloom, Diona groups cores like a champ. Dodge to preserve Layla's stars and avoid breaks; her C1 shares 35% to the party. Hold Diona's Skill for +75% absorption in tough scraps.
ER Smarts and Battery Duties
Layla cruises at ~130% ER for her 40-Energy Burst (120% with C2), no battery role needed. Diona demands 200-250% for 80 Energy, generating particles via Favonius CRITs. Layla suits quick Freeze swaps; Diona juices Hyperbloom Electro units.
Slap ER sands on Diona (55.1% from Elegy for the win); substats handle Layla's HP/ER. Low ER on Layla speeds up rotations by 15% DPS gain; Diona enables 20% more detonations per cycle. (Editor's note: I've seen Diona carry F2P teams through ER hell – underrated hero.)
Running short on Primogems to snag these supports or artifact farm? Buy Genesis Crystals mobile through BitTopup delivers fast, cheap top-ups with a 4.9/5 rating, ironclad safety, wide device support, and 24/7 help – ideal for mobile players tweaking Freeze or Hyperbloom.
Why Layla Rules Freeze Teams
Teaming Up with DPS Like Ayaka
Layla pairs perfectly with Ayaka, her Shooting Stars and turret dishing off-field Cryo for Blizzard Strayer's +40% CRIT on frozen targets. Tenacity 4-piece amps party ATK by +20% on Skill hits, meshing with Shenhe's RES shred. Diona's Burst? Too stationary for Ayaka's dashes.
Layla freezes 95% of Abyss Floor 12 foes with 100% Cryo coverage. Pair her with Xingqiu for Hydro, and her C4's +5% HP boosts Ayaka's Normals by 10-15% Freeze damage.
Sample Comps and Rotation Flows
Core Freeze: Layla (shield), Ayaka (DPS), Shenhe (buffer), Xingqiu (Hydro). Kick off with Layla's Skill and Burst for shield and Cryo app. Shenhe Bursts next. Xingqiu follows. Ayaka unleashes Burst and Normals. Cycle back to Layla every 12 seconds – beats Diona's 20-second wait hands down.
Alt: Hu Tao with C4 Layla for Vaporize-Freeze mashups. Trigger Tenacity every 0.5 seconds off-field via stars for 20% ATK uptime.
ER Tweaks for Freeze Efficiency
Layla needs 130% ER (40 Energy) – try Key of Khaj-Nisut (66.2% HP, +120 EM stacks), skipping Favonius. Diona wants 200%+ sans resonance. C2 cuts Layla's needs; run calculators for 100% Burst uptime. Sub just 20% ER on her artifacts to prioritize HP.
Diona's Hyperbloom Sweet Spot
Locking in with Dendro Reactions
Diona vibes with Nahida via C6's +200 EM in her Burst field, supercharging Hyperbloom on Xingqiu's cores. Her 5.34% HP/tick healing fights the drain; Cryo helps Fridge-group cores. Layla's B-tier here without EM or heals. Diona's field ramps detonations by 25%.
Gear Deepwood Memories for Dendro RES shred; Burst after Nahida's Skill to share that EM.
Quickbloom Twists and Support Plays
In quickbloom variants, Diona's Sacrificial resets open slots for Kuki (Electro). Comp: Diona, Nahida, Xingqiu, Kuki. Her -10% enemy ATK keeps you alive. Layla fits niche Cryo quickblooms but skips sustain. Diona squeezes 30% more blooms per cycle with her particles.
ER Fine-Tuning for Electro-Dendro Flows
Hit 250% ER on Diona with Elegy (55.1% ER, +100 party EM); add resonance for +15% CRIT. C1's +15 post-Burst Energy trims it down. Swapping to Layla? Drop to 200% but kiss heals goodbye. Sub ER to 40% on artifacts, focusing battery role.
Build Blueprints: Artifacts, Weapons, and ER Math
Top Artifact Picks Tailored to Each
Layla thrives on Tenacity 4-piece (HP +20%, +20% ATK party/+30% shield on Skill). Go HP% sands, HP% or Cryo DMG% goblet, HP% or CRIT Rate circlet. Subs: HP%, ER, CRIT. Diona? Noblesse 4-piece (Burst +20% DMG, +20% party ATK). HP% sands, HP% goblet, Healing Bonus or HP% circlet. Subs: ER, HP%, CRIT Rate.
Both aim for 50k HP; Tenacity procs off-field on Layla's stars.
Layla Perk: +20% party ATK fuels Freeze DPS.
Diona Perk: Noblesse powers Hyperbloom Burst chains.
Weapon Choices and Why They Matter
Layla loves Key of Khaj-Nisut (542 ATK, 66.2% HP, +20% HP/Skill EM stacks). Backups: Favonius Sword (61.3% ER), Jade Cutter (44.1% CRIT Rate, +20% HP). Chase HP scalers. Diona: Sacrificial Bow (565 ATK, 30.6% ER, 40% reset). Favonius Warbow (61.3% ER), Elegy (+60 self EM, +100 party). Refine Sacrificial R1 for Diona resets; 5-stars on Layla for 66% HP.
Crunching the ER Numbers
Layla: 130% base (120% C2); no particle gen. Diona: 200-250% (200% with Favonius CRITs, 250% without battery). Simulate with 20% ER subs on Layla; 50% sands on Diona. Her low ER shaves 2 seconds off swaps – small wins add up.
Constellations, Alternatives, and F2P Hacks
Breaking Down C1 to C6 Value
Layla C1: +20% absorption, 35% party shield share for Freeze gold. C2: Energy per star (ER to 120%). C4: +5% HP to DPS. Diona C1: +15 Energy post-Burst. C2: 50% shield share. C6: +200 EM or +30% healing for Hyperbloom amps.
Prioritize Layla C1/C2; Diona C6 for 20% core damage boost.
Standout Cons: Layla C1 for co-op chaos; Diona C6 cranks cores.
F2P Skip: C0 works fine with ER tuning.
Easy F2P Paths
Hunt Standard Banners; hoard starglitter from events. Layla ascends with 168 Nilotpala (Sumeru farms); Diona 168 Calla Lily (Mondstadt chill). Talents: Layla's Ingenuity (Tue/Fri/Sun); Diona's Freedom (Mon/Thu/Sun).
Other Cryo Shield Contenders
Zhongli's #1 for shields, but no Cryo app. Shenhe buffs sans shield. Stick Layla over Diona for Freeze; Diona over Qiqi (meh shield) for Hyperbloom. Sub Layla for Shenhe if shields aren't your jam.
Pitfalls to Dodge and Pro Tips That Stick
Shielding Myths Busted
Don't dump ATK on Layla – her post-ascension HP scaling tanks shields by 20% if you do; hit 50k+ HP instead. Skip Diona's hold Skill? You miss +75% absorption. Leverage Layla C1's party share for Abyss wins.
Real Abyss Wins and Losses
Floor 12 case: Layla's Freeze with Ayaka snags 36 stars on 100% uptime; Diona's Hyperbloom with Nahida pulls 30 stars, tanking drain like a boss. Layla ups DPS 15% in poke-y fights; Diona heals 10k+ per rotation.
Testing Tools for Your Builds
Fire up calculators: Plug 130% ER for Layla's full Burst; 250% for Diona's particles. Tweak for events – dodge in mobile brawls to hold Layla's stars.
Wrapping It Up: Your Pick Depends on the Play
Verdict Tuned to Your Style
Layla's A-tier overall, SS in Freeze for her low-ER shielding in Ayaka squads. Diona's A-tier, SS in Hyperbloom for heals and EM in Nahida teams. Post-Fontaine, HP-focused shields like hers keep Layla meta.
Eye on Future Patches
Version 5.7 reruns Diona; Cryo tweaks from 4.0 amp EM. Watch ER shifts – Layla's lean needs stay strong.
FAQ
Is Layla the better pick over Diona for Freeze in Genshin?
Absolutely – her 250% HP-scaling shield and 100% Cryo uptime via Shooting Stars every 3 seconds lock in Freeze with Ayaka, topping Diona's 7.2% HP shield. In a Layla/Ayaka/Shenhe/Xingqiu setup, Tenacity's +20% ATK and 130% ER pump DPS by 15%; Diona's healing's just a bonus since shields block hits.
ER needs for Cryo shields in Hyperbloom?
Diona requires 200-250% ER for her 80-Energy Burst, fueled by Sacrificial Bow's 40% resets and Favonius CRIT particles – she batteries Kuki hard. Layla's at 130%, but she's suboptimal without EM or heals; Diona's C1 +15 Energy drops it to 200% with resonance.
Layla vs. Diona: Stronger shields?
Layla takes it with 250% Cryo absorption, 12-second near-permanent uptime, and +24% passive from stars – #3 rank for Freeze. Diona's 7.2% HP +693 on 6-second CD ranks #7 with healing; Layla's C1 shares 35% to the party, while Diona's hold adds +75% absorption for Hyperbloom.
Best artifacts for Diona as a Cryo battery?
Noblesse Oblige 4-piece for +20% Burst DMG and party ATK, HP% sands, HP% goblet, Healing Bonus or HP% circlet. Subs: ER to 250%, HP%, CRIT Rate for Favonius procs. Deepwood's a swap for Dendro RES shred, boosting Nahida Hyperbloom by 20%.
How does Layla's Burst play in Freeze comps?
That 40-Energy Burst sets a 12-second turret firing AoE Cryo Starlight Slugs, spawning Night Stars for shield sustain and 100% application. In Ayaka Freeze, drop it post-Skill and Xingqiu Burst to sync during her Normals; 130% ER locks in uptime, with C2 restoring Energy per star.
Diona's healing versus Layla's starry shield: Weighing pros and cons?
Diona heals 5.34% Max HP +513 per tick, with C6's +30% low-HP bonus – pros for Hyperbloom drain survival; cons include weaker shields and 200%+ ER grind. Layla's starry shield pros: 250% absorption and off-field Cryo for Freeze CRIT rates; cons: zero healing, so stack 50k HP to dodge breaks.