

Quick Answer: Lauma excels as an EM Stack Support (800-1000+ EM, 160-200% ER) for Bloom teams, but high-investment players can build Personal DPS (EM/CRIT hybrid) at C2+ for massive Lunar-Bloom damage. Her signature weapon Nightweaver's Looking Glass is best-in-slot, though F2P options like Etherlight Spindlelute work excellently.
Lauma Character Overview & Role Analysis
Lauma dropped in Version 6.0 back in September, and honestly? She's been a game-changer for Bloom teams that were gathering dust in everyone's rosters. This 5-star Dendro Catalyst user from Nod-Krai comes with a hefty +115.2 EM ascension bonus at level 90 – which should tell you everything about her intended role.
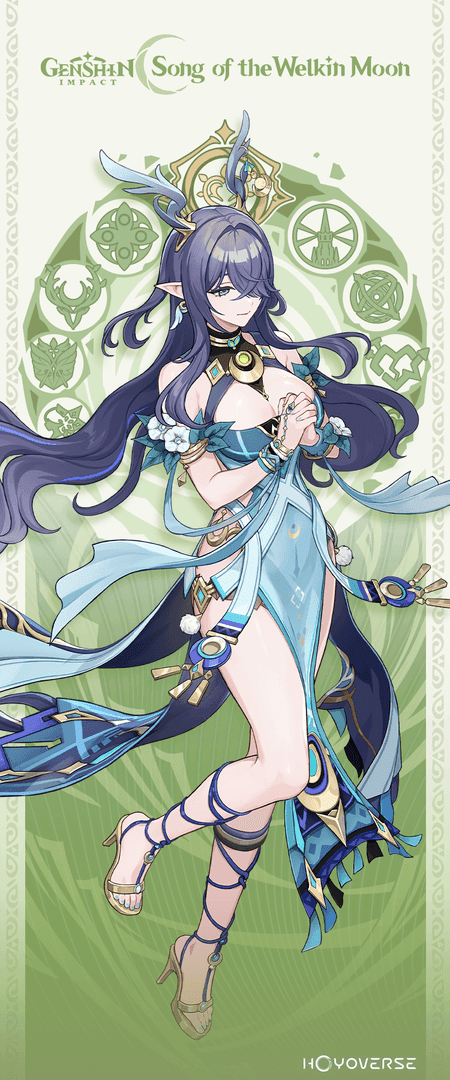
Here's where it gets interesting. Lauma doesn't just participate in Bloom reactions; she fundamentally changes how they work. When she's in your party, every Bloom reaction creates the standard Dendro Core plus grants your team a Verdant Dew stack (with a 2.5-second cooldown, so no spam). Your party can hold up to 3 stacks, and Lauma consumes these through her Hold Elemental Skill to unleash separate Lunar-Bloom DMG instances.
The Moonsign system adds another layer – it determines passive effectiveness based on how many Nod-Krai characters you're running. With just Lauma (Nascent Gleam), your Bloom, Hyperbloom, and Burgeon reactions gain 15% CRIT Rate and 100% CRIT DMG. That's roughly a 15% damage boost across the board, which is nothing to sneeze at.
For players seeking Genesis Crystals safe checkout, BitTopup offers secure transactions with competitive rates and instant delivery.
Kit Breakdown
Lauma's Elemental Skill is where the magic happens – it's got two distinct modes that serve completely different purposes. The Tap version deals AoE Dendro damage and summons a Frostgrove Sanctuary that'll poke enemies every 2 seconds while shredding 25% Dendro and Hydro RES at max talent level. Pretty standard support stuff.
But the Hold version? That's where things get spicy. You need at least 1 Verdant Dew stack to use it, and it'll consume all your stacks to deal Dendro damage plus Lunar-Bloom damage scaling at 273.6% of her EM per Dew consumed at max level. Three stacks = massive damage.
Her Elemental Burst costs 60 Energy with a 15-second cooldown – reasonable for a support character. It grants 18 Pale Hymn stacks that enhance reaction damage based on her EM. At Talent Level 10, you're looking at 277.76% of EM for Bloom/Hyperbloom/Burgeon and 222.24% for Lunar-Bloom. Combined with Moon Song stacks from Hold Skill, she can reach up to 36 total Pale Hymn stacks.
Her A4 passive is basically a built-in EM check. Up to 32% Skill DMG bonus and 20% Charged Attack cooldown reduction, maxing out at 800 EM. Consider this your minimum EM target for optimal support performance, though pushing 1000+ EM yields even stronger team buffs.
EM Stack Support Build Guide
Let's be real – this is how 90% of players should build Lauma. The EM Stack Support build maximizes her team-buffing capabilities through pure Elemental Mastery stacking, and it's surprisingly accessible for the value it provides.
Your priority order is simple: Energy Recharge until you can burst on cooldown, then EM until your eyes bleed.
Artifact Set Recommendations
Deepwood Memories (4pc) is your go-to when Lauma's the only Dendro character or when no teammate can hold it. That 30% Dendro RES shred is absolutely crucial for team damage optimization. Just remember – this effect doesn't stack, so only one character per team should wear Deepwood.
Silken Moon's Serenade (4pc) becomes optimal when someone else is handling Deepwood duties. This set provides 20% Energy Recharge (which helps with those pesky ER requirements), party-wide EM buffs up to 120, and enhances Lunar Reaction damage. The EM sharing is particularly valuable for reaction-focused teammates like Kuki Shinobu or Raiden Shogun in Hyperbloom comps.
Gilded Dreams (4pc) serves as your reliable generalist option, providing up to 150 EM from its 4-piece effect in typical mixed-element teams. For temporary builds while you're farming, combining any 2pc EM sets provides reasonable performance.
Main Stats & Substats
Your main stat distribution should be: EM/ER Sands, EM Goblet, EM Circlet. Use ER Sands if you're below target thresholds, otherwise prioritize EM Sands. This configuration typically yields 600-800 base EM from main stats alone – a solid foundation.
Energy Recharge takes absolute priority until you meet rotation requirements. C0 Lauma in double Dendro teams needs 130-190% ER depending on how frequently you're using her skill, while solo Dendro scenarios bump that up to 155-210% ER.
After meeting ER thresholds, every EM substat roll provides direct value through enhanced reaction buffs. CRIT substats? Pretty much worthless in pure support builds – don't chase them.
Personal DPS Build Strategy
Now here's where things get controversial. The Personal DPS build represents a niche but genuinely potent alternative for high-investment players, particularly those with C2+ constellations. You're sacrificing some team buffing for substantially higher personal damage output through Lunar-Bloom optimization.
Is it worth it? Depends on your account and investment level. But when it works, it really works.
Crit-Focused Artifacts
Night of the Sky's Unveiling (4pc) becomes your premier choice for personal DPS builds in Ascendant Gleam teams. This set provides EM and significant CRIT Rate buffs up to 30%, directly supporting the hybrid EM/CRIT approach you're going for.
When that's unavailable, Gilded Dreams (4pc) serves as an excellent alternative, providing substantial EM while allowing CRIT-focused circlet selection. Deepwood Memories (4pc) remains viable if no teammate can hold it – team utility still matters.
ATK vs EM Balance
Here's the thing about Personal DPS builds – you still maintain EM priority for Sands and Goblet slots because Lunar-Bloom damage scales exclusively with EM. The critical difference lies in Circlet selection, where CRIT Rate or CRIT DMG Circlets replace EM Circlets to enable consistent critical hits.
Target CRIT ratios follow standard 1:2 optimization, aiming for 40-50% CRIT Rate and 100%+ CRIT DMG. EM targets remain high at 800+ to maintain reaction support value. Energy Recharge requirements stay consistent with support builds – you still need to burst on cooldown.
For players looking to enhance their Lauma with premium resources, Welkin + Crystals bundle deal packages from BitTopup provide excellent value for constellation and weapon investments, featuring instant delivery and secure payment processing.
Best Weapons for Each Build Type
Support Weapon Tier List
Nightweaver's Looking Glass stands as Best-in-Slot across all builds, and it's not even close. At R1, it provides 265 EM base stat with additional EM on Skill hit and Lunar-Bloom triggers. When both effects activate, it buffs party Bloom damage by 120%, Hyperbloom/Burgeon by 80%, and Lunar-Bloom by 40%. Those numbers are absolutely bonkers.
Etherlight Spindlelute (R5 Event Weapon) represents your premier 4-star option, providing 45.9% ER and 200 EM after Skill usage. This weapon perfectly addresses both primary stat needs for support builds – it's like it was made for Lauma.
A Thousand Floating Dreams offers a strong 5-star alternative with 265 EM and party-wide EM buffs of 40. Solid choice if you've got it lying around.
Blackmarrow Lantern (R5 Craftable) provides your most accessible high-performance option with 221 EM base and 96% Bloom damage increase. Seriously underrated weapon that punches above its weight class.
F2P Alternatives
Mappa Mare (R5 Craftable) offers budget-friendly EM stacking with 221 EM at max level. Its passive provides additional EM after triggering elemental reactions – straightforward and effective.
Magic Guide (R5 3-star) presents your ultra-budget option with EM secondary stat and damage bonuses against Hydro/Electro-affected enemies. Not glamorous, but it gets the job done while you're farming for better options.
Optimal Team Compositions
Hyperbloom Teams
The premium setup features Lauma, Neuvillette, Furina, and Kuki Shinobu, creating what the community's dubbed a Quickbloom variant.
Rotation begins with Neuvillette's Skill, followed by Furina's Skill and Burst for consistent Hydro application. Kuki Shinobu applies Electro for Hyperbloom triggers while keeping everyone alive. Lauma's Burst and Hold Skill maximize reaction damage through those juicy Pale Hymn stacks.
Alternative teams feature Xingqiu and Yelan for premium Hydro application, with Raiden Shogun as your Electro trigger. Budget options include Barbara for Hydro application (she's actually not terrible here) and Fischl providing reliable off-field Electro damage.
Nilou Bloom Teams
Premium composition features Lauma, Nilou, Nahida, and Kokomi for optimal reaction generation. This is where Lauma really shines – Nahida's Skill marks enemies while her Burst provides EM sharing, Nilou's Skill sequence enables Bountiful Core generation, and Lauma's RES shred plus CRIT buffs maximize core damage. Kokomi's healing counters Bloom self-damage because, let's face it, Bloom cores hurt.
C1 Lauma significantly improves Nilou Bloom teams by providing EM-scaling healing, potentially replacing dedicated healers with more offensive options. Game-changing constellation for this archetype.
Burgeon Teams
Typical team features Lauma, Thoma, Kokomi, and Fischl, balancing reaction triggers with survivability. Thoma serves as your premier Burgeon trigger due to his shield protection against self-damage – trust me, you need that protection. Kokomi provides healing and Hydro application, while Fischl contributes Electro damage during Burgeon downtime.
Talent Priority & Investment Guide
Skill Leveling Order
Elemental Skill takes absolute priority as your primary damage and utility source. The Frostgrove Sanctuary's RES shred scales with talent level, reaching that crucial 25% at Level 10. Hold Skill's Lunar-Bloom damage scales at 273.6% EM per Verdant Dew at maximum investment – those are some serious multipliers.
Elemental Burst follows as secondary priority, enhancing EM scaling on Pale Hymn stack consumption. At Talent Level 10, damage increase reaches 277.76% of EM for standard reactions and 222.24% for Lunar-Bloom.
For resource optimization, I'd suggest Level 10 Elemental Skill, Level 10 Elemental Burst, and Level 6 Normal Attack as your ideal stopping point. Going beyond that hits diminishing returns pretty hard.
Constellation Value
C1 provides substantial utility through EM-scaling healing after Skill or Burst usage. The healing triggers once every 1.9 seconds and scales at 500% of Lauma's EM – with proper EM investment, you're looking at 4000-5000 healing per proc. That's Kokomi-level healing from a DPS constellation.
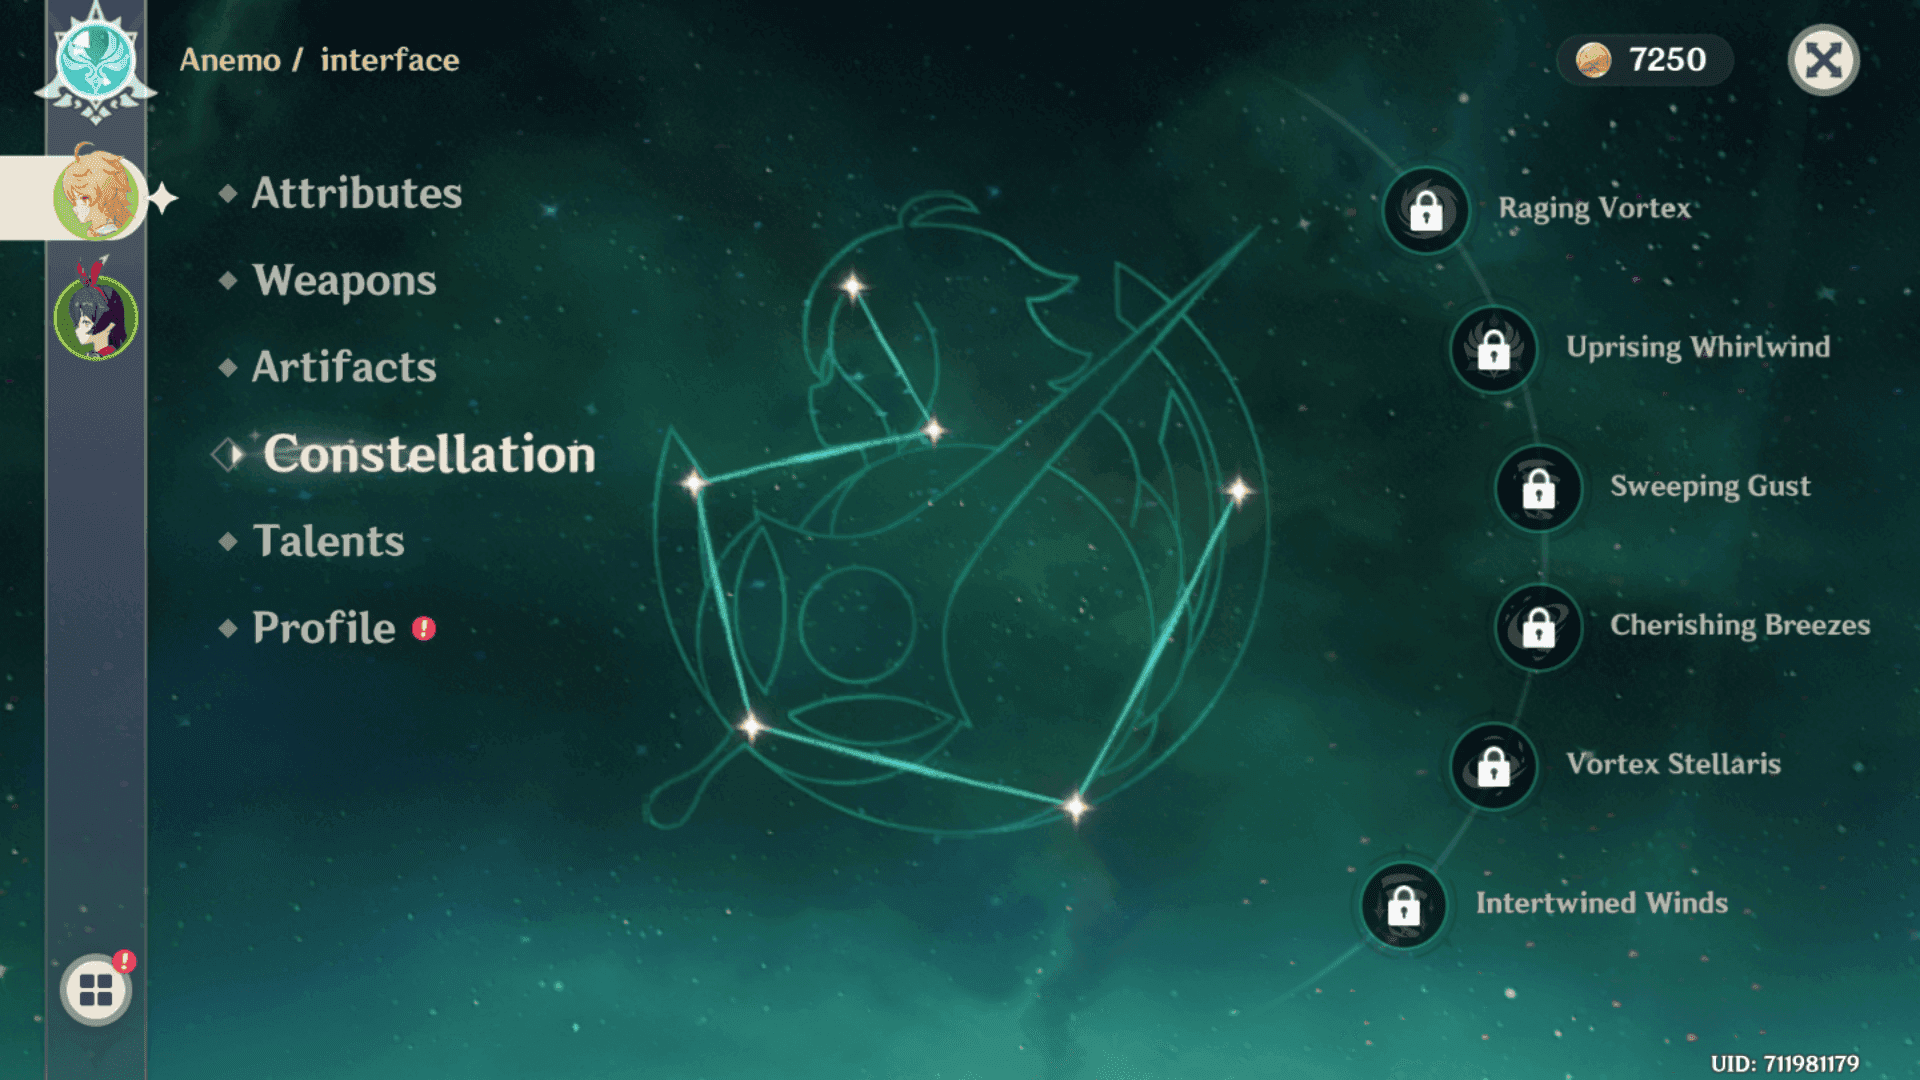
C2 represents Lauma's largest power spike, enhancing Pale Hymn buffs with additional EM scaling. Bloom/Hyperbloom/Burgeon damage gains 500% EM scaling, while Lunar-Bloom damage receives 400% EM scaling. This is where Personal DPS builds become genuinely competitive.
C6 transforms Lauma into a potent personal DPS through multiple additions. Frostgrove Sanctuary gains up to 8 additional Lunar-Bloom instances at 185% EM scaling, while Normal Attacks can consume Pale Hymn stacks for 150% EM Lunar-Bloom damage. Whale territory, but absolutely devastating when properly built.
Energy Recharge & Rotation Optimization
ER Requirements
C0 Lauma in double Dendro teams requires 175-190% ER when using one Skill per rotation, dropping to 130-160% with two Skills per rotation. Solo Dendro scenarios bump those requirements up to 155-210% ER – she's definitely energy-hungry without Dendro battery support.
C4 dramatically reduces ER needs through passive energy generation, providing 4 Energy every 5 seconds. Double Dendro teams drop to 130-140% ER requirements, while solo Dendro scenarios need 115-155% ER. Night and day difference.
Rotation Patterns
Standard rotations prioritize Burst activation early for Pale Hymn stack generation, followed by other characters' setup abilities. In Nilou Bloom teams, rotation begins with Nahida's Skill and Burst, followed by Nilou's Skill sequence, then Lauma's Burst and Skill, finishing with Kokomi's sustained application.
The key is maximizing uptime on those Pale Hymn stacks – they're doing most of your team's heavy lifting.
Build Comparison: Support vs DPS Performance
EM Stack Support builds excel in team damage amplification through reaction buffs and RES shred. At 1000 EM, Lauma's Pale Hymn stacks provide substantial damage increases to all qualifying reactions, often contributing more total damage through team buffs than personal damage output. It's the multiplicative effect that makes this so powerful.
Personal DPS builds sacrifice some team buffing for significantly higher individual damage, particularly at C2+ investment levels. Damage calculations favor Support builds in most scenarios due to the multiplicative nature of team buffs versus additive personal damage – but the gap narrows considerably with constellation investment.
Current meta analysis positions Lauma as S+ to SS-tier character, revitalizing Bloom-based teams and bringing them back into competitive viability. Support builds represent the most accessible and universally effective approach, while Personal DPS builds offer scaling potential for dedicated players willing to invest heavily.
Common Mistakes & Optimization Tips
The most frequent mistake I see involves confusing Bloom damage with Lunar-Bloom damage. Dendro Cores created by Lunar-Bloom reactions still deal standard Bloom/Hyperbloom/Burgeon damage, while Lunar-Bloom DMG refers specifically to Lauma's personal damage instances. Two completely different damage sources.
Over-investing in Energy Recharge represents another frequent optimization mistake. While ER requirements are crucial for consistent rotations, exceeding necessary thresholds wastes potential EM scaling. Find your sweet spot and stop there.
Neglecting character level 90 ascension significantly reduces effectiveness due to EM-based reaction scaling. This isn't like other characters where you can stop at 80/90 – Lauma needs that final ascension for optimal performance.
FAQ
Is Lauma better as support or DPS? Lauma excels primarily as EM Stack Support, providing team-wide reaction buffs and RES shred. Support builds require minimal investment (800-1000 EM, 160-200% ER) for maximum effectiveness. Personal DPS builds become viable at C2+ but sacrifice team utility for individual damage.
What artifacts should I use for Lauma EM build? Use Deepwood Memories (4pc) if no teammate holds it for 30% Dendro RES shred. Otherwise, Silken Moon's Serenade (4pc) provides optimal support with 20% ER and party EM buffs up to 120. Main stats: EM/ER Sands, EM Goblet, EM Circlet.
Which weapons are best for Lauma support? Nightweaver's Looking Glass (signature) is best-in-slot with 265 EM and 120% party Bloom damage buff at R1. For F2P: Etherlight Spindlelute (R5 event) offers 45.9% ER and 200 EM. Blackmarrow Lantern (R5 craftable) provides 221 EM and 96% Bloom damage increase.
How much Elemental Mastery does Lauma need? Target minimum 800 EM to maximize A4 passive bonuses (32% Skill DMG bonus, 20% Charged Attack cooldown reduction). Ideal range is 1000+ EM for stronger team buffs and personal Lunar-Bloom damage scaling.
What are best team comps for Lauma? Nilou Bloom (Lauma, Nilou, Nahida, Kokomi) maximizes Bountiful Core synergy. Hyperbloom (Lauma, Neuvillette, Furina, Kuki Shinobu) leverages EM buffs for Electro reactions. Burgeon (Lauma, Thoma, Kokomi, Fischl) utilizes Dendro Core generation for Pyro triggers.
Should I prioritize talents or constellations? Prioritize Level 90 ascension first for EM scaling, then Elemental Skill ≥ Elemental Burst to Level 10. For constellations: C1 provides healing utility, C2 offers largest damage increase with 500% EM scaling for reactions, C6 transforms her into personal DPS with additional Lunar-Bloom instances.