

When Genshin Impact’s Nod-Krai region dropped with Version 6.0 back in September, it completely flipped the script on how we approach exploration. Gone are the days of simple climbing and gliding—this place runs on Kuuvahki energy manipulation, a primordial system that honestly makes the seven elements feel like child’s play.
Kuuvahki Traversal Mechanics
The Energy System That Changes Everything
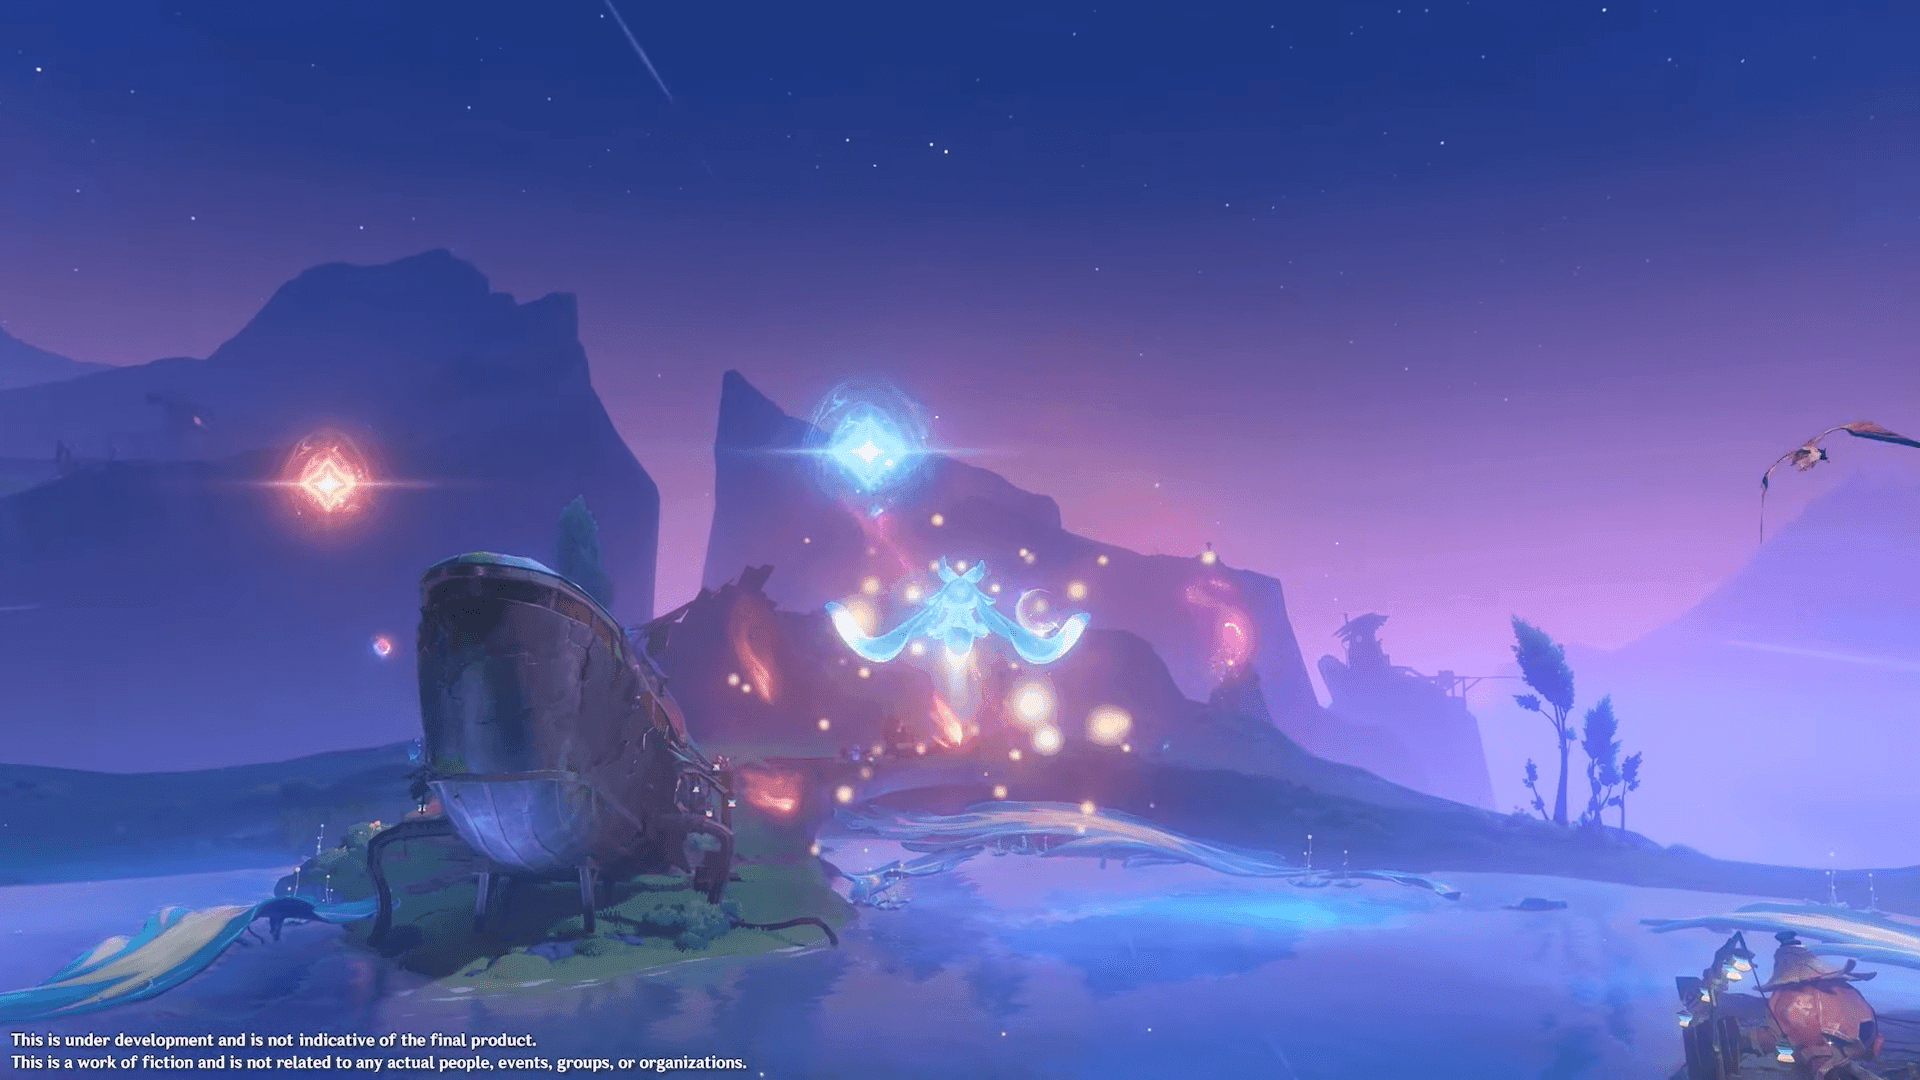
Here’s the thing about Kuuvahki: it’s not just another gimmick. This energy grants you a temporary Empowered status that lasts 30-45 seconds, and trust me, you’ll become addicted to maintaining it. You can snag this power from Kuuvahki-infused plants, ancient mechanisms, and those gorgeous terrain formations marked by blue-white glowing auras.
What Empowered Status Actually Does:
• Enhanced jumps within Unipolar Fields (those shimmering translucent domes you’ll see everywhere)
• 40% reduced climbing stamina consumption—a game changer for vertical exploration
• Access to character-gated Moonsign puzzles and chests
• Enables Kuuhenki transformation for free gliding along Moonlanes
The elemental synergies? They’re brilliant. Electro application extends your duration by 15 seconds (always keep an Electro character handy), while Hydro creates these temporary energy bridges that last 20 seconds. Cryo stabilizes those annoyingly wobbly platforms, and Anemo—well, Anemo amplifies your jump height by an additional 25%.
Kuuhenki Transformation: Your New Best Friend
Transform into Kuuhenki and suddenly you’re gliding for free, navigating through mist like it’s nothing, and riding Moonlanes—those glowing trail networks that’ll get you across complex terrain faster than any other traversal method in the game. Enhanced jumps reach 3x normal height, bumping up to 3.75x with Anemo resonance.
(Personal note: I spent my first week just riding Moonlanes because they’re genuinely fun—don’t judge me.)
Essential Character Setup
The Characters You Actually Need
Lauma (5-star Dendro): She’s basically a walking resource detector. Displays Nod-Krai resources on your mini-map, shapeshifts for sprint enhancement and double jumps, plus she gains items from wild creatures. If you’re serious about exploration, she’s non-negotiable.

Flins (5-star Electro): His lamp illuminates approaching Wild Hunt enemies before they ambush you, shows nearby resources on the mini-map, and—here’s the cool part—he actually understands those cryptic Wild Hunt whispers that confused everyone during the first week.
For snagging these characters without breaking the bank, Genshin Top Up Deals through BitTopup offers competitive pricing with rapid delivery and secure transactions for all your Primogem needs.
Team Building That Actually Works
The Nod-Krai Resonance System rewards mixed-character teams with up to 36% Lunar Reaction damage for 20 seconds when non-Nod-Krai characters use their abilities. It’s a system that actively encourages diversity rather than punishing it.
Damage scaling varies by element:
• Pyro/Electro/Cryo: +0.9% per 100 ATK
• Hydro: +0.6% per 1000 HP
• Geo: +1% per 100 DEF
• Anemo/Dendro: +2.25% per 100 EM
My go-to recommendation? Lauma or Flins + Electro support + Healer + Anemo character. This combo handles everything Nod-Krai throws at you.
Core Puzzle Types
Moonsign Chests: The Character Gate System
These chests require Nod-Krai natives in your active party—no exceptions. They’re worth it though, containing Ancient Runes and Crystallized Moonbeams that you’ll desperately need later.
Sequential Activation Challenges
Multi-stage puzzles that’ll test your energy management:
Activate primary Kuuvahki source
Navigate to secondary points under time pressure
Apply elemental reactions to maintain energy
Hit that final mechanism while still Empowered
Miss the timing? Start over. It’s brutal but fair.
Environmental Manipulation
The advanced stuff. These puzzles let you reshape terrain and construct energy bridges using Hydro-Kuuvahki interactions. They’re optional, but the rewards justify the brain power.
Advanced Traversal Techniques
Momentum Conservation—The Real Meta
Energy Jump Chains: Chain consecutive Unipolar Field usage while Empowered for ridiculous height gains
Glide-to-Transform Sequences: Transition from regular gliding into Kuuhenki form mid-air
Moonlane Acceleration: Use your initial momentum for higher speeds along the lanes
Field Exit Optimization: Time your exits for maximum horizontal distance
Vertical Navigation Mastery:
Stack multiple Unipolar Fields for extreme height, use that 40% stamina reduction for energy-enhanced climbing, and always transform to Kuuhenki at peak height for maximum gliding distance.
When you nail these techniques, optimized routes achieve 40-60% faster completion times. The difference is night and day.
Step-by-Step Major Puzzle Solutions
Kuuvahki Experimental Design Bureau (Paha Isle)
This one stumped half the community during launch week.
Entry Protocol: Approach with Empowered status—the energy sensors won’t activate otherwise
Laboratory Navigation: Hit those Bobik devices with Electro while Empowered
Energy Conduit Alignment: Terminal sequence is Northwest → Central Hub → Southeast → Emergency Override
Final Chamber: Four energy nodes must be activated simultaneously with continuous Empowered status
Rewards include: Ancient Runes, Crystallized Moonbeams, and those Precision Kuuvahki Stamping Dies you’ll need later.
Blue Amber Lake Complex (Lempo Isle)
Initial Activation: Northern shore Kuuvahki source reveals hidden energy platforms
Platform Sequence: Navigate clockwise, applying Electro to each mechanism (extends duration by 10 seconds)
Underwater Chamber: Final platform reveals an Empowered-only entrance
Chamber Completion: Three energy nodes activated simultaneously using character swapping
Frostmoon Enclave Shrine Network (Hiisi Island)
The most complex puzzle system in Nod-Krai.
Shrine Activation: Seven shrines must be activated following lunar phase order from ancient murals
Energy Pathway Creation: Successful activation creates temporary connecting pathways
Central Sanctum Access: Complete the network to unlock advanced challenges
Sanctum Trials: Three trials testing traversal precision, energy conservation, and elemental integration
For building optimal exploration teams to tackle these challenges, Buy Genesis Crystals Online through BitTopup provides secure transactions with competitive pricing and excellent customer support.
Route Optimization Strategy
My 14-Day Exploration Plan
Days 1-3 (Lempo Isle): Focus on Nasha Town quests, Blue Amber Lake puzzles, establishing your waypoint network, and completing the Clink-Clank Craftshop questline.
Days 4-7 (Paha Isle): Bureau infiltration, high-level enemy farming, Moonsign Chest collection, and mapping those Fatui facilities.
Days 8-14 (Hiisi Island): Frostmoon ruins exploration, shrine network completion, Radiant Moonfly boss farming, and pushing for that 100% exploration achievement.
Resource Management Reality Check
Critical Materials You Can’t Ignore:
• Moonlit Flora: Found on Lempo Isle, essential for Lauma ascension
• Crystallized Moonbeams: High-level enemies and Moonsign Chests
• Ancient Runes: Fatui facilities and shrine completions
• Precision Kuuvahki Stamping Dies: Knuckle Duckle boss drops (you need 46 pieces total—that’s 1,840 Original Resin)
Boss Farming Route: Knuckle Duckle on Paha Isle (30-second travel time) → Radiant Moonfly on Hiisi Island (45-second travel). Both cost 40 Original Resin with 10-second respawn timers.
Time-Saving Shortcuts That Actually Work
Master the Moonlane network for 40-60% travel time reduction through optimal entry and exit points. Memorize energy source locations to maintain continuous Empowered status. And for the love of the Archons, upgrade your Nod-Krai Compass—the High-Tier version displays all collectibles simultaneously.
Common Mistakes & Solutions
The Critical Errors Everyone Makes
Energy Management: Always verify your Empowered status before attempting complex traversal. I can’t count how many times I’ve watched players fail puzzles because they started without proper energy.
Unipolar Field Misuse: Learn those field boundaries through visual indicators—the shimmering effects aren’t just pretty.
Transformation Timing: Practice Kuuhenki transformation in safe areas before attempting challenges. Trust me on this one.
How to Avoid Complete Resets
Maintain a 15+ second Empowered status buffer before starting puzzles. Screenshot successful activation orders (you’ll thank me later). Clear the area of enemies before attempting timed challenges—nothing’s worse than getting interrupted mid-sequence.
Recovery Techniques for When Things Go Wrong
Emergency energy sources exist within 50 meters of all major puzzles. Use Kuuhenki transformation for emergency gliding when you’re falling. Plan your attempts during high-energy periods with adequate supplies on hand.
Advanced Tips & Secrets
Hidden Achievements Worth Chasing
Moonlane Rider: Complete 50 Moonlane traversals without touching the ground
Energy Eternal: Maintain Empowered status for 10 minutes straight
Field Master: Use 20 different Unipolar Fields in a single session
Nod-Krai Explorer: Achieve 100% exploration on all three islands
Easter Eggs That Made Me Smile
Lempo Isle has Mondstadt references on Nasha Town’s notice board and a hidden artifact chamber in Blue Amber Lake. Paha Isle features fake bug reports on Bureau terminals and hilarious epitaphs in the cemetery. Hiisi Island showcases community fan art in the Enclave murals and gaming terminology inscribed on platforms.
For comprehensive region exploration without resource constraints, Genshin Impact Top Up services through BitTopup ensure reliable, secure transactions with competitive rates and excellent customer service.
FAQ
How do I maintain Empowered status during those impossibly long sequences?
Plan routes connecting energy sources within 30-second intervals, keep Electro characters for 15-second extensions, and memorize source locations along major routes. It becomes second nature after a while.
What characters are absolutely essential for exploration?
Lauma and Flins provide massive advantages through resource detection and enemy warnings. Bare minimum? One Electro character and one healer. Mixed teams benefit significantly from Nod-Krai Resonance bonuses.
Is the Nod-Krai Compass worth the investment?
The High-Tier version displays all collectibles simultaneously across the entire region. It eliminates the need for external maps and cuts farming time dramatically—absolutely worth it.
What’s the most efficient boss farming strategy?
The Knuckle Duckle → Radiant Moonfly route minimizes travel time. Pro tip: hit Duck minions with exactly 10 Electro-Charged reactions each during Knuckle Duckle Phase 2. Bring powerful healers for Radiant Moonfly’s debuff cleansing.
How exactly do Lunar Reactions work?
They’re new elemental interactions enhanced by the Nod-Krai Resonance system, providing up to 36% damage bonuses. Anemo and Dendro offer the highest scaling at 2.25% per 100 EM.
What should I prioritize when the region releases?
Complete Nasha Town quest chains first, establish waypoint networks early, and unlock Nod-Krai Compass upgrades ASAP. Follow the 14-day exploration plan for optimal pacing and resource efficiency.