

Moon-blessed characters from Nod-Krai unlock game-changing Lunar Reactions that can actually crit and deal massive damage. We're talking Ineffa, Flins, and Lauma here – characters that need specific team setups and builds to unleash their unique elemental mechanics from Version 6.0.
What's the Deal with Moon-blessed Status?
The Moon Wheel Revolution
Here's where things get interesting. Moon-blessed characters are exclusively from Nod-Krai, and they've completely ditched Visions for something called Moon Wheels. This isn't just cosmetic – it fundamentally changes how reactions work.
Think about it: standard Transformative Reactions have always been limited by Level and EM scaling. Boring, right? Lunar Reactions throw that rulebook out the window. They can crit. They incorporate stats from your entire party. One Moon-blessed character in your team automatically converts standard reactions into these souped-up Lunar variants.
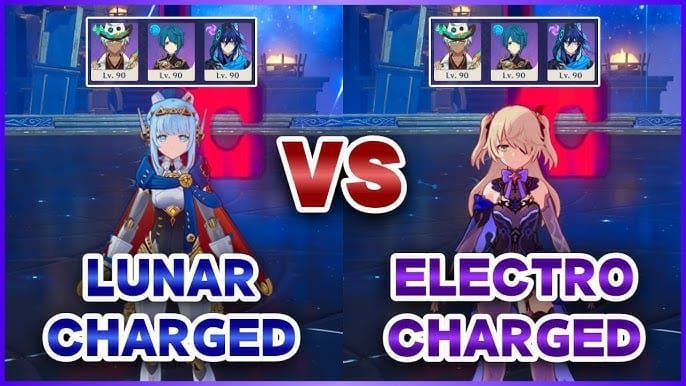
Ineffa or Flins? They'll turn your basic Electro-Charged into Lunar-Charged. Lauma transforms Bloom into Lunar-Bloom. Each character has passive talents tied directly to their Moon Wheels – it's like they're playing by completely different rules than traditional Vision holders.
The Lore That Actually Matters
Nod-Krai folks worship Kuutar through these Frostmoon Scions, channeling something called Kuuvahki – primordial lunar energy that predates our usual seven elements. The region connects to Teyvat's Three Moons: Aria, Sonnet, and Canon.
And here's a fun detail: former Fatui Harbinger Columbina gets revered as the Moon Maiden there. Makes you wonder about the connection between her powers and this lunar energy system, doesn't it?
The Native vs. Outsider Dynamic
Only Nod-Krai natives get Moon-blessed status. Period. But here's the clever part – non-Nod-Krai characters aren't useless. They provide damage bonuses to Lunar Reactions when using Skills or Bursts, stacking up to 36%:
Pyro, Electro, Cryo: +0.9% DMG per 100 ATK
Hydro: +0.6% DMG per 1000 Max HP
Geo: +1% DMG per 100 Defense
Anemo, Dendro: +2.25% DMG per 100 EM
That Anemo/Dendro bonus is particularly spicy if you've got a well-built Kazuha or Nahida.
Your Moon-blessed Roster Breakdown
The Heavy Hitters
Ineffa (5★ Electro Polearm) kicked things off in Version 5.8 as our first Lunar-Charged character.
Her A1 passive Overclocking Circuit deals AoE Electro damage equal to 65% ATK – and yes, it's classified as Lunar-Charged damage. She also provides team-wide Lunar-Charged Base DMG increases of 0.7% per 100 ATK, capping at 14% when you hit 2000 ATK. That threshold isn't just a suggestion – it's crucial for maximizing her team contribution.
Flins (5★ Electro Polearm) serves as your veteran Lightkeeper and on-field Main DPS. His Ascendant Gleam Moonsign cranks up personal Lunar-Charged damage by 20%. The guy features Electro infusion and can spam his Elemental Burst through special Skill mechanics. Pretty straightforward DPS approach, but effective.
Lauma (5★ Dendro Catalyst) is where things get wild. This Moonchanter enables Lunar-Bloom reactions and can transform into a cervitaur (because why not?).
Her Moonsign system works like this: Nascent Gleam lets standard Bloom/Hyperbloom/Burgeon reactions CRIT with 15% CRIT Rate and 100% CRIT DMG. Ascendant Gleam bumps party Lunar-Bloom CRIT Rate by 10% and CRIT DMG by 20%.
Aino (4★ Hydro Claymore) – the free character from Nod-Krai's Archon Quest. Her Elemental Burst deploys devices for periodic Hydro damage. Essential for F2P Lunar Reaction teams, even if she feels a bit underpowered without proper support.
Understanding the Moonsign System
Each character brings unique Lunar mechanics through this Moonsign system. One Nod-Krai character activates Nascent Gleam, while two or more trigger Ascendant Gleam with enhanced party-wide benefits. It's designed to encourage diverse team compositions rather than mono-element stacking.
For players eyeing upcoming characters like Jahoda and Nefer, Genshin Impact Top Up services through BitTopup offer competitive pricing and fast delivery for Primogem acquisition.
How Lunar Reactions Actually Work
The Mechanics Behind the Magic
Lunar-Charged creates Thunderclouds above enemies that deal AoE Electro damage every 2 seconds.
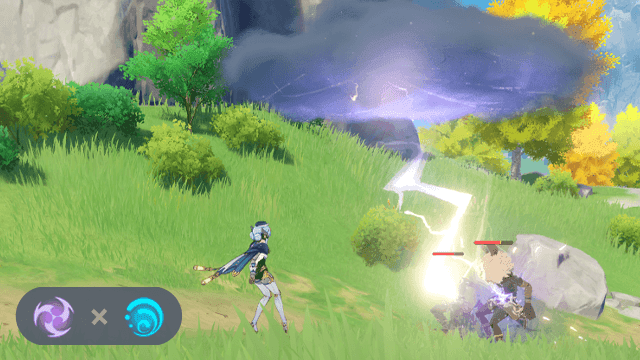
Here's the clever part: damage calculation sums potential damage from all your Electro/Hydro applicators. Your highest damage dealer contributes 100%, second-highest adds 50%, and third/fourth characters contribute roughly 8.3% each.
Lunar-Bloom generates Verdant Dew stacks when Lauma's present. Pair her with Nilou and you get Bountiful Lunar Cores that explode instantly with larger AoE coverage. Both reactions can critically hit using complex formulas that incorporate multiple party members' stats.
It's honestly refreshing to see reactions that reward team building rather than just individual character investment.
The Math That Matters
Lunar-Charged formula: Personal DMG = 1.8 × Level Multiplier × (1 + Base DMG Bonus) × (1 + Reaction DMG Bonus + EM Bonus) × (1 + Crit DMG) × Enemy RES Multiplier.
Key parameters you need to know:
Level Multiplier: ~1447 at Lv. 90
EM Bonus: ((6 × EM) / (EM + 2000)) × 100%
Ineffa's special attacks use 3x ATK multiplier instead of Level Multiplier
After running the numbers, 100 EM roughly equals 34 CRIT Value for damage contribution. Balanced builds with 300 EM and 300 CRIT Value expect around 9,000 damage per tick, while highly invested builds (1500 EM, 440 CV) can reach approximately 27,500 damage.
Lunar vs. Standard Reactions: The Real Difference
Why Crits Change Everything
Standard Electro-Charged at level 90 with 1000 EM deals 6,000-8,000 damage per tick. No crits, no scaling beyond EM and level. Lunar-Charged's multi-character stat incorporation and CRIT capability represents a massive power increase in optimized compositions.
Early EM investment provides substantial returns, but once you hit moderate amounts (around 300 EM), investing in CRIT stats yields higher percentage damage increases. This relationship completely changes how you approach artifact optimization.
Building Your Moon-blessed Characters Right
Artifact Sets That Actually Matter
Silken Moon's Serenade is Lauma's BiS, providing 20% ER (2pc) and teamwide EM buffs of 60 (Nascent) or 120 (Ascendant) plus Lunar Reaction damage bonuses (4pc). It's tailor-made for her kit.
Night of the Sky's Unveiling offers 80 EM (2pc) and CRIT Rate buffs for your on-field character: 15% (Nascent) or 30% (Ascendant) when nearby party members trigger Lunar Reactions. Great for DPS characters in Lunar teams.
4pc Gilded Dreams remains Ineffa's BiS for personal damage optimization.

Alternative builds can use 2pc combinations of ATK%/EM/ER% sets depending on your substats.
Stat Priorities That Work
Ineffa: ER (140-160% in double Electro) > CRIT Rate/DMG > ATK% ≥ EM. That 2000 ATK target for maximum passive buffs isn't negotiable if you want optimal team performance.
Lauma: CRIT Rate/DMG > EM > ER. Main stats should be EM Sands, EM Goblet, CRIT Circlet. Her C1 provides healing based on 500% EM, while C2 boosts Bloom damage scaling with EM.
Flins: Standard DPS optimization emphasizing CRIT stats and ATK% for on-field damage dealing. Nothing revolutionary here.
Weapon Selection Strategy
Signature weapons provide substantial advantages: Fractured Halo (Ineffa), Bloodsoaked Ruins (Flins – increases Lunar-Charged DMG by 36-84% after Burst), Nightweaver's Looking Glass (Lauma – increases Bloom DMG by 120-240%).
Alternatives include Staff of Scarlet Sands or Deathmatch for Ineffa, other 5★ EM catalysts or 4★ Blackmarrow Lantern for Lauma. The damage difference is noticeable, but not game-breaking if you're working with what you have.
Team Building for Maximum Impact
The Golden Composition Formula
Optimal setup: two Nod-Krai characters plus two non-Nod-Krai characters. This activates Ascendant Gleam while allowing maximum 36% damage bonus from non-Nod-Krai passives.
Example team that works beautifully: Flins, Aino, Furina (30,000 HP), Raiden Shogun (2000 ATK). You get 18% boost from Furina plus 18% from Raiden, hitting the damage cap while maintaining strong elemental application.
For Lunar-Bloom teams: Lauma plus Nilou for Bountiful Lunar Cores, Aino for Hydro application, and a flex slot for additional Dendro or support.
Support Synergies Worth Considering
Hydro characters like Furina and Yelan provide substantial HP-based bonuses. Anemo/Dendro characters offer the highest bonus potential at 2.25% per 100 EM – making Kazuha and Nahida excellent choices with sufficient EM investment.
Energy management becomes crucial due to the Burst-dependent nature of these teams. Pair with energy generators or ER buffers for consistent rotation uptime.
For team optimization resources, Buy Genesis Crystals through BitTopup's secure platform ensures competitive pricing and reliable delivery.
Advanced Strategies for Lunar Mastery
Rotation Timing That Matters
Start with support abilities to establish damage bonuses, then activate Moon-blessed kits before applying elements. Thundercloud's 2-second intervals allow strategic positioning during damage windows – use this timing to your advantage.
Lunar-Bloom rotations focus on Verdant Dew generation and consumption timing. Build stacks through consistent Dendro-Hydro reactions, then consume during damage amplification windows for maximum impact.
Energy Management Solutions
Ineffa needs 140-160% ER in double Electro teams. Bloodsoaked Ruins provides 12-16 Energy restoration after triggering Lunar-Charged for Flins. Optimal funneling uses non-Nod-Krai particle generation while maintaining damage bonus contributions.
The key is balancing energy needs with damage optimization – don't sacrifice too much offensive potential for energy comfort.
Endgame Performance Analysis
Spiral Abyss Viability
Lunar teams excel in Abyss due to high damage scaling and AoE capabilities. The multi-target nature of reactions shines in chambers with multiple enemies, while single-target damage remains competitive through optimized builds.
Current Abyss rotations favor elemental reaction damage, making Lunar teams particularly effective. Adapt compositions to enemy types: Electro-resistant enemies favor Lunar-Bloom, while Dendro-resistant content benefits from Lunar-Charged.
Domain and Boss Applications
Artifact domains benefit from consistent AoE damage, reducing clear times significantly. Weekly bosses showcase the scaling potential against high-HP targets through sustained Thundercloud and Lunar-Bloom damage.
The multi-character damage contribution allows consistent output during repositioning or boss mechanics – a real advantage over single-character focused teams.
Common Pitfalls to Avoid
Build Optimization Mistakes
The most common error? Prioritizing EM over CRIT stats. Balanced builds with moderate EM (around 300) and high CRIT investment typically outperform pure EM builds by a significant margin.
Don't ignore Ineffa's 2000 ATK threshold. It's crucial for team-wide damage contribution through her Moonsign Benediction passive. Falling short significantly reduces her effectiveness.
Use the specialized Version 6.0 Lunar Reaction artifacts instead of generic reaction sets. The character-specific bonuses are substantial.
Team Composition Errors
Avoid forcing multiple Nod-Krai characters without considering synergy. While Ascendant Gleam provides buffs, some characters like Aino may feel underpowered without proper team support.
Balance elemental application to maintain consistent reaction triggers. Energy management requires careful ER investment and funneling strategies for Burst-dependent characters.
For optimization difficulties, Genshin Top Up Online through BitTopup provides resources for character constellations and weapon refinements that can significantly improve team performance.
Your Burning Questions Answered
Which characters can access Lunar Reactions? Only Moon-blessed characters from Nod-Krai: Ineffa (5★ Electro Polearm), Flins (5★ Electro Polearm), Lauma (5★ Dendro Catalyst), and Aino (4★ Hydro Claymore). At least one must be present to convert standard reactions into Lunar variants.
How do Lunar Reactions differ from standard reactions? They can critically hit using complex damage calculations from multiple party members – completely unlike standard Transformative Reactions. Lunar-Charged creates AoE Thunderclouds every 2 seconds, while Lunar-Bloom generates Verdant Dew stacks with weighted damage contributions from all participating characters.
What's this Moonsign system about? It provides buffs based on your Nod-Krai character count: Nascent Gleam (1 character) offers basic effects, Ascendant Gleam (2+ characters) provides enhanced buffs. Both effects stack with multiple Moon-blessed characters, encouraging diverse team compositions.
What builds work best for Moon-blessed characters? Ineffa needs that 2000 ATK target, prioritizing ER > CRIT > ATK% ≥ EM with 4pc Gilded Dreams. Lauma wants CRIT > EM > ER using Silken Moon's Serenade artifacts. Flins follows standard DPS optimization with CRIT/ATK focus. Signature weapons provide substantial advantages over alternatives.
How do non-Nod-Krai characters contribute? They provide damage bonuses up to 36% when using Skills/Bursts, scaling by element: Pyro/Electro/Cryo (+0.9% per 100 ATK), Hydro (+0.6% per 1000 HP), Geo (+1% per 100 DEF), Anemo/Dendro (+2.25% per 100 EM).
What maximizes Lunar Reaction damage? Two Nod-Krai plus two non-Nod-Krai characters activates Ascendant Gleam while maximizing damage bonuses. Examples: Flins/Aino with Furina/Raiden for Lunar-Charged, or Lauma/Aino with Nilou/Nahida for Lunar-Bloom. Balance application and energy management for optimal results.