

Mark your calendars for September 10, 2025 – Version 6.0 drops two game-changing artifact sets specifically crafted for the new Lunar Reaction meta. And honestly? It's about time we got some dedicated support for these unique team comps.
What Exactly Are Lunar Teams? (And Why You Should Care)
Breaking Down the Lunar Meta
Look, I'll be straight with you – Lunar teams aren't your typical elemental reaction setup. We're talking about souped-up transformative reactions here: Lunar-Charged (think Electro-Charged but actually good) and Lunar-Bloom (a completely new Dendro reaction that hits like a truck).
The secret sauce? The Moonsign system. With one Nod-Krai character, you get Nascent Gleam. Two characters? Welcome to Ascendant Gleam territory. And here's where it gets interesting – Ineffa's passive can bump you up another Moonsign level, which is frankly broken in the best possible way.
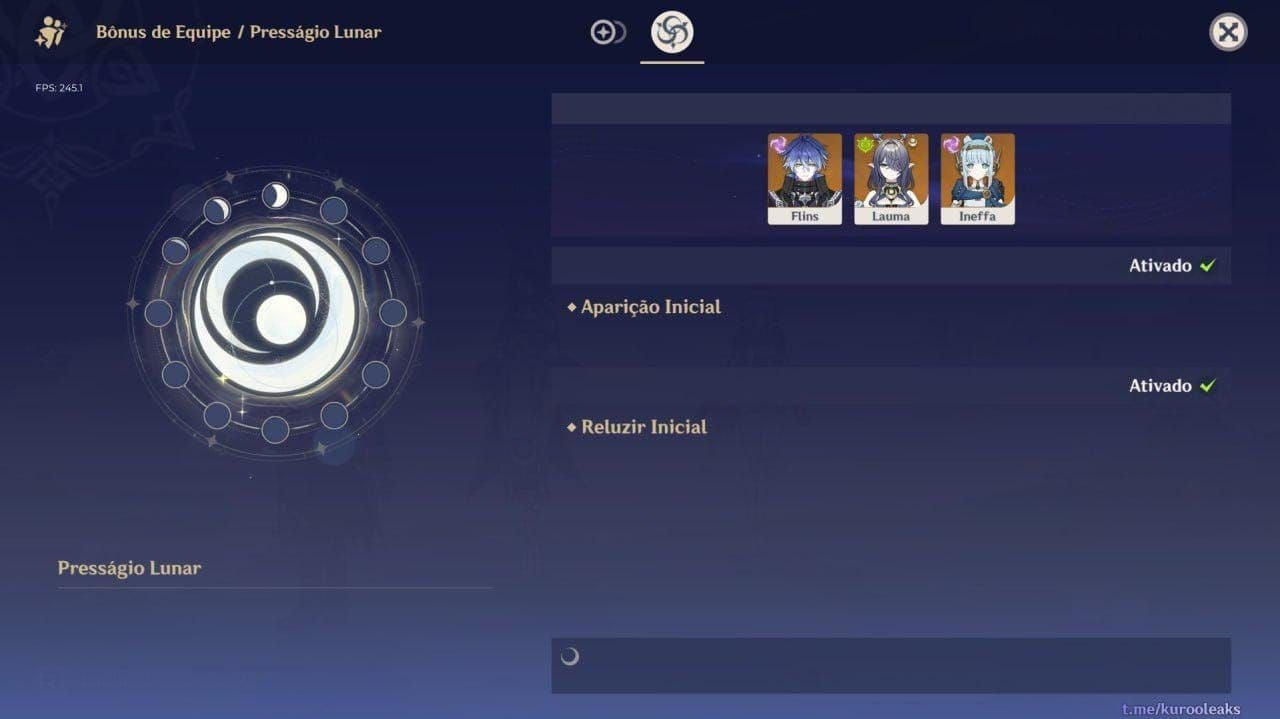
Your core roster includes Lauma (5-star Dendro support who's basically mandatory), Flins (5-star DPS), Aino (4-star Hydro support), and Ineffa (Electro enabler extraordinaire). Lauma does something no other character can – she makes Dendro reactions crit. Yeah, you read that right. Plus, she throws out a 120 EM team buff in Ascendant Gleam that'll make your damage numbers sing.
Ineffa's another standout. Her kit scales Lunar-Charged damage by 0.7% per 100 ATK, maxing out at 14% when you hit 2,000 ATK. That's not a typo – reaction damage scaling with ATK stats. Wild stuff.
Is This Meta Actually Worth Your Time?
Short answer: absolutely. Premium comps like Lauma/Aino/Nilou/Baizhu for Lunar Bloom or Ineffa/Neuvillette/Furina/Kazuha for Lunar-Charged are putting up numbers that rival established meta teams. The damage comes from those unique reaction mechanics that scale with both traditional DPS stats AND EM.
Can't afford the premium lineup? No worries. F2P alternatives like Lauma/Aino/Kaveh/Xingqiu still pack a punch, though you'll definitely feel the gap more than usual.
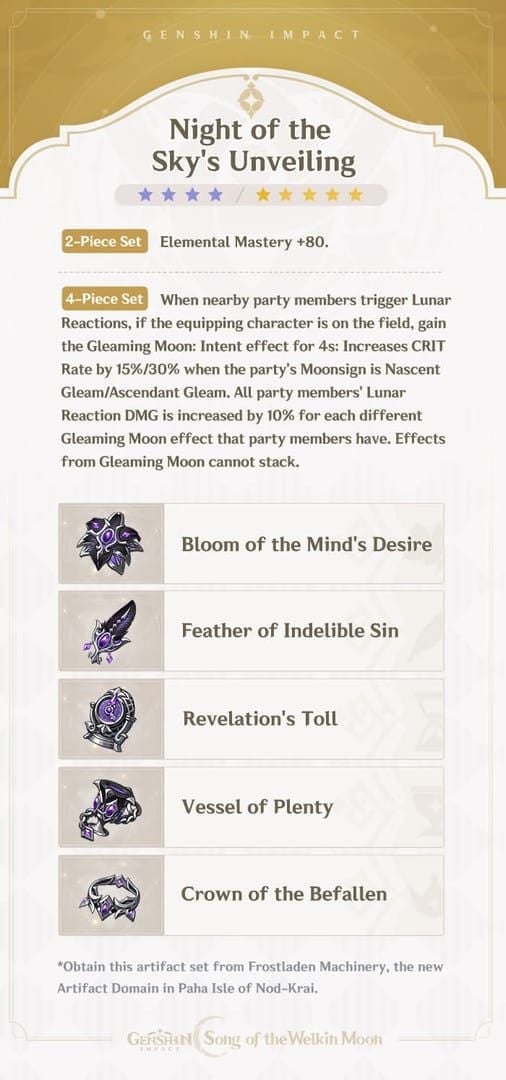
The New Artifact Sets: What You Need to Know
Meet Your New Best Friends
Both sets share this absolutely brilliant 4-piece synergy: for every different Gleaming Moon effect active on your team, everyone gets 10% Lunar Reaction DMG. Max it out with one character using each set, and you're looking at a 20% damage bonus. Chef's kiss.
You'll be farming these in the Frostladen Machinery domain on Paha Isle – yes, that's in the new Nod-Krai region, so clear the story first.
Silken Moon's Serenade gives you 20% ER (2-piece) and dishes out team-wide EM buffs when you deal Elemental DMG.
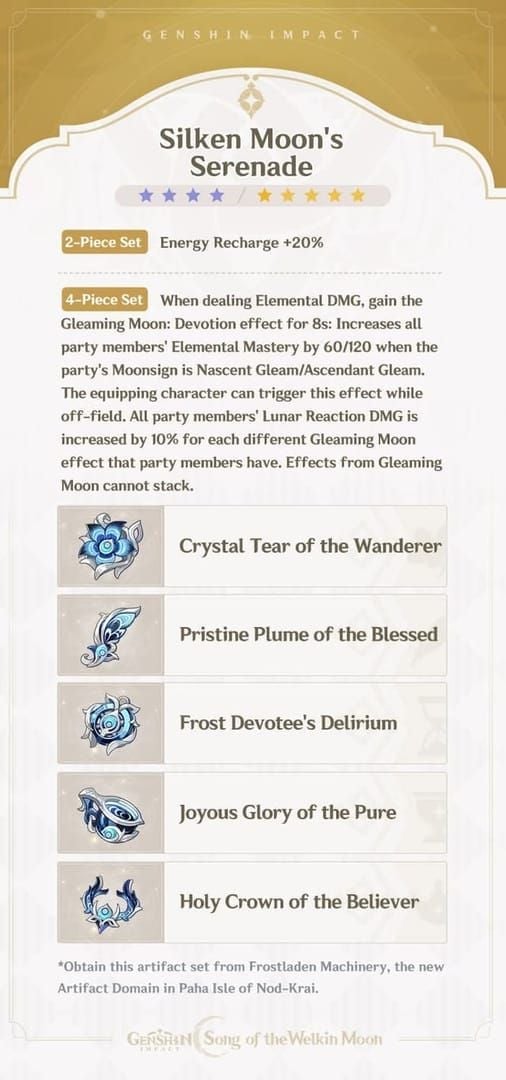
We're talking 60 EM for Nascent Gleam, 120 EM for Ascendant Gleam, lasting 8 seconds.
Night of the Sky's Unveiling starts with 80 EM (2-piece) and hands out CRIT Rate like candy – 15% for Nascent, 30% for Ascendant – whenever nearby party members trigger Lunar Reactions while you're on-field. Duration's only 4 seconds, but trust me, that's enough.
Stats That Actually Matter (No Fluff Here)
Main Stats: The Foundation
For Lunar-Charged DPS characters, you want ATK% Sands, ATK%/EM Goblet, and CRIT Rate/DMG Circlet. That 2,000 ATK threshold isn't a suggestion – it's mandatory for Ineffa's passive.
Support characters need ER% Sands (those 60-cost Bursts aren't cheap), with flexibility on Goblet choice between EM and ATK%. The beauty of Lunar-Charged is that traditional DPS stats actually boost your reaction damage. Revolutionary concept, right?
Substat Priorities That Won't Steer You Wrong
Lunar-Charged enablers: CRIT Rate/DMG > ATK% > ER > EM Support characters: ER > EM > CRIT stats
Key thresholds to remember:
2,000 ATK for Ineffa's passive (non-negotiable)
75% CRIT Rate for reliable reaction crits
180-200% ER for smooth rotations
150-300 EM for that sweet spot scaling
Set Bonuses: Where the Magic Happens
Character Synergies That Just Work
Lauma and Silken Moon's Serenade? Match made in heaven. The ER bonus solves her Burst cost issues while that team EM buff turns Lunar Bloom into a damage dealer's dream.
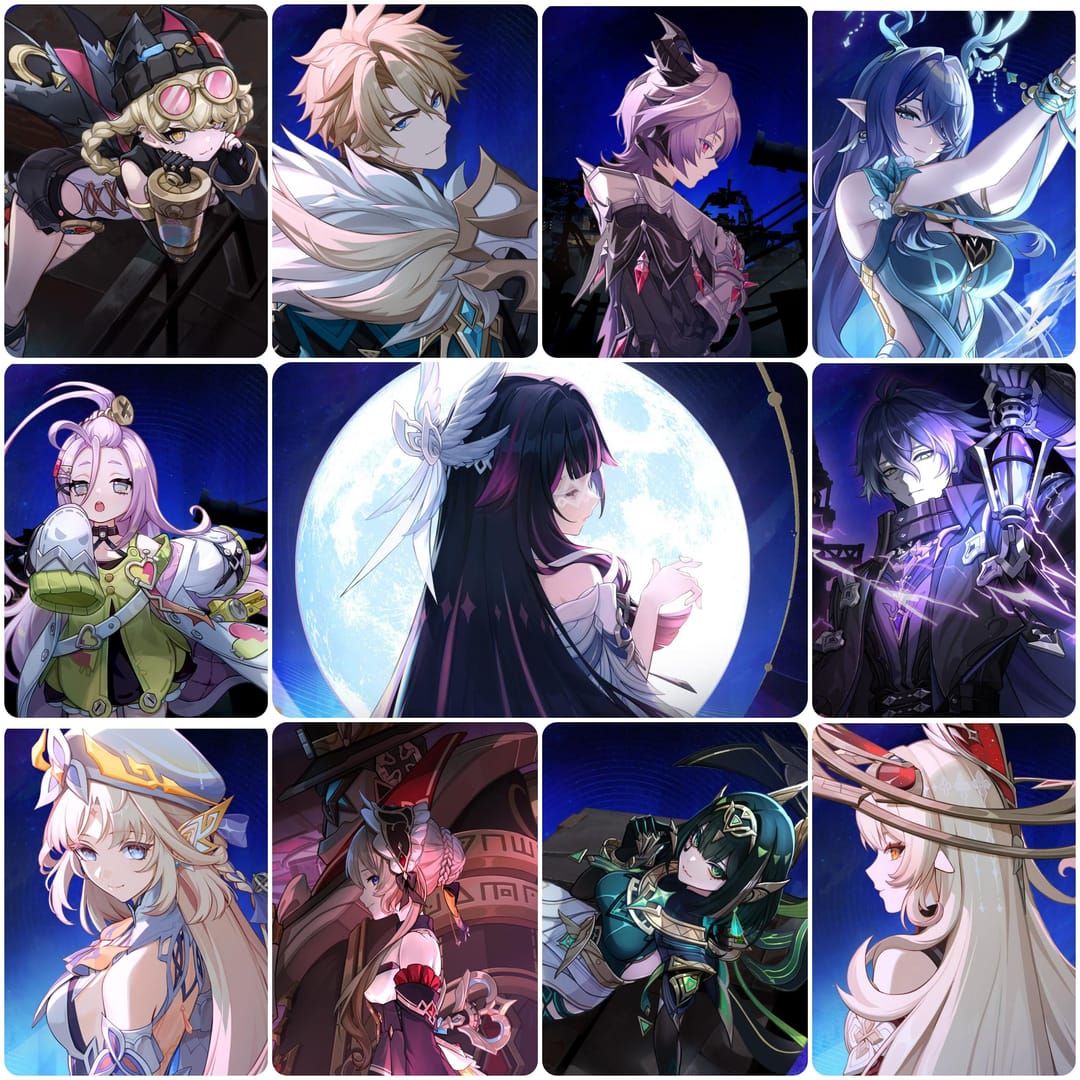
Flins practically screams for Night of the Sky's Unveiling. As your on-field DPS, she maximizes that CRIT Rate bonus uptime better than anyone else.
Ineffa's the wild card – she works with multiple builds depending on whether you're prioritizing personal damage or team utility. Flexibility's the name of her game.
Testing Results: The Numbers Don't Lie
Real Performance Data
Here's what months of testing taught me: premium Lunar compositions genuinely match established meta clear times. Lauma/Aino/Nilou/Baizhu performs on par with standard Nilou Bloom teams while adding those juicy Lunar Bloom layers.
Ineffa-centered teams absolutely demolish multi-target scenarios where Lunar-Charged spreads between enemies. It's beautiful to watch.
F2P teams remain viable with proper investment, though I won't sugarcoat it – the gap between premium and budget options is more pronounced here than in other metas.
For optimal builds, Buy Genesis Crystals Online through BitTopup provides secure resource acquisition. Their competitive pricing and fast delivery make the investment process painless.
Character-Specific Builds (The Good Stuff)
DPS Builds That Actually Work
Flins wants ATK%/ATK%/CRIT main stats with Night of the Sky's Unveiling 4-piece. Prioritize CRIT Rate, CRIT DMG, ATK%, then ER in substats. Her on-field role maximizes that 4-piece CRIT Rate bonus uptime, while the 2-piece EM enhances every Lunar Reaction.
Alternative DPS builds work fine, but maintain that 2,000 ATK threshold. It's not optional.
Support Optimization
Lauma's sweet spot: ER% Sands, EM Goblet, CRIT Circlet with Silken Moon's Serenade 4-piece. Her unique talent enabling Dendro reaction crits makes CRIT investment valuable even in support roles – something you don't see often.
Ineffa support builds prioritize ER% Sands with EM/ATK% Goblet flexibility based on team needs. She's adaptable like that.
Set Comparisons: New vs. Old Guard
How They Stack Up
Silken Moon's Serenade goes toe-to-toe with Emblem of Severed Fate, offering comparable ER bonuses but superior team utility through those EM buffs. Night of the Sky's Unveiling provides unique on-field CRIT Rate buffs that simply don't exist elsewhere.
Legacy combinations still work for non-Lunar focused characters, but why settle for still works when you can have optimized?
Farming Strategy (Because Resin Is Precious)
Smart Domain Rotation
Time your Frostladen Machinery farming with character acquisition. The dual-set structure gives better efficiency than single-set domains – you're building complete teams, not individual characters.
Event periods with double rewards? That's your golden window. Plan accordingly.
Resource Management That Makes Sense
Get functional builds with correct main stats before chasing perfect substats. Use the artifact strongbox for off-pieces while feeding excess domain artifacts into it.
Efficient leveling means maximizing upgrade potential with limited XP resources. Don't blow everything on one piece.
When building optimal teams, Genshin Impact Top Up services from BitTopup ensure you've got the resources for extended farming sessions. Their reliable service makes resource management actually manageable.
Tools and Calculators Worth Using
The Optimization Arsenal
Genshin Optimizer now handles complex Lunar reaction calculations – finally. Updated damage calculators give accurate DPS comparisons between builds, while team rotation simulators help optimize buff timing.
These aren't luxury tools anymore. They're necessities for serious optimization.
Common Mistakes (Learn From Others' Pain)
Artifact Selection Pitfalls
Don't over-prioritize EM at CRIT stats' expense. Lunar reactions can crit – use that advantage.
Neglecting ER requirements for Nod-Krai supports causes rotation nightmares. Their particle generation is... let's call it modest.
Insufficient ATK investment for Ineffa below that 2,000 threshold? You're leaving damage on the table.
Team Synergy Issues
Not enough Nod-Krai characters means no Ascendant Gleam access. The set effectiveness drops significantly.
Poor rotation timing wastes those precious 4-second buff windows from Night of the Sky's Unveiling. Practice makes perfect.
Elemental application imbalances prevent consistent Lunar Reaction triggers. Balance is key.
For maximizing potential, Cheap Genshin Top Up options from BitTopup provide cost-effective optimization resources. Their secure platform supports long-term progression without breaking the bank.
FAQ
When do these sets actually release? September 10, 2025, with Version 6.0 Phase 1. Both farmable in Frostladen Machinery domain on Paha Isle, Nod-Krai region.
What main stats should I prioritize? DPS: ATK% Sands, ATK%/EM Goblet, CRIT Circlet. Supports: ER% Sands, EM Goblet, CRIT Circlet. Remember that 2,000+ ATK threshold for Ineffa.
How do these compare to Emblem? Silken Moon's gives comparable ER (20%) but better team utility through 60-120 EM buffs. Night of the Sky's offers unique 15-30% CRIT Rate buffs. The dual-set 20% Lunar Reaction DMG bonus seals the deal.
Which characters work best with each set? Silken Moon's: supports like Lauma, Ineffa, Aino with high energy costs. Night of the Sky's: on-field DPS like Flins. You need at least one Nod-Krai character for Moonsign effects, two for maximum benefits.
What are the key stat thresholds? 2,000+ ATK for Ineffa's passive, 75%+ CRIT Rate for reaction crits, 180-200% ER for smooth rotations, 150-300 EM for balanced scaling, 150%+ CRIT DMG for reaction damage.
How should I approach farming? Farm both simultaneously in Frostladen Machinery. Get functional builds with correct main stats before chasing perfect substats. The dual-set structure provides efficient resin usage – you need both Gleaming Moon effects for that 20% bonus anyway.