

The Short Version: Lempo Isle's got 20 Luxurious Chests scattered across seven distinct areas. Best hunting route? Start at Nasha Town, then hit Nothing Passage → Blue Amber Lake → Starsand Shoal → Clink-Clank Krumkake Craftshop. Budget 8-12 hours and make sure you're AR 35+.
Getting Your Bearings on Lempo Isle
What You Need to Know Before You Start
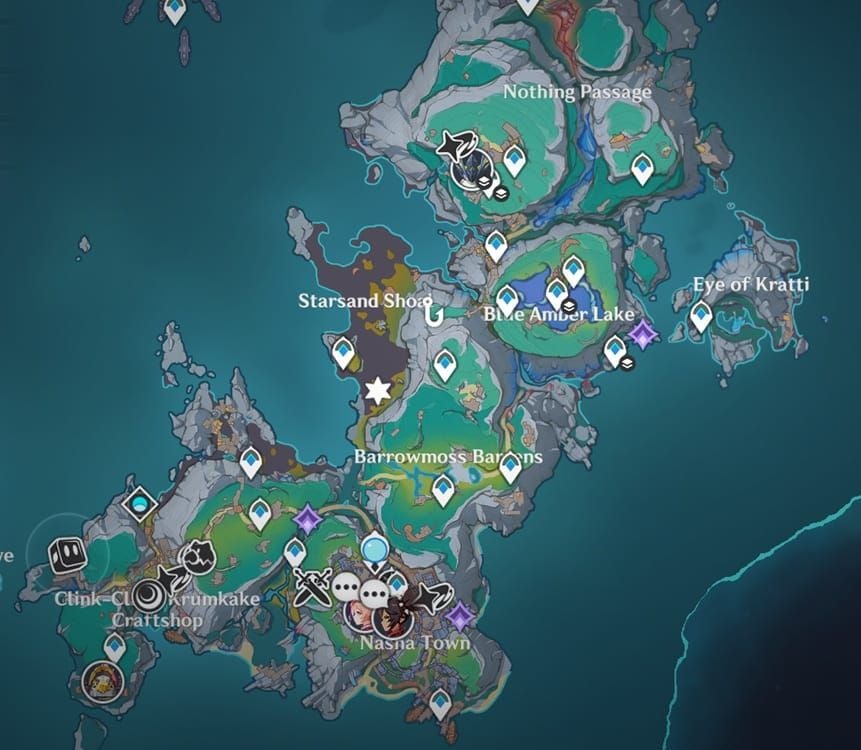
Lempo Isle drops with Version 6.0 'Luna I' on September 10, 2025. You'll need to clear Archon Quest Prologue Act 3 first—no shortcuts here. The treasure's spread across seven zones, each packing 2-4 Luxurious Chests: Nothing Passage, Eye of Kratti, Blue Amber Lake, Starsand Shoal, Barrowmoss Barrens, Clink-Clank Krumkake Craftshop, and Nasha Town.
Here's where things get interesting. Kuuvahki energy gives you this 'Empowered' status that lasts 30-45 seconds. We're talking 40% less climbing stamina, triple jump height in Unipolar Fields, and access to those tricky Moonsign puzzles.
For players looking to optimize their exploration teams, genshin impact top up through BitTopup offers competitive pricing and instant delivery—handy when you need those character constellations or weapon refinements for the tougher encounters ahead.
Team Building That Actually Works
Your Dream Team Setup:
Electro Character: Extends Empowered duration by 15 seconds (trust me, you'll need it)
Anemo Character: Boosts jump height by 25% (making it 3.75x total—pretty wild)
Hydro Character: Creates those crucial 20-second energy bridges
Nod-Krai Native: Aino, Lauma, or Flins for Moonsign puzzle access
The Luna Treasure Compass has three levels. Level 1 finds basic treasures, Level 2 adds Oculi plus 10 collectibles, and Level 5 reveals everything. You'll need at least 30 Luna Sigils and 10% exploration per sub-region to get started.
Don't Leave Home Without These
Essential Supplies:
30 Luna Sigils for Meeting Points Level 1
Portable Bearings and Midsommar Berries (puzzle fuel)
20+ Sweet Madames (because healing items are life)
Electro-infused materials for energy extension
Set up shop in Nasha Town first. Hit the Adventurers' Guild for bounties, Voynich Guild for Meeting Points, and Rossum Workshop for upgrades. Fair warning—you'll face the Knuckle Duckle boss and some nasty elite enemies, so come prepared for a fight.
The Master Route: All 20 Chest Locations Mapped
Your Treasure Hunting Game Plan
I've tested this clockwise spiral pattern starting from Nasha Town's northwestern exit. Minimal backtracking, maximum efficiency:
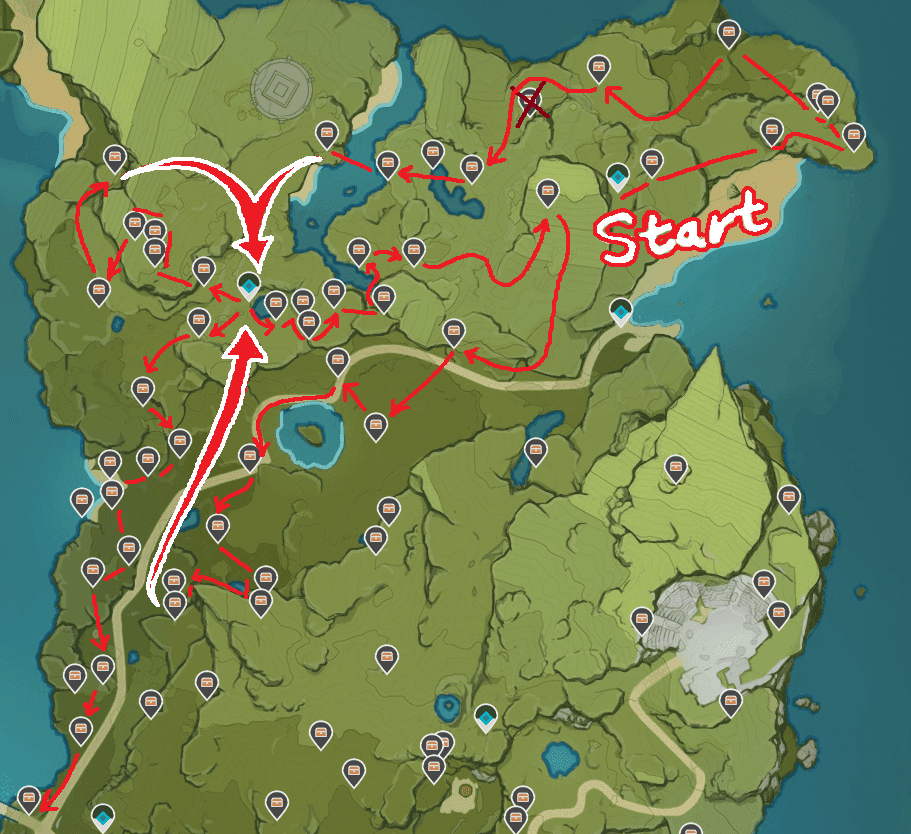
The Three-Phase Approach:
Northern Circuit (Chests 1-7, 2-4 hours): Nothing Passage → Eye of Kratti → Blue Amber Lake
Central Hub (Chests 8-14, 3-5 hours): Blue Amber Lake complex → Starsand Shoal → Barrowmoss Barrens
Southern Sweep (Chests 15-20, 3-4 hours): Clink-Clank Krumkake → Nasha Town periphery
Key Waypoints (using Nasha Town as your 0,0 reference):
Nothing Passage Entry: (-150, +200)
Blue Amber Lake Center: (+100, +150)
Starsand Shoal: (+250, +50)
Clink-Clank Workshop: (+200, -100)
Borderland Shrines: (+125, +75) and (+180, -120)
Northern Territory: Chests 1-7
The Coastal Cave Network
Chests 1-2: Nothing Passage Caverns (-140, +190)
First chest involves a Kuuvahki polarity puzzle—you'll need to activate three energy nodes in sequence while Empowered. Remember: opposite colors attract, same colors repel. The second chest requires applying Hydro to create a 20-second energy bridge. You've got to traverse it while Empowered, so time it right.
Loot includes Nocturnal Blossoms and Portable Bearings.
Chest 3: Elevated Sentry Post (-120, +210)
This one's all about the Energy Jump Chain through three Unipolar Fields. Pro tip: apply Anemo mid-jump for that 25% height bonus to reach the platform.
Platform Puzzles That'll Test Your Patience
Chests 4-5: Eye of Kratti Towers (-80, +160)
Left tower features a rotating platform puzzle with Electro activation—time your jumps with the rotation. Right tower? Defeat the Cryo Slimes, apply Pyro to the Frostlamp Flower, then survive 30 seconds of enemy waves before the chest appears.
Going Deep: Underwater Chambers
Chests 6-7: Blue Amber Lake Depths (+90, +140)
Four-step sequence that'll make you sweat: 1) Trigger the northern shore Kuuvahki source, 2) Traverse platforms clockwise with those brutal 10-second Electro timers, 3) Enter the underwater chamber while Empowered, 4) Coordinate simultaneous three-node activation.
Your rewards? Ancient Runes, Crystallized Moonbeams, Stellafruit, and Crystal Cores. Worth the effort.
Central Island Treasure Hunt: Chests 8-14
The Main Event
Chests 8-9: Blue Amber Lake Central Island (+100, +150)
You'll need to start the 'Tale Telling Heart' quest first. The flower opens with Dendro (outer), Hydro (middle), Electro (core). Chest 8 involves a memory sequence puzzle with elemental pattern replication. Chest 9? Face off against the Radiant Moonfly mini-boss—spend 40 Original Resin for bonus rewards.
Chests 10-11: Starsand Shoal Beach (+240, +60)
Chest 10 is all about tidal timing—hit those pressure plates during water recession. For Chest 11, collect five Lakkaberries and arrange them by the nighttime constellation pattern at the shrine.
Monument Madness
Chests 12-13: Barrowmoss Barrens (+180, +20)
Seven-monument sequence within 90 seconds: Pyro → Hydro → Electro → Dendro → Anemo → Cryo → Geo. Chest 12 appears after the first four, Chest 13 after you nail the complete sequence. Contains Rainbowdrop Crystals for your Nod-Krai characters.
Chest 14: Guardian Arena (+160, +10)
Three brutal combat phases: 8 Hilichurls plus 2 Mitachurls (you've got 3 minutes), a Ruin Guard while Empowered, then pressure plates with respawning enemies. Rewards include a Crown of Insight and serious Adventure EXP.
Southern Territory: The Final Push (Chests 15-20)
Cliff-side Challenges
Chests 15-16: Clink-Clank Overlooks (+190, -90)
Chest 15 demands vertical climbing with that Empowered stamina reduction—position your energy sources strategically. Chest 16 requires Kuuhenki transformation, then glide along the Moonlane energy trail to an isolated spire.
Underground Complexes
Chests 17-18: Workshop Basement (+200, -100)
You'll need to complete 'Stress of Changing Careers' quest and grab Aino's workshop key. Steam pressure redirection puzzles await: Chest 17 in the eastern wing (power restoration), Chest 18 in the central chamber (gear alignment). Use Electro for mechanisms, Cryo for pipe stabilization.
The Final Boss Rush
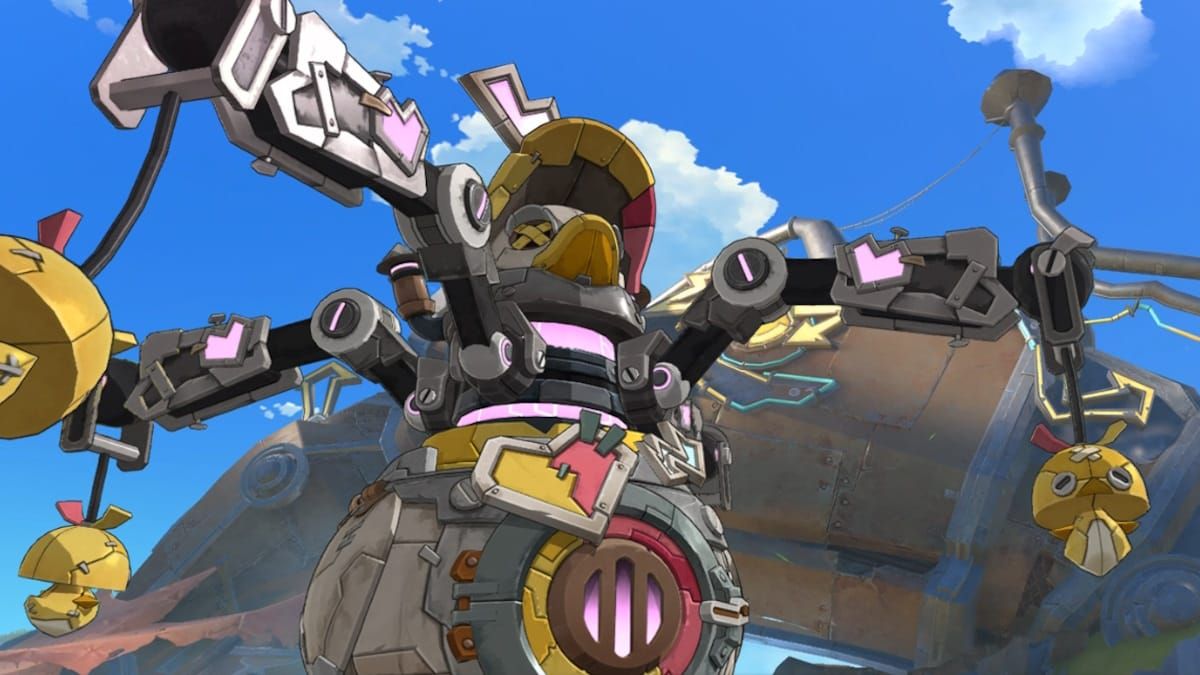
Chests 19-20: Knuckle Duckle Arena (+210, -110)
Chest 19: Defeat Knuckle Duckle within 5 minutes. Chest 20 gets complex—damage the boss to 50% in 2 minutes, activate Kuuvahki nodes during combat, then finish the fight while maintaining node activation.
Mastering the Mechanics
Elemental Interactions You Need to Know
Kuuvahki Synergies:
Electro: +15 seconds Empowered duration
Hydro: 20-second energy bridges
Cryo: Platform stabilization, 25% slower mechanisms
Anemo: +25% jump height bonus
Advanced Moves: Energy Jump Chains for massive gaps, Glide-to-Transform mid-air transitions, Moonlane Acceleration (40-60% faster travel).
Boss Fight Strategies
Knuckle Duckle: Target those exposed gears during charges. It's vulnerable after 90 seconds of overheating—use workshop machinery for bonus damage.
Radiant Moonfly: Kuuhenki transformation for aerial pursuit, rotate Pyro/Hydro/Electro for shield breaking, maintain consistent DoT to prevent regeneration.
For players serious about optimizing their treasure hunting efficiency, consider buy genesis crystals from BitTopup's secure platform with competitive rates, instant delivery, and comprehensive payment options.
Speed Running and Optimization
The Express Route
Priority Path: Nasha Town periphery (2 chests, 30 min) → Starsand Shoal surface (3 chests, 45 min) → Nothing Passage caves (2 chests, 40 min) = 7 chests in 2 hours.
Resource Management: Stock up on 20+ Sweet Madames, Electro materials for duration extension, and pre-farm those Portable Bearings and Midsommar Berries.
Co-op Advantages
Simultaneous puzzle activation cuts completion time by 30-50%. That Blue Amber Lake underwater chamber? Definitely needs three-player coordination. Distribute elemental coverage and coordinate Kuuvahki energy source usage.
Daily Routine Integration
Combine with boss encounters (Knuckle Duckle, Radiant Moonfly), align with commission routes, and schedule during weekly boss resets for maximum resource efficiency.
What You're Actually Getting
The Numbers Game
Per Chest: 10-40 Primogems (averaging 25), 3-5 Hero's Wit, 30,000-50,000 Mora, 2-4 Mystic Enhancement Ore, plus regional specialties.
Full Collection: 400-800 Primogems, 31,000-45,000 Adventure EXP (that's 1.5-2 AR levels below AR 45), 40-60% Meeting Points progress.
Rare Drops: Ancient Runes (5-8), Crystallized Moonbeams (3-6), Precision Kuuvahki Stamping Dies, Crown of Insight (from Chest 14).
When Things Go Wrong
Missing Chest Solutions
Invisible Chests: Double-check quest completion—chests 8, 9, 17, 18 need specific world quests finished. Your Luna Treasure Compass will help with detection.
Empowered Status Problems: Find nearby Kuuvahki sources, use Electro for duration extension.
Prerequisites: 'Tale Telling Heart' (Blue Amber Lake), 'Stress of Changing Careers' (workshop basement), Nod-Krai native for Moonsign Chests.
Your Burning Questions Answered
How many Luxurious Chests are we talking about here? 20 confirmed across seven sub-regions, plus 2 more in Borderland Shrines that need special keys from Statue upgrades.
What's the minimum time investment? Experienced players with optimized routes can do it in 6-8 hours. First-timers? Budget 10-12 hours including the learning curve.
Do these chests respawn? Nope. Some might seem to respawn if you didn't meet the unlock conditions initially.
Best exploration team? Lauma (resource detection, mobility), Flins (enemy detection), Aino (Moonsign access), plus any Electro character for Kuuvahki duration.
Any time-gated content? Chest 11 requires 24-hour tidal cycles. Knuckle Duckle chests reset weekly with the boss but don't respawn after collection.
Luna Treasure Compass acting up? Check your Meeting Points progression: Level 1 (basic), Level 2 (Oculi + 10 items), Level 5 (all collectibles). Upgrade using Luna Sigils and exploration percentage.