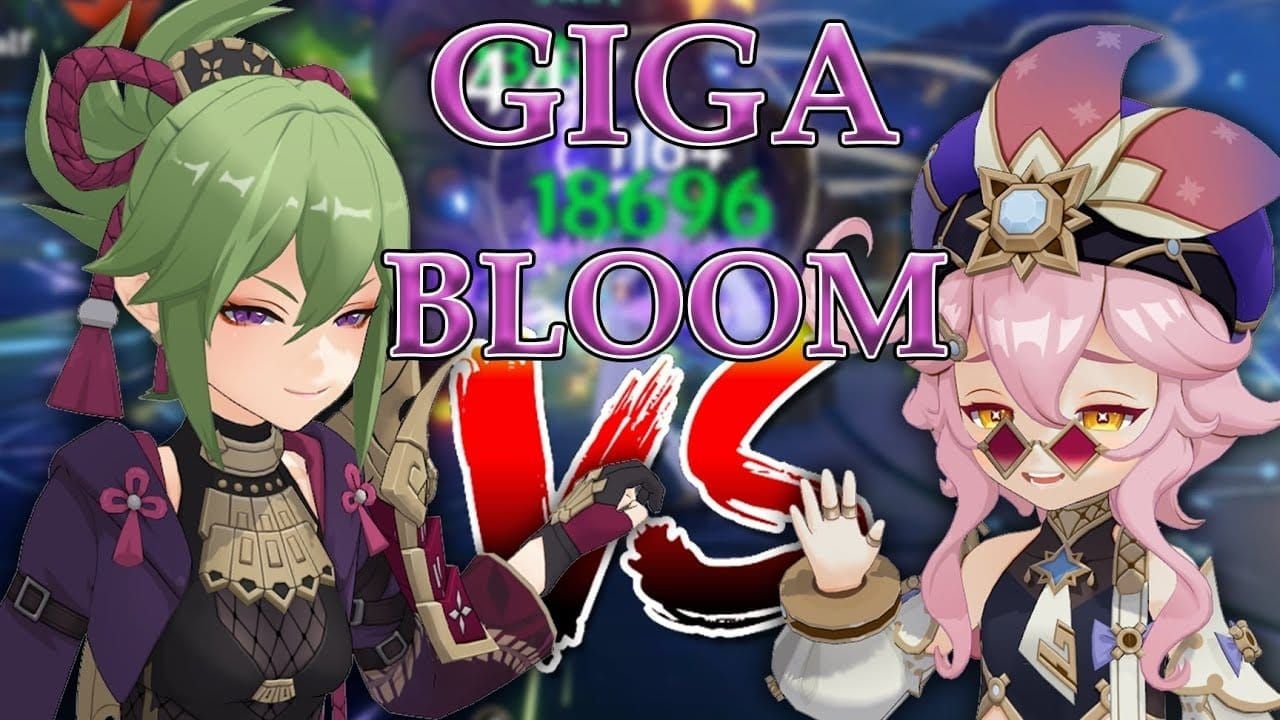
Quick Take: In the thick of Genshin's Dendro shake-up, Kuki Shinobu edges out Dori as the go-to low-investment 4-star Electro support for Aggravate and Hyperbloom setups. She dishes out reliable off-field Electro every 1.5 seconds, chasing that 1000+ EM sweet spot for procs hitting 30k or more. Dori, on the other hand, pumps out a solid 15 Energy total per Burst to keep ER-hungry teams humming—but only if you crank her ER to 200% or higher. Both cost about 420k Mora to ascend fully, and for F2P players, Kuki's straight-up S-tier in Hyperbloom squads.
Dori vs. Kuki Shinobu: A Snappy Side-by-Side
Stats Breakdown at a Glance
Picture this: At level 90, Kuki Shinobu rocks 12,289 HP, 212 ATK, 751 DEF, and a 24.0% HP% bonus. We build her toward 1000 EM for Hyperbloom nukes pushing 30k+ per proc. Dori? She's got 12,397 HP, 223 ATK, 723 DEF, and she thrives on 250% ER, with her 80-Energy Burst regenerating a total of 15 Energy. Kuki's Skill heals for 3.0% Max HP + 289 every 1.5 seconds over 12 seconds (hitting 100% uptime with C2). Dori's Burst counters with 6.7% Max HP + 642 every 2 seconds for the same duration. For Kuki, aim for 135-175% ER using a Favonius weapon; Dori demands 200%+ ER, best via Favonius Greatsword, netting those extra 15 Energy particles.
Where Each Shines Brightest
Kuki's your pick for steady AoE Electro application every 1.5 seconds, plus her A4 pumps +75% EM into her heals for killer Hyperbloom synergy—and she generates about 0.5 particles per second. Dori? She restores 2.5 Energy per Burst tick directly to whoever's on-field, making her a boon for Raiden-focused crews. In a Nahida-Yelan setup, Kuki amps reaction procs by 20-30%; swap to Tighnari-Raiden, and Dori delivers 15 Energy regen alongside debuff cleansing. I'd prioritize building Kuki first for Hyperbloom—grab Gilded Dreams artifacts—while leveling Dori's Burst to 10 with 4pc Noblesse Oblige if you're leaning into ER support. (Editor's note: Noblesse is a resin hog, but worth it for that team-wide Burst boost.)
Bottom Line Recs by Squad Type
Aggravate teams? Kuki's Skill keeps the Quicken aura humming, and her ring tags along with the active character for seamless triggers. Dori slots in better for single-target battery work with her tether. Community polls? 101 votes lean toward Kuki's all-around utility. Stick with Kuki as the default for Hyperbloom—she's S-tier according to GameWith's October 2025 rankings—at 1000 EM for 30k DMG procs. Only pull Dori if you're missing Kuki and need that cleanse on deck.
For full breakdowns on character setups, swing by our Complete Genshin Impact Character Build Guide Hub.
Decoding Healer-Battery Hybrids in Genshin
What Defines a Solid Healer-Battery?
Take Kuki: Her Skill chews through 30% of her HP to scale healing off Max HP and EM, while spitting out about 0.5 particles per second at a 45% chance per hit. Dori's Burst tethers for a total 15 Energy regen, and her A4 tacks on 5 Energy per 100% ER from her Skill (capping at 15). Both crave HP% pieces for that 24.0% bonus—stack 1000-1100 EM on Kuki with an R5 Iron Sting (165 EM), or push Dori to 250% ER using ER Sands and Favonius Greatsword. It's all about balancing sustain and juice in those Dendro reactions.
Why Electro Healers Rule the Dendro Scene
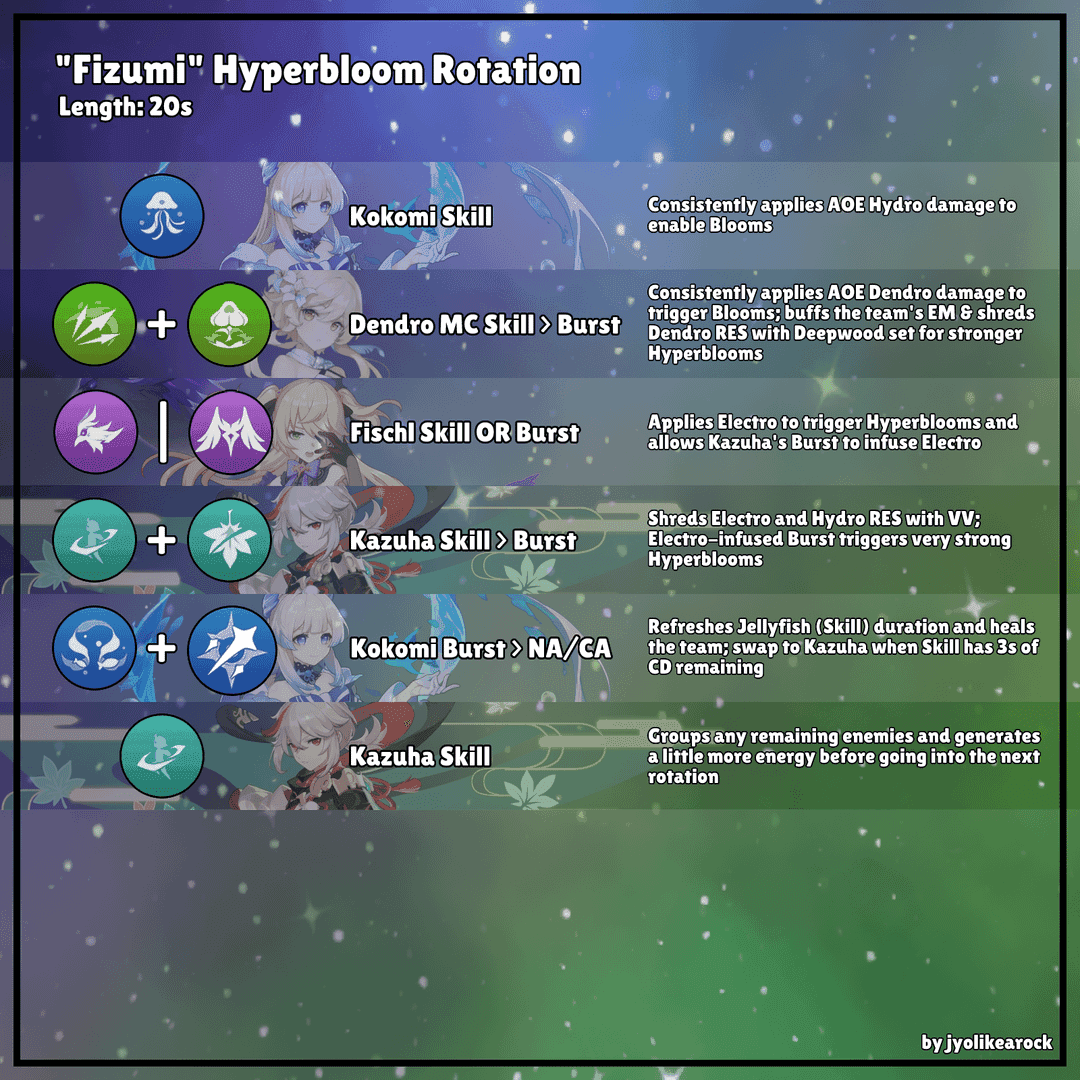
Ever wonder why Electro feels essential here? Kuki's 1.5-second Electro pulses fuel Aggravate (that 1.25x Electro DMG multiplier on Quicken) and Hyperbloom (pure EM-scaled chaos). She dropped on June 21, 2022, in Version 2.7. Dori followed on September 9, 2022, during Version 3.0 Phase 2, shining in about 20% of ER-specific teams like those with Cyno. Kuki pops up in 80% of Hyperbloom comps for her cheap healing. Farm up Vajrada Amethyst (1/9/9/6 split), and team her with Nahida to share EM—watch those Hyperbloom procs climb to 30k+ as you rotate Skill after Dendro or Hydro application.
Expectations Meet Gameplay
Kuki's A1 bumps healing by +15% when below 50% HP; C2 stretches her Skill to 15 seconds for full uptime against the 15-second cooldown. Dori's Burst slaps 16% Electro DMG every 0.4 seconds but guzzles 80 Energy. In Abyss runs, Kuki heals through her ring while triggering reactions—handle the HP drain with a Skill > Burst combo for a 3.5-second extension under 50% HP. For Dori, lean on A1 to shave Skill cooldown on reactions, especially at 300% ER for 15 Energy per Skill use. Reality check: These aren't full-time healers, but they keep your Dendro cores blooming without breaking the bank.
Breaking Down Dori: Hits and Misses
How Her Healing Stacks Up
Dori's Burst—80 Energy, 20-second cooldown—heals 6.7% Max HP + 642 every 2 seconds for 12 seconds (six ticks total), and it scrubs debuffs clean at her 12,397 HP base. In Hyperbloom, those 2-second gaps cap you at about 30k DMG with 1000 EM. Slap on an HP% Goblet and Healing Bonus Circlet; prioritize Burst to level 10, then Skill (147.3% DMG + two 31.6% tracking rounds on a 9-second cooldown). It's consistent, but that spacing? It leaves gaps in fast-paced fights.
Energy Pump Mechanics
She regenerates 15 Energy straight from her Burst (2.5 per tick) and snags particles for another 42.5 total (12.5 from A4, 15 from Skill, 15 from Favonius procs). C4 throws in a +30% ER buff to allies under 50% energy. But she needs 200%+ ER to stay online in Raiden teams. Quick tips: Go ER/HP% Sands, refine Favonius Greatsword to R5 for those procs, and pair with Raiden for 15+ extra Energy per rotation. (Personal aside: I've burned way too much resin chasing her ER sands—patience pays off.)
If you're aiming to juice up your Genshin account fast, check out Genshin top up without card on BitTopup. Folks rave about the competitive prices, deliveries in under 5 minutes, and rock-solid security that sticks to game rules—plus, it handles tons of currencies for easy top-ups.
Her Electro Rhythm
The tether hits Electro every 0.4 seconds during Burst; her Skill chucks tracking rounds for off-field damage in Aggravate setups. With 4pc Deepwood Memories, she shreds Dendro RES by 30% for 8 seconds on reactions. In rotations, lay it down after Quicken—her C6 even infuses Normal Attacks with Electro for 3 seconds, healing 4% Max HP every 0.1 seconds to the whole party. Smooth for tether lovers, clunky elsewhere.
Constellation Breakdown (C0/C2/C6)
C0 works fine but ER-hungry (B-tier overall); C4 unlocks that +30% ER buff for low-energy allies; C6 turns her into on-field DPS for Aggravate. Skip C4, and Burst downtime kills you. I'd chase C4 for the best bang—test C0 at 250% ER with energy calculators for those 15-second rotations.
Dig deeper with our Dori Complete Build Guide.
Kuki Shinobu Spotlight: Pros and Cons
Healing Reliability
Her Skill (15-second cooldown) dishes 3.0% Max HP + 289 every 1.5 seconds for 12 seconds; A4 adds +75% EM to those heals, and A1 gives +15% below 50% HP—full 100% uptime at C2. At 12,289 HP, chain Skill into Burst (60 Energy) for a 3.5-second extension under 50% HP. Steps: Keep HP low with Skill, level it to 10 (76% initial DMG + 25.20% ring DMG), and it's gold in co-op since the ring follows the active player. Steady as she goes.
Off-Field Electro Flow
That ring applies Electro every 1.5 seconds (45% particle chance per hit) for AoE Hyperbloom and Aggravate glory; C4 sprinkles Thundergrass Marks (9.7% HP Electro DMG every 5 seconds). She generates ~0.5 particles per second at 135% ER in double Electro teams. Rotations? Drop it after Bloom cores; team with Fischl for 15-second cycles at 140-150% ER. No fuss, all function.
EM Power Plays
Kuki's Hyperbloom scales hard with 1000-1100 EM, using 4pc Flower of Paradise Lost (+80 EM, 140% reaction DMG bonus); her A4 weaves EM into healing too. At 1000 EM, expect 30k+ DMG procs every 1.5 seconds in Nahida squads. Gear up with EM Sands/Goblet/Circlet; substats EM > HP% > ER; craft Iron Sting for 165 EM. It's like her EM obsession was made for Dendro.
Constellation Worth
C0 is S-tier for Hyperbloom (Game8 agrees); C2 adds +3 seconds to Skill for 100% uptime and two extra ticks; C4 amps off-field DPS. C2 eases ER burdens in budget builds. Start at C0 (18/30/36 in Spectral Husk), upgrade to C2 for 20% more Abyss procs. High value, low drama.
Head to our Kuki Shinobu Complete Build Guide for tweaks.
Aggravate Teams: Head-to-Head
Dori's Role in Aggravate
Dori pulls double duty as healer-debuffer with 4pc Deepwood Memories (-30% Dendro RES for 8 seconds) in Tighnari-Kazuha-Raiden lineups; she feeds 15 Energy per Burst to keep Raiden rolling. But her 2-second intervals mean 20% fewer procs. Flow: Tighnari Skill for Dendro, Dori Burst for tether, Raiden swap for Aggravate at 1000 EM—~30k triggers.
Kuki in Aggravate Mode
Kuki stays off-field for Electro and heals in Alhaitham-Yae-Nahida with 4pc Tenacity of the Millelith (+20% HP, +20% team ATK on Skill); her 1.5-second ticks net 20-30% more procs, plus EM buffs. Sequence: Nahida E/Q for Quicken, Kuki Skill for Electro, Alhaitham on-field for the ride. Cleaner, punchier.
Raw Damage Numbers
Kuki pulls ahead with 30k+ Aggravate at 1000 EM and 100% Skill uptime; Dori contributes indirectly via 15 Energy for that 1.25x amp, but only 70% uptime. Polls tip to Kuki (A-tier via Skycoach), with +30% shield strength to boot. Data doesn't lie—frequency wins.
Top Synergies
Kuki thrives with double Dendro like Nahida-Alhaitham for EM sharing; Dori pairs with ER-thirsty Electro such as Raiden-Cyno. F2P go-to: Kuki + Dendro Traveler + Fischl + Sucrose. Flex Zhongli for Kuki shields; add Hydro Resonance (+25% HP) via Kokomi for Dori.
For more squad ideas, check our Best Aggravate Team Compositions Guide.
Keeping your account topped off? BitTopup's buy Genesis Crystals legit gets high marks for low prices at market rates, credits in minutes, full HoYoverse compliance, crypto payments, 24/7 help, and 4.8/5+ ratings for smooth sailing.
Hyperbloom Face-Off
Trigger Timing
Kuki's ring fires every 1.5 seconds on cores, 100% uptime at C2—way smoother than Dori's 2-second waits for EM-scaled hits. In Nahida-Yelan, Kuki lands 30k+ procs; Dori gets fewer but batteries the team. Routine: Yelan Q/N1/E for Hydro, Nahida E/Q for Dendro, Kuki Skill for 15-20 second loops.
EM Efficiency
Kuki's A4 (+75% EM to healing) and 4pc Gilded Dreams (80-230 EM) give her the edge, outpacing Dori by 20-30% in trigger frequency at 1000 EM. Dori rocks 4pc Instructor for team EM in hybrid roles. For Kuki, stack 1000+ EM with 2pc Wanderer's Troupe + 2pc Gilded Dreams (160 EM total). It's her playground.
Example Lineups
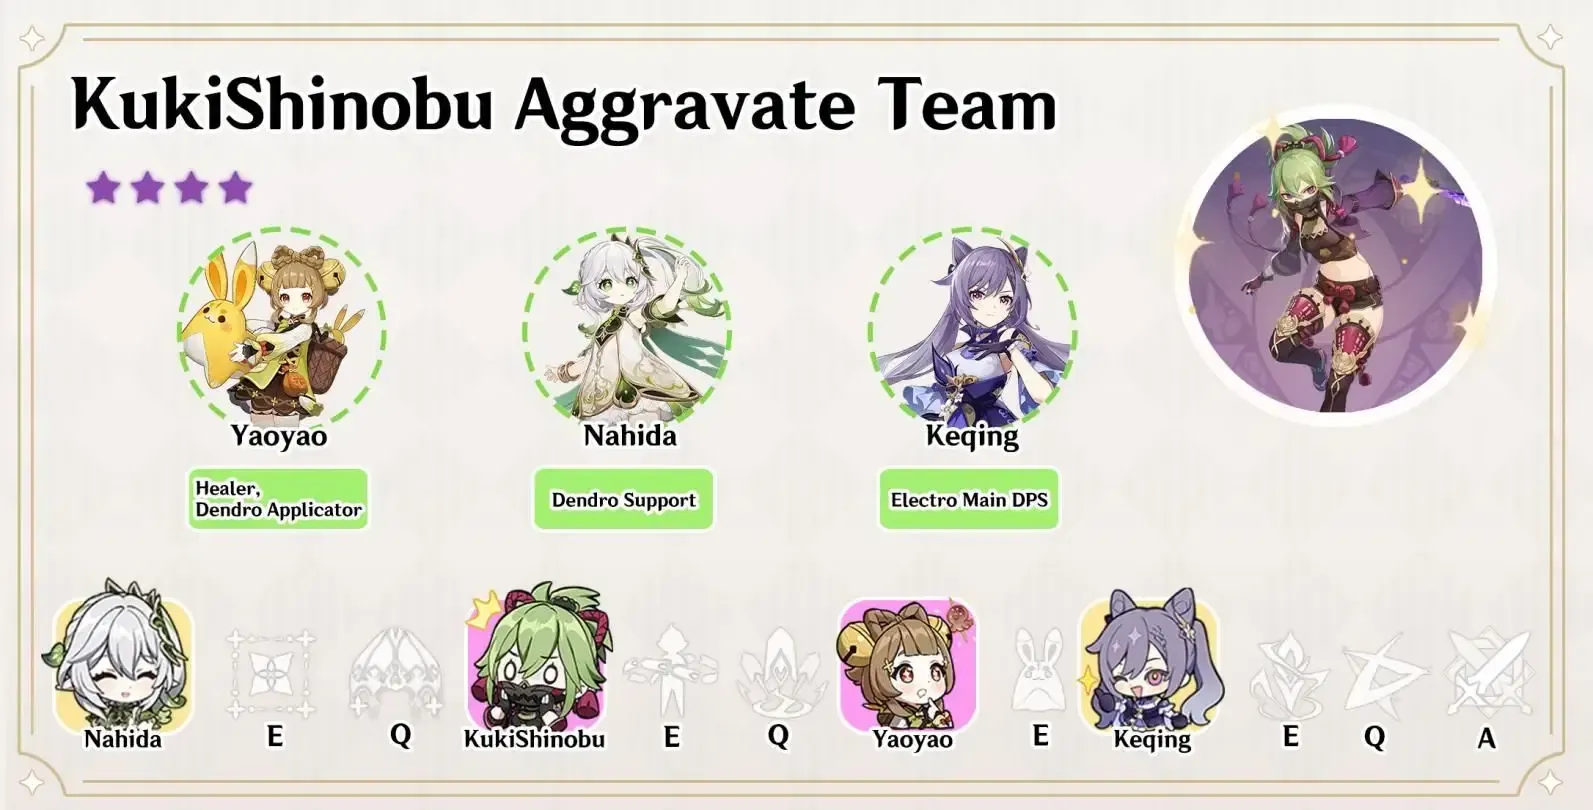
Kuki core: Her as trigger/healer, Nahida on Dendro, Yelan/Xingqiu for Hydro, Zhongli shields—F2P twist: Dendro Traveler + Xingqiu + Sucrose + Kuki. Dori variant: Her as trigger/battery, Collei Dendro, Kokomi Hydro, Sucrose EM—Deepwood on Dori. EM on everyone but Hydro for Kuki; ER/EM hybrid at 300% for Dori.
Abyss Results
Kuki conquers 80% of Hyperbloom floors (S-tier clears); Dori hits 60% hampered by ER gaps. Her C4 adds marks for DPS spikes; Dori's C6 goes on-field. Stick to 15-second rotations—Kuki's data shows higher success.
Jump into our Hyperbloom Team Building Complete Guide for the full scoop.
Gear and Build Tips: Weapons & Artifacts
F2P Weapon Picks for Dori
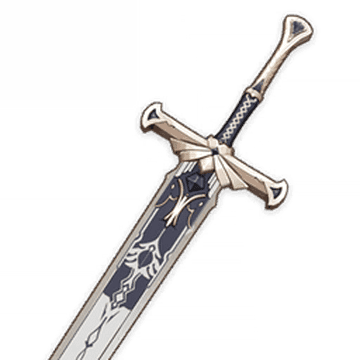
Favonius Greatsword (61.3% ER, 15 Energy procs) leads for battery duty; The Bell (41.3% HP), Forest Regalia (30.6% ER +60 EM after reactions), or Sacrificial Greatsword for resets. R5 Favonius nails 250% ER. Refine to R1, pair with ER Sands, prioritize battery over EM.
F2P Options for Kuki
Iron Sting R5 (165 EM) dominates Hyperbloom; Xiphos' Moonlight (165 EM), Freedom-Sworn for buffs, Favonius Sword at 135% ER. Those 6 EM swords? Reaction gold. Craft Iron Sting, level to 90 for +20% damage.
Artifact Showdown
Kuki loves 4pc Flower of Paradise Lost (+140% Hyperbloom) or Gilded Dreams (EM focus); 4pc Tenacity for +20% team ATK. Dori? 4pc Noblesse Oblige (20% Burst DMG +20% team ATK) or Deepwood (-30% Dendro RES); mix 2pc Tenacity + 2pc Emblem. Low-resin Gilded for Kuki's EM/HP; Noblesse ER/HP for Dori.
Stat Priorities
Kuki: EM Sands/Goblet/Circlet; subs EM > HP% > ER. Dori: ER/HP% Sands, HP% Goblet, HP%/Healing Bonus Circlet; subs ER > HP%. Farm weekly domains; target 1000 EM on Kuki, 200% ER on Dori—use calculators to fine-tune.
Costs and Resource Breakdown
Talent Priorities
Push Kuki's Skill to 10 for healing/DMG, then Burst; Dori's Burst to 10 for healing/battery, followed by Skill—total ~4.96M Mora. Kuki needs Teachings of Elegance (9/63/114), 18 Spectral Husk, 18 Tears of the Calamitous God, 3 Crowns. Grind dailies for Mora, resin on Elegance domain, save Crowns for key breakpoints.
Mora and Resin Needs
Each ascends for 420k Mora; Kuki: 168 Naku Weed, 46 Runic Fang; Dori: 168 Kalpalata Lotus, 46 Thunderclap Fruitcore—super F2P-friendly. About 200 resin for shared Vajrada domains. Kuki farms Inazuma spots; Dori's Sumeru but easy reach.
Farming Paths
Kuki: Naku Weed in Inazuma fields, Runic Fang from Perpetual Mechanical Array weekly. Dori: Kalpalata Lotus on Sumeru cliffs, Thunderclap Fruitcore via Thunder Manifestation. Use Adventurer's Handbook to scout, hit bosses Tuesday/Saturday, craft Iron Sting first.
ROI Verdict
Kuki scores 9/10 ROI for C0 Hyperbloom; Dori 7/10 at C4/C6 for battery/DPS—she's in 80% of teams. Craftables tilt toward Kuki over Dori's ER thirst. Build her first; she's meta-essential.
Pitfalls and Pro Tips
Build Blunders to Dodge
Don't slap ATK on Kuki—chase EM/HP for 1000+; never run Dori without 200% ER or she'll downtime hard. EM Sands for Kuki, ER Sands + Favonius for Dori. Check menu stats, refarm subs, test in the Theater.
Squad Slip-Ups
Steer clear of Kuki with Pyro—it pops cores early; Dori falters in AoE sans tether. Stick to Hydro/Dendro cores; Anemo for grouping. No fast-swaps for Dori in Hyperbloom—Kuki's off-field magic shines.
Energy Flow Fumbles
Kuki's low gen? Add Favonius to the team (Dendro MC helps); Dori's 80-cost Burst? A4 nets 15 Energy at 300% ER. C2 Kuki loops Skills forever; Raiden particles fuel Dori. Tools say 135% ER for Kuki in double Electro.
Pick Your Fighter: Decision Guide
Go Dori When...
You've got no Kuki, crave battery + cleanse in ER-starved physical or Electro-Charged teams; medium investment with ER sands and Sumeru farms. 7/10 for mixed utility. If Raiden or Cyno calls, C4 Dori first.
Opt for Kuki If...
You want Hyperbloom/Aggravate reliability, AoE coverage, low ER, and craftables; perfect with Nahida/Alhaitham. 9/10 off-field beast. F2P default—Inazuma farms await. (Editor's view: She's the unsung hero of Dendro; underrated gem.)
Building Both: Smart?
Yes, for variety—Kuki reactions, Dori battery; they share Vajrada. Resin tight? Kuki covers 80% needs, Dori 20%. C0 both viable; build around your roster.
Meta Outlook
Both hold strong post-3.0; Kuki dominates 5.5+; Dori synergizes ER. Her rerun: September 30-October 21, 2025 (Version 6.0 Phase 2). Kuki flexes with EM; refresh builds every 6-8 weeks.
Prioritize wisely via our 4-Star Character Investment Priority Tier List.
Ready to crank those Dendro reactions? Our Aggravate and Hyperbloom guides await, or plug into the interactive build calculator for your ideal setup.
FAQ: Dori vs. Kuki Shinobu
Is Dori or Kuki better for Hyperbloom?
Kuki takes it with 1.5-second Electro and A4 EM healing for 30k+ procs at 1000 EM, full uptime at C2. Dori's 2-second limits hurt triggers, but she batteries Kokomi-Collei well.
Does Dori out-energy Kuki?
Yep—15 Energy per Burst (2.5/tick) +15 from A4/Skill/Favonius for active battery. Kuki's ~0.5 particles/second; Favonius pairs get her to 135% ER.
Best healer for Nahida?
Kuki, hands down—EM sharing hits 1000+ for Hyperbloom in Nahida-Yelan-Zhongli, 20-30% more procs. Dori subs with Deepwood RES shred, but ER's a beast.
Can Kuki swap for Dori in Aggravate?
Absolutely—superior Skill uptime for Quicken in Alhaitham-Yae-Nahida, no 80 Energy hit. Dori edges battery for Raiden; Kuki's A-tier meta pick.
Constellations for viable Dori?
C0 works at 200%+ ER; C4's +30% ER buff cuts downtime for top battery; C6 adds on-field DPS. C4 shines for Cyno ER spots.
Kuki C0 enough for Hyperbloom?
Totally—C0 S-tier F2P (Dendro Traveler-Xingqiu-Sucrose) at 1000 EM/135% ER for solid triggers. C2 perfects uptime; C0 Abyss-clears per polls.

