

Master Delta Force's Extraction Mode with proven strategies for Hazard Operations success. Learn optimal loot prioritization, extraction timing, combat tactics, and team coordination to maximize survival rates and secure high-value rewards consistently.
Getting Your Head Around Delta Force Extraction Mode
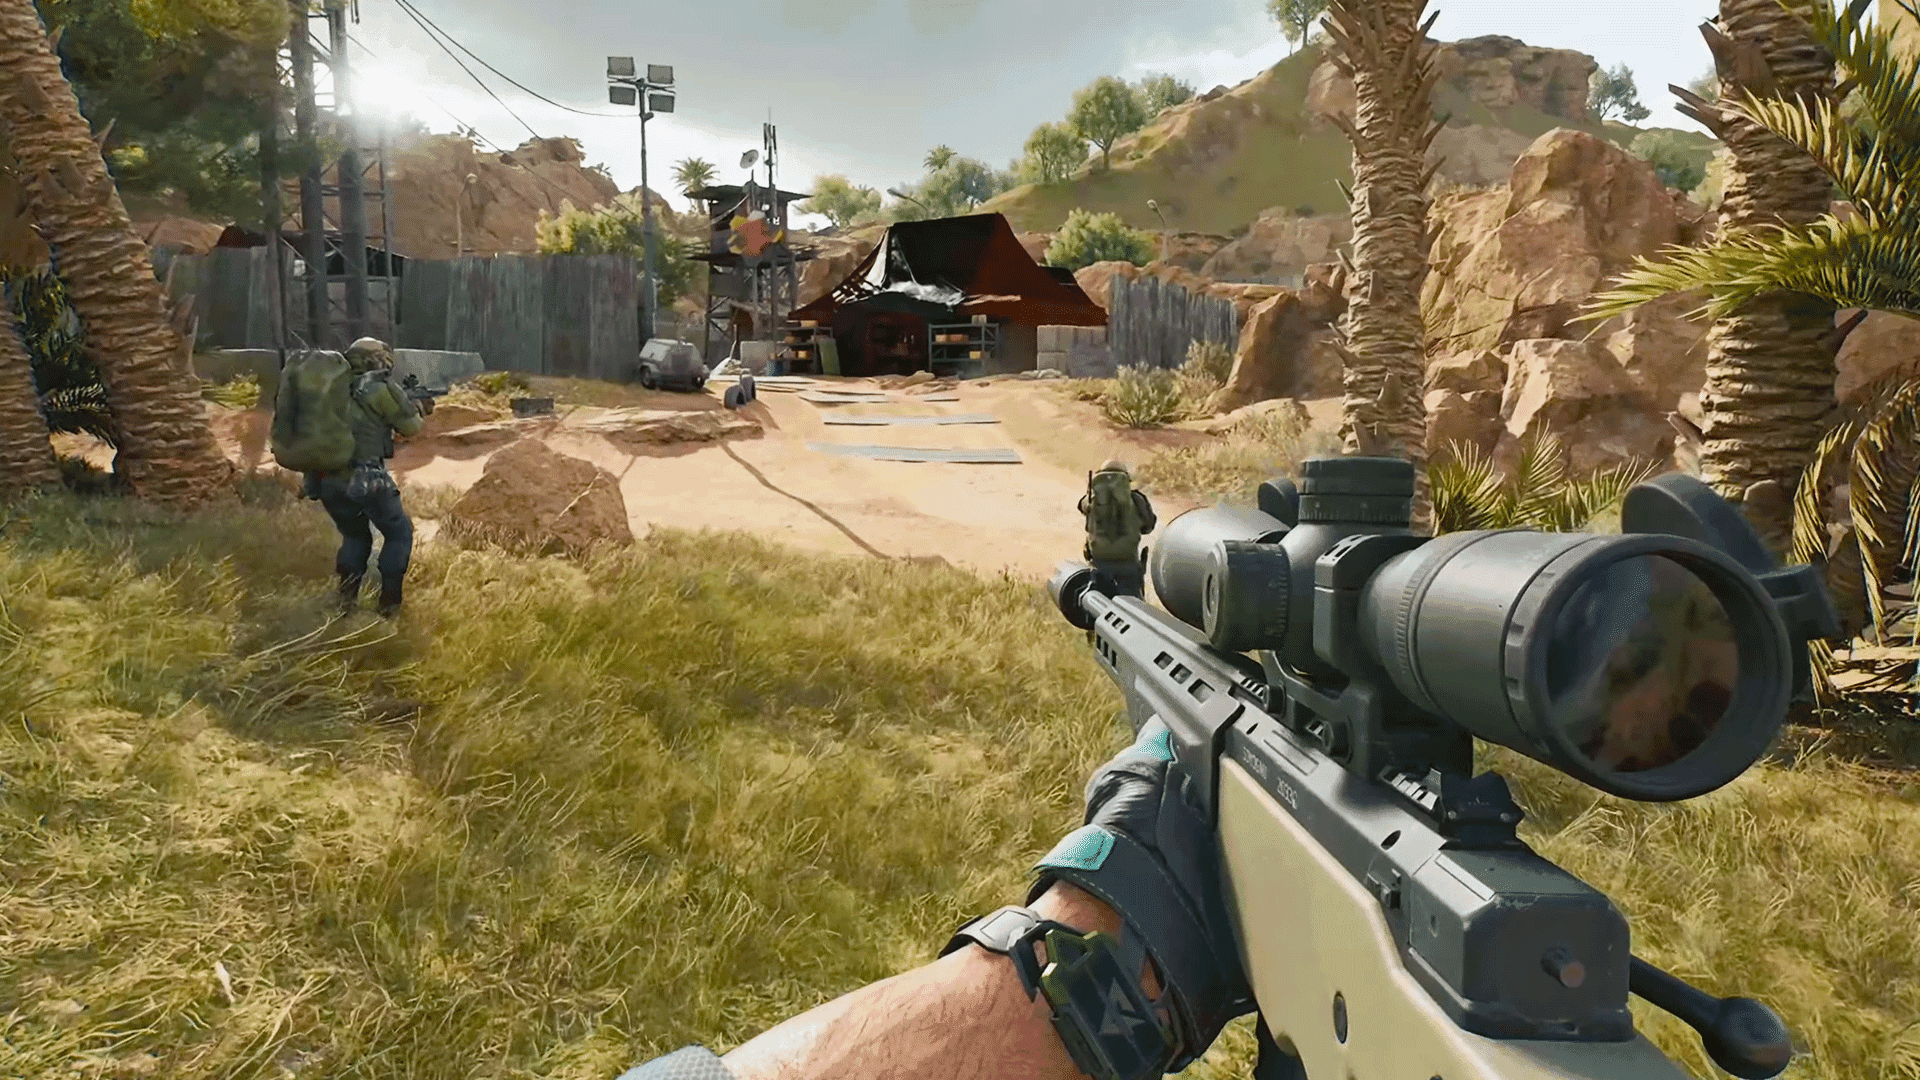
Here's the thing about Delta Force's Operations Mode—it's not your typical run-and-gun shooter. This is tactical PvPvE extraction gameplay where every piece of gear you're wearing could vanish the moment you hit the dirt. Your Safe Box? That's protected. But that shiny rifle you just picked up? Gone if you don't make it out alive.
Hazard Operations throws you into this high-stakes treasure hunt where you're racing against time, other players, and AI enemies to grab valuable loot and get out in one piece. It's completely different from Raid mode (where you keep your gear no matter what) or Hot Zone's PvP practice runs.
The injury system adds another layer of complexity. You'll need a Support class operator on your 3-person squad if you want any hope of getting revived. Victory isn't about your kill count—it's about walking away with your loot intact.
One thing I really appreciate about this game? Cross-progression works seamlessly across PC, PlayStation, and Xbox. Your loadouts follow you everywhere.
For players looking to get serious about Hazard Operations, cheap Delta Force credits recharge through BitTopup gives you instant access to premium gear and operators. BitTopup's got competitive pricing, secure transactions, and their customer support actually responds—which matters when you're trying to gear up for a big operation.
Planning Your Mission (Because Winging It Gets You Killed)
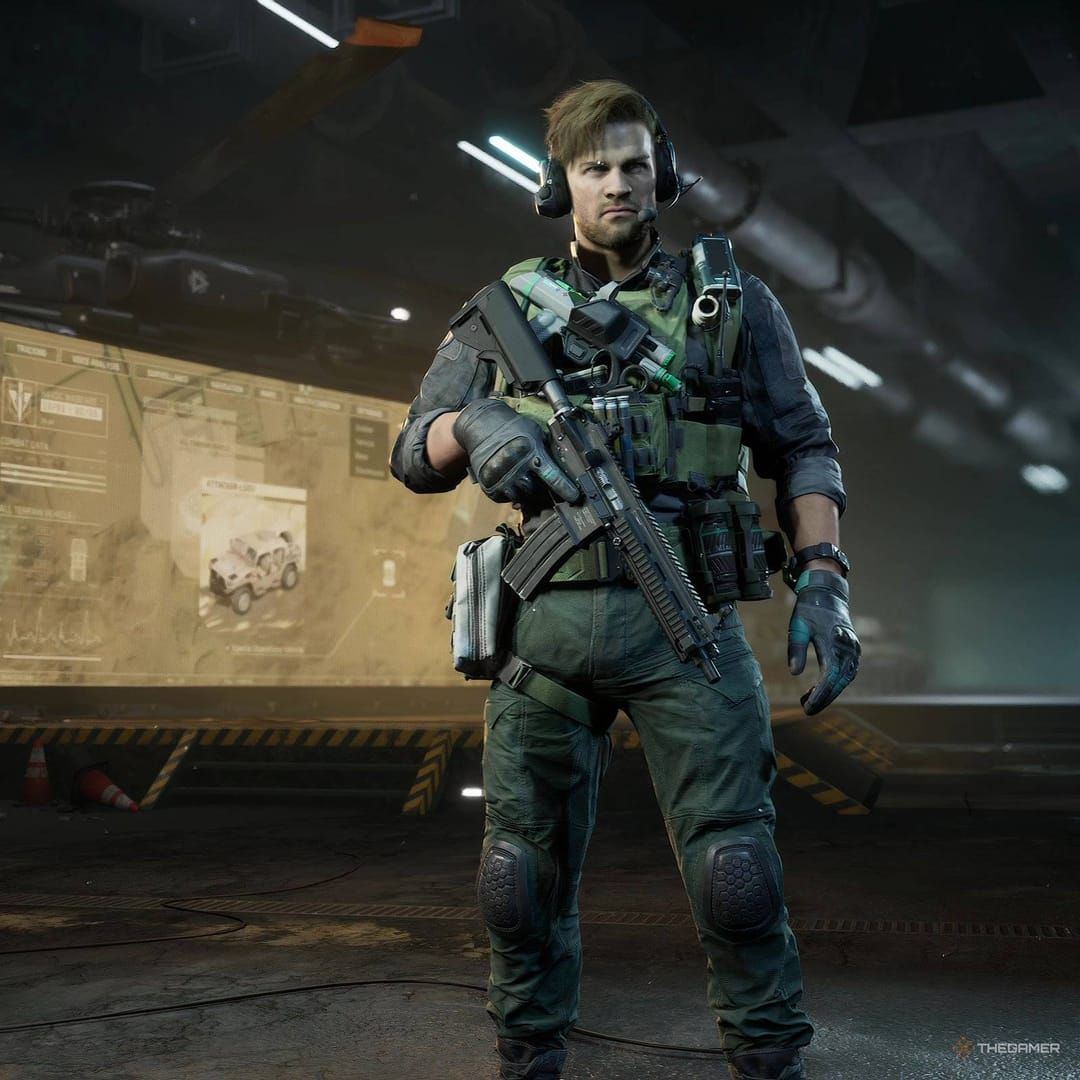
Operator selection isn't just about picking your favorite character model. Each class serves a specific purpose, and getting this wrong will cost you.
D-Wolf (A-Tier) excels at aggressive pushes thanks to enhanced mobility. Luna (SS-Tier)? She's your eyes and ears—absolutely essential for spotting ambushes before they happen. Stinger (S-Tier) keeps everyone alive with rapid healing, while Engineer operators handle the technical stuff and objective completion.
My honest take? Start with Luna. Her scouting capabilities will save your life more times than you can count, especially when you're still learning the maps.
Raptor deserves special mention here—S-Tier unlock priority. EMP grenades, 5x ping capacity, footprint tracking. This operator's toolkit is ridiculously useful for gathering intel and disrupting enemy equipment.
The synergies matter too. Recon intel feeds perfectly into Assault mobility plays. Support healing keeps your Assault operators in the fight longer. Engineer barriers create safe sniping positions for your Recon specialists.
Loadout optimization follows a specific hierarchy:
Recoil control attachments first (Sandstorm Vertical Compensator is your friend)
Optics based on expected engagement ranges—Cobra for mid-range, OSIGHT for close-quarters
Extended magazines (45-round for M4A1) and muzzle attachments
DBAL-X2 lasers for Tactical Stance breath hold functionality
Essential Pre-Mission Checklist:
Pick operator class based on your intended role
Match primary weapon to expected engagement ranges (M4A1 works for most situations)
Add secondary weapons and tactical gadgets
Test everything in training first
For beginners, I recommend the Assault M4A1 Long Range build (Code: 6FINC4G0CQTV1IBVCBQVT). It features Resonant Ergonomic Grip and AR Gabriel Long Barrel for solid mid-long range stability. There's a reason it maintains a 10.1% pick rate among competitive players.

Loot Strategy: What to Grab and What to Leave Behind
Northern Haavk WSR Lab and southern Hotel locations are loot goldmines. High safe box spawn rates, but you'll be fighting other players and bosses for access. Risk versus reward at its finest.
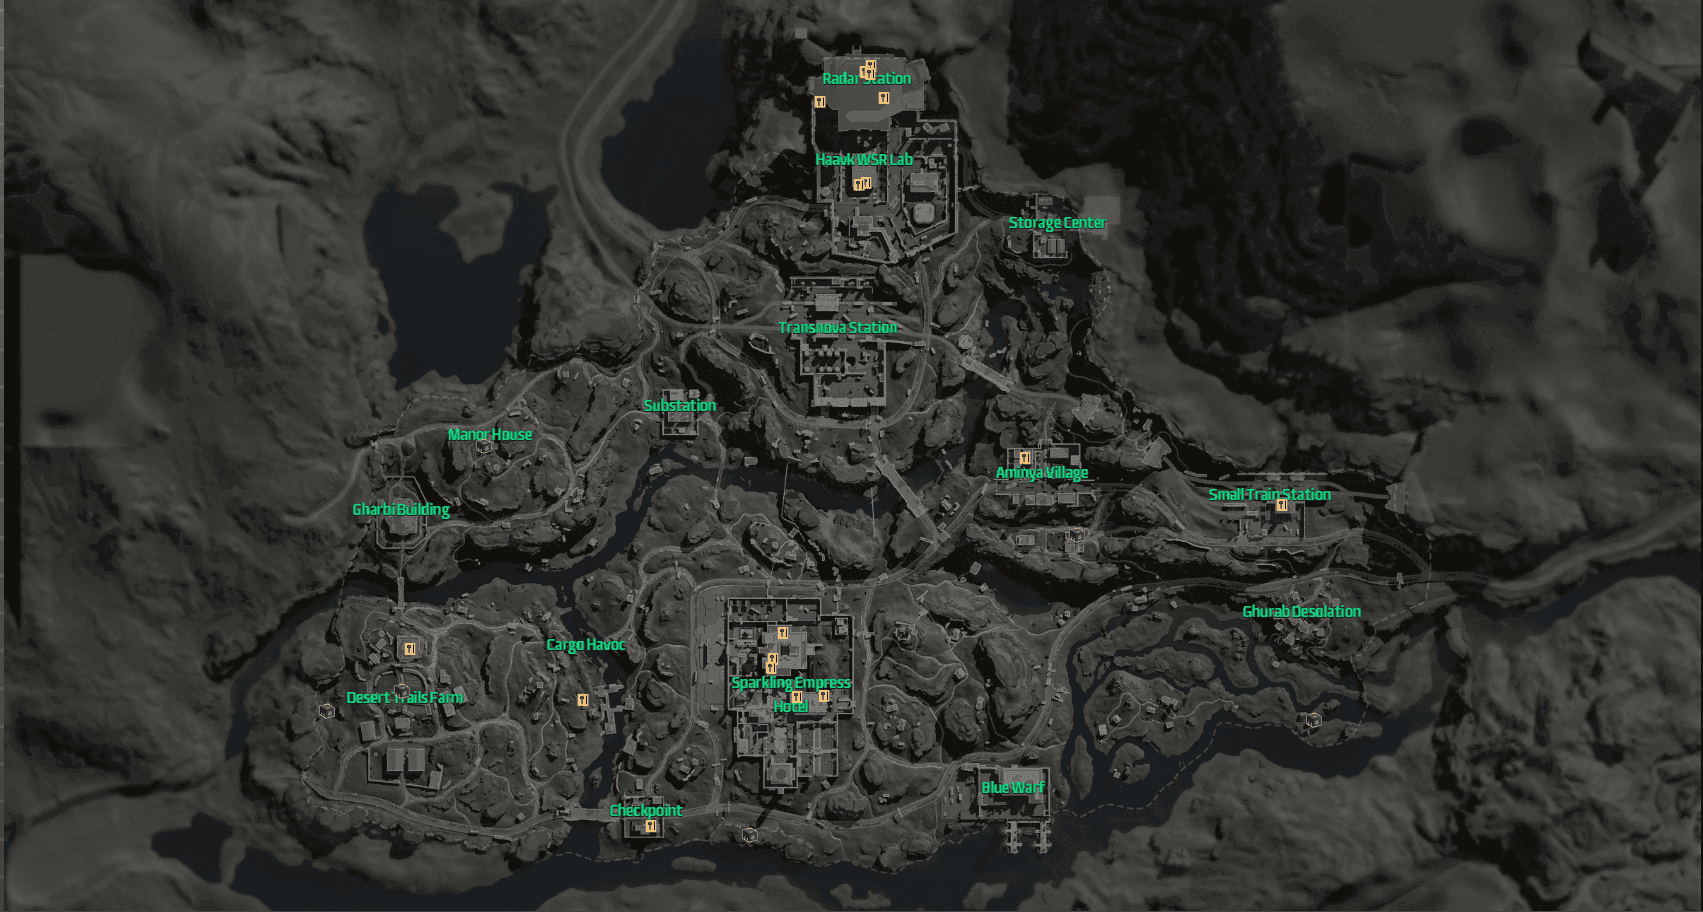
Central areas like Transnova Station and Aminya Village offer decent access with manageable risk levels. If you spawn west, hit up Gharbi Building—it's loaded with loadout items and medical supplies.
Safe boxes cluster around the map edges and train interiors. Red zones mean heavy enemy presence, yellow zones are moderate threats. Avoid both during your initial raid phase unless you're feeling particularly brave (or foolish).
Loot prioritization isn't negotiable:
High-Value Items (★★★★★) - grab these immediately
Usable Weapons/Ammo (Lv3+, ★★★★) - solid second priority
Task/Exchange Items (★★★) - if you have space
Armor/Helmets (★★) - situational
Rigs/Healing Items (★★) - last priority
Use this formula for backpack management: Reference Price ÷ Slots Used ≥8,000. If an item doesn't meet this threshold, leave it behind.
Quick Loot Process:
Rarity first - Gold/Red items over White/Green variants
Ammo efficiency - Lv3+ ammo gives you 60 rounds per slot
Weapon swapping - Equip high-value weapons directly (you've got 2 primary slots)
Armor management - Wear it immediately to free backpack space
Pro tip: Damaged armor loses significant value after repair. And those shotgun shells? Terrible slot efficiency compared to rifle ammo.
Combat: Staying Alive When Things Go Sideways
Combat in Extraction Mode isn't about fragging out—it's about achieving objectives and getting home with your loot. Every bullet counts, so practice strategic reloading and utility timing.
Squad formation prevents those devastating cluster eliminations while enabling coordinated responses. Pre-aim choke points and potential flanking routes. Use Engineer barriers to support Recon sniping positions—these synergies can turn the tide of a firefight.
Fog and urban environments demand audio-based detection. SMG-45 works beautifully for close-range engagements when visibility drops.
Combat Execution Framework:
Avoid clustering - spread out to prevent group eliminations
Control positions - pre-aim likely enemy approach routes
Use synergies - combine Engineer barriers with Recon overwatch
Adapt to environment - audio cues and appropriate weapons for terrain
Current meta favors Raptor's EMP capabilities for disabling enemy optics. QJB-201 LMG provides excellent mobile suppression with its 550 RPM and 125-round magazine. Map-specific loadouts matter too—suppressed weapons for Forest stealth, sniper rifles for Dam's elevated positions.
For serious tactical advancement, consider Delta Force credits top up for Hazard Operations through BitTopup's platform. Instant delivery, competitive rates, and reliable customer service ensure you've got access to the premium equipment needed for advanced strategies.
Extraction Points: Getting Out Alive
Layali Grove offers multiple extraction methods, each with unique requirements and risks. Canyon Area serves East spawn players, while Run Dam Shallow and Run Dam Boat each have 50% availability. The Train requires lever activation, Zero Road serves West spawn, Farm Path handles East spawn, and Paid Shoreline accommodates up to 4 players for 10,000 Tekniq Alloy coins.
Understanding extraction categories is crucial. Conditional points need switch activation or gear removal. Paid options use mission-earned coins. Random assignments can disappear if unclaimed. Permanent locations stay consistently available.
Countdown timers range from 10-30 seconds at permanent points. Combat engagement resets extraction progress—something that's gotten me killed more times than I care to admit.
Train Extraction Process:
Activation - Pull the lever in south station building (starts 6-minute countdown)
Verification - Make sure the train's actually there
Preparation - Loot those safe boxes during the wait
Notification - Everyone on the server knows you're extracting
Execution - Get in before that 5-second door closure
Train extraction offers incredible loot in locked safes, but you'll face increased enemy pressure due to server-wide notifications. Squad members extract independently, and successful extraction triggers those satisfying mission-ending cutscenes.
Team Coordination: Making Your Squad Actually Work
Optimal 4-player composition: 1 Recon (spotting and intel), 1 Support (healing and revives), 1 Engineer (barriers and objectives), 1 Assault (breaches and pushes). This distribution maximizes tactical flexibility while covering essential capabilities.
Coordination Protocol:
Callout system - Use concise landmark-based communications
Formation management - Point man, support, rear guard positions
Resource sharing - Distribute ammo and medical supplies by role
Extraction consensus - Everyone agrees on timing
Luna's intelligence gathering pairs beautifully with D-Wolf's mobility for rapid repositioning. Stinger's healing keeps Assault operators in extended firefights. Directional pings, resource updates, and landmark callouts ensure precise communication during high-pressure moments.
Solo Strategies: When You're Flying Alone
Solo operations emphasize stealth over confrontation. Suppressed weapons like the SR-3M budget burst configuration (Code: 6FFVV9O02IUUSDGSUS7DN) reduce detection signatures significantly.
Light loadouts prioritize mobility. SMG-45 CQC variants enable rapid repositioning and escape capabilities when things go wrong.
Solo Framework:
Lightweight loadouts - Suppressed weapons for mobility
Route planning - Avoid hotspots and high-traffic areas
Quick extracts - Focus on random/permanent points
Emergency procedures - Smoke grenades for countdown cover
Audio detection becomes absolutely critical when you're alone. Invest in decent headphones and develop environmental awareness. Independent extraction eliminates squad coordination requirements—when you see an opportunity, take it.
Advanced Meta and Tactics
Current meta leverages Raptor's footprint reveals, Wing Cam pings, and EMP effectiveness in fog conditions. M7 Battle Rifle delivers 4-shot elimination potential with excellent penetration. QJB-201 LMG provides sustained mobile fire support.
Advanced Loadout Configurations:
CI-19 Long Range (Code: 6FIN5OG0CQTV1IBVCBQVT) - High damage, extended range
MP7 SMG (Code: 6H4ST1O088K38R05C0LGG) - Balanced close-quarters performance
SR-3M Suppressed (Code: 6FFVV9O02IUUSDGSUS7DN) - Stealth-focused burst fire
Improvement Timeline:
Weeks 1-2: Tutorials, aim training, map familiarity, 1-2 weapon specializations
Weeks 3-4: Sprint-slide mechanics, pre-aiming, recoil pattern mastery
Weeks 5-6: Callout systems, defensive positioning, utility timing
Track your performance through extraction success rates, K/D ratios, and accuracy percentages. Killcam review helps identify improvement areas.
Common Mistakes (And How to Stop Making Them)
Critical errors that'll get you killed:
Gear overloading causing mobility penalties
Attachment stacking with diminishing returns
Solo aggression breaking formation integrity
Ammunition waste leaving you dry during extractions
Poor map awareness from insufficient practice
Prevention Strategies:
Use lightweight weapons (SMG-45/MP5) to maintain mobility
Diversify attachment types instead of stacking similar benefits
Maintain squad cohesion; retreat when outnumbered
Practice strategic reloading and ammo conservation
Complete offline exploration to learn layouts
Never engage enemies alone. Retreat when outnumbered to enable teammate revivals. Southern routes in Layali Grove offer better cover and branching paths.
Audio awareness distinguishes player activity from NPCs. NPCs don't engage in random gunfire—weapon sounds indicate real players nearby.
FAQ
Q: What's the most important factor for winning in Hazard Operations? A: Survival trumps everything. Focus on objectives, loot acquisition, and coordinated extraction rather than hunting for kills.
Q: Which operators should beginners choose? A: Luna (SS-Tier Recon) for scouting, Stinger (S-Tier Support) for healing, or D-Wolf (A-Tier Assault) for mobility. Master one class for 2-3 weeks before expanding.
Q: How do I prioritize loot efficiently? A: Use the slot value formula (Reference Price ÷ Slots Used ≥8,000). Prioritize Gold/Red rarity items, Lv3+ ammunition, and high-value weapons over low-tier gear.
Q: When should I extract versus continuing to loot? A: Extract when inventory reaches optimal value, enemy pressure increases, or team coordination breaks down. Successful extraction with moderate loot beats failure with maximum items every time.
Q: What's the best beginner weapon loadout? A: M4A1 provides balanced performance (10.1% pick rate, 25 damage, 672 RPM, manageable recoil). Pair with 93R pistol and prioritize recoil control attachments over optics initially.
Q: How do I avoid losing gear to other players? A: Stealth approaches with suppressed weapons, avoid early-raid hotspots, maintain squad formations, and develop audio awareness for enemy detection. Never engage alone when outnumbered.