

Master Delta Force's 2025 meta with proven competitive loadouts featuring CI-19 (9.5% pick rate) and M4A1 builds, optimized attachment combinations, and class-specific strategies for Warfare and Operations modes. Includes import codes, tier rankings, and pro-level optimization techniques.
Delta Force 2025 Meta Overview: Current State of Competitive Play
Here's what's actually dominating the competitive scene right now – and trust me, the numbers don't lie. The CI-19 Assault Rifle sits at the top with a 9.5% pick rate, followed closely by the M4A1 at 9.3%. For close-quarters work, the SMG-45 claims 5.3% of the meta, while the AWM sniper maintains its 3.4% share for those long-range eliminations that make highlight reels.
Season 6 dropped on September 23, 2025, and honestly? It changed everything. The suppressor rework alone – adding +9% range and enhanced recoil reduction – shifted the entire meta toward stealth-oriented builds. That Advanced Multicaliber Suppressor everyone was sleeping on? Yeah, it's actually viable now.
Quick note for anyone serious about staying competitive: Delta Force Hawk Ops recharge through BitTopup keeps you stocked on premium content and seasonal unlocks. Their pricing's competitive, delivery's instant, and the transactions are secure – which matters when you're trying to stay ahead of the curve.
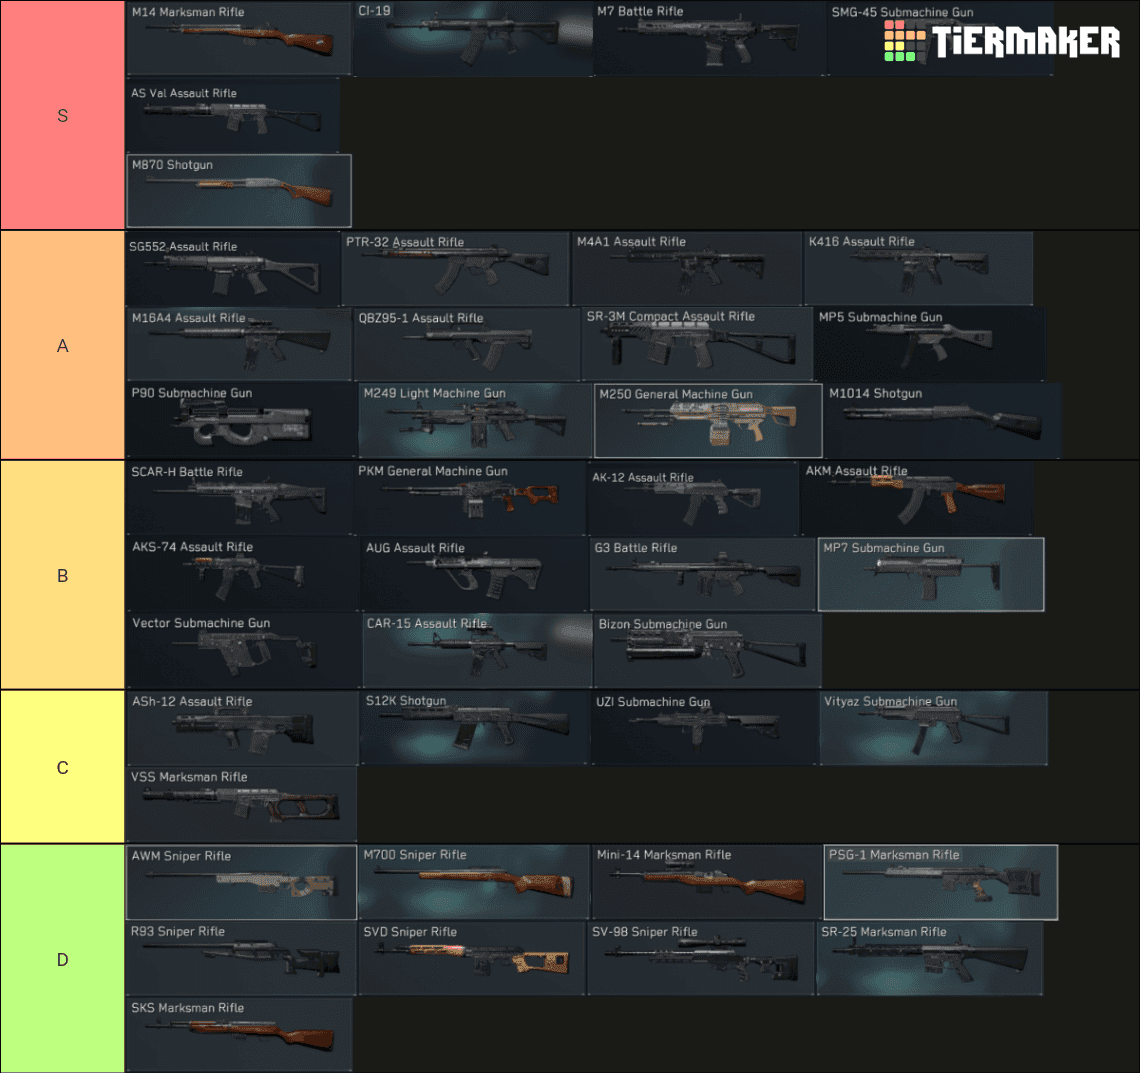
Meta Weapon Tier Rankings
S-Tier (The Untouchables):
CI-19 Assault Rifle: That 9.5% pick rate isn't an accident – pinpoint accuracy for days
M4A1 Assault Rifle: 9.3% pick rate, the Swiss Army knife of rifles
SMG-45 Submachine Gun: 5.3% pick rate, close-range stability that actually works
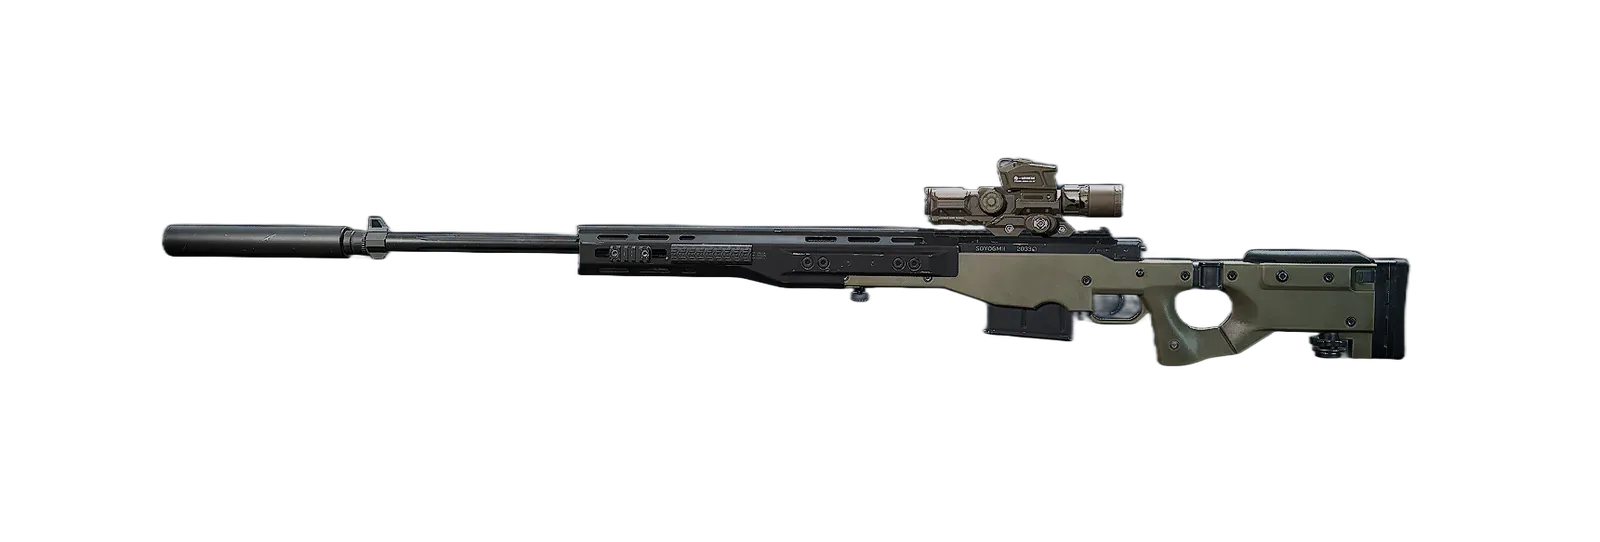
AWM Sniper Rifle: 3.4% pick rate, one-shot potential to chest up to 30m (yes, really)
R93 Sniper Rifle: 3.4% pick rate, faster handling for aggressive plays
High-Performance Alternatives (Still Meta, Just Pickier):
M7 Battle Rifle: 7% pick rate, four-shot kill potential with minimal drop-off
AUG Assault Rifle: 4% pick rate, low-recoil hard-hitter for Engineer mains
SCAR-H Battle Rifle: 3.8% pick rate, the long-range Engineer's best friend
The suppressor changes favor tactical positioning over the old rush-everything meta. Teams that adapted show 15-20% improved survival rates in Operations mode – which is huge when you're talking competitive play. Also worth noting: Raptor operator's EMP Grenades absolutely wreck those laser-heavy builds that dominated pre-Season 6.
Best Warfare Mode Loadouts: Dominating Large-Scale Combat
Top Assault Rifle Builds
CI-19 #1 Long Range Build (Code: CI-19 Assault Rifle-Warfare-6HLOANO09MFFCME3G7LT2)
This build maximizes what the CI-19 does best – being stupidly accurate:
Foregrip: Secret Order Bevel Foregrip
Rear Grip: New Type Vanguard Light Grip
Barrel: New Leviathan Tactical Long Barrel
Muzzle: Sandstorm Vertical Compensator
Stock: 416 Light Stock
Optic: Cobra Accuracy Sight
Mag: 5.8 Newtype 60-Round Drum Mag
Right Rail: DBAL-X2 Purple Laser-Light Combo
Works for Assault, Recon, Support, and Engineer classes. The mid-range control is excellent while keeping that extended distance effectiveness intact.
M4A1 #2 Long Range Build (Code: M4A1 Assault Rifle-Warfare-6HLOBES09MFFCME3G7LT2)
The balanced approach that just works:
Barrel: AR Gabriel Long Barrel Combo
Muzzle: Sandstorm Vertical Compensator
Stock: M16A4 Stable Stock
Mag: M4 45-Round Extended Mag
Upper Patch: KC Hound Handguard
Pair it with a 93R secondary, TAC Dagger for melee, and Anti-Personnel Launcher for those oh shit moments.
Sniper Loadouts for Long Range
AWM #1 Sniper Build (Code: AWM Sniper Rifle-Warfare-6HLOCT009MFFCME3G7LT2)
One-shot potential to chest up to 30m? Yeah, this is why people ban snipers in scrims:
Barrel: AWM Skyline Long Barrel
Muzzle: Resonant Sniper Rifle Suppressor
Optic: ACOG Precision 6x Scope (or XCOG Assault 3.5x if you're feeling aggressive)
Right Rail: DBAL-X2 Purple Laser-Light Combo
Unique: AWM M-Lok Kit
Unlocks at Level 35 for Recon and Support. The quick-scope optimization lets you play aggressive while maintaining that long-range elimination capability.
R93 Alternative Build (Code: R93 Sniper Rifle-Operations-6HS2U0C0FSH6GRF76DG60)
For when you want faster handling:
Muzzle: Whisper Tactical Suppressor
Barrel: R93 Lightweight Short Barrel
Optic: XCOG Assault 3.5x Scope (calibrate to 4x)
Damage: 100 (buffed)
More versatile magazine options with faster velocity for aggressive mid-range work. You sacrifice some long-range effectiveness versus the AWM, but the handling difference is noticeable.
Support LMG Setups
QJB201 Warfare Build (Code: QJB201 Light Machine Gun-Warfare-6FAMCA005E7GMC01NIUGE)
125-round capacity and 785 RPM for when you absolutely need to suppress everything:
Barrel: QJB201 Newtype Sledgehammer Barrel (+3% ADS Speed)
Muzzle: Sandstorm Vertical Compensator
Foregrip: Resonant Ergonomic Grip
Gas Block: QJB201 Newtype Stable Gas Block
Stock: Practical Tactical Stock
Optic: Combat Red Dot Sight
The +4% ADS Speed calibration on the foregrip helps with the typical LMG sluggishness. 550m/s muzzle velocity means your suppression actually reaches where you're aiming.
Operations Mode Meta Classes: Tactical Team Compositions
Stealth Infiltration Builds
SMG-45 #1 Close Range Build (Code: SMG-45 Submachine Gun-Warfare-6HLOBLC09MFFCME3G7LT2)
That 5.3% pick rate reflects just how dominant this thing is in close quarters:
Foregrip: Secret Order Bevel Foregrip
Rear Grip: AR Heavy Tower Grip
Barrel: SMG-45 Fission Long Barrel
Muzzle: SMG Echo Suppressor
Stock: UR Spec Ops Tactical Stock
Mag: SMG-45 40-Round Extended Mag
Right Rail: PEQ-2 Red Laser-Light Combo
The 40-round extended mag trades some stats (-1 Control, -5 Handling, -2 Stability, -8 Accuracy) but the sustained engagement capability is worth it. The Sandstorm Vertical Compensator's +9 Control bonus compensates nicely.
AS Val Stealth Build (Code: 6FIN6LS0CQTV1IBVCBQVT)
Maximum stealth for those flanking plays:
Barrel: VSS Tsunami Long Barrel Combo
Mag: VSS 30-Round Mag
Stock: Shadow Rail Stock
Optic: Recon 1.5/5 Adjustable Scope
Upper Rail: DBAL-X2 Purple Laser-Light Combo
Integrated suppressor and CQB burst capability make this perfect for flanking. Only 3% pick rate, but stealth specialists swear by it.
Assault Breacher Loadouts
M7 Battle Rifle Build (Code: M7 Battle Rifle-Operations-6HG788005KBR2BJ359PNA)
7% pick rate and four-shot kill potential make this the premier Operations assault weapon:
Barrel: Practical Long Barrel Combo (+10% range)
Muzzle: Spiral Fire Flash Hider
Optic: Holographic sight
Foregrip: Recoil control grip
Perks: Accuracy Boost, Ammo Reserve (30 extra rounds)
S-Tier configuration that handles 80% of engagement scenarios with minimal visual recoil. It's honestly kind of unfair.
Need to optimize your competitive loadouts? Delta Force credits top up online via BitTopup keeps you stocked. 24/7 customer support and instant delivery mean you never miss critical unlocks.
S12K Full-Auto Room Clearer
For when you absolutely need to clear a room:
Full-Auto Conversion Stock
Vortex Choke (tightens spread)
Competition Handstop
Multi-purpose Riser with laser
No optic (hip-fire optimization)
1.4% pick rate reflects its specialized role. Counter-play? Keep your engagement distances >8-10m and use EMP/stuns to deny those laser stance advantages.
Weapon-Specific Build Guides: Optimizing Every Category
Assault Rifles: M4A1 vs CI-19 Analysis
The Numbers Game:
CI-19: 9.5% pick rate, superior long-range accuracy, pinpoint precision
M4A1: 9.3% pick rate, balanced mid-long range, higher versatility
M16A4 Starter Alternative:
Damage: 25 per round, 672 RPM
Build: Sandstorm Vertical Compensator, AR Trench Standard Barrel Combo, Russian Accuracy 2x Scope
Equipment: Desert Eagle secondary, class-specific gadgets
QBZ95-1 Assault-Only Build:
Fire Rate: 679 RPM, Pick Rate: 1.1% (niche but effective)
Muzzle: Poseidon Flash Hider
Barrel: QBZ95-1 Longbow Barrel Combo
Mag: QBZ 75-Round Drum for sustained fire
Optic: Micro Sight Riser with Panoramic Red Dot
SMGs: Close Quarters Dominance
Top 3 Close Range Meta:
SMG-45: 5.3% pick rate, superior stability and range extension
P90: 0.8% pick rate, high mobility focus
SR-3M: 0.7% pick rate, stealth specialization
MP7 Operations Build (Code: MP7 Submachine Gun-Operations-6FQP8280FGU21TB2NA8RD):
Laser sight for hip-fire accuracy
Extended mag (+15 rounds)
Suppressor for stealth operations
Perks: Sprint Boost, Quick Reload
K416 Support Build:
Fire Rate: 880 RPM (fastest among meta rifles)
Pick Rate: 3.2%
Muzzle: Poseidon Flash Hider
Barrel: K416 A8 Long Barrel Combo
Mag: M4 45-Round Extended Mag
Sniper Rifles: One-Shot Potential
AWM vs R93 – The Eternal Debate:
AWM: Better muzzle velocity and range for open maps, 3.4% pick rate
R93: Faster handling for aggressive mid-range, 3.4% pick rate
VSS Marksman Alternative:
Pick Rate: 0.7% (underrated, honestly)
Barrel: VSS Tsunami Long Barrel Combo
Optic: 1P-29 Russian 3x Scope
Mag: VSS 30-Round Mag
Attachment Optimization: Maximizing Weapon Performance
Optics Selection Guide
Long-Range Priorities:
ACOG Precision 6x Scope: Maximum zoom for AWM builds
Cobra Accuracy Sight: Balanced magnification for assault rifles
XCOG Assault 3.5x: Fast handling compromise for aggressive sniping
Close-Range Optimization:
Panoramic Red Dot: Wide field of view for SMG builds
Combat Red Dot Sight: Standard CQC optic for LMGs
Micro Sight Riser: Compact profile for stealth builds
Barrel and Muzzle Combinations
Recoil Control Priority:
Sandstorm Vertical Compensator: +9 Control bonus, works on everything
New Leviathan Tactical Long Barrel: Range extension with stability
SMG Echo Suppressor: Stealth with recoil reduction
Range Extension Focus:
AR Gabriel Long Barrel Combo: M4A1 optimization
AWM Skyline Long Barrel: Maximum sniper range
QJB201 Newtype Sledgehammer Barrel: +3% ADS Speed for LMGs
Grip and Stock Synergies
SMG-45 Calibration Example:
Barrel Weight: +50g (+4% Stability, -4% ADS Speed)
Foregrip Thickness: +20mm (+16% Moving Stability)
Rear Grip: +50g, -20mm thickness (+4% Hip Speed, +6% Control)
Stock: +50g, -4 placement (+6% Control, +4.8% ADS Speed)
This configuration prioritizes Control and ADS Speed while accepting a 36% stability loss – which sounds scary but has minimal performance impact in practice.
Map-Specific Loadout Strategies: Adapting to Terrain
Urban Combat Builds
Interior Clearing Priority:
S12K full-auto shotgun for room clearing
SMG-45 with laser optimization for hip-fire
AS Val for suppressed flanking
Counter-Strategies:
Maintain >8-10m engagement distances against shotgun rushers
Use EMP/stuns to disable laser advantages
Position for angle-holding rather than aggressive pushing
Open Field Loadouts
Long-Range Dominance:
CI-19 with 6x optics for precision elimination
AWM for one-shot potential across open areas
QJB201 for suppressive fire and area denial
Positioning Considerations:
Prioritize elevated positions for range advantage
Use suppressed builds to avoid revealing position
Coordinate with team for overlapping fields of fire
Mixed Terrain Adaptations
Versatile Build Philosophy:
M7 Battle Rifle for 80% engagement coverage
M4A1 with balanced attachments for adaptability
Optic selection based on primary engagement ranges
Loadout Switching Strategy:
Assess map layout during prep phase
Identify primary engagement zones
Select builds optimized for expected ranges
Prepare secondary loadouts for mid-match adaptation
Pro Player Builds Analysis: Learning from the Best
Tournament Winning Setups
Absolute Meta Tournament Builds:
CI-19 long-range configuration: 9.5% pick rate in competitive
M7 Operations setup: 7% pick rate for versatility
SMG-45 close-range: 5.3% pick rate for objective play
Team Composition Synergies:
Diversify classes: 1 Assault, 1 Support, 1 Engineer, 1 Recon
Synergize operators: Luna intel + D-Wolf assault combinations
Adapt to maps: Recon for open areas, Engineer for tight spaces
Communicate timing – this is where most teams fall apart
Streamer Favorite Builds
Luna (Recon, S-Tier):
Eagle Eye reveals enemy positions
Silent Steps for invisibility
Game-changing intel for competitive Operations
Stinger (Support, S-Tier):
Combat Stim boosts speed and attack
Ammo Resupply for team sustainability
Dual healer/damage role that's essential for 2025 team compositions
Team Composition Strategies
Balanced Team Framework:
Assault: Damage dealing with M4A1 or CI-19
Support: Healing and close-quarters with SMG-45
Engineer: Area denial with QJB201 or M250
Recon: Intel gathering with AWM or R93
Operator Synergies:
D-Wolf + Vyron: Assault class coordination
Stinger + Toxik: Support class sustainability
Shepherd + Uluru: Engineer defensive positioning
Luna + Hackclaw: Recon intel dominance
Counter-Meta Strategies: Beating Popular Builds
Anti-Sniper Tactics
Positioning Counters:
Smoke grenades to block sightlines
Rapid repositioning after engagement
Coordinated multi-angle approaches
Engineer gadgets for area denial
Equipment Counters:
EMP grenades against laser-equipped snipers
Stun grenades for position disruption
Respawn Beacon placement for pressure maintenance
Rushing Meta Counters
Defensive Positioning:
Hold angles beyond SMG effective range (>10m)
LMG suppressive fire for area control
Coordinate overlapping fields of fire
AT4 Launcher for group elimination
Build Adaptations:
Prioritize stability over mobility in defensive setups
Extended magazines for sustained engagement
Select optics appropriate for expected engagement ranges
Defensive Position Builds
M250 Operations Build (Code: 6FIAPV406L5PA4U76HE30):
Barrel: M250 Sentinel Short Barrel
Mag: M250 75-Round Belt
Optic: Micro Sight Riser with Panoramic Red Dot
Foregrip: Resonant MKII Foregrip
Role: Stationary lane-holder with 34 damage per bullet
PKM Engineer Setup:
Muzzle: Poseidon Flash Hider
Barrel: PKM Elite Standard Barrel
Foregrip: RK-0 Foregrip
Gadget: AT4 Launcher for vehicle counter
Pick Rate: 0.3% for specialized defensive roles
Advanced Loadout Techniques: Next-Level Optimization
Mid-Match Adaptation
Loadout Import Process:
Open Gun Customization Station from main menu
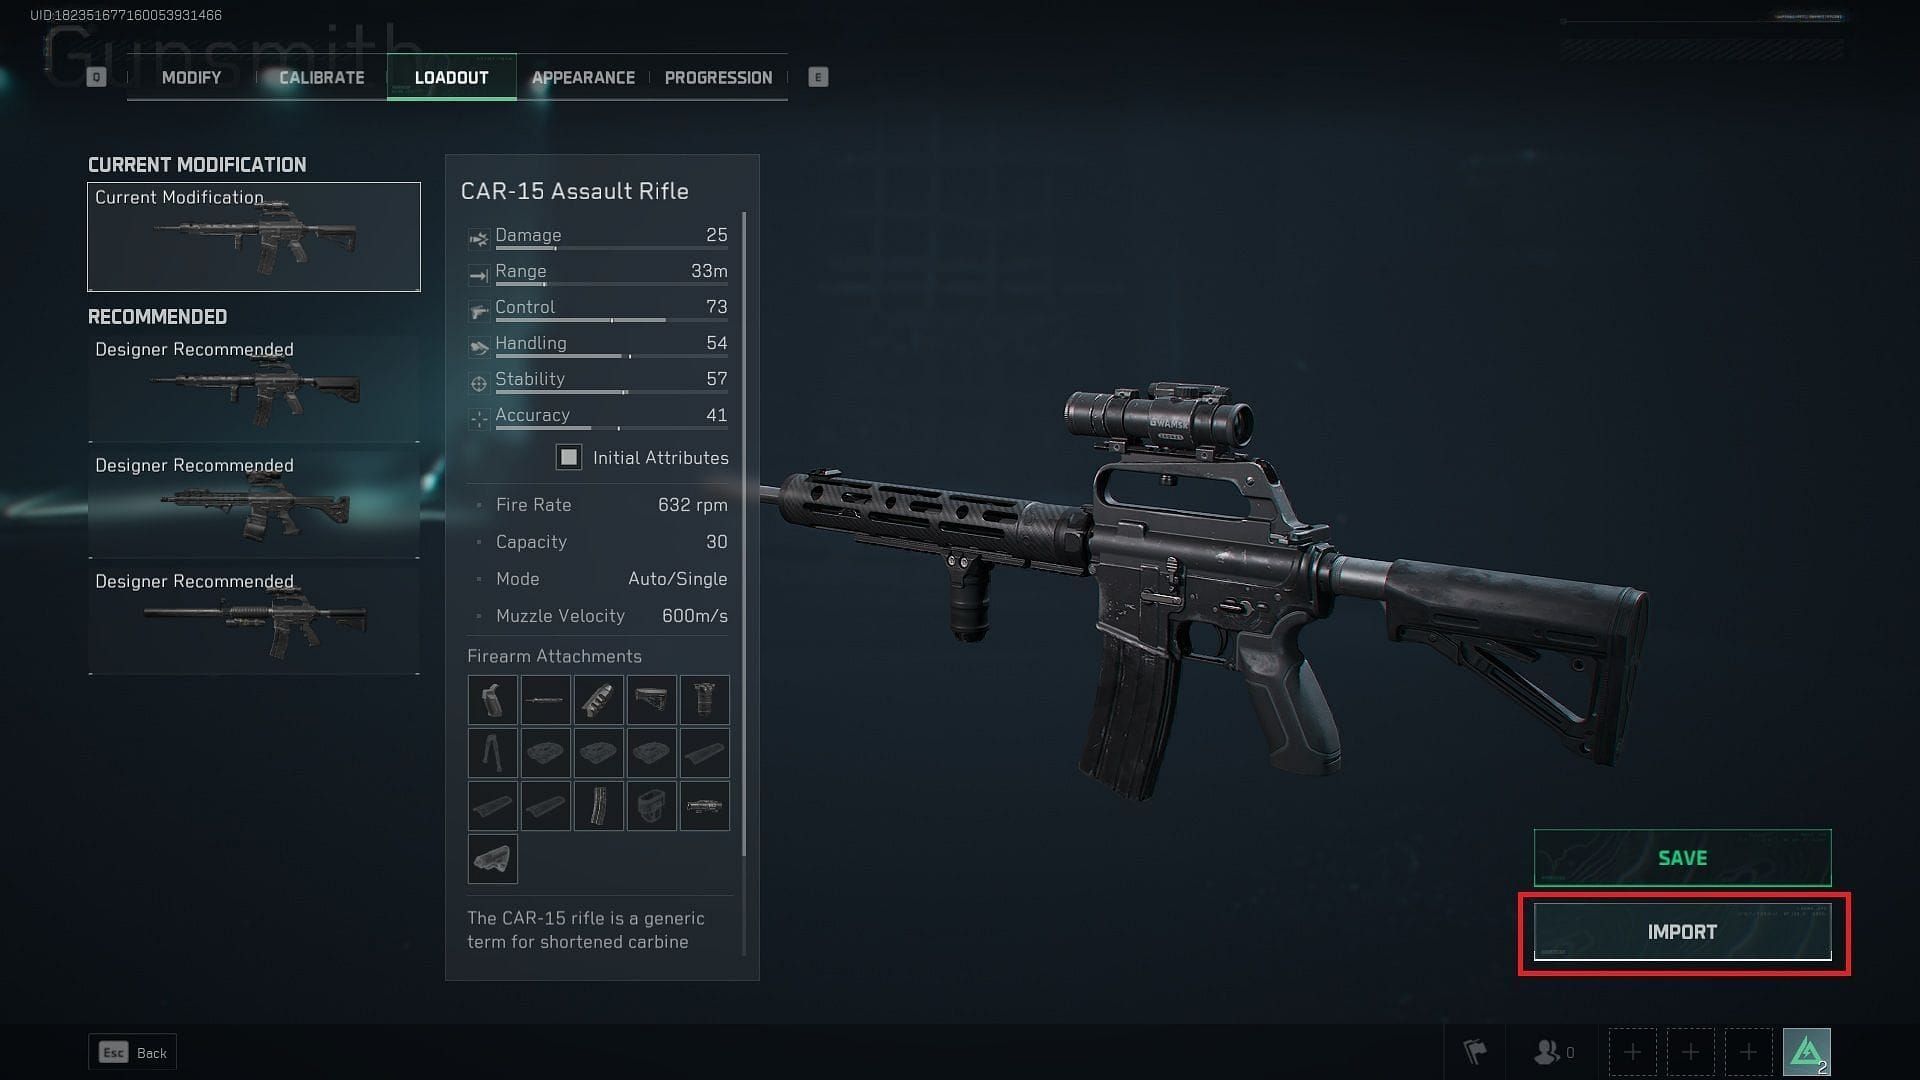
Select target weapon
Click 'Preset' > 'Import Preset'
Paste build code (e.g., 6HLOANO09MFFCME3G7LT2)
Confirm and verify all attachments
Save configuration for immediate use
This process saves 3+ hours of testing while giving you proven meta setups for immediate deployment. No more guessing.
Situational Switching
Mode-Specific Considerations:
Ensure proper 'Operations' or 'Warfare' label compatibility
Different rules apply (no vehicles in Operations)
Switch to compatible codes or manual setup when needed
Troubleshooting Common Issues:
Code Expired/Invalid: Use 2025-updated codes, verify in-game
Mode Mismatch: Check label compatibility before import
Missing Attachments: Switch to manual build or updated code
Performance Issues: Adjust calibrations for personal playstyle
Team Synergy Maximization
Communication Protocols:
Coordinate loadout selections during prep
Share build codes with teammates for consistency
Adapt roles based on map and opponent analysis
Maintain backup loadouts for counter-strategy deployment
Performance Optimization:
Define playstyle before build selection (CQC, Long-Range, All-Range)
Use codes as templates, avoid overstacking damage
Prioritize map knowledge and teamwork over individual builds
Monitor performance metrics for continuous improvement
Future Meta Predictions: Staying Ahead of Updates
Upcoming Weapon Balances
Season 6 Suppressor Rework Impact:
Advanced Multicaliber Suppressor: +9% range, enhanced recoil reduction
Stealth builds gain significant viability improvements
Control and stability prioritization over raw damage
SKS Damage Buffs:
Base damage: 48 (up from 44)
AP damage: 49 (up from 42)
Two-shot body potential in current meta
Build focus: Stability barrel, 1-2x optic, AP rounds
New Content Impact
Raptor Operator Introduction:
EMP Grenade disables laser builds
Drone marking for team coordination
Trace Scanner ultimate: 5 enemy pings
Footprint tracking passive ability
Wildfire Event Considerations:
Dense fog (30-40m visibility) on Longbow Valley
Thermal optics gain significant advantage
Shotgun and SMG effectiveness increases
Lava interior hazards after ~7 minutes
Long-term Strategy Planning
Meta Evolution Patterns:
Weapon tiers shift with quarterly updates
Attachment effectiveness varies with patches
Operator abilities influence weapon selection
Map rotations affect optimal loadout choices
Preparation Strategies:
Maintain multiple build configurations
Monitor patch notes for balance changes
Test new combinations in practice modes
Adapt team compositions for meta shifts
Investment Priorities:
Focus on versatile weapons (M4A1, M7)
Develop proficiency across multiple classes
Master fundamental attachment principles
Build adaptable team communication systems
FAQ
What are the best Delta Force weapons for beginners in 2025? Start with the M4A1 (9.3% pick rate) for versatile performance, SMG-45 for close quarters, and R93 sniper (unlocks Level 7) for long-range. These weapons are forgiving while remaining competitive – perfect for learning the ropes.
How do I import loadout codes in Delta Force? Open Gun Customization Station > Select weapon > Click 'Preset' > 'Import Preset' > Paste code (like 6HLOANO09MFFCME3G7LT2) > Confirm. Just make sure the code matches your intended mode (Warfare/Operations).
Which attachments provide the biggest performance improvements? Sandstorm Vertical Compensator (+9 Control), Secret Order Bevel Foregrip (stability), and New Leviathan Tactical Long Barrel (range extension) offer the most significant universal improvements. Start there.
What's the difference between Warfare and Operations loadouts? Warfare emphasizes long-range precision (CI-19, AWM) for large-scale combat, while Operations prioritizes stealth and close-quarters effectiveness (SMG-45, suppressed builds) for tactical team play. Different game modes, different priorities.
How often does the Delta Force meta change? Major shifts happen with seasonal updates (quarterly), minor adjustments with monthly patches. Season 6 (September 2025) introduced significant suppressor reworks that reshaped the competitive landscape – so stay alert.
What team composition works best for competitive play? Use 1 Assault (M4A1/CI-19), 1 Support (SMG-45), 1 Engineer (QJB201), 1 Recon (AWM/R93). Pair operators like Luna (intel) with D-Wolf (assault) for coordinated advantages. Communication beats individual skill every time.