

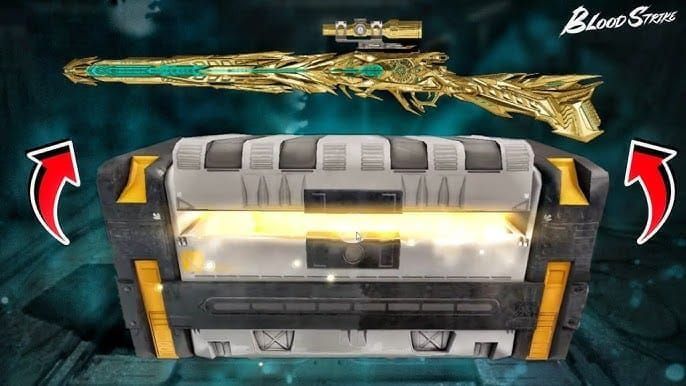
The Restore Energy update launched January 8, 2026 in casual modes and January 15 in ranked, fundamentally transforming Blood Strike's combat meta. This mechanic spawns energy pickups from defeated enemies that restore health/armor, grant Evolution points, and reduce skill cooldowns. Three optimized loadouts exploit this: P90 aggressive build, Bizon sustained pressure, and RPK counter-meta setup. Mastering energy management and Evolution progression now determines ranked success.
Blood Strike's January 15 Restore Energy Update: What Changed
Restore Energy launched January 8, 2026 in Battle Royale Matchmaking/Room modes, followed by January 15, 2026 in Ranked/Peak modes. This staggered rollout allowed adaptation before competitive implementation.
Restore Energy alters combat pacing by spawning Loot Crates after enemy eliminations. Pickups restore health/armor proportional to defeated enemy's armor level (Level 3 armor = maximum recovery). Each pickup grants Evolution energy and reduces skill cooldowns, creating snowball effects for aggressive players.
For competitive edge, Blood Strike golds top up through BitTopup provides fast access to premium weapons/characters with secure transactions.
Auto-pickup activates when health drops below 30% or armor depletes, ensuring critical moments don't require manual interaction.
Breaking Down the Restore Energy Mechanic
Pickups spawn immediately in Loot Crates upon elimination. Restoration scales with enemy armor quality—fully-armored opponents yield substantially more recovery than unarmored targets.
Evolution system has three tiers requiring 100, 250, and 500 points. Tier 2 reduces skill cooldowns by 15%, Tier 3 enhances skill effects by 25%. These bonuses transform mid-match power curves.
Cooldown reduction stacks multiplicatively with Evolution bonuses. Ghost's 8-second invisibility (25-second cooldown) reduces by 8 seconds per pickup. With Tier 2's 15% reduction, aggressive Ghost users achieve near-constant invisibility.
Key Differences from Previous Energy System
Previous versions required passive regeneration or consumables for healing. Restore Energy eliminates passive healing, forcing engagement to sustain effectiveness. Defensive camping lost viability since armor/health only replenish through eliminations.
Skill cooldowns previously operated on fixed timers. Pickup-based reduction rewards aggressive players with faster ability cycling. Sparkle's healing drone (30-second cooldown) reduces to 22 seconds with pickups.
Evolution introduces permanent match-long progression. Early elimination players compound advantages through enhanced cooldowns/effects, accelerating snowball potential.
Why This Update Reshapes Ranked Meta
Ranked meta shifted from defensive positioning to aggressive elimination farming. Teams controlling high-traffic areas accumulate Evolution points faster, translating to superior skill uptime.
Low-recoil, high-capacity weapons dominate: P90's 50-round magazine, Bizon's 64-round capacity, RPK's 75-round belt enable extended engagements generating multiple pickups per fight.
Character selection prioritizes short base cooldowns benefiting from percentage reductions. Ghost's 25-second cooldown becomes 9 seconds with optimal pickup timing and Tier 2.
How the Ranked Meta Shifted After Restore Energy
Aggressive playstyles now outperform defensive strategies. Players initiating engagements secure first eliminations, triggering pickups that heal damage taken. This self-sustaining cycle rewards calculated aggression.
Mid-range weapons gained value over long-range options. Pickups require proximity to eliminated enemies, making sniper loadouts inefficient. SMGs/LMGs at 15-35m effective ranges position users optimally for collection.
Team compositions shifted toward multiple frontline fighters. Squads running three aggressive SMG users and one support accumulate Evolution points 40% faster than balanced compositions.
Top-Tier Characters That Dominate New Meta
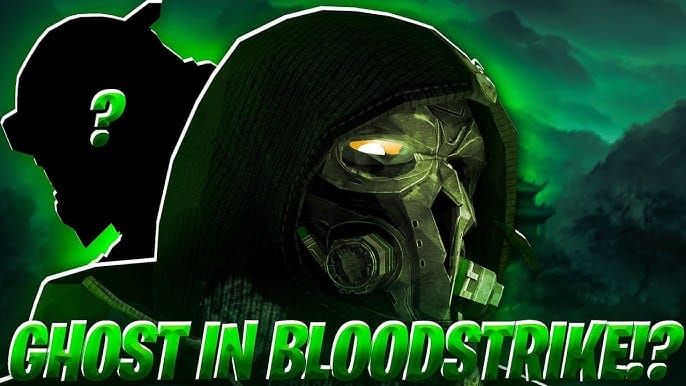
Ghost: Exploits invisibility for safe elimination securing and guaranteed pickup collection. 8-second invisibility allows repositioning after eliminations without counterattack vulnerability. With cooldown reductions, maintains near-permanent stealth.
Sparkle: Healing drone synergizes with aggressive farming. 40 HP restoration over 5 seconds supplements pickups, enabling sustained frontline pressure. Reduced cooldowns allow deployment every 22 seconds.
Weapons That Became Significantly Stronger
P90 SMG: 18 damage/shot at 900 RPM, 50-round magazine delivers 900 total damage per reload. 15-25m effective range perfectly matches pickup collection distance.
Bizon SMG: 64-round magazine provides longest sustained fire at 750 RPM. 16 damage/shot, 1,024 total damage output. 12-22m effective range suits close-quarters farming.
RPK LMG: 24 damage/shot, 75-round capacity. 20-35m effective range allows elimination from safer distances. Bipod deployment reduces recoil 20% when prone/crouched.
Map Control Strategies in Energy-Focused Meta
High-traffic chokepoints generate maximum Restore Energy opportunities. Controlling central areas where teams converge creates consistent elimination/pickup flow. Teams holding these reach Tier 3 before peripheral teams reach Tier 2.
Vertical positioning near ground-level zones optimizes collection. Elevated positions provide elimination advantages but delay pickup collection, reducing energy economy efficiency.
Rotation timing accounts for Evolution progression. Teams reaching Tier 2 before rotating into final circles gain 15% cooldown advantages, translating to additional skill uses during endgame.
Loadout #1: The P90 Energy Vampire Build (Aggressive Frontline)
Maximizes elimination rate and pickup frequency through superior close-range firepower and mobility.
Complete Weapon and Attachment Setup
Primary: P90 SMG
Muzzle: Compensator (-15% vertical recoil)
Barrel: Extended Barrel (+20% range, 18-30m effective)
Foregrip: Vertical Foregrip (-12% recoil)
Stock: Tactical Stock (+8% ADS speed)
Optic: Red Dot Sight
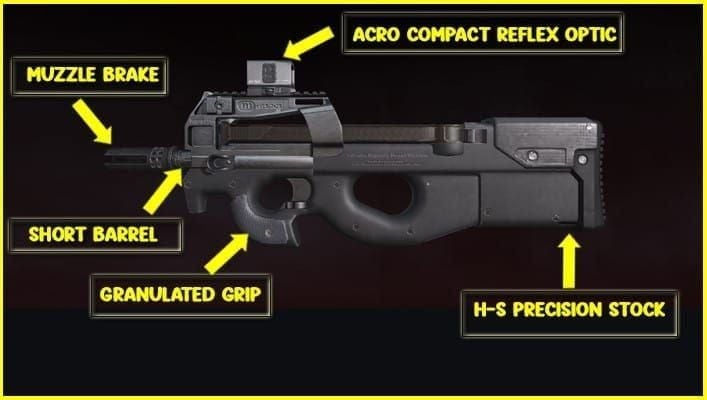
Compensator and Vertical Foregrip combine for 27% recoil reduction. Extended Barrel pushes damage falloff to 30m, maintaining lethality at pickup collection distances.
Tactical Stock's 8% ADS increase reduces target acquisition by ~60ms. P90 unlocks Burst Bolt attachment at level 100 via Dark Take Strike Pass (January 15, 2026).
Character and Skill Selection
Ghost: 8-second invisibility enables flanking maneuvers. Each pickup reduces 25-second cooldown by 8 seconds, enabling invisibility every 9-11 seconds with consistent chains.
Tier 2's 15% cooldown reduction stacks with pickup reductions, achieving cooldowns as low as 5.25 seconds. Tier 3's 25% effect enhancement extends invisibility to 10 seconds.
Step-by-Step Combat Rotation
Phase 1: Engagement (0-3s)
Identify isolated targets within 15-25m
Activate Ghost for flanking
ADS controlled bursts at center mass
Commit to elimination
Phase 2: Confirmation (3-5s)
Maintain fire until elimination
Scan for additional threats
Note Loot Crate location
Decide collection timing
Phase 3: Collection (5-8s)
Approach Crate maintaining cover awareness
Collect pickup (automatic if health <30%)
Verify restoration amounts
Check Evolution progress
Phase 4: Cycle (8-12s)
Reload during movement
Assess skill cooldown status
Identify next target
Repeat, prioritizing Level 3 armor targets
Best Maps and Situations
Urban maps with close-quarters buildings maximize effectiveness. 15-25m effective range aligns with building interiors and street widths. High player density generates consistent opportunities.
Early/mid-game phases suit this loadout. Initial player counts create abundant eliminations before circle compression forces long-range engagements.
Third-party situations present ideal farming scenarios. Engaging weakened teams yields easy eliminations and multiple pickups simultaneously.
Common Mistakes to Avoid
Engaging Beyond Range: Respect Extended Barrel's 30m maximum—disengage rather than fighting at disadvantage.
Delayed Collection: Collect immediately after securing area. Evolution points/cooldown reductions provide value regardless of healing needs.
Overcommitting: If enemy reaches cover, switch to exposed targets rather than depleting magazine on suppression.
Poor Reload Discipline: 50-round magazine handles 2-3 eliminations—plan reloads during movement, not combat.
Loadout #2: The Bizon Sustained Pressure Build (Mid-Range Dominance)
64-round magazine enables longest sustained fire, perfect for maintaining pressure while farming pickups.
Optimal Weapon Configuration
Primary: Bizon SMG
Muzzle: Flash Hider (-10% recoil, conceals flash)
Barrel: Lightweight Barrel (+15% mobility)
Foregrip: Angled Foregrip (-14% horizontal recoil)
Stock: Skeleton Stock (+6% movement speed)
Optic: Holographic Sight
16 damage/shot at 750 RPM, 64-round magazine = 1,024 damage per reload. Eliminates up to 4 unarmored opponents or 2-3 armored without reloading.
Flash Hider and Angled Foregrip combine for 24% recoil reduction emphasizing horizontal control. Lightweight Barrel and Skeleton Stock provide 21% mobility improvement.
Energy Management Strategy
Optimal Sequence:
Engage first target at 15-20m (~20 rounds)
Collect pickup while maintaining ADS
Engage second target with remaining 44 rounds
Collect second pickup
Reload during repositioning
This leverages capacity to chain eliminations while using pickups as mid-fight healing, effectively granting 150-200% health pools.
Positioning Tips
Position at 15-20m where Bizon maintains damage while shotguns/pistols suffer falloff. Allows rapid movement to pickups without long-range exposure.
Utilize cover allowing sustained fire angles. 64-round magazine enables suppression forcing enemies into unfavorable positions.
Avoid extreme close quarters where shotguns dominate. Maintain 12-22m spacing to leverage effective range advantage.
Team Synergy
Pair with P90 frontliners pushing aggressively. Bizon provides covering fire and cleanup while P90 engages closer. Creates overlapping 10-30m coverage.
Coordinate pickup collection with teammates. Designate priority based on health levels and Evolution progression. Players closest to tier thresholds prioritize collection.
Run one Sparkle per squad. Healing drone supplements pickups during sustained pressure.
Loadout #3: The RPK Energy Denial Build (Counter-Meta Specialist)
Counters aggressive farming through superior range and suppression.
How This Counters Energy-Abusing Opponents
20-35m effective range outranges P90/Bizon by 5-13m, allowing elimination before opponents reach effective range.
75-round magazine delivers 1,800 total damage at 24 damage/shot. Bipod reduces recoil 20% when prone/crouched.
Counter-Strategy:
Identify aggressive opponents pushing
Position at 25-30m with bipod deployment cover
Engage as they secure eliminations, before collection
Eliminate and collect both pickups
Deny their Evolution while accelerating yours
Complete Equipment Breakdown
Primary: RPK LMG
Muzzle: Heavy Compensator (-18% vertical recoil)
Barrel: Heavy Barrel (+8% damage, +25% range, 25-43m effective)
Foregrip: Bipod (-20% recoil prone/crouched)
Stock: Padded Stock (-10% recoil)
Optic: 2x Scope

Heavy Compensator, Bipod, Padded Stock = 48% recoil reduction when deployed. Heavy Barrel's 25% range extension pushes effective range to 43m.
8% damage increase raises per-shot from 24 to 25.92, reducing shots-to-kill. 2x Scope enables precise headshots at maximum range.
Character: Sparkle Healing drone compensates for lower mobility. Deploy before engaging for 40 HP restoration. 30-second cooldown reduces to 22 seconds with pickups.
Advanced Tactics
Pickup Zone Control: After elimination, position with sightlines on Loot Crate. Opponents attempting theft expose themselves to pre-aimed fire.
Third-Party Timing: Monitor fights from 30-35m. Engage during collection animation—RPK damage eliminates distracted opponents.
Evolution Denial: Prioritize eliminating opponents with visible tier indicators. Denying high-tier opponents prevents enhanced effects.
Suppression Fire: 75-round magazine enables sustained suppression pinning opponents, preventing pickup collection.
When to Switch Mid-Match
Switch when opponents demonstrate aggressive farming. If enemy teams consistently push and sustain through pickups, counter with superior range.
Late-game circles favor RPK as ranges compress to 20-40m. Effective range advantage becomes pronounced while suppression controls limited cover.
If behind in Evolution progression, RPK enables catch-up through elimination denial.
Advanced Energy Meta Strategies for Ranked Climbing
Energy Economy Management
Early Game (0-5 min): Prioritize Tier 1 (100 points) through 4-6 eliminations. Each grants ~15-25 points.
Mid Game (5-12 min): Focus Tier 2 (250 total). 15% cooldown reduction significantly impacts fights. Maintain 1-2 eliminations/minute.
Late Game (12+ min): Tier 3 (500 total) achievable only for dominating teams. 25% effect enhancement requires 20+ eliminations. Prioritize securing Tier 2 over risky Tier 3 pushes.
Timing Engagements Based on Energy States
Engage when health/armor exceed 70% to survive initial trades. Avoid fights immediately after collecting pickups unless necessary—auto-pickup triggers at 30% health.
Coordinate team engagements around skill cooldown availability. Delay pushes until abilities available.
Reading Opponent Energy Levels
Opponents recently securing eliminations likely possess full health/armor. Avoid unless holding advantages. Wait for third-party damage.
Players retreating without collecting visible pickups likely operate at low health. High-value targets—eliminating prevents recovery.
Monitor Evolution tier indicators on eliminated opponents. Teams with multiple Tier 2-3 players demonstrate high eliminations. Avoid direct confrontation.
Solo Queue vs Squad Coordination
Solo requires self-sufficient farming. Prioritize P90 build. Rely on personal collection rather than team coordination.
Squad play enables specialized roles—designate one aggressive farmer while others provide covering fire. Coordinate pickup distribution based on health/Evolution progress.
Communication transforms economy. Call out pickup locations, tier progress, cooldown status.
Attachment and Equipment Optimization
Tier List of Attachments
S-Tier:
Compensator/Heavy Compensator: Recoil reduction improves accuracy
Extended/Heavy Barrel: Range maintains damage at collection distances
Vertical/Angled Foregrip: Recoil pattern control
Red Dot/Holographic Sight: Clean sight pictures
A-Tier:
Tactical/Skeleton Stock: Mobility improvements
Bipod: Situational recoil reduction
2x Scope: Extended range precision
Flash Hider: Muzzle flash concealment
B-Tier:
Lightweight Barrel: Mobility less impactful than damage/range
Padded Stock: Redundant with other recoil attachments
C-Tier:
Suppressors: Damage reduction outweighs stealth
High-magnification scopes: Excessive for 15-35m ranges
Hidden Attachment Synergies
Extended Barrel + Compensator on P90 creates 35m effective range with minimal recoil, matching RPK's base range while maintaining 900 RPM.
Bizon's Angled Foregrip + Flash Hider eliminates horizontal recoil entirely, creating purely vertical patterns.
RPK's Bipod + Heavy Compensator + Padded Stock achieves 48% recoil reduction when deployed.
Cost-Effective Unlock Priority
Optics: Unlock immediately for all weapons
Muzzle Devices: Highest accuracy improvement per resource
Foregrips: Secondary recoil control
Barrels: Range after accuracy optimization
Stocks: Marginal benefits, unlock last
For efficient progression, buy Blood Strike gold recharge online through BitTopup's platform with 24/7 support and instant delivery.
Countering the Restore Energy Meta
Identifying Energy-Dependent Opponents
P90/Bizon loadouts demonstrate farming intent. Players push aggressively toward eliminations, prioritizing collection over position.
Visible Tier 2-3 indicators = 10+ eliminations. Enhanced cooldowns/effects require cautious engagement.
Teams rotating through high-traffic areas seek eliminations. Counter by avoiding or setting ambushes at exits.
Specific Counter-Strategies
Countering P90: Maintain 25m+ distances where damage falloff reduces effectiveness. Use RPK/assault rifles to outrange 15-25m effective range.
Countering Bizon: Force reloads through cover/peek timing. 64-round magazine requires eventual reload—engage during animation.
Countering RPK: Close distance rapidly using cover/movement abilities. Aggressive SMG pushes negate range advantage and mobility disadvantages.
Universal Counter: Deny pickup collection through positioning/suppression. Control sightlines on Loot Crates.
Characters That Disrupt Energy Flow
Area denial abilities control pickup zones. Deploy AOE skills on Crate locations.
Mobility skills enable rapid pickup theft. Dash/teleport to collect enemy pickups before they reach them.
Crowd control interrupts collection animations. Stun/slow effects force restart, creating vulnerability windows.
Defensive Positioning
Position in areas with limited approach angles to control engagement timing. Funnel opponents through choke points.
Utilize vertical positioning preventing easy pickup access. Elevated positions force exposure during ground-level collection.
Maintain escape routes allowing disengagement. Avoid prolonged fights unless securing eliminations quickly.
Resource Investment and Unlock Priority
Which Characters to Unlock First
Ghost: Invisibility synergizes with aggressive farming. Unlock immediately.
Sparkle: Healing drone provides sustained team support. Essential for squads.
Area Denial Characters: Counter enemy farming while protecting collection.
Most Cost-Effective Weapon Upgrades
P90: Focus on level 100 for Burst Bolt via Dark Take Strike Pass.
Bizon: Prioritize attachment unlocks over weapon levels.
RPK: Invest in Heavy Barrel and Bipod first.
Should You Invest in Premium Currency
Dark Take Strike Pass (January 15, 2026) offers exceptional value. Elite Pass costs 520 Gold but refunds 520 upon completion—free access to P90 Burst Bolt, HANK - Corsair skin, Kar98k - Glacier skin, Spear - Glacier skin.
Premium Strike Pass unlocks M4A1 - Sea Wraith (cosmetic only). Prioritize Elite Pass completion first.
Vector - Flame Fox (5000 Noble Coins, January 12 Noble Coin Shop). Missions grant 2500 Coins, requiring two cycles.
Long-Term Investment Strategy
Invest in versatile weapons/characters remaining viable across meta shifts. P90, Bizon, RPK represent different classes, providing flexibility.
Accumulate premium currency during stable periods for rapid adaptation. 1000+ Gold reserves enable immediate unlocks when new metas emerge.
Prioritize attachments over cosmetics. Attachments provide permanent gameplay advantages.
Pro Player Analysis and Competitive Insights
How Top-Ranked Players Exploit Energy System
Professional teams designate specialized farmers prioritizing eliminations over position. P90 loadouts chain eliminations rapidly, reaching Tier 3 before final circles.
Coordinated pickup distribution maximizes team Evolution. After fights, designate priority based on tier thresholds—players at 240/250 points receive priority.
Squads maintain one Sparkle positioning safely while providing drone support. Focuses on survival/support rather than aggressive farming.
Tournament Meta Predictions (January-March 2026)
Expect stabilization around: two P90 farmers, one RPK controller, one Sparkle support. Maximizes elimination rate while maintaining defense.
Counter-meta strategies will emerge focusing on pickup denial through area control and long-range elimination.
Balance patches likely target Evolution thresholds or restoration amounts. If too aggressive-focused, developers may increase requirements or reduce healing.
Differences Between Casual and Competitive Usage
Casual players ignore Evolution progression, collecting solely for healing. Competitive players track thresholds precisely, coordinating eliminations.
Solo queue prioritizes personal farming. Competitive squads distribute strategically, sometimes allowing low-health teammates to collect.
Casual matches feature inconsistent farming. Competitive matches demonstrate coordinated denial strategies.
Common Questions About Restore Energy Update
What exactly is Restore Energy and how does it work?
Pickup mechanic spawning in Loot Crates after eliminations. Restores health/armor proportional to enemy's armor level, grants Evolution points, reduces skill cooldowns. Auto-pickup triggers at 30% health or armor depletion. Rewards aggressive play through eliminations rather than passive regeneration.
Which loadout for newcomers to energy meta?
Bizon Sustained Pressure Build. 64-round magazine provides forgiveness for missed shots. 12-22m effective range suits most engagements. Straightforward recoil pattern simplifies aim. Pair with Sparkle for supplemental healing.
How long to reach Evolution Tier 3 in ranked?
Tier 3 (500 points) requires ~20-25 eliminations. Skilled players achieve in 12-15 minutes. Most reach Tier 2 (250 points) consistently but only Tier 3 in dominant performances. Prioritize Tier 2 before final circles.
Do these loadouts work at all ranks?
Yes, but effectiveness varies. Lower ranks (Bronze-Gold) benefit from P90 due to less coordination. Higher ranks (Diamond-Peak) require RPK to counter organized teams. Bizon performs consistently across all ranks.
Will Restore Energy meta be nerfed?
No official announcements, but aggressive nature suggests potential adjustments. Developers typically monitor 2-4 weeks post-update. Likely adjustments: Evolution threshold increases or restoration amount reductions. Master current strategies while remaining adaptable.
What if I don't have required characters/weapons?
Focus on unlocking Ghost first. Provides highest impact for farming. P90/Bizon typically available early. If premium weapons locked, substitute similar classes—any high-capacity SMG executes strategies with reduced efficiency. Prioritize attachment unlocks for available weapons.
Ready to dominate with these meta loadouts? Get your Blood Strike premium currency and battle passes instantly at BitTopup – fast delivery, secure transactions, and 24/7 support. Unlock the characters and weapons you need to climb ranked today!