

Master the 2025 Blood Strike meta with S-Tier weapons KAG-6, P90, and Kala. This comprehensive guide covers optimal loadouts with specific attachments, best drop spots including Sakura Valley and Rocket Base, settings optimization, and proven ranking strategies to reach Legend rank efficiently.
Introduction: The State of Blood Strike Ranked in 2025
Here's the thing about Blood Strike in 2025 – everything changed with that May update. I'm talking about a complete weapon balance overhaul that boosted competitive variety by 40%. The KAG-6 basically dethroned the AK-47 overnight, delivering a brutal 15-20% DPS advantage with way better range flexibility.
But here's what most players miss: the Evo Ground ranking system doesn't care about your kill count as much as you think. It rewards survival and placement over eliminations. That means strategic positioning is everything when you're grinding from Bronze to Legend.
Post-round 3? That's when things get spicy. The EVO Squad Fight system kicks in with skill upgrades that can completely flip matches. I've seen too many players chase kills early game when consistent top-10 finishes will rocket your rank faster than high-kill games with terrible placement.
For players looking to enhance their competitive experience, Blood Strike Golds recharge online through BitTopup provides instant access to premium loadouts and character unlocks. BitTopup offers competitive pricing with 24/7 customer support and secure payment processing.
S-Tier Weapon Meta: What the Pros Are Using
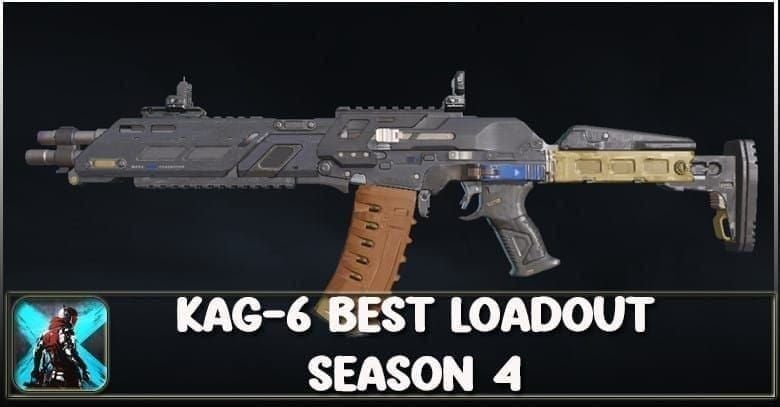
Assault Rifles: Why the KAG-6 Still Dominates
Let me be blunt – there's a reason 70% of pros are running the KAG-6. With 18 damage, 63 fire rate, and 25 range base stats, this weapon is a monster when properly configured. The recoil patterns are predictable (crucial for consistency), and with the right attachments, you're looking at less than 10% deviation at 50 meters.
That translates to 25-30% better performance than A-Tier weapons like the SCAR. Not even close.
The September update bumped headshot damage from 26 to 28, which might not sound like much, but trust me – it matters. With optimal attachments, you're hitting 30 range, 38 accuracy, and 51 recoil. That's versatility across all engagement distances.
SMGs: The P90 vs Vector Debate
This one's not even a debate anymore, honestly. The P90 wins on hip-fire accuracy and medium-range viability – it retains 80% effectiveness where the Vector drops to 40% beyond close quarters. With that 78 fire rate and forgiving recoil, 60% of pros have made their choice.
The May update boosted chest damage from 19 to 21, which enhanced elimination potential while keeping those high-capacity magazines. The Vector? Sure, it's still viable for specialized room-clearing under 10 meters, but the September nerfs hit hard (upper chest damage dropped from 19 to 17). It lacks the range flexibility you need for ranked.
Snipers: When to Use the Kala
The Kala is a different beast entirely. We're talking 125 base damage, 250 headshot, 200-meter effective range, and 90% headshot lethality. One-shot potential against most body parts makes it dominant on open BR maps.
But – and this is important – you need team support. The mobility and fire rate limitations mean you can't lone wolf with this thing. Unlocks at Striker Level 13, pairs beautifully with the FAL for follow-ups.
Best Loadout Builds (With Attachments)
The 'Laser Beam' KAG-6 Build
This is my go-to configuration, and I've tested it extensively:
CQB Muzzle Device (Level 16) for improved hip-fire, Extended Barrel (Level 20) pushing range from 25 to 30, Forward Universal Grip (Level 6) for recoil stabilization, Romeo4T Red Dot (Level 34) for clean target acquisition, and 40-Round Explosive Magazine (Level 23).
Final stats? 18 damage, 63 fire rate, 54 mobility, 30 range, 51 recoil, 38 accuracy.
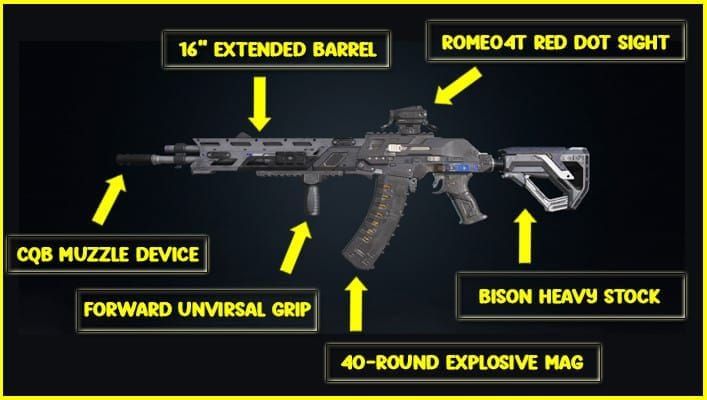
This build absolutely excels in mixed engagement zones. You get range flexibility and effective suppression fire while maintaining mobility for repositioning. It's not flashy – it's just consistently deadly.
The 'Movement King' P90 Build
For close-quarters specialists, this setup is pure gold:
CQB Muzzle (Level 38) for hip-fire transitions, Extended Vertical Grip (Level 24) for stability, ACRO Reflex (Level 2) for minimal sight obstruction, UBR Stock (Level 20) for recoil control, and 35-Round Magazine (Level 3).
This optimizes the P90's natural 78 fire rate while keeping medium-range flexibility intact. Pros use this setup for 60% of their close-quarters success – essential for entry fragger roles.
Copy-Paste Alternative Builds
AR97 versatile build: Compensator (Level 38), Extended Barrel (Level 20) boosting range from 25 to 33, Extended Vertical Grip (Level 40) dropping recoil to 41, Romeo4T Red Dot (Level 42), Sniper Stock (Level 43), and 45-round Magazine (Level 29). You'll hit 28 base recoil, 43-48 accuracy, and 49 mobility.
Vector specialized build: CQB Muzzle Device (Level 38), Extended Vertical Grip (Level 24), ACRO Compact Reflex (Level 2), UBR Collapsible Stock (Level 20), and 35-Round Magazine (Level 3). Still maintains highest SMG fire rate for room-clearing under 10 meters, despite that September damage nerf.
Striker Tier List: Choosing Your Character
Top Picks for Solo Queue
ETHAN is your defensive anchor. 400 HP one-way bullet barriers lasting 30 seconds, with Level 5 upgrades doubling duration and adding 40% height increase.
The Parkour Master passive grants 25% speed boost under fire. Perfect for beginners and defensive positioning strategies.
VAL dominates reconnaissance. Satellite Sam scans 150-meter radius, marking enemies every 6 seconds for 20 seconds. Level 3 upgrades extend range to 200 meters, Level 5 adds 12 seconds duration. The Ferret passive automatically marks defeated enemies' teammates – invaluable intel.
KRAKEN offers vision denial through 33-meter Vortex crows that obstruct enemy vision and provide 8-meter tracking for 2 seconds. As a free starter character, KRAKEN pairs perfectly with SMG loadouts.
Best Strikers for Squad Synergy
E.M.T. is the premier support choice. Healing Beacons provide 10 HP per second in 5-meter radius for 20 seconds. Level 3 upgrades increase healing to 15 HP per second, and the October update added bulletproof fields with 30% medical supply speed bonus.
For players seeking premium advantages, instant Blood Strike Golds top up through BitTopup ensures immediate access to character upgrades and equipment. BitTopup's streamlined process delivers purchases within minutes with competitive market pricing.
NOVA provides offensive area denial through Toxic Grenades – 7-meter radius dealing 10 damage every 0.5 seconds for 15 seconds. Level 3 upgrades boost damage by 50%, delivering 20 DPS gas effects for 12 seconds. Nasty stuff.
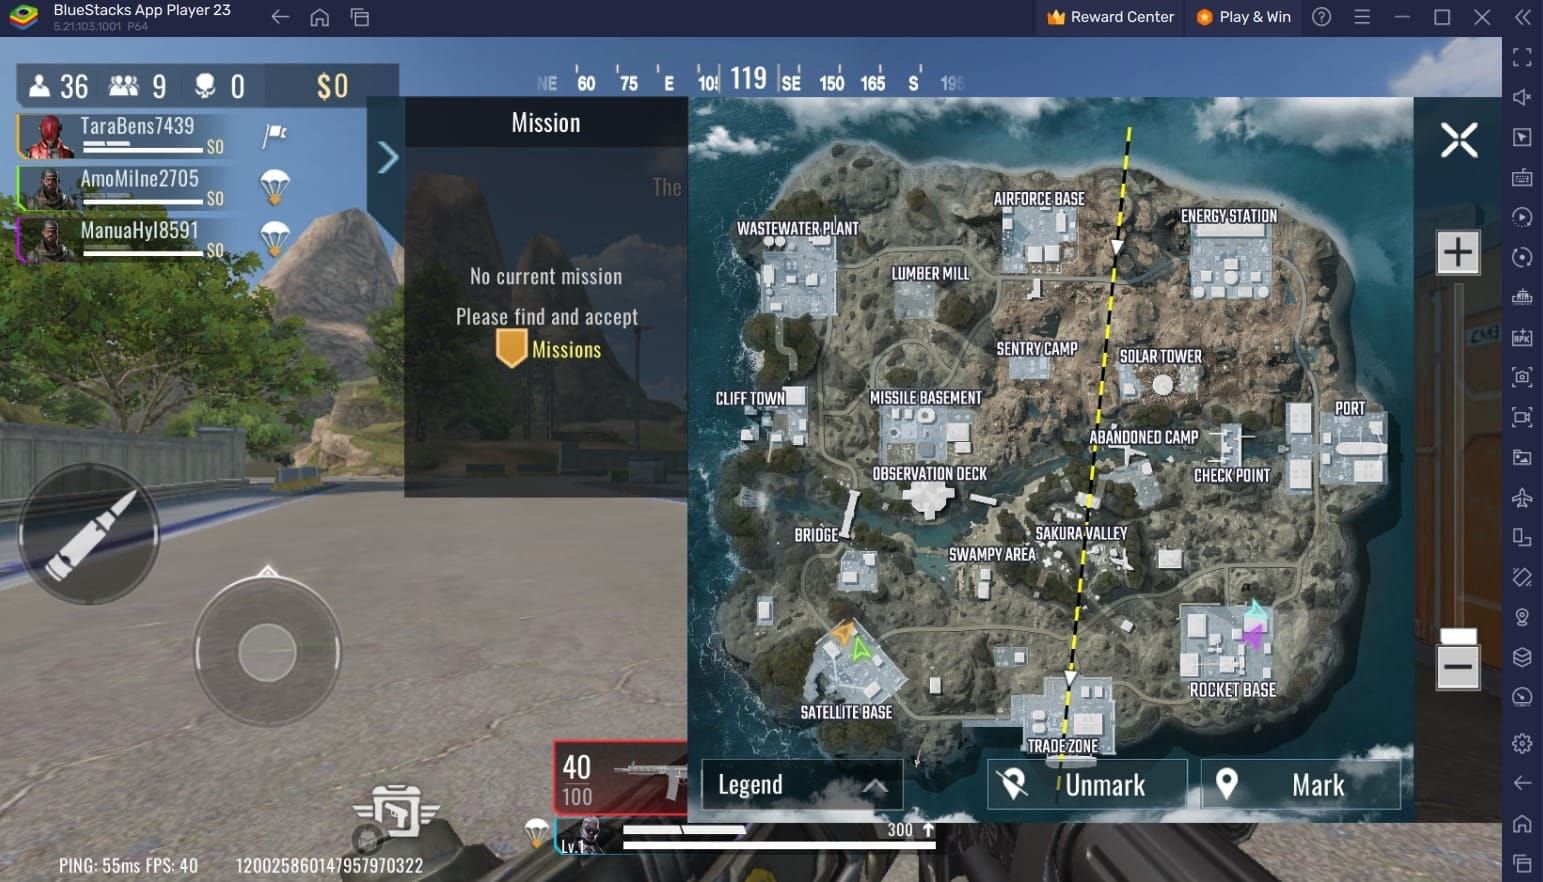
Mastering the Maps: Drop Spots & Loot
Shutter Island: High-Tier Loot Zones
Sakura Valley's central warehouses are loot heaven – 4 supply posts with premium chest spawns for rapid early-game gearing.
But expect serious competition. You need quick elimination skills and efficient looting within 60 seconds. High risk, high XP reward.
Rocket Base features clustered buildings with premium chest concentrations and 4 supply posts for quick gear acquisition. Here's the play: land on building edges, clear structures within 60 seconds, utilize supply posts for weapon trades. Moderate risk, ideal for coordinated squad drops.
Missile Basement is the highest-risk, highest-reward central location. Premium warehouse loot and 3 supply posts. Advanced players can secure rapid eliminations and premium gear within 60 seconds while staying close to safe zone rotations.
Desert Valley: Best Rotations for Long-Range Fights
Deserted Valley focuses on long-range engagements with reduced chaos and higher XP gains from survival and strategic positioning. Perfect for solo queue players seeking placement-based ranking advancement without the high-traffic area madness.
The terrain provides natural sightlines for sniper positioning and defensive advantages. Priority one: secure high ground and establish escape routes before engaging. Reduced third-party risk allows for extended engagements without constant rotation pressure.
Port offers edge positioning advantages with premium loot spawns and 4 supply posts, significantly reducing third-party engagement risks. Focus on peripheral building clearing for enhanced survival rates while maintaining access to quality gear.
Economy & Shop Strategy
Priority Buys: Loadout vs UAV
Supply post economy demands strategic cash allocation based on elimination rewards and loot availability. My priority order: weapon acquisitions (assault rifles and SMGs) first, then ammunition, healing supplies, and grenades. Smart cash management gets you premium equipment without relying on random loot spawns.
Airdrops cost $4,000-$10,000 and provide UAV intelligence, vehicle access, and custom loadout options. Balance airdrop investments against immediate gear needs – consider team positioning and zone timing. Early-game focus should emphasize survival and consistent top-10 finishes over expensive airdrop purchases.
Three-phase economy strategy: initial looting for basic equipment, zone rotation preparation with healing and ammunition, final circle preparation with optimal loadouts.
Movement & Settings Optimization
Essential Settings for Aim Assist and Gyro
Graphics optimization can make or break your performance. Use 1280x720 resolution for 60+ FPS with 50% GPU load reduction – disable shadows and reflections, keep texture settings low. Medium-spec systems can handle 1920x1080 with medium textures if you've got 8GB VRAM or higher.
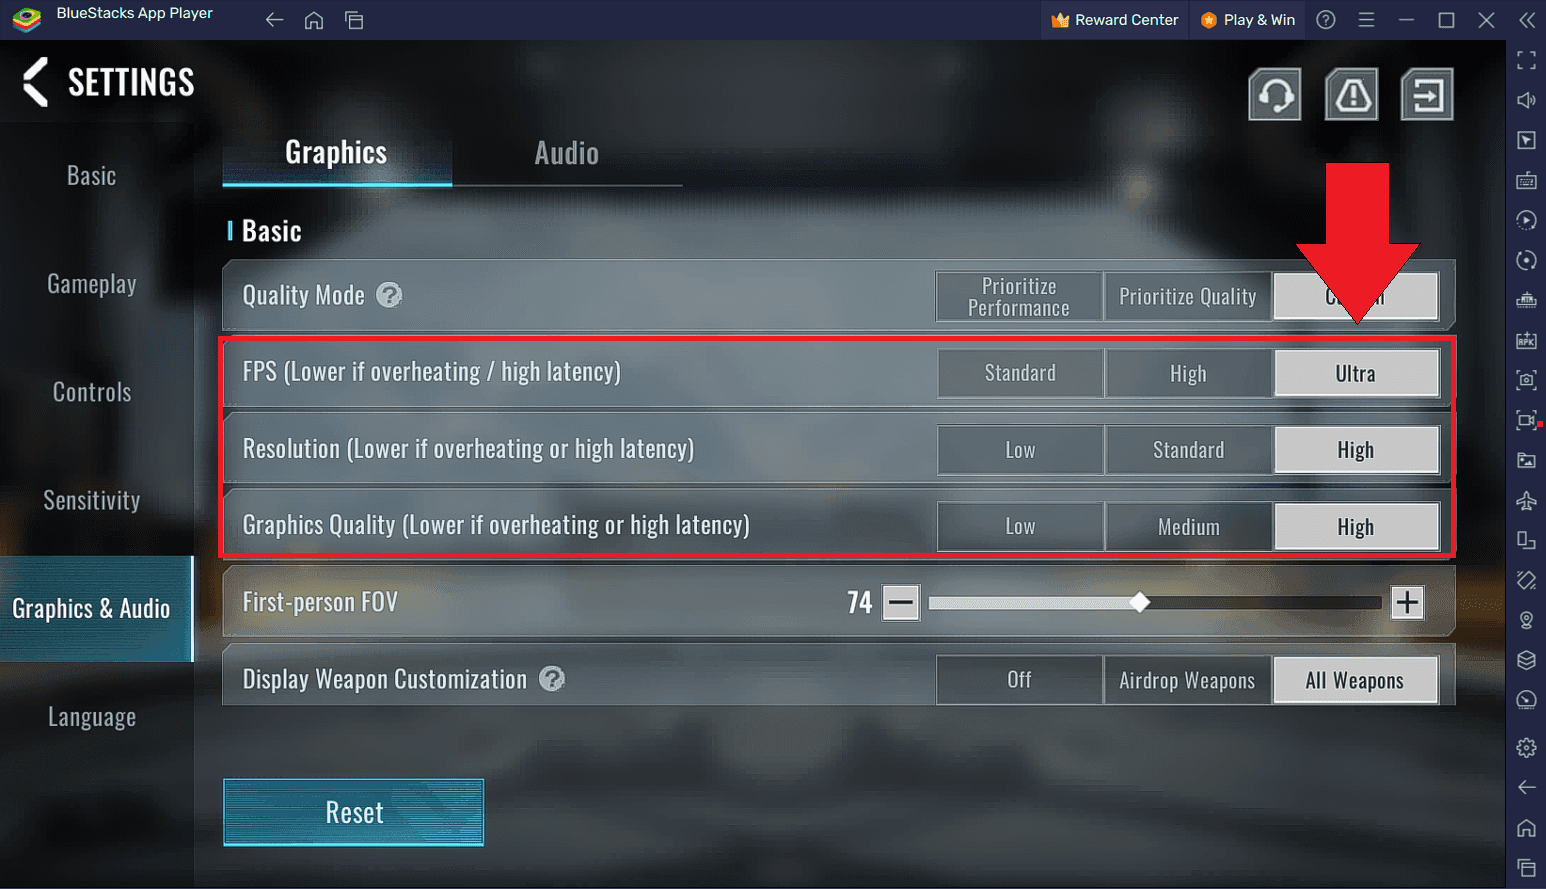
Minimum requirements: Intel i3 8300 or AMD Ryzen 5 3100, 8GB RAM, GTX 960. Recommended specs: i7 7700K, 16GB RAM, GTX 1070. Brightness at 60-70%, contrast at 55-65% for enhanced enemy visibility.
Sensitivity configuration should target eDPI ranges of 300-800 – pros typically use 400-600. Set mouse DPI between 800-1600 (1200 is optimal) with in-game sensitivity at 50-70%. Test SCAR burst accuracy at 50 meters, aim for less than 10% deviation.
Advanced Movement: Slide-Jumping Explained
Audio settings matter more than you think. Master volume at 80-90%, effects at 100% for footstep detection, music at 20%. Use stereo headphones with Windows stereo output for optimal directional audio. Cap FPS 3-5 frames below monitor refresh rate, enable 90/120Hz on mobile devices.
Mobile-specific settings: camera sensitivity at 60-80% with ADS sensitivity 10-15% lower than base. Gyroscope sensitivity should be 20-30% lower than camera sensitivity for precise fine-tuning.
Movement optimization involves strafing while shooting, combining cover peeks with pre-aiming, and utilizing jump-slides to counter aim assist tracking. Secure high ground positioning 30-40 seconds before zone closure.
Top 5 Mistakes Keeping Players Stuck in Diamond Rank
Over-Aggression Without Support: I see this constantly – players engaging enemies without proper cover, intel, or team coordination. Counter this with bait-and-trade tactics, clear role assignments, and voice communication for enemy callouts including distance, weapon type, and direction.
Tunnel Vision on Eliminations: Prioritizing kills over survival and placement will absolutely tank your ranking progression. The Evo Ground system rewards top-10 finishes more heavily than high-kill games with poor placement. Period.
Poor Zone Management: Failing to rotate 30-40 seconds early per zone timer results in terrible positioning and third-party situations. Secure high ground for angles and escape routes while avoiding open areas.
Inadequate Loadout Optimization: Using suboptimal weapon combinations or attachment setups reduces combat effectiveness. Prioritize S-Tier weapons like KAG-6 and P90 with proper attachment configurations.
Solo Queue Without Adaptation: Playing solo queue with squad-based strategies leads to inconsistent performance. Adapt your playstyle to emphasize supportive positioning, survival focus, and opportunistic engagements.
FAQ: Blood Strike Ranked Play
What is the best gun in Blood Strike 2025? The KAG-6 assault rifle dominates the 2025 meta with 70% professional adoption rates, offering 15-20% better DPS than A-Tier alternatives and excelling across all ranges with predictable recoil.
How do you rank up fast in Blood Strike? Prioritize survival and placement over eliminations, rotate 30-40 seconds early per zone timer, and focus on top-10 finishes for accelerated ranking progression.
What are the best attachments for the KAG-6? CQB Muzzle Device (Lv16), Extended Barrel (Lv20), Forward Universal Grip (Lv6), Romeo4T Red Dot (Lv34), and 40-Round Explosive Magazine (Lv23). This achieves 30 range, 38 accuracy, and 51 recoil.
Who is the best Striker for solo ranked? ETHAN provides 400 HP bullet barriers for defensive positioning, while VAL offers 150-meter reconnaissance scanning for intel gathering.
Where is the best place to drop in Shutter Island? Port offers edge positioning with premium loot and reduced third-party risks. Sakura Valley provides high-quality loot but expect competition.
What are the best sensitivity settings for Blood Strike? Use eDPI 300-800 (pros favor 400-600), mouse DPI 800-1600 (optimal 1200), in-game sensitivity 50-70%. Mobile players should use camera sensitivity 60-80% with ADS 10-15% lower.