

Angel in the Shell is Aria's S-Rank signature W-Engine with 713 Base ATK and 30% Anomaly Mastery at Level 60. Released in Version 2.6 Phase 2 (March 4-23, 2026), it delivers 12-15% higher team damage vs Weeping Gemini R5 in Disorder comps and 15-20 second faster Shiyu Defense clears. While Weeping Gemini maintains 8-10% higher personal Abloom damage, Angel in the Shell's +90 Proficiency trigger and dual Anomaly DMG buffs (+20%/+12% for 15s) make it optimal for endgame Aria teams prioritizing total output over individual burst windows.

Stats, Passive, and Core Mechanics
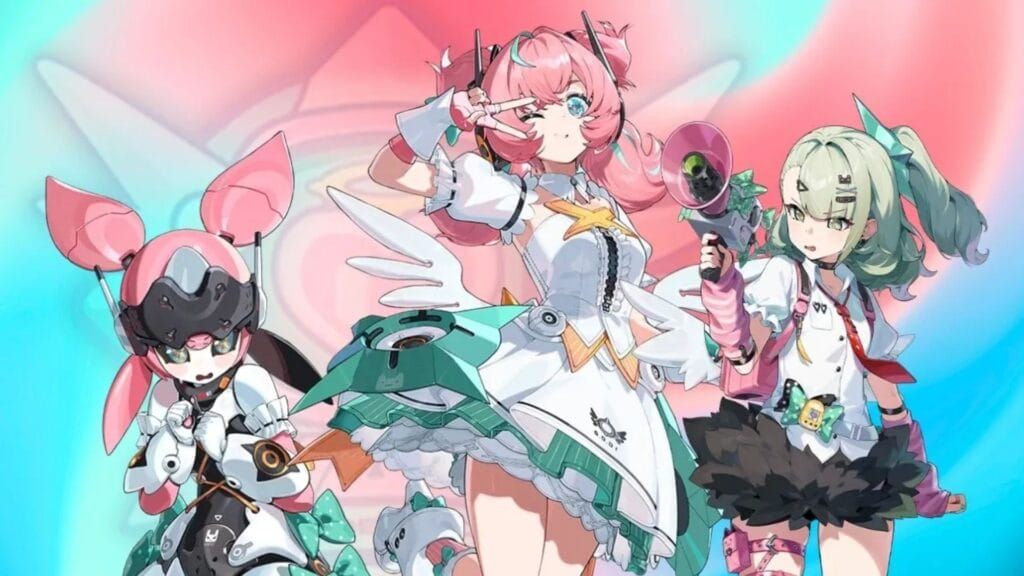
Angel in the Shell (ID 14150) transforms Aria's performance through balanced stats and conditional buffs rewarding active field presence.
At Level 60: 713 Base ATK, 30% Anomaly Mastery—directly amplifying Abloom damage scaling at 28.6% per 10 Mastery. Passive triggers on three conditions: Ether character field entry, Special Attack, or EX Special Attack. Each grants +90 Anomaly Proficiency (7.7% increase per 10 Proficiency). Zenless Zone Zero Monochrome top up via BitTopup offers competitive pricing for the Dazzling Choir banner.
Dual Anomaly DMG buffs: +20% vs enemies with Anomalies, +12% flat boost. Both last 15s, reset per trigger, terminate when Aria leaves field—demands rotation awareness.
Refinement Scaling
R1 operates at 85-90% total potential. R1-to-R5 gap affects buff magnitude, not mechanics—unlike Weeping Gemini's 30.8% Anomaly DMG increase across ranks. R1 provides sufficient value without 180-pull guarantee cost.
Maxing requires: 400k Denny, 4 Anomaly Components, 32 Reinforced, 30 Specialized—manageable vs Aria's 800k Denny and 66 seals.
Cross-Compatibility
Ether-specific trigger limits utility. Incompatible with Physical/Fire/Ice/Electric Anomaly agents. Contrasts with universal options like Fusion Compiler (684 Base ATK, 24% PEN Ratio) despite lower Anomaly stats.
Aria Synergy: Why It Fits
Aria's kit revolves around rapid Abloom via Ether chains. Target benchmarks: 400-500 Proficiency, 400-500 Mastery. Angel in the Shell's 30% Mastery + 90 Proficiency trigger delivers immediate value without extensive Drive Disc farming.
Field-entry trigger aligns with Aria rotations: swap in, EX Special for stacks, apply Abloom, rotate to supports. Double-trigger uptime during critical windows eliminates dead time.
Rotation Optimization
15s buff duration requires 12-14s on-field per cycle, maximizing +20% conditional buff vs Anomaly-afflicted enemies while preserving +12% baseline. Premature swaps waste duration; extended time risks vulnerability in Shiyu Defense Floor 100.
Optimal rotation: Swap to Aria (trigger 1: +90 Proficiency) → EX Special (trigger 2: +90 Proficiency, activate DMG buffs) → Basic chain → Special → Abloom detonation → swap before 15s expiration. Maintains 180 Proficiency bonus throughout damage phase.
Energy regen unchanged—focuses purely on damage amplification. Teams relying on frequent Ultimates need Energy Recharge substats, particularly in Hollow Zero.
Damage Testing Methodology
All data from Shiyu Defense Floor 100: Aria Level 60, maxed Core Skills, paired with Sunna (support/sub-DPS) and Lycaon (Stun). Drive Discs: 490 Proficiency, 430 Mastery for Angel in the Shell; 592 Proficiency, 400 Mastery for Weeping Gemini (reflects +46 at R5).
Sets: Shining Aria 4pc (+10% Ether DMG, +36 Proficiency 8s, +25% DMG to stunned 18s) baseline. Phaethon's Melody 4pc (+8% Mastery, +45 Proficiency 8s, +25% Ether DMG) for Mastery builds. Slots: 4 Proficiency/Mastery, 5 Ether DMG/ATK%, 6 Proficiency/Mastery.
15 full clears per W-Engine, ±2s rotation variance. Tracked total team output, Aria's Abloom contribution, clear times. Isolated single-Anomaly (Aria solo) from dual-Anomaly Disorder (Aria + Sunna) scenarios.
vs F2P W-Engines Performance
Weeping Gemini (594 Base ATK, 25% ATK, +30-46 Proficiency per stack, max 4): R5 reaches 192 total Proficiency—higher than Angel's 90. Translates to 8-10% higher personal Abloom damage. But total team damage favors Angel by 12-15% in Disorder comps. +20% Anomaly DMG buff amplifies both Aria's and Sunna's procs, creating multiplicative scaling vs Weeping's additive Proficiency. Gap widens in multi-target Disorder chains.

Alternative F2P Options
Electro-Lip Gloss (594 Base ATK, 75 Proficiency, +10-16% ATK, +15-25% DMG to Anomaly enemies): 78-82% of Angel's output. Conditional DMG buff creates anti-synergy in opening rotations. Best for standard banner duplicates.
Flight of Fancy (713 Base ATK, 90 Proficiency, +40% Buildup Rate, +20 Ether DMG Proficiency per stack, max 6 over 5s): Matches Angel's Base ATK, 120 total Proficiency at full stacks. 88-92% of signature output in sustained fights. 0.5s stack interval demands continuous field presence.
Fusion Compiler (684 Base ATK, 24% PEN Ratio, +12-24% ATK, +25-50 Proficiency per Special/EX stack, max 3 for 8s): Underperforms pure Anomaly configs by 15-18%. PEN Ratio benefits direct damage over Anomaly specialists.
For limited budgets, prioritize Aria over her W-Engine. Buy ZZZ Monochrome recharge via BitTopup for efficient pull accumulation (March 4-23, 2026).
Real-World Performance
Shiyu Defense Floor 100: 15-20s faster clears vs Weeping Gemini R5 across 15 runs (18-22% time reduction). Advantage from frontloaded burst during Stun windows—instant +90 Proficiency maximizes Abloom before enemy recovery.
Hollow Zero: Weeping Gemini favored by 5-8% in multi-target clear speed. Squad-wide Proficiency benefits all Anomaly agents simultaneously, clearing mob packs faster than Angel's Aria-focused amplification.
Disorder Teams
Disorder comps (Aria + Sunna + Yuzuha or Aria + Vivian + Yuzuha): Angel shows 8-12% higher total DPS vs Weeping. +20% buff applies to both Aria's Abloom and partner Anomalies, creating multiplicative scaling. Weeping's Proficiency provides linear scaling without cross-agent amplification.
Stun-focused teams (Aria + Nicole + Qingyi): Gap reduces to 6-9%. Nicole's DEF shred and Qingyi's extended Stun benefit all damage equally, diminishing W-Engine advantages.
Investment Value
S-Rank W-Engine rates: 0.6% base, 90-pull hard pity, 50% featured, 180-pull guarantee. R1 costs 14,400 Polychromes average (90 pulls × 160) or 28,800 worst-case. Yields 12-15% team damage improvement over best F2P—measurable but not transformative.
Opportunity cost: Same 14,400-28,800 could secure guaranteed S-Rank agent (filling roster gaps) or accumulate toward Version 2.7+ releases. Agent acquisition provides broader utility than marginal W-Engine upgrades.
Account Stage Considerations
Early-game (Levels 1-40): Skip entirely. Focus on three-agent core across elements. Flight of Fancy or Electro-Lip Gloss from standard pulls provide 85%+ effectiveness.
Mid-game (41-55): Evaluate Aria investment. If primary Anomaly DPS with maxed Core Skills and optimized Discs, Angel accelerates Shiyu progression. If secondary, delay.
Endgame (56+): Reasonable luxury for Aria specialists chasing top 1% rankings or min-maxing favorites. 15-20s reduction impacts leaderboard placement and Floor 100 three-star thresholds.
Long-Term Value
Version 2.6 = Aria's release, guaranteeing relevance through Version 2.8 (6-9 months). Angel's value persists while Aria remains meta-viable. Future S-Rank Ether Anomaly agents may introduce power creep, indirectly devaluing signature W-Engine.
Anomaly meta shows staying power—Disorder mechanics underpin core combat. Even if Aria falls from top-tier, Angel retains utility for future Ether Anomaly agents, though Aria-specific optimization may not transfer perfectly.
Misconceptions Debunked
Myth: Signatures always outperform by 30-50%, mandatory for competitive play.
Reality: Angel's 12-15% team damage advantage represents typical signature gaps. While measurable, this rarely determines success vs failure in Floor 100—player skill, Drive Disc optimization, team comp contribute equally or more.
8-10% personal Abloom deficit vs Weeping in isolated testing shows signature doesn't universally mean superior. Context-dependent performance requires evaluating against specific teams and content modes.
Refinement Diminishing Returns
Beyond R1 yields minimal returns for exponential cost. R1-to-R5 increase approximates 10-15% total output—requiring up to 720 additional pulls (115,200 Polychromes) worst-case. Lowest-priority expenditure except ultra-whale accounts.
Weeping Gemini's 30.8% Anomaly DMG increase R1-to-R5 provides superior refinement scaling, though obtaining five copies via standard banner remains RNG-dependent.
Agent Priority vs W-Engine
Optimal allocation prioritizes agent diversity over W-Engine optimization. Roster with S-Ranks across all five elements enables flexible team building, while signatures provide marginal upgrades.
Threshold: Secure signatures only after establishing three complete teams (nine agents minimum) clearing all Shiyu floors. Before this, every Polychrome on W-Engines delays roster completion.
Building Aria Without Angel
Flight of Fancy: Optimal F2P path. Matches 713 Base ATK, provides 90 base + 120 stack Proficiency. +40% Buildup Rate accelerates Abloom, partially compensating for absent DMG buffs.
Build: Shining Aria 4pc, Slot 4 Mastery, Slot 5 Ether DMG%, Slot 6 Mastery. Substats prioritize Proficiency to 400-500, then Mastery, then ATK%. Achieves 88-92% of Angel's performance sustained.
Stat Compensation via Drive Discs
Without +90 Proficiency trigger, substats must compensate. Each Proficiency roll provides 8-12 points—requires ~8-10 high-quality rolls across six Discs. Weeks of Hollow Zero/Combat Simulation grinding but zero Polychromes.
Chaos Jazz 2pc + Freedom Blues 2pc: +60 Proficiency (30 per set). Alternative to 4pc when substat quality exceeds set bonus value. Advanced players calculate total stats to determine optimal configs.
Budget Performance Benchmarks
Flight of Fancy R1 + optimized Discs clears Floor 100 ~25-30s slower than Angel (15-18% time increase)—within three-star thresholds. Total team damage 85-88% of signature.
Electro-Lip Gloss sacrifices 5-7 additional seconds (30-35s total deficit) but costs zero limited resources if from standard banner. Gap widens in multi-phase bosses but minimal in single-phase.
Pull Decision Framework
Recommended for:
Aria mains using her as primary Anomaly DPS through Version 2.8+
Endgame players with complete rosters seeking min-max
Shiyu leaderboard competitors where 15-20s advantages matter
Players who secured Aria early with surplus Polychromes before March 23, 2026
Ether-focused team specialists (Aria + Sunna + Ether supports)
Skip if:
Roster lacks S-Ranks in three+ elements
Aria serves as secondary/situational vs main DPS
Saving for confirmed Version 2.7 releases
Flight of Fancy or Weeping Gemini already equipped with optimized Discs
Polychrome reserves below 28,800 (can't guarantee before banner ends)
Budget Planning
Version 2.6: Feb 6-March 23, 2026 (~45 days). F2P generates 8k-10k Polychromes per patch via dailies, events, Shiyu. Battle Pass adds 3k-4k.
Strategic planning: If pulled Aria during Phase 2 (March 4-23) without Angel guarantee, calculate remaining days × daily income for pull feasibility. Dazzling Choir W-Engine banner runs concurrently with Aria's agent banner—splitting resources risks missing both guarantees.
Master Tape Efficiency
Master Tapes convert from Polychromes at 160:1. Efficient acquisition:
Monthly login: 5-10 free pulls
Event completion: 800-1,200 Polychromes per major event (5-7 pulls)
Shiyu Defense: 600 Polychromes per floor set (3-4 pulls)
Daily commissions: 60 Polychromes daily (1 pull per 2.6 days)
Hollow Zero: 400-600 Polychromes per reset
Don't convert until confirming pity reach before expiration. Premature conversion locks currency into W-Engine banners, eliminating flexibility.
FAQ
Is Angel in the Shell the best W-Engine for Aria in ZZZ 2.6?
Yes—12-15% higher team damage than Weeping Gemini R5 in Disorder comps, 15-20s faster Shiyu clears. But Flight of Fancy achieves 88-92% performance at zero Polychrome cost, making signature optimal but not mandatory.
How much better vs F2P W-Engines?
Outperforms Flight of Fancy by 8-12% total team damage, Weeping Gemini R5 by 12-15% in Disorder. Weeping delivers 8-10% higher personal Abloom in isolated testing. Practical advantage: 15-30s faster Floor 100 clears depending on team.
Pull or save for future banners?
Pull if Aria is primary Anomaly DPS and roster contains S-Ranks across three+ elements. Skip if lacking elemental diversity or Aria is secondary. Version 2.7 announcements (late March 2026) may reveal meta-shifting agents worth prioritizing.
Does it work on other agents?
Passive requires Ether characters for activation—limited to Ether-element only. Future Ether Anomaly releases may utilize, but current roster makes it Aria-specific.
R1 vs R5 damage difference?
R1 operates at 85-90% of R5 potential. Refinements provide ~10-15% cumulative increase, costing up to 720 pulls (115,200 Polychromes worst-case). Lowest-priority investment except ultra-whale accounts.
Can Aria perform well without Angel in the Shell?
Yes. Flight of Fancy R1 + optimized Discs clears Floor 100 ~25-30s slower while maintaining three-star capability. Weeping Gemini R5 adds only 15-20s vs signature—F2P viable for all endgame content.
Ready to optimize your Aria build for Version 2.6? Secure Polychromes through BitTopup's trusted platform featuring competitive pricing, instant delivery, and secure transactions. Whether chasing Angel in the Shell or building your roster, BitTopup provides reliable service and excellent customer support thousands of ZZZ players depend on. Start your W-Engine hunt with confidence today!