Flagbearing Spriteling in Honor of Kings refers to River Sprites spawning at strategic map locations, providing critical gold advantages and team buffs. Following Patch 1.10.5 (February 5, 2026), defensive flag buffs dropped from 20-30% to 20-25% damage reduction, while offensive buffs decreased from 15-25% to 15-20% damage increase. This guide covers new safe initiation rules, optimal flag carriers, and 5-stack compositions for post-balance meta dominance.
What is Flagbearing Spriteling in Honor of Kings?
Core Mechanics and Game Impact
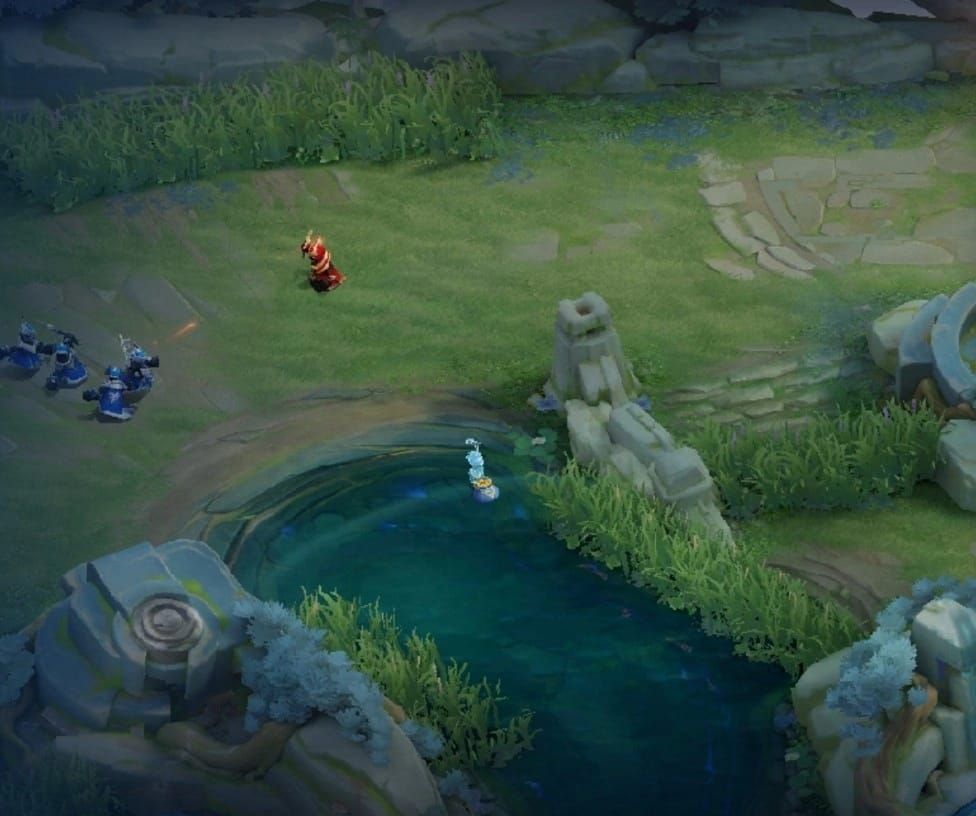
River Sprites are neutral objectives that shape early-game economy and team power. Each grants 63 gold upon capture plus temporary buffs that swing lane matchups and team fights. Consistent control generates 252 gold/minute when securing both spawns—126 gold advantage before 2:00 (nearly two minion waves).
For competitive advantage, Honor of Kings Tokens top up through BitTopup provides fast access to heroes optimizing flag control strategies.
Spawn Timing and Capture Mechanics
Spawn times: 0:30, 1:30, then every 60s until 4:00
Total pre-4:00 gold: 504 gold
Capture duration: 3-5s uncontested, 5-7s contested
Zone requirement: 3-5s uncontested presence
Optimal jungler paths:
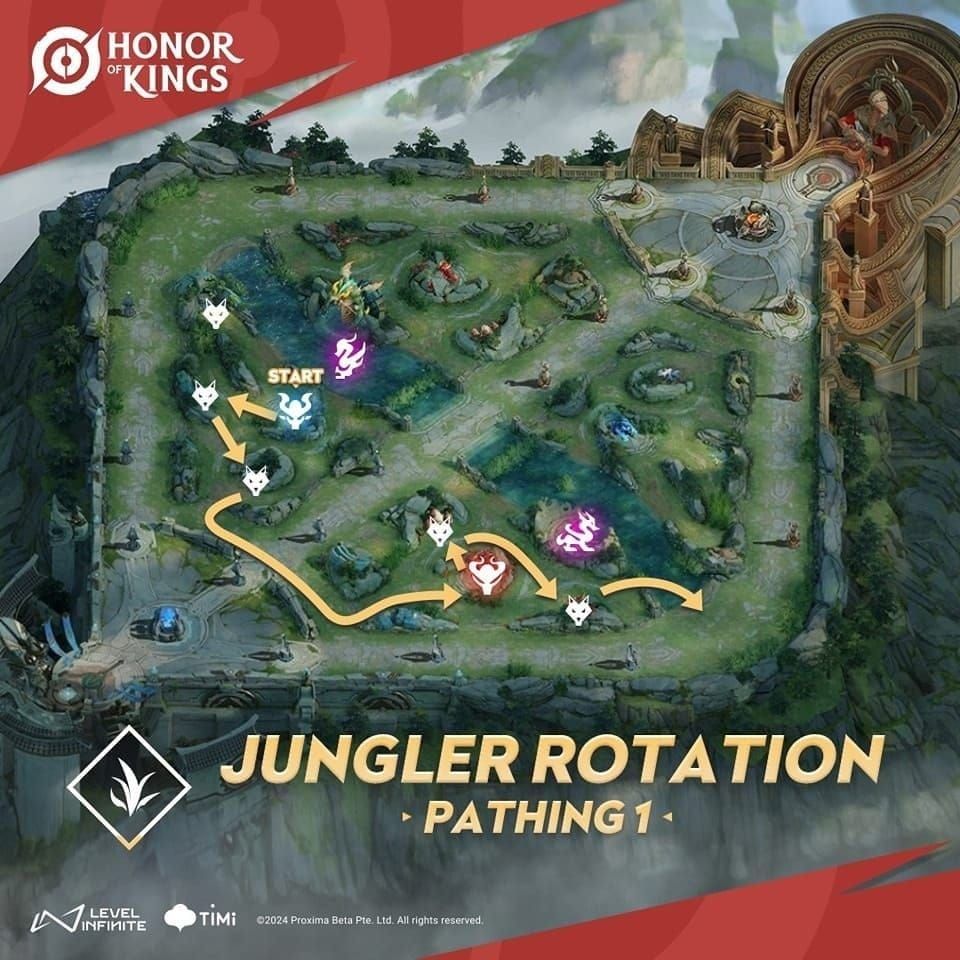
Lam: Red 0:30 → Azure 0:45 → Blue 1:00 → gank 1:15
Augran: Blue-Azure 0:30 → small camps 0:45 → Crimson 1:15 → gank 1:30-2:00
Why 5-Stack Teams Dominate Flags
Coordinated teams gain disproportionate advantages through synchronized rotations and vision control. Level 2 ganks at 1:00-1:30 achieve 73% win rates when timed around spawns. Post-patch buffs (20-25% damage reduction, 15-20% damage increase) favor teams layering buffs across multiple members. Flag control chains into Tyrant at 4:00 (71 gold/player) and Storm Lord at 10:00 (136 gold), creating snowballing leads.
Patch 1.10.5 Balance Changes
Complete Stat Adjustments

Defensive flags: 20-30% → 20-25% damage reduction
Offensive flags: 15-25% → 15-20% damage increase
Regeneration flags: 40-80 → 40-60 health over 2.0s
Team shields: 10% → 8% max HP
Solo shields: 25% max HP (unchanged)
Extension flags: 800+ attack range (unchanged, diminishing returns >600 base range)
Impact on Meta Heroes
Lam:
Professional pick/ban: 98% → 76%
Diamond+ win rate: 54.9% → 51.2%
Ban rate: 38.7% → 22.3%
King's World Cup: 67% win rate maintained
Augran:
Professional pick/ban: 94% → 71%
Diamond+ win rate: 55.1% → 52.1%
Ban rate: 45.2% → 28.7%
Loong:
Win rate: 55.3% → 51.8%
Pick rate: 26.8% → 34.2%
Loong-Yaria duo: 70%+ → 61% win rate
Five New Safe Initiation Rules
Rule 1: Vision Control Requirements
Secure vision of three jungle quadrants before engaging. Place wards 15-20s before spawns covering:
River bushes (direct flag vision)
Jungle entrances (mid/jungle rotations)
Deep enemy camps (jungler tracking)
Clear enemy wards to force facecheck decisions or objective concessions.
Rule 2: Minimum Team Positioning
Require three members within 1,200 range before initiating:
Flag carrier (tank/fighter)
Damage dealer (jungler/mid)
Support with crowd control
Form triangular positioning (not linear) to prevent AoE wipes. Carrier positions closest; damage dealers maintain 600-800 range.
Rule 3: Health and Cooldown Thresholds
Flag carrier: 70%+ health minimum
Ultimates: Two members with ults ready
Summoner spells: Flash available on carrier
Delay 30-60s if thresholds unmet—63 gold doesn't justify 200+ gold death bounties.
Rule 4: Escape Route Planning
Pre-plan two retreat paths:
Primary: Toward allied towers
Secondary: Jungle terrain for line-of-sight breaks
Retreat triggers:
Enemy numerical superiority (4v3+)
Carrier drops below 40% health
Failed capture after 7s
Rule 5: Enemy Jungler Tracking
Confirm jungler location through vision/lane presence before engaging. Assume worst-case positioning when unknown. Lam reaches flags by 0:45; Augran by 1:30-2:00. Engaging into unseen junglers risks 200+ gold deaths for 63 gold gains.
Best Flag Carrier Heroes by Tier
S-Tier: Tanks
Dominate through survivability, crowd control, and zone presence. Key attributes:
Built-in damage mitigation stacking with flag buffs
Crowd control disrupting enemy contests
Mobility for unfavorable disengages
Post-patch favors self-sustaining abilities over pure health stacking (regeneration nerf: 40-60 vs 40-80 health).
A-Tier: Fighters
Balanced survivability and damage for compositions lacking dedicated tanks. Extension flags grant 800+ range, transforming melee fighters into medium-range threats. Require gap-closers and escape tools. 25% max HP solo shield benefits moderate health pools.
Situational: Marksmen/Supports
Marksmen: Viable with heavy frontline protection. Offensive buffs (15-20% damage increase) amplify output, but 8% team shield provides minimal value for low health pools.
Supports: Work in coordinated 5-stacks with layered protection. Crowd control ults threaten enemy engagements while capturing.
Avoid: Assassins and Immobile Carries
Assassins lack survivability for 3-5s capture duration. Immobile marksmen risk instant elimination during 5-7s contested captures. Heroes with abilities on cooldown become easy kills regardless of role.
Optimal 5-Stack Compositions
Core Structure: 1-1-3
1 tank (primary carrier with crowd control ult)
1 support (crowd control/healing)
3 damage dealers (eliminate contesters)
Tank threatens carries with crowd control, forcing focus decisions. Support provides peel or area denial. Post-patch team shield nerfs (8% max HP) make active support abilities critical.
Composition 1: Early Pressure
Leverages level 2 ganks (1:00-1:30, 73% win rate) around spawns:
Tank with level 2 crowd control
Jungler reaching level 4 by 2:00-2:30
Laners with strong level 1-2 trading
Execute: Jungler completes camps by 1:15 → gank for summoner spells/kills → rotate to 1:30 spawn with advantages.
Buy HoK Tokens recharge global through BitTopup for early-game specialists with competitive pricing.
Composition 2: Late-Game Scaling
Sacrifices early flags for dominant mid-game team fighting:
Hypercarry marksmen
Scaling mages
Percentage-based damage reduction tanks
Concede 63-gold flags to secure 71-gold Tyrant (4:00) and 136-gold Storm Lord (10:00). By 10:00, item spikes create combat advantages overriding early deficits.
Key Synergies
Tank-Support: Layered crowd control chains, forcing early tenacity items
Jungler-Mid: Roaming pressure controlling spawn timings
Marksman-Support: Sustained damage in extended fights
Step-by-Step Capture Strategy

Pre-Initiation (30s Before Spawn)
Support places wards in river/jungle entrances
Laners clear waves by 0:20/1:20 for rotation windows
Team confirms role assignments and cooldowns
Engagement Phase
Tank enters flag zone first, drawing attention
Target enemy damage dealers (not tanks)
Damage dealers position at max effective range
Melee waits for tank to absorb initial crowd control
Capture Phase
Support body-blocks skill shots between carrier and enemies
Chain crowd control (don't overlap): 1s stun → 1.5s knock-up = 2.5s total
Damage dealers pressure enemy backlines, splitting enemy focus
Retreat Phase
Disengage immediately after capture (not after kills)
Staggered retreat: Carrier first → damage dealers → support
Communicate buff usage and next objectives
Vision Control for Safe Fights
Essential Ward Placements

River bushes: Direct flag vision, 15-20s pre-spawn
Jungle entrances: 3-5s advance warning of rotations
Deep enemy camps: Track jungler pathing, identify 15-20s safe windows
Tracking Enemy Rotations
Monitor missing enemies via minion waves/tower health
Track major ults and summoner spells
Constant minimap awareness (all members, not just support)
Ping Communication
Standard sequence:
Danger ping (enemy positions)
On-my-way ping (flag location)
Attack ping (objective)
Retreat pings override engagement pings—any member spotting danger triggers immediate disengage.
Vision Denial
Sweep enemy wards 30-45s before spawns. Timing prevents replacement while maintaining allied superiority. Control bushes with champion positioning for temporary vision zones enabling ambushes.
Common Mistakes to Avoid
1. Solo Flag Attempts
Most costly mistake. 3-5s capture becomes 5-7s contested, providing time for enemy collapse. Single death grants 200+ gold vs 63 gold reward—net 150+ gold loss. Require three-member minimum.
2. Ignoring Jungler Position
Junglers possess mobility, burst, and crowd control swinging fights decisively. Never engage without confirming location. Assign one member (support/mid) to maintain jungler awareness.
3. Poor Carrier Selection
Fragile damage dealers lack survivability for 3-5s capture duration. Designate carriers pre-fight—tanks path toward zones first while damage dealers maintain spacing.
4. Overcommitting After Failures
Chasing kills after failed captures transforms setbacks into team wipes. Establish retreat triggers before engaging: failed capture = immediate retreat. 60s respawn ensures another attempt.
5. Neglecting Vision
Attempting captures without coverage creates vulnerability to unseen rotations. Support prioritizes vision items in early builds. Delay attempts when coverage inadequate.
Advanced Timing Strategies
First Capture Windows
0:30 spawn: Depends on lane states—63 gold must outweigh minion losses
1:30 spawn: Higher priority—junglers reach level 2-3, enabling 73% win rate ganks
Coordinate around jungler availability, not spawn timing alone.
Mid-Game Trade-offs
4:00 Tyrant: 71 gold/player (355 total) > 63 gold River Sprite
Concede 4:00 flag to secure Tyrant (292 gold differential)
10:00 Storm Lord: 136 gold/player (680 total)—reset by 9:30, sacrifice 9:30 flag
Late-Game Control
Post-15:00 flags serve vision control over economy. 63 gold becomes insignificant, but buffs provide combat advantages. Extension flags (800+ range) excel for sieging—marksmen damage towers from safer positions.
Respawn Patterns
60s timer creates predictable rotations. After 1:30 capture, next spawns at 2:30—enables proactive positioning. Cross-map rotations: Secure flag → opposite-side objectives → return for next spawn.
Role-Specific Responsibilities
Tank
Primary carrier entering zones first
Absorb initial damage during 3-5s capture
Save crowd control to disrupt enemy damage dealers
Engage when enemy hard CC on cooldown
Jungler
Burst damage eliminating contesters
Dive enemy backlines, forcing defensive repositioning
Reach level 4 by 2:00-2:30 via optimized pathing
Prioritize eliminating threats over flag damage
Support
Crowd control peeling for carriers
Body-block skill shots and AoE
Place wards 30s pre-spawn
Carry vision denial items
Marksman
Maintain max effective range
Offensive buffs grant 15-20% damage increase
Extension flags provide 800+ range for safer positioning
Target enemy tanks creating space for carriers
Mid Laner
Burst damage deleting enemy carries in 2-3s
Push waves by 0:20/1:20 for rotation windows
Hold burst combos for fights (not minion waves)
Lane priority enables rotations without XP loss
Counter-Strategies
Identifying Enemy Initiation
Lane disappearances near spawn timings (0:30, 1:30, 2:30, 3:30)
Vision spots enemy grouping near river 5-10s pre-engagement
Enemy jungler near flags = high contest probability
Defensive Positioning
Establish presence near zones without entering. Crowd control zoning covers flag approaches, threatening instant disable. Poke damage reduces enemy health, creating kill threat discouraging captures.
Trading vs Contesting
Trade when enemy positioning creates numerical disadvantages. If enemies group four members while allies have two, pressure opposite-side towers/camps/other flag. Late-game: Concede flags near Storm Lord/Tyrant spawns—major objectives vastly exceed 63 gold value.
Punishing Overextension
Collapse from multiple angles simultaneously when enemies capture without vision/backup. 5-7s contested duration provides time for coordinated traps. Post-punishment: Secure flag → rotate to nearby objectives (jungle/towers/opposite flag).
Measuring Success
Gold Advantages
63 gold per capture
252 gold/minute with consistent control
504 total gold pre-4:00
Deaths cost 200+ gold—require positive K/D for net gains
Win Rate Correlation
Teams controlling 75%+ flags pre-4:00 show significantly higher win rates. However, >75% in first 10 minutes triggers anti-exploit detection. Realistic high-performance target: 60-70% control.
Hero correlations:
Lam: 67% King's World Cup win rate
Coordinated environments maximize advantages over solo queue
Power Spike Acceleration
Offensive buffs: 15-20% damage = 75-100 bonus damage on 500-damage attacks
Defensive buffs: 20-25% reduction = 1,000-1,250 effective HP on 5,000 HP tanks
Regeneration: 40-60 health over 2.0s = 200-300 total team restoration
Tracking Success Rates
Calculate: Successful captures ÷ total attempts. 70%+ success = strong coordination. <50% = systematic problems requiring strategic adjustment.
Distinguish contested vs uncontested captures. High uncontested/low contested = focus combat execution. Time-based analysis reveals composition strengths (early vs late game).
FAQ
What are the new balance changes? Patch 1.10.5 (Feb 5, 2026) reduced defensive buffs to 20-25% (from 20-30%), offensive to 15-20% (from 15-25%), regeneration to 40-60 health (from 40-80), and team shields to 8% max HP (from 10%).
When do River Sprites spawn? 0:30, 1:30, then every 60s until 4:00. Total pre-4:00 gold: 504.
Best flag carrier heroes? Tanks with high health, crowd control, and defensive abilities. 25% max HP solo shield and 20-25% defensive buff stack with tank abilities for exceptional survivability during 3-5s captures.
How to safely initiate? Require: Vision of three jungle quadrants, three members within 1,200 range, carrier at 70%+ health, confirmed enemy jungler location, pre-planned escape routes.
Best 5-stack composition? 1 tank carrier, 1 support with crowd control, 3 damage dealers (jungler/mid/marksman). Early comps leverage level 2 ganks (73% win rate); late comps sacrifice early flags to scale.
How much gold advantage? 63 gold per capture, 252 gold/minute with consistent control, 126 gold advantage pre-2:00. Deaths grant enemies 200+ gold—require positive K/D for net gains.

