

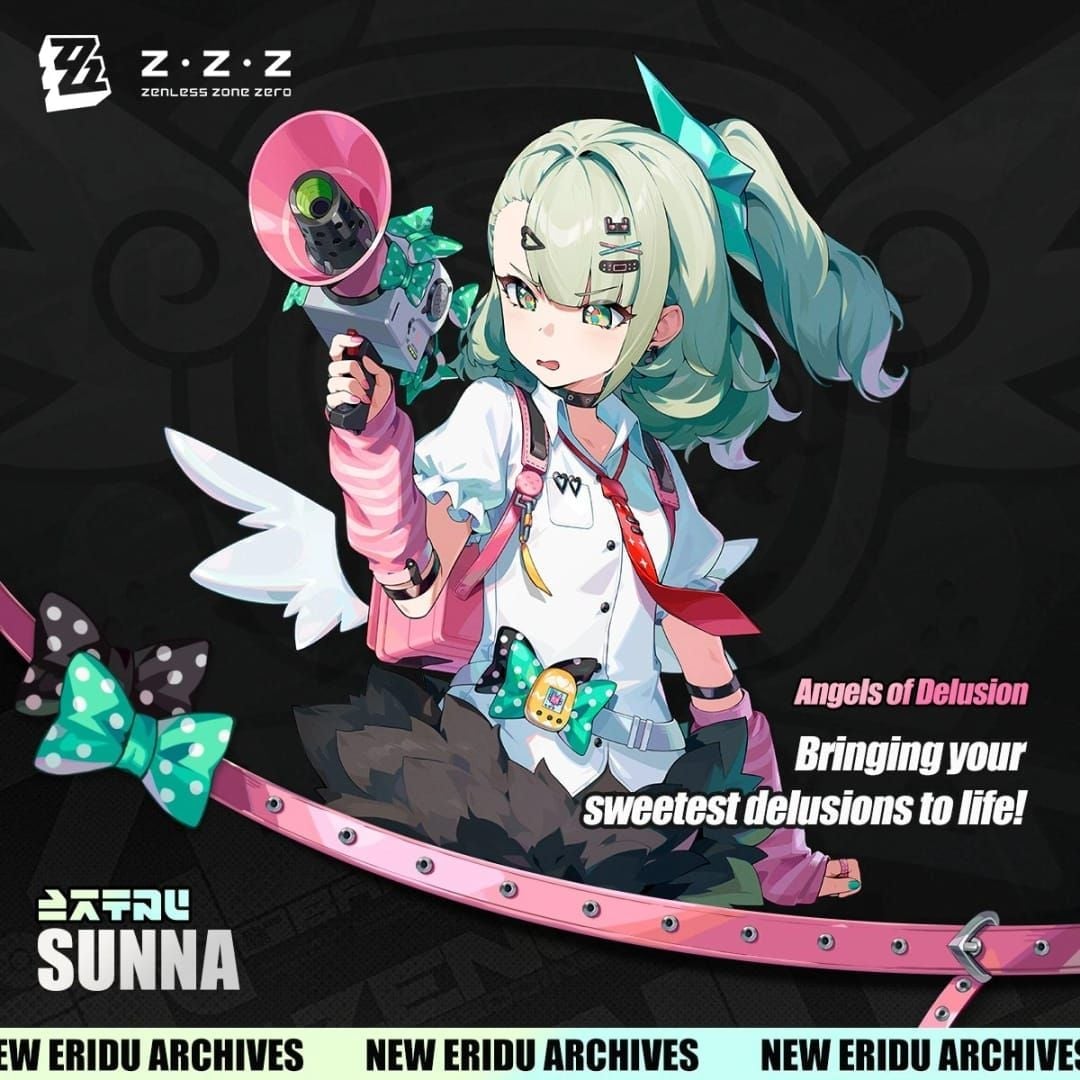
Version 2.6 launches February 6, 2026 at 11:00 AM UTC+8, introducing Angels of Delusion Idol faction with three S-Rank characters: Sunna (Ice Support), Aria (Ether Anomaly DPS), and Nangong Yu (Physical Stunner). Pre-farming requires 800,000-2,905,000 Dennies and 250 specialized chips per character. Top teams: Miyabi+Yanagi+Astra (Anomaly), Evelyn+Dialyn+Astra (Chain Attack), Yixuan+Ju Fufu+Lucia (buff stacking).
Idol Faction Overview
Angels of Delusion emphasizes buff stacking, energy loops, and Chain Attack amplification—different from standard attribute-matching factions.
Banner Schedule:
Phase 1 (Feb 6-27): Sunna + Aria (21 days)
Phase 2 (Feb 27-Mar 20): Nangong Yu (21 days)
Standard 0.6% rate, soft pity at 75-80 pulls, hard pity at 90. Guaranteed featured S-Rank needs 180 pulls (28,800 Polychrome).
For pulling power, Zenless Zone Zero Monochrome top up at BitTopup offers competitive pricing and instant delivery.
Unique Mechanics
Mesmerized Mark System: Sunna applies marks dealing 500% ATK damage with 50% CRIT DMG bonus (12s duration). Creates predictable burst windows.
Fever State: Generates ATK bonuses up to 1,000 plus Ether Veil: Idol buffs (+50 ATK, 30s). Extended duration allows multiple rotation cycles.
Loneliness Corruption Syndrome: Sunna's M1 applies 5% DEF reduction per stack (max 3 stacks, 15s). Benefits all teammates with multiplicative scaling.
Pre-Farm Benefits
Immediate deployment gains two additional Shiyu Defense cycles vs. delayed farming. Eliminates 3-7 day material accumulation period. Four weeks of pre-farming generates 840-1,400,000 Dennies and 1,680 Polychrome through daily commissions alone.
Core Synergy Mechanics
Faction Bonuses
Sunna's Fever state scales with her ATK, incentivizing ATK% Drive Discs over HP%/DEF%. Aria's Ether Anomaly benefits from Mesmerized Mark's 50% CRIT DMG bonus—unusual for Anomaly builds. Nangong Yu completes the triangle with Physical Stunner role, enabling Freeze reactions with Sunna's Ice element.
Energy Generation
Sunna's signature W-Engine provides 60% Energy Regen, stacking 20% DMG and 12.5% ATK bonuses. With Drive Disc Slot 6 Energy Regen substats (15-20%), reaches 80% soft cap for Ultimate usage every 8-10 seconds.
Evelyn+Dialyn+Astra composition maximizes Chain Attack damage through Decibel generation. Shockstar Disco 4-piece adds +6% Impact on Chain/Ultimate skills.
Buff Stacking Rules
Additive: Multiple ATK% buffs combine additively; DEF reduction stacks to 15% total.
Multiplicative: ATK buffs × CRIT DMG bonuses; Attribute damage × total ATK; DEF reduction × final damage.
Yixuan+Ju Fufu+Lucia maximizes stacking through CRIT/Ultimate/Chain bonuses. Swing Jazz 4-piece grants +15% ally ATK on EX Special.
vs. Existing Factions
Current meta prioritizes attribute matching for 40-60% damage bonuses. Idol synergies require precise timing but offer higher ceilings—500% ATK Mesmerized Mark + 50% CRIT DMG = 750% effective scaling per proc.
Energy advantages maintain 90%+ buff uptime vs. 60-70% for traditional teams. Translates to 15-25% higher sustained DPS in extended encounters.
Top Team Compositions
Best-in-Slot Teams
Miyabi + Yanagi + Astra (Anomaly)
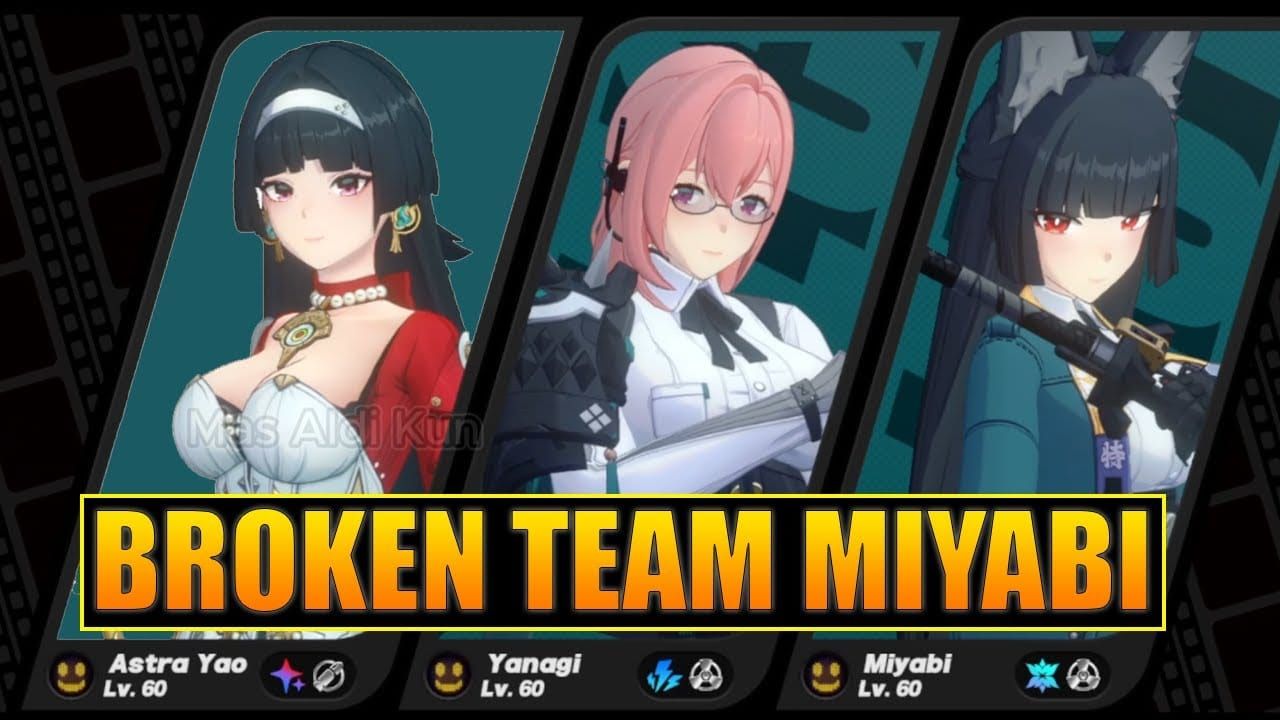
Anomaly Proficiency stacking for Disorder procs. Miyabi (Ice) + Yanagi (Electric/Shock) + Astra (Support).
Drive Discs: Chaos Jazz 4-piece (+30 Anomaly Proficiency). Slot 4 Anomaly Proficiency, Slot 6 Anomaly Mastery.
Rotation: Astra EX Special → Yanagi Shock → Miyabi Freeze → Disorder → repeat (12s cycle).
Evelyn + Dialyn + Astra (Chain Attack)
Shockstar Disco 4-piece (+6% Impact). Bank Decibel to 3000+ before Chain Attacks for max damage. Energy Regen substats (15-20%) enable sub-10s Ultimate cooldowns.
Yixuan + Ju Fufu + Lucia (Buff Stacking)
Swing Jazz 4-piece on Lucia (+15% ally ATK on EX Special). Stacks with Yixuan CRIT buffs and Ju Fufu Ultimate amplification. 30s Fever duration allows 2-3 rotation cycles per buff window.
Drive Discs: Slot 4 CRIT Rate/DMG, Slot 6 ATK% (DPS). Energy Regen focus for supports.
Hybrid Teams
Sunna + Existing DPS + Flex Support
Sunna's Mesmerized Marks work with Ellen, Zhu Yuan, Jane Doe. Adds 15-20% team DPS regardless of faction. Safe first investment for uncertain players.
Aria + Anomaly Specialists
Synergizes with Grace or Piper. Chaos Jazz 4-piece applies universally. Hybrid teams achieve 80-90% of full Idol performance with single limited character investment.
F2P Alternatives
4-Star Core + Single S-Rank Idol
Invest in Sunna (support flexibility) with free 4-stars like Anby (Stunner) and Nicole (Support). Requires 90 pulls (14,400 Polychrome). Daily commissions generate 1,680 Polychrome monthly—8-9 months saves guaranteed featured character.
Selector Ticket Optimization
Prioritize universal support S-Ranks over specialized DPS for long-term value.
Role Distribution
DPS (40-50% team damage):
250 Specialized Chips, 9 boss materials
Drive Discs: CRIT Rate/DMG (Slot 4), Attribute DMG/PEN (Slot 5), ATK%/Energy Regen (Slot 6)
Support (20-30% damage + buffs):
4 Basic + 32 Advanced Certification Seals
Drive Discs: HP%/DEF% (Slot 4), Energy Regen 15-20% (Slot 6)
Stunner (15-20% damage + utility):
250 Specialized Chips, 9 boss materials
Drive Discs: Impact% (Slot 4), ATK% (Slot 6)
Pre-Farm Material Checklist
Character Ascension
Sunna:
4 Basic + 32 Advanced + 30 Ruler Support Certification Seals
800,000 Dennies
Aria:
4 Basic + 32 Advanced + 30 Controller Anomaly Certification Seals
800,000 Dennies
Nangong Yu:
4 Basic + 32 Advanced + 30 Specialized Stunner Certification Seals
800,000 Dennies
Certification Seals: 40 Stamina per run, 2-3 seals. Complete ascension needs 800-1,000 Stamina per character.
Skill Upgrades
Sunna:
25 Basic + 75 Advanced + 250 Specialized Physical Chips
5 Hamster Cage Passes
2,905,000 Dennies
Aria:
25 Basic + 75 Advanced + 250 Specialized Ether Chips
5 Hamster Cage Passes
9 Clouded Crystalline Substance
60 Higher Dimensional Data: Spiked Corruption Core
2,905,000 Dennies
Nangong Yu:
250 Specialized Physical Chips
9 Exuvia of Refinement
60 Miasmic Elytron
Hamster Cage Passes: 3-5 weekly from Hollow Zero (1-2 weeks per character). Exuvia of Refinement: 3 weekly from Notorious Hunt (3 weeks minimum).
W-Engine Enhancement
0-60 Requirements:
4 Basic + 32 Reinforced + 30 Specialized W-Engine Components
200 W-Engine Energy Modules
400,000 Dennies
Sunna's signature: Base ATK 713, Energy Regen 60%, stacks 20% DMG + 12.5% ATK. 25-30% damage increase over 4-star alternatives.
W-Engine Energy Modules: 50-70 weekly. Complete enhancement needs 3-4 weeks.
Drive Disc Priorities
DPS:
Slot 4: CRIT Rate/CRIT DMG
Slot 5: Attribute DMG/PEN Ratio
Slot 6: ATK%/Energy Regen
Substats: CRIT Rate > CRIT DMG > ATK% > Energy Regen
Anomaly DPS:
Slot 4: Anomaly Proficiency
Slot 6: Anomaly Mastery
Substats: Anomaly Proficiency > Anomaly Mastery > ATK%
Support:
Slot 4: HP%/DEF%
Slot 6: Energy Regen 15-20%
Substats: Energy Regen > HP% > DEF%
Chaos Jazz 4-piece: Withering Garden domain, 40 Stamina/run. 800-1,200 Stamina for complete set with acceptable substats.
Swing Jazz 4-piece: Resonant Ruins domain. +15% ally ATK on EX Special—universal for supports.
Optimal W-Engines
Signature vs. Universal
Sunna Signature:
Base ATK 713, Energy Regen 60%
Stacks 20% DMG + 12.5% ATK (max 5 stacks = 1,000+ ATK to teammates)
Reaches 80% Energy Regen soft cap with Drive Disc substats
Universal 5-Star Alternatives:
Weeping Cradle: Energy Regen 55%, team buffs. 60-70% of signature performance at zero Polychrome cost. 15-20% performance gap = 3-5% total team DPS difference.
Best 4-Star Alternatives
Support:
Kaboom the Cannon: Energy Regen 40%, team ATK buff on Ultimate (70-75% of signature performance)
Precious Fossilized Core: HP% scaling, defensive utility
DPS for Aria:
Starlight Engine: CRIT Rate 24%, Anomaly Proficiency bonus (synergizes with Sunna's 50% CRIT DMG)
Electro-Lip Gloss: Attribute DMG 30%, energy generation
Stat Priority Rankings
Support: Energy Regen > Base ATK > HP%/DEF% > Team buffs
DPS: CRIT Rate/CRIT DMG > Base ATK > Attribute DMG% > Energy Regen
Anomaly DPS: Anomaly Proficiency > Anomaly Mastery > Base ATK > Energy Regen
Drive Disc Optimization
Top Sets for DPS
Chaos Jazz 4-Piece (Anomaly):
+30 Anomaly Proficiency
Users: Aria, Grace, Piper
Main stats: Anomaly Proficiency (Slot 4), Anomaly Mastery (Slot 6)
Substats: Anomaly Proficiency > Anomaly Mastery > ATK%
Flat +30 provides 15-20% increased Disorder damage. Each 10 Anomaly Proficiency = 3-4% more Disorder damage.
Standard DPS:
Woodpecker Electro 4-piece: +8% CRIT Rate (enables 50%+ CRIT Rate with moderate substats)
Hormone Punk 4-piece: +10% ATK, additional Ultimate buffs
Support Sets
Swing Jazz 4-Piece:
+15% ally ATK on EX Special
Users: Sunna, Astra, Lucia
Main stats: Energy Regen (Slot 6), HP%/DEF% (Slot 4)
Stacks multiplicatively with Sunna's Fever state for 25-30% total ATK increases. Energy Regen substats (15-20%) enable permanent buff uptime.
Shockstar Disco 4-Piece:
+6% Impact on Chain/Ultimate
Users: Evelyn, Dialyn, Stunners
Main stats: Impact% (Slot 4), ATK% (Slot 6)
Accelerates Daze by 10-15%, creates more stun windows.
Main Stat vs. Substat Priority
Main stats provide 3-5x more value than substats. CRIT Rate main stat (Slot 4) grants 24-32% vs. 3-5% per substat roll.
Critical Main Stats:
Slot 4: CRIT Rate/CRIT DMG (DPS), Anomaly Proficiency (Anomaly), HP%/DEF% (Support)
Slot 5: Attribute DMG% (universal DPS), PEN Ratio (high-defense content)
Slot 6: ATK% (DPS), Energy Regen (Support), Anomaly Mastery (Anomaly)
Substat Efficiency:
DPS: CRIT Rate until 50-60%, then CRIT DMG for multiplicative scaling.
Anomaly: Anomaly Proficiency scales linearly without diminishing returns. Prioritize Anomaly Proficiency > Anomaly Mastery > ATK%.
Support: Energy Regen (15-20% total) increases team damage 15-25% through rotation consistency. Target Energy Regen before HP%/DEF%.
Farming Efficiency
Stamina Allocation: 60% Drive Discs, 40% character materials during pre-farm.
Domain Priority:
Withering Garden (Chaos Jazz)
Resonant Ruins (Swing Jazz)
Murderous Obituary (Shockstar Disco)
Woodpecker Electro domain
Farm until 4-piece sets with correct main stats, then optimize substats. Acceptable substats need 10-15% total in priority stats.
Stamina Costs:
Complete 4-piece with correct main stats: 800-1,200 Stamina
Good substats (15%+ priority stat): 2,000-3,000 Stamina
Excellent substats (25%+ priority stat): 5,000+ Stamina
Skill Rotation & Combat
Optimal Rotations
Miyabi + Yanagi + Astra (Anomaly):
Astra EX Special (Swing Jazz buff, 3s)

Yanagi Basic → Special (Shock, 4s)
Miyabi Dash → Basic → Special (Freeze, 5s)
Yanagi Quick Assist (Disorder, 2s)
Miyabi Ultimate (3s)
Repeat (17s cycle)
Maintains permanent elemental debuffs, generates 800-1,000 Decibel/cycle. Disorder every 8-10s deals 60,000-100,000 damage (200+ Anomaly Proficiency builds).
Evelyn + Dialyn + Astra (Chain Attack):
Bank Decibel to 3000+
Astra EX Special → Ultimate (buffs + Decibel)
Evelyn rotation (6s)
Dialyn rotation (6s)
Chain Attack at 3000 Decibel
Repeat (25-30s total)
Chain Attacks at 3000 Decibel deal 400-600% more damage than 1500 Decibel activations.
Energy Management
Characters generate 20-30 energy/second during combat. Supports with 60% Energy Regen W-Engines + 15-20% Drive Disc substats reach 100 energy in 8-10s.
DPS characters prioritize damage stats, resulting in 15-20s Ultimate cooldowns. Creates natural pattern: supports use 2 Ultimates per DPS Ultimate.
Ultimate Timing:
Sunna: Activate immediately for Fever uptime. 30s duration allows 2-3 casts per buff window.
DPS: Align with support buffs and Mesmerized Mark application. Delaying 2-3s for synchronization increases damage 15-25%.
Chain Attack Optimization
Decibel Generation:
Stunners: 150-200 per Daze
Supports: 50-80 per Ultimate
DPS: 30-50 per rotation
Bank to 3000 before Chain Attacks in boss encounters. Use 1500 in mob-clearing for faster clears.
Damage Scaling:
Shockstar Disco +6% Impact increases Chain Attack damage 20-25% with other bonuses. Sunna's Fever ATK buffs create 30-40% damage increases. Time Chain Attacks with max buff stacks.
Beta Performance Data
Shiyu Defense Floor 12 Clear Times:
Miyabi + Yanagi + Astra: 90-120s
Evelyn + Dialyn + Astra: 75-100s
Yixuan + Ju Fufu + Lucia: 100-130s
Assumes maxed characters with correct main stats and 15%+ priority substats. Suboptimal builds extend times 30-50%.
Damage Distribution:
Anomaly teams: Disorder 40-50%, DPS direct damage 35-45%, support 10-15%.
Chain Attack teams: Chain Attacks 50-60% during burst, sustained damage fills gaps.
Resource Investment Strategy
Polychrome Budget
Guaranteed S-Rank Costs:
Single featured: 14,400 Polychrome (90 pulls, 50/50 loss)
Guaranteed featured: 28,800 Polychrome (180 pulls worst case)
Signature W-Engine: 12,000-24,000 Polychrome (75-150 pulls)
Monthly Income:
Daily Commissions: 1,680 (60 × 28)
Weekly Missions: 480 (120 × 4)
Shiyu Defense: 800-1,200
Events: 1,000-2,000
Total: 3,960-5,360 monthly
F2P accumulates 47,520-64,320 annually = 1-2 featured S-Ranks + potential signatures.
Pull Priority
Tier 1 (Universal):
Sunna - Functions in all teams
Versatile DPS with broad coverage
Tier 2 (Specialized):
Aria - High ceiling Anomaly DPS
Nangong Yu - Physical Stunner
Tier 3 (Luxury):
Signature W-Engines - 15-25% increase
Duplicate copies - marginal improvements
Sunna's universal support makes her safest first investment.
Dennies & Materials
Dennies Bottleneck:
Each character needs 3,705,000 Dennies (ascension + skills). Three S-Ranks = 11,115,000 total.
Daily income: 30,000-50,000 (840,000-1,400,000 monthly). Hollow Zero: 200,000-300,000 weekly (800,000-1,200,000 monthly). Total monthly: 1,640,000-2,600,000.
Complete maxing needs 4-7 months per character without refreshes. Invest selectively in 1-2 characters for immediate deployment.
Material Priority:
Hamster Cage Passes (weekly-limited, 3-5 from Hollow Zero)
Exuvia of Refinement (weekly-limited, 3 from Notorious Hunt)
Specialized Chips (Stamina-farmable, 250/character)
Certification Seals (Stamina-farmable, 66/character)
Weekly materials create 3-5 week timegates. Start farming immediately.
Long-Term Value
Character Longevity:
Supports: 12-18 months relevance (universal buffs).
Specialized DPS: 6-9 months (power creep).
Stunners: 12-15 months (utility-based value).
ROI Calculations:
Sunna (28,800 Polychrome): Value across 4-6 teams over 12-18 months = 160-270 Polychrome/month utility.
Specialized DPS (28,800 Polychrome): 6-9 months across 1-2 teams = 320-480 Polychrome/month utility.
Endgame Performance
Shiyu Defense Floor 12
Anomaly Approach:
Floor 12 bosses: 2,000,000+ HP, 60% base resistance. Anomaly bypasses resistance through Disorder's true damage.
Miyabi + Yanagi + Astra: 90-120s clears via Disorder every 8-10s. Each Disorder: 60,000-100,000 damage = 600,000-1,200,000 total.
Chain Attack Burst:
Evelyn + Dialyn + Astra: 75-100s clears. Banking to 3000 Decibel creates 500,000-800,000 damage spikes, eliminating bosses in 2-3 bursts.
Requires precise timing with vulnerability phases. Missing windows extends clears 30-50s.
Hollow Zero
Farming Efficiency:
200,000-300,000 Dennies + 3-5 Hamster Cage Passes weekly. Optimized runs: 15-20 minutes.
Miyabi + Yanagi + Astra clears standard floors in 2-3 minutes.
Corruption Management:
High corruption (6+): 50% increased rewards, severe penalties. Idol buff-stacking offsets debuffs through multiplicative scaling.
Sunna's Fever counters corruption ATK reduction, maintaining 70-80% normal damage at Corruption 6.
Boss Strategies
High-Mobility Bosses:
Favor Anomaly teams. Persistent DoT effects continue during brief vulnerability windows. Miyabi + Yanagi + Astra maintains Shock/Freeze during movement, triggering Disorder immediately.
Multi-Target Encounters:
Favor Chain Attack teams' AoE burst. Evelyn + Dialyn + Astra eliminates grouped enemies in single Chain Attacks.
Shockstar Disco +6% Impact applies to all targets—multiplicative value in multi-target scenarios.
Common Mistakes
Faction Misconceptions
Myth: Idol teams require full faction matching.
Reality: Sunna provides 70-80% effectiveness with non-Idol teammates. Hybrid teams achieve 75-85% of full Idol performance.
Myth: Faction bonuses are mandatory.
Reality: Kit synergies contribute more than faction bonuses (10-15% damage). Drive Disc optimization creates 25-40% variance—prioritize farming over faction matching.
Over-Investment Traps
Trap: Pulling signatures before roster completion.
Signatures: 15-25% increase. Additional characters: entirely new teams. Prioritize character diversity until establishing 2-3 functional teams.
12,000-24,000 Polychrome for signatures = 40-80% of character acquisition cost. Delays roster expansion 1-2 months.
Trap: Maxing multiple characters simultaneously.
Focus single characters to Level 60, Skill 10, acceptable Drive Discs before secondary investment. Enables immediate endgame participation.
Stat Errors
Error: Neglecting Energy Regen on supports.
Without 15-20% Energy Regen: 15-20s Ultimate cooldowns, 40-50% buff uptime gaps. Reduces team damage 20-30%.
Energy Regen > HP%/DEF% for current content. Prioritize to 15-20% before defensive stats.
Error: CRIT Rate beyond 60%.
Diminishing returns past 60%. Each point provides less value than CRIT DMG or ATK%.
Optimal: 50-60% CRIT Rate, remaining budget to CRIT DMG and ATK%.
Error: Ignoring Anomaly Proficiency on Anomaly DPS.
Disorder = 40-50% total damage. Neglecting Anomaly Proficiency for ATK%/CRIT reduces damage 30-40%.
Chaos Jazz +30 Anomaly Proficiency mandatory—15-20% damage increase over alternatives.
Future-Proofing
Predicted Meta Shifts
Anomaly Continuation:
Design patterns indicate continued Anomaly support through 2.7+. Disorder's true damage bypasses defense creep, maintaining relevance.
Aria provides 9-12 month relevance vs. 6-9 for traditional DPS.
Support Longevity:
Universal supports maintain 12-18 month relevance. Sunna's ATK buffs/DEF reduction apply to all damage types, compatible with future releases.
Support investments provide highest long-term value per Polychrome.
Future Characters
Confirmed Releases:
Chinatsu (Remiel): Ice Support, Composer, Megaphone (Version 2.7-2.8). Synergizes with Sunna for dual-support compositions.
Rokudou (Sariel): Giant mace, Certain Doom faction. Likely Physical DPS or Stunner.
Resource Strategy:
Maintain 14,400-28,800 Polychrome reserves for unexpected high-value releases. Monthly income allows rebuilding reserves in 3-5 months after major pulls.
Staying Competitive F2P
Selective Investment:
F2P achieves 70-80% of whale performance through selective investment. Focus 2-3 core teams vs. complete roster.
Prioritize universal synergy and extended relevance. Sunna and Aria provide better long-term value than specialized DPS.
Optimization Over Acquisition:
Maxing existing characters > acquiring new at low investment. Fully-maxed 4-star outperforms under-invested S-Rank.
Allocate Stamina to Drive Disc farming and materials vs. pursuing every release.
Community Resources:
Engage guides, farming routes, meta analysis for informed decisions. Participate in beta discussions and datamines to anticipate releases for strategic saving.
FAQ
What is Angels of Delusion faction?
New Idol faction with three S-Ranks: Sunna (Ice Support), Aria (Ether Anomaly DPS), Nangong Yu (Physical Stunner). Emphasizes buff stacking, energy loops, Chain Attack amplification. Sunna's Mesmerized Mark: 500% ATK damage + 50% CRIT DMG. Fever state: ATK bonuses up to 1,000 for 30s.
Which materials to pre-farm?
Each S-Rank: 800,000 Dennies (ascension) + 2,905,000 (skills) = 3,705,000 total. 250 Specialized Chips, 66 Certification Seals, 5 Hamster Cage Passes (Hollow Zero), boss materials like Exuvia of Refinement (3 weekly from Notorious Hunt). Start weekly materials immediately to avoid 3-5 week delays.
How do Idol synergies work?
Sunna's Mesmerized Marks and Fever states provide team buffs. Signature W-Engine: 60% Energy Regen for sub-10s Ultimates. Swing Jazz 4-piece: +15% ally ATK on EX Special. Buffs stack multiplicatively for 25-30% total ATK increases. Optimal rotations maintain 90%+ buff uptime.
Best team compositions?
Miyabi+Yanagi+Astra (Anomaly, 90-120s Shiyu clears), Evelyn+Dialyn+Astra (Chain Attack, 75-100s clears), Yixuan+Ju Fufu+Lucia (buff stacking). Hybrid teams with Sunna + existing DPS achieve 75-85% performance. F2P: Sunna + free 4-stars like Anby and Nicole.
How much Polychrome needed?
Guaranteed featured S-Rank: 28,800 Polychrome (180 pulls worst case). Single character: 14,400 (assuming 50/50 win). Monthly F2P income: 3,960-5,360 (daily commissions 1,680, weekly 480, Shiyu 800-1,200, events 1,000-2,000). Maintain 14,400-28,800 reserves, rebuild over 3-5 months.
Should F2P invest in Idols?
Prioritize Sunna first—universal support with 70-80% effectiveness with non-Idol teammates. 12-18 month relevance provides excellent ROI on 28,800 Polychrome. Secondary investments (Aria/Nangong Yu) depend on roster gaps and playstyle. Anomaly players benefit most from Aria.