

Bellstrike-Umbra is the current T0 meta for solo PvE boss content — and it's not close. Community testing puts it at roughly 50% higher DPS than hybrid alternatives, driven by path-locked buff multipliers stacking to 1.56x versus the 1.5x ceiling on general builds. That 0.06x gap sounds trivial. Across a full boss fight with multiple detonation cycles, it compounds into a gap that a Level 90 hybrid can't close against a well-geared Level 85 Bellstrike-Umbra player.
The core loop: build 5 bleed stacks with Strategic Sword light attacks → swap to Heavenquaker Spear to amplify the DoT cycle → detonate with Sword Horizon at the end of the boss's Qi exhaustion window. If you're fighting Guo Xin, Heartseeker, or Qianye and struggling to close fights cleanly, this guide covers the exact rotation, gear, and boss-specific adjustments.
DoT Mechanics: The Foundation
Bleed is the primary DoT type for Bellstrike-Umbra. It runs on a stack-based model — not a duration timer. You need all 5 stacks active before detonation. Partial stacks produce partial damage, and that gap compounds across every burst window in a fight.
How DoT Damage Is Calculated
DoT scales with Physical ATK, active Internal Art bonuses, and path-specific multipliers. Wolfchaser Internal Art is the engine that keeps bleed stacks alive between rotations — without it, stacks decay before detonation and the combo falls apart.
The Hawking Set adds Physical ATK when your Affinity trigger fires, meaning DoT tick values climb during the rotation if you're triggering Affinity correctly. This isn't optional — it's how the damage ceiling actually gets reached.
Bleed vs. Other Status Effects
Bleed stacks from Strategic Sword accumulate independently up to 5. Critical rule: stacks from the same source add, they don't overwrite. Burn appears to refresh duration rather than stack multiplicatively. For solo Bellstrike-Umbra, this distinction doesn't matter — you're working entirely within the bleed framework.
In co-op, different DoT types coexist with your bleed stacks. But Sword Horizon's detonation only amplifies bleed — it won't trigger off Burn or Poison from allies. Factor that into team compositions.
Burst Windows: Timing and Amplification
A burst window is any moment a boss enters Qi exhaustion — the staggered state where defensive capabilities drop and incoming damage is amplified. Your rotation is built around hitting detonation at the end of this window, not the start.
The instinct when Qi depletes is to dump everything immediately. That's wrong. Community testing is clear: delaying Execute to the final second of Qi exhaustion produces a meaningfully higher DPS multiplier. The window amplifies whatever is already active — so you want maximum bleed stacks and all Internal Art buffs running before you hit Execute.
Burst Skills and Active DoT
Sword Horizon doesn't just deal damage — it multiplies active bleed stack value. Fire it with 3 stacks instead of 5 and you're leaving roughly 40% of your burst damage on the table. Full stacks, then detonate. No exceptions.
The Heavenquaker Spear is frequently misunderstood. It's not a primary DPS weapon. Its Flow buffs — Water Drop → Spring Surge → River Flow — support the sword's bleed cycle and extend the window where DoT is at peak value. The spear is the amplifier, not the damage source.
Building Burst Gauge Faster
Red-glow boss attacks are parryable. Landing a perfect parry creates a knockdown state — free attack time to build bleed stacks without taking damage. Gold-glow attacks are dodge-only; attempting to parry these is a wipe risk. Knowing which is which for each boss matters as much as knowing the rotation.
Bellstrike Path: Mechanics and Applications
Bellstrike is the offensive half of this combination. Path buffs activate by staying within the weapon ecosystem — specifically Strategic Sword as the primary bleed applicator. Swapping to off-path weapons mid-fight resets these buffs entirely. Introduce any weapon outside the Bellstrike-Umbra ecosystem and you lose the 1.56x multiplier immediately.
Unlock: ESC → Develop → Abilities → Inner Ways at Level 40. It's buried in the Develop tab — not under Combat or Character, which is where most players look first.
Bellstrike Gear Priorities
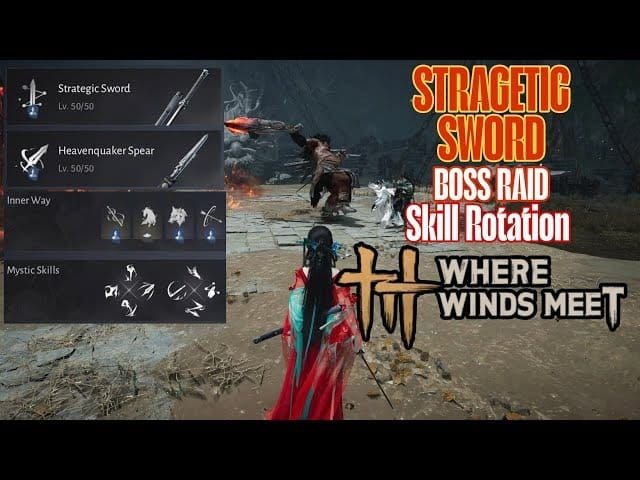
| Primary Weapon | Strategic Sword | Bleed stack applicator, core of rotation | | Secondary Weapon | Heavenquaker Spear | Flow buffs support bleed cycle | | Armor Set (default) | Eaglerise Set | Damage reduction + shield every 30s | | Armor Set (high-skill) | Hawking Set | Physical ATK boost on Affinity trigger | | Internal Art (Primary) | Wolfchaser | Maintains bleed stacks between rotations | | Internal Art (Secondary) | Sword Horizon | Detonates bleed stacks for burst damage |
Eaglerise is the default for most boss content — the 30-second shield cycle provides survivability during stack-building phases where you can't dodge freely. Hawking is the higher damage ceiling if your parry timing is consistent and you don't need the defensive buffer.
Where Bellstrike Works (and Where It Doesn't)
Bellstrike-Umbra excels on bosses with long Qi exhaustion windows: Guo Xin, Heartseeker, Qianye, Ye Wanshan. The longer the window, the more detonation cycles you complete, and the more the path multiplier compounds.
It underperforms on bosses with short or irregular Qi windows where you can't reliably complete the full 5-stack build before the window closes. For those encounters, Bellstrike-Splendor Path (Nameless Sword + Nameless Spear) offers better mobility to adapt to unpredictable patterns.
Umbra Path: Sustained Pressure
Umbra is the sustained-damage half. Where Bellstrike creates burst spikes, Umbra ensures DoT pressure never drops between them — the difference between a build with one good moment per fight and one dealing elite-tier damage throughout.
Wolfchaser keeps stacks alive between Qi exhaustion windows so you're not rebuilding from zero when the next burst window opens. The Morale Chant Inner Way adds a passive layer: 80% chance of a 1% physical/healing bonus, stackable up to 5 times for 8 seconds. In a sustained rotation, those stacks are consistently active.
Any boss with multiple distinct phases benefits from Umbra's sustained model. Guo Xin's Phase 2 transition is the clearest example — maintained stacks mean you're dealing damage through the transition rather than rebuilding from scratch. Bellstrike's burst spikes carry Phase 1; Umbra's sustain carries Phase 2 and beyond.
The Full Bellstrike-Umbra Rotation
Standard Rotation
Strategic Sword light attacks → confirm 5 bleed stacks
Swap to Heavenquaker Spear → charged heavy attack to trigger Flow buffs (Water Drop → Spring Surge → River Flow)
Sword Horizon → detonate bleed stacks
Delay Execute → hold until the final second of Qi exhaustion
Wolfchaser upkeep → maintain stacks, repeat from Step 1

The single most important discipline: do not swap to the spear before 5 bleeds are confirmed. Community forums are full of players reporting underwhelming damage — in most cases, premature weapon swaps are the cause. The swap resets your buff state and loses your stack count.
Alternative High-Damage Rotation
For players comfortable with the standard sequence and looking for higher output:
Inner Track Slash → 5 bleed stacks
Spear Sober Sorrow → 20% HP buff activation
5 charged spear hits → 50% DoT/bleed buff
Dragon's Breath → burn application
Sword Inner Balance Strike + Crosswind → damage phase
Repeat
Higher execution requirement, but the 50% DoT/bleed buff from charged spear hits significantly raises the detonation damage ceiling.
Phase Adjustments
Boss-Specific Strategies
Guo Xin (Whitecrown Fortress, Hexi — v1.4, March 6, 2026)
One of the longer Qi windows in the current roster, which is exactly why Bellstrike-Umbra dominates here.
Phase 1: Standard rotation. Build full stacks, execute at Qi exhaustion end.
Phase 2: Boss becomes more aggressive. Two options — maintain Eaglerise shields and continue the standard rotation, or swap to Bellstrike-Splendor for mobility if Phase 2 patterns are interrupting your stacks. The mobility swap costs some DPS but prevents the rotation from breaking entirely under forced dodges.
Qianye (Witch Boss Trials)
Hits for 2000–3000 damage per strike. Requires consistent perfect parries to break stamina — you can't play defensively and build stacks slowly here. Time stack-building phases to coincide with the Eaglerise shield's active window. When the shield is down, prioritize parries over stack building until it refreshes.
Ye Wanshan (Hard/Abyss Trials)
The Bellstrike challenge requires defeating the boss within 3 minutes. Use the alternative high-damage rotation — the 50% DoT/bleed buff from charged spear hits is the difference between meeting the timer and missing it.
Tian Ying (Sundara Land Campaign Boss)
Three distinct phases:
Phase 1: Most attacks parryable. Build stacks aggressively, standard rotation.
Phase 2: Position on the arena's blind spot (side positioning). The gold-glow staff shockwave can be cancelled with Meridian Touch (10-second cooldown) — most guides miss this entirely. Yuan Jin'gang companion bow staggers create additional attack windows.
Phase 3: Parry the clones. The pattern is consistent once you've seen it twice.
The Meridian Touch cancel matters specifically for Bellstrike-Umbra: Phase 2 is where most rotations break down because players are forced into defensive play by the shockwave. Cancelling it lets you maintain offensive pressure and keep stacks active through the phase.
Heartseeker
Long Qi windows, no unusual mechanics. This is the ideal boss to practice delayed Execute timing before applying it to more demanding fights. Internalize the timing here, then take it to Guo Xin and Qianye.
Wandering Ark (Shifting Sands, Hexi)
Drops multi-path materials supporting both Wolfchaser and Sword Horizon Internal Arts. Priority weekly farm target. Standard rotation applies — no unusual mechanics requiring adjustment.
Team Composition
The Four Roles
Applicator: Builds DoT stacks (Strategic Sword)
Amplifier: Boosts DoT values, extends stack duration (Wolfchaser, Heavenquaker Spear Flow buffs)
Detonator: Triggers burst damage on active DoT (Sword Horizon)
Sustain: Keeps the team alive through damage phases
Solo play means one character covers all four roles through the rotation. Co-op distributes them — but requires coordination that random matchmaking rarely provides.
Co-op Additions
Silkbind-Deluge Path (Soulshade Umbrella + Panacea Fan): healer with combat resurrect. Unlocks at Level 51. Essential for Abyss-tier content.
Stonesplit-Might Path (Thundercry Blade + Stormbreaker Spear): tank with taunt and shields. Frees the Bellstrike-Umbra player to focus entirely on stack building without managing boss aggro.
F2P Viability
Bellstrike-Umbra is community-confirmed as the best beginner build for high damage combined with survivability. Strategic Sword, Heavenquaker Spear, and Eaglerise Set are all farmable without premium currency. The Internal Arts require trial completions — Lucky Seventeen trial (bleed 15 times across 3 runs) and Dao Lord Spring Surge (5 times across 3 runs) — time-gated but not currency-gated.
The rotation requires mechanical skill, not resource investment. For players who want to accelerate gear progression without grinding every material from scratch, Where Winds Meet Echo Jade cheap top up 2026 can close the resource gap efficiently.
Gear and Progression Priorities
Internal Arts Order
Wolfchaser — first, no exceptions. Stack maintenance is the prerequisite for everything else.
Sword Horizon — second. The detonation trigger.
Morale Chant — third. Consistent passive damage once the core rotation is established.
Equipment Set Decision
For players looking to fast-track Echo Jade and upgrade materials for Eaglerise Set and weapon enhancements, Where Winds Meet recharge discount buy Echo Beads online supplements farming without waiting on weekly reset timers.
Common Mistakes
Swapping to the spear before 5 bleeds are confirmed. The most damaging mistake in the rotation. The swap resets your buff state and loses your stack count. Fix: count your light attack hits. Five hits, then swap. No exceptions until it's muscle memory.
Executing at the start of Qi exhaustion. The Execute multiplier peaks at the window's final second. Firing immediately when Qi exhaustion begins wastes the amplification. Resist the instinct to act immediately — let the window run, then Execute.
Neglecting Internal Arts synergy. The biggest structural mistake. Bellstrike-Umbra without properly leveled Wolfchaser and Sword Horizon is a fundamentally weaker build. Players who invest in weapon stats while neglecting Internal Arts leave the majority of the build's potential untapped.
Using Bellstrike-Umbra on short-Qi bosses. The build is T0 on long-Qi bosses. On bosses with brief or unpredictable Qi windows, you'll complete fewer detonation cycles and the DPS advantage shrinks. Recognize when Bellstrike-Splendor is the better tool.
Attempting to parry gold-glow attacks. Red-glow: parry. Gold-glow: dodge. Misreading this interrupts your stack-building phase at the worst possible moment.
FAQ
What's the best starting combo for Bellstrike-Umbra beginners? Standard rotation: 5 bleeds with Strategic Sword → Heavenquaker Spear charged heavy → Sword Horizon detonate → delay Execute to Qi exhaustion end → Wolfchaser upkeep → repeat. Master this before attempting the alternative rotation.
Does Bellstrike-Umbra work in co-op? Yes. The Bellstrike-Umbra player focuses on applicator/detonator roles while Silkbind-Deluge covers sustain and Stonesplit-Might handles taunt. The rotation doesn't change — but watch for teammates applying off-type DoT that won't interact with Sword Horizon's detonation.
Is Bellstrike-Umbra still viable after v1.4? Stronger than before. The new Hexi region bosses — Guo Xin and Wandering Ark — both have long Qi windows that play directly into the build's strengths. The level cap increase to 90 benefits the build proportionally.
How do I unlock Bellstrike-Umbra Path? ESC → Develop → Abilities → Inner Ways at Level 40. It's in the Develop tab — not under Combat or Character.
Can F2P players execute this effectively? Yes. All core gear is farmable without premium currency. The Internal Arts are trial-gated, not paywall-gated. The only area where currency accelerates progression is gear enhancement materials — and consistent Wandering Ark farming covers baseline requirements.
Fastest way to learn Execute timing? Practice on Heartseeker first. It has one of the longest Qi windows in the current roster, giving you maximum time to observe the window and practice holding until the final second. Once internalized, apply it to Guo Xin and Qianye where the margin for error is smaller.
Bellstrike-Umbra rewards players who understand why each step exists, not just the button order. The 5-stack discipline, the delayed Execute, the Internal Arts synergy — these aren't arbitrary rules. They're the mechanical logic of a build designed around a specific damage model. Get the model right, and the T0 performance follows.