Clearing Spiral Abyss 6.2 Floor 12 without Kazuha is entirely achievable using F2P alternatives like Sucrose, Venti, or Anemo Traveler. This guide reveals proven grouping strategies, chamber-specific positioning, and complete team rotations enabling free-to-play players to secure all 36 stars against level 95-100 enemies.
Understanding Enemy Grouping Mechanics
Enemy grouping directly impacts your ability to meet the 420-second requirement for 3-star clears. When enemies cluster, AoE abilities hit multiple targets simultaneously, dramatically increasing effective DPS against level 95-100 enemies with substantial HP pools.
Grouping relies on Anemo abilities applying suction effects. Effectiveness varies by enemy weight, AI patterns, and pulling strength of different Anemo characters.
For players strengthening rosters, Genshin Impact top up center platforms like BitTopup offer secure Primogem access with competitive pricing.
Why Grouping Is Critical
Floor 12's strict time constraints punish inefficient damage distribution. Scattered enemies waste seconds repositioning between targets.
Concentrated positioning enables:
Xiangling's Pyronado hits all grouped enemies simultaneously (40,000+ DPS)
Sucrose's Viridescent Venerer 4pc applies 40% resistance shred to all clustered enemies for 10s
Xingqiu's Rain Swords distribute damage efficiently when hitboxes overlap
Bennett's buff zone covers party without repositioning
Perfect Floor 12 completion provides 300 Primogems. Missing grouping windows often results in 2-star clears forfeiting 50 Primogems per chamber.
Enemy AI and Spawn Patterns
Floor 12 enemies follow predictable spawn locations and movement algorithms. Chamber 1 features Bloom Seeds and Rock Crabs spawning in waves from fixed positions.
Enemy AI prioritizes active character, creating controlled positioning opportunities. Standing in specific locations when waves spawn naturally funnels enemies toward grouping-friendly positions. Heavy enemies like Rock Crabs move slower and can't be pulled by most Anemo abilities.
Spawn timing follows consistent intervals. First wave appears immediately, subsequent waves trigger after eliminating specific counts or meeting time thresholds.
The Kazuha Myth
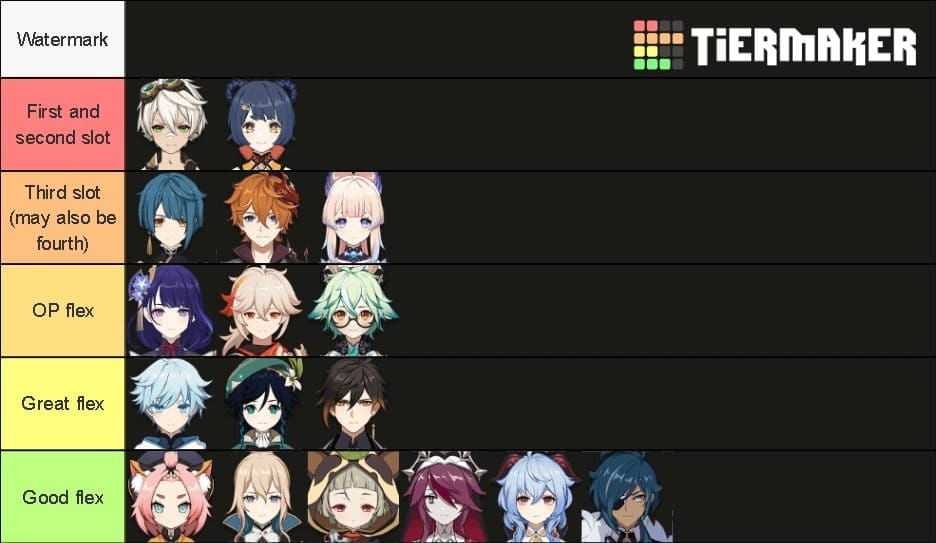
Kazuha's popularity stems from versatile elemental damage bonus and convenient grouping, but Floor 12 completion doesn't require him. Sucrose provides comparable grouping with Skill and Burst pulling enemies forward. Her 4pc Viridescent Venerer delivers identical 40% resistance shred for 10s.
National Team (Xiangling, Xingqiu, Bennett, Sucrose) consistently achieves 9-star Floor 12 clears without limited 5-stars. Sucrose's EM sharing (especially C6) enhances reaction damage for Hyperbloom teams where triggers reach 30,000 damage at 800+ EM.
Venti outperforms Kazuha against lighter enemies his burst can lift, creating sustained vortex immobilizing enemies for extended periods.
Chamber Differences in 6.2
Chamber 1: Emphasizes Bloom reactions with Seeds requiring detonation of 6 to break Rock Crab shields. Rewards Dendro-Hydro teams with strong grouping.
Chamber 2: Introduces Electro Shields and Shock Troopers demanding consistent Electro application. Grouping more challenging due to heavier enemy types.
Chamber 3: Features high-HP targets where grouping matters for buff zone coverage. Pyro damage essential—Xiangling's Pyronado with proper snapshotting is cornerstone.
Best F2P Grouping Characters
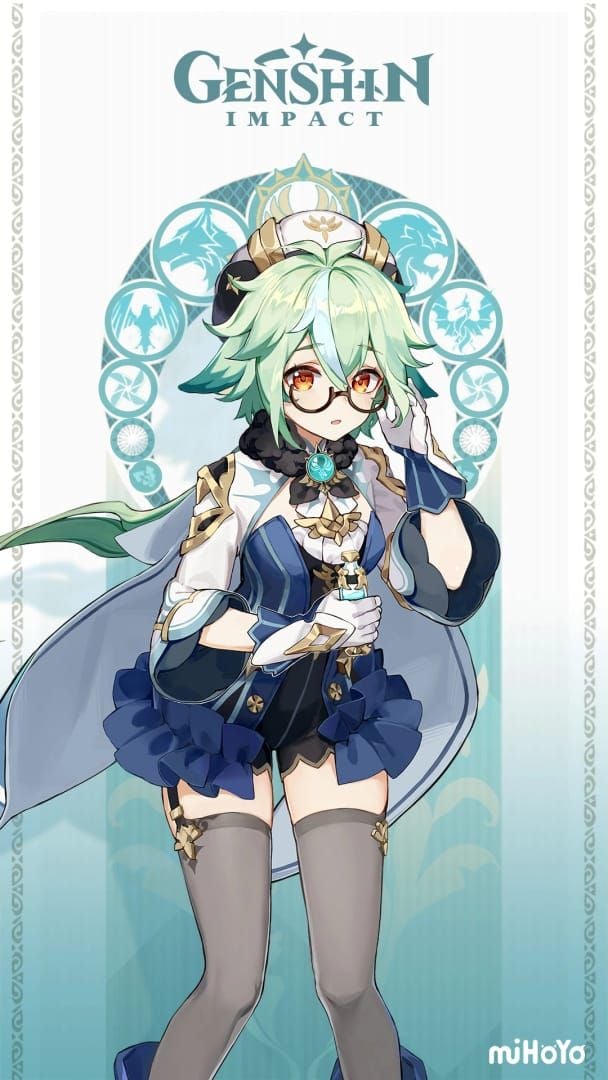
Sucrose: Ultimate F2P Solution

Sucrose is premier F2P grouping character—accessible, low energy requirements, powerful crowd control. Skill pulls enemies forward (6s cooldown), 80-energy Burst creates sustained pulling field.
Build:
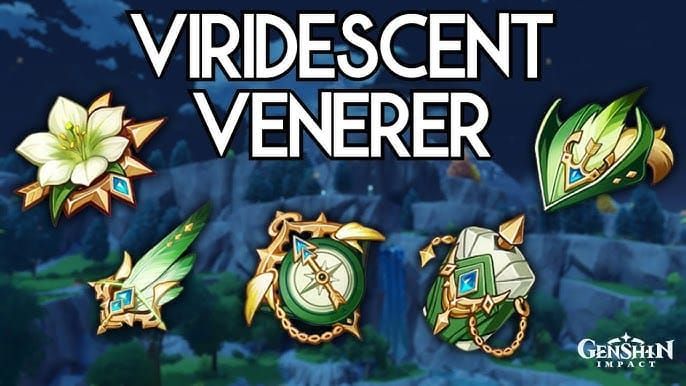
4pc Viridescent Venerer
Triple EM main stats (Sands/Goblet/Circlet)
180%+ Energy Recharge substats
Sacrificial Fragments (221 base EM, skill reset)
Rotation: Bennett Skill → Burst → Sucrose Skill → Xingqiu Burst → Skill → Xiangling Burst → Skill → Sucrose normals. This 20s rotation ensures VV shred applies before Xiangling's Pyronado snapshots Bennett's buff.
Minimal investment needed. Level 90 maximizes EM scaling, talents can stay 1/8/8 since grouping doesn't scale with multipliers.
Venti: Better Than Kazuha When It Works
Venti's Burst excels against lighter enemies that can be lifted. When applicable, grouping duration and radius surpass Kazuha's. Sustained 8s vortex immobilizes enemies completely.
60-energy cost enables faster rotation cycling vs Sucrose's 80. With 180-200% ER, achieves near-permanent uptime in multi-enemy scenarios.
Struggles against heavy enemies resisting lift. Chamber 2's composition limits effectiveness. Deploy specifically in Chamber 1 where lighter enemies dominate.
Build: 4pc VV, balance ER and EM.
Jean: Unconventional Charged Attack Grouping
Jean offers unique grouping through charged attacks pulling smaller enemies before launching. Less consistent than dedicated grouping but provides emergency options.
Primary value: combining healing with VV shred, enabling single-character fulfillment of two roles.
Build: 4pc VV, ATK%/Anemo DMG/Crit or Healing Bonus.
Anemo Traveler: Budget Option
Completely free grouping available from start. 60-energy burst creates tornado pulling enemies, though less consistently than Sucrose/Venti.
Tornado's movement creates unpredictability—can push enemies away if positioned poorly. Requires careful positioning toward walls/corners.
Build: 4pc VV, EM focus. Last resort when no other Anemo available.
Chamber 1 Strategy: Bloom Seeds & Rock Crabs
Spawn Locations and Movement
Bloom Seeds spawn in clusters at fixed positions flanking starting location. Rock Crabs emerge from ground burrow animations.
Position centrally when waves spawn to minimize scatter. Enemies initially orient toward active character, creating brief clustering window.
Rock Crabs can't be pulled—position yourself to bait them toward Bloom Seed clusters for natural grouping.
Optimal Positioning

Stand center-front when initiating. This places you equidistant from spawn points, causing natural convergence.
Avoid moving backward—causes horizontal spread maximizing scatter.
When Rock Crabs spawn, move toward their location immediately.
Team Rotations
National Team (20s rotation):
Bennett Skill → Burst (0-2s): Establish buff zone
Sucrose Skill (2-3s): Apply VV Pyro shred, group
Xingqiu Burst → Skill (3-5s): Apply Hydro
Xiangling Burst → Skill (5-7s): Snapshot Bennett buff before field expires
Sucrose normals (7-20s): Maintain on-field for Xingqiu swords
Critical: Xiangling must activate burst within Bennett's field (~12s) to snapshot full attack bonus.
Hyperbloom Team:
Dendro Traveler Skill → Burst (0-3s)
Xingqiu Burst → Skill (3-5s): Create Bloom cores
Sucrose Skill (5-6s): Group cores and enemies
Kuki Shinobu Skill (6-7s): Trigger Hyperbloom (30,000 damage at 800+ EM)
Maintain Dendro (7-20s)
Common Mistakes
Overload reactions launch enemies away—avoid Pyro-Electro unless enemies against walls.
Charged attacks scatter lighter enemies—stick to normal strings.
Activating grouping too early wastes duration before enemies fully spawn.
Chamber 2 Strategy: Heavy Enemies
Dealing with Heavy Enemies
Heavy enemies can't be pulled by most Anemo abilities. Focus on positioning yourself to fight where they spawn rather than relocating them.
Prioritize shield-breaking over grouping—scattered enemies with broken shields die faster than grouped with active shields.
Use camera angles to keep all targets visible for quick switching.
Aggro Manipulation
All enemies prioritize active character. Switch to grouping character before spawns complete, drawing them toward desired location.
Position near walls/corners when heavy enemies spawn, limiting movement options for pseudo-grouping through environmental constraints.
Alternative Strategies
When grouping impossible, shift to single-target burst optimization. Ensure max buff stacking—Bennett attack bonus, VV shred, proper snapshotting.
Prioritize high-threat targets first. Electro Shock Troopers deal significant damage.
Use iframe abilities to avoid damage without repositioning.
Elemental Reactions
Freeze teams naturally group through immobilization. Kaeya/Rosaria bursts + Xingqiu Hydro create frozen clusters.
Avoid Overload unless enemies against walls.
Electro-Charged doesn't apply knockback—grouping-friendly.
Chamber 3 Strategy: High-HP Targets
Positioning Priorities
Against single large enemies, grouping means keeping team positioned together within buff zones. Character positioning matters more than enemy positioning.
Pyro damage essential. Xiangling's Pyronado with proper snapshotting deals 40,000+ DPS.
Phase Transitions
Time burst rotations to begin just before transitions, maximizing damage during vulnerable phases.
Avoid wasting bursts during invulnerability. Track HP percentages and hold abilities if transition imminent within 2-3s.
Energy management critical. Ensure supports have 180-200% ER for consistent uptime.
Emergency Techniques
When approaching 420s limit, prioritize damage over perfect grouping. Slightly scattered with active bursts outperforms waiting for ideal grouping.
Use food buffs if struggling. Adeptus Temptation (+ATK%) and Elemental Potions significantly boost damage.
For additional resources, buy Genesis Crystals through BitTopup for fast access to resin refreshes and upgrades.
Complete F2P Team Compositions
National Team with Sucrose

Core: Xiangling (Main DPS), Xingqiu (Sub DPS), Bennett (Healer/Buffer), Sucrose (Grouping/VV)
Most reliable F2P option. Xiangling's Pyronado snapshots Bennett's buff achieving 40,000+ DPS. Xingqiu provides Hydro for Vaporize plus damage reduction.
Sucrose focuses on VV shred and grouping. EM sharing provides minimal benefit since Xiangling's Vaporize scales from ATK/Crit.
Freeze with Venti
Core: Kaeya (Main DPS), Rosaria (Sub DPS/Crit share), Xingqiu (Hydro), Venti (Grouping/VV)
Excels Chamber 1 where Venti lifts lighter enemies. Frozen enemies cluster indefinitely.
Rosaria provides Crit Rate sharing. Her burst remains stationary requiring grouped enemies—exactly what Freeze accomplishes.
Struggles Chambers 2-3 with heavier enemies. Deploy first-half Chamber 1 specifically.
Hyperbloom with Sucrose
Core: Dendro Traveler, Xingqiu, Kuki Shinobu (Electro trigger/Healer), Sucrose (Grouping/EM share)
Hyperbloom triggers deal 30,000 at 800+ EM. Kuki's EM investment is damage priority. Sucrose C6 provides 20% EM sharing.
Grouping clusters enemies and Bloom cores before Kuki triggers.
Requires specific investments—Kuki needs 800+ EM with 4pc Gilded Dreams/Flower of Paradise Lost. Dendro Traveler needs 180%+ ER.
Budget Overload Team
Core: Fischl, Beidou, Xiangling, Bennett
Sacrifices grouping, accepting Overload knockback. Fight against walls where knockback minimized. Chambers 2-3's heavier enemies resist knockback better.
Fischl's Oz provides consistent Electro. Beidou's burst delivers massive damage but needs 180-200% ER.
Build Optimization
Sucrose Build
Artifacts: 4pc Viridescent Venerer (mandatory)

Main Stats: EM/EM/EM Substats:
Energy Recharge (180%+)
Elemental Mastery
ATK%
Weapons:
Sacrificial Fragments (Best): 221 EM, skill reset doubles grouping
Thrilling Tales (Budget): 48% ATK buff but no EM
Mappa Mare (Craftable): EM and elemental damage
Target 200+ EM from artifacts, Sac Frags adds 221 for 400+ total.
Talents: 1/8/8 Level to 90/90. Anemo gains significant Swirl damage from levels, ascension EM benefits team sharing.
Venti Build
Artifacts: 4pc VV Main Stats: ER or EM/EM/EM Substats: ER (180-200%), EM, Crit
60-energy cost allows flexible ER. Passive refunds 15 energy when burst ends.
Choose ER Sands if struggling uptime. Switch to EM Sands once rotations consistent.
Weapons: Stringless (EM + skill/burst DMG), Favonius Warbow (ER + particles), Windblume Ode (EM + ATK)
Functions effectively 80/80 without final ascension.
Jean Build
Artifacts: 4pc VV Main Stats (Healing): ATK%/ATK% or Anemo/Healing Bonus Main Stats (Damage): ATK%/Anemo/Crit Substats: ER (160-180%), ATK%, Crit
Healing scales from ATK, creating synergy between damage/healing builds.
Weapons: Amenoma Kageuchi (Craftable, ER passive), Favonius Sword (ER + particles)
Charged attack grouping requires stamina management—use strategically.
Advanced Techniques
Camera Angle Tricks
Enemy AI pathfinding responds to character position relative to camera. Enemies approach from directions keeping them on-screen.
Angle camera toward walls/corners before spawns. Encourages approach from angles funneling into confined spaces.
During combat, rotate camera to influence repositioning. Quick 90-180° rotations make enemies adjust positions to maintain on-screen presence.
Wall-Pinning
Fighting against walls prevents knockback scatter. Overload reactions pin enemies instead of launching.
Corner positioning amplifies effect. Enemies trapped have minimal movement options.
Identify corners in each chamber during initial runs. Memorize and bait enemies toward them.
Iframe Timing
Burst animations provide invincibility letting you ignore damage while maintaining aggressive positioning. Use iframes to stay within clusters rather than dodging away.
Time activations to coincide with enemy attack windups. Wastes enemy animations while you remain invulnerable.
Xingqiu's Skill includes iframes during dash animation.
Troubleshooting
Why Enemies Spread
Knockback reactions (Overload, heavy attacks) scatter after initial grouping. Avoid Pyro-Electro unless wall-pinned.
Certain enemy attacks include repositioning. Rock Crabs burrow and re-emerge elsewhere. Time bursts to avoid these phases.
Player movement causes position adjustments. Minimize movement once grouped.
Dealing with Knockback
Freeze prevents knockback by immobilizing. Pair Overload teams with Cryo to freeze before triggers.
Fight against walls/corners where knockback pins rather than launches.
Accept some scatter as inevitable in Overload teams. Build high single-target damage to compensate.
Energy Management
Funnel particles to grouping character by catching while on-field. Sucrose should catch Bennett Skill particles.
Use Favonius weapons on supports for additional neutral particles.
Extend rotations 2-3s if burst not ready. Generating energy outperforms forcing rotations without critical abilities.
Version 6.2 Specifics
Ley Line Disorders
6.2 disorders modify reaction damage or provide energy regeneration. Influence whether grouping for multi-target reactions outweighs single-target burst.
Disorders boosting Swirl damage make Sucrose/Venti more valuable. Prioritize EM builds.
Energy regeneration disorders reduce ER requirements 20-30%, reallocating substats to Crit/ATK%.
Abyssal Blessings
Choose blessings complementing team damage profile.
Normal Attack blessings benefit on-field DPS but provide minimal value to off-field teams like National. Prioritize Skill/Burst damage blessings.
Grouping-focused blessings triggering on multi-hit synergize perfectly with Sucrose/Venti.
6.2 Enemy Lineup
Chamber 1's Bloom mechanic requires detonating 6 Seeds to break Rock Crab shields—Dendro-Hydro teams more valuable. National remains viable with careful seed management.
Chamber 2's Electro Shields demand consistent Electro application.
Resource Management
Upgrade Priority
Focus on highest damage contributors. In National: Xiangling gets priority for 90, 8/8/8, artifact optimization. Pyronado deals 40,000+ DPS when invested.
Bennett functions at 70/80 with 1/8/8. Buff scales from base ATK (character + weapon).
Xingqiu needs 80/90 with 1/8/8 minimum. Target 180-200% ER with 1:2 Crit ratio.
Sucrose requires 90 for max EM but only 1/8/8 talents.
Weapon Priority:
The Catch R5 for Xiangling (+32% Burst DMG, +12% Crit)
Sacrificial Fragments for Sucrose
Sacrificial Sword for Xingqiu
Highest base ATK sword for Bennett
Primogem Allocation
Early-game: prioritize character acquisition. Established players benefit more from resin refreshes for artifacts.
Daily refreshes cost 50-100 Primogems, provide guaranteed progress vs weapon banner split rate-ups.
Save for character banners with strong 4-star supports. Key constellations:
Xiangling C4: +40% Pyronado duration
Bennett C1: Removes HP restriction
Xingqiu C2: Hydro RES shred
Avoid weapon banner unless willing to reach pity multiple times (up to 240 wishes = 38,400 Primogems).
BitTopup Benefits
Strengthening characters requires ~7M Mora and 418 Hero's Wit per character to 80/90. Resin naturally gates progression.
BitTopup provides secure Genesis Crystal access for Welkin Moon, Battle Pass, resin refreshes accelerating resource acquisition. Competitive pricing with fast delivery.
Welkin provides 90 Primogems daily for 30 days (2,700 total)—most efficient source. Battle Pass unlocks talent materials, weapon XP, Mora.
Strategic small purchases provide better value than large crystal packs.
FAQ
Can you clear Floor 12 without Kazuha?
Yes. National Team (Xiangling, Xingqiu, Bennett, Sucrose) consistently achieves 9-star clears without limited 5-stars. Sucrose provides comparable grouping with identical 40% resistance shred through 4pc VV.
Best F2P Kazuha alternative?
Sucrose—accessible, consistent pull mechanics, low investment. Build 4pc VV, triple EM, Sacrificial Fragments, 180%+ ER. Grouping matches Kazuha for most scenarios with added EM sharing for reaction teams.
How does Sucrose compare to Kazuha?
Both apply 40% resistance shred through 4pc VV. Kazuha offers elemental damage bonuses and convenience. Sucrose provides EM sharing benefiting Hyperbloom/reaction teams. For F2P, Sucrose's accessibility makes her practical choice.
Best Chamber 1 grouping strategies?
Position centrally when enemies spawn. Use Sucrose Skill after Bennett establishes buff to group before Xiangling Pyronado. Rock Crabs can't be pulled—fight them near Bloom Seeds. Avoid Overload. Time bursts with spawn waves.
How much EM does Sucrose need?
Target 200+ from artifacts, Sac Frags adds 221 for 400+ total. Grouping doesn't scale with EM—stat benefits Swirl damage and team buffs. Prioritize ER (180%+) for consistent burst uptime.
How to get 36 stars F2P?
Build two complete teams with proper artifacts, weapons, talents. National handles one half, Freeze/Hyperbloom the other. Invest strategically: main DPS to 90 with 8/8/8, supports to 70/80 with key talents at 8. Farm 4pc Emblem and VV. Master chamber strategies, spawn patterns, optimal rotations. Each chamber needs <420s for 3-star (300 Primogems total).
Master Floor 12 faster with resources you need! Visit BitTopup for convenient, secure top-ups to get Primogems, Welkin Moon, and Battle Pass strengthening your F2P roster. More resources mean better artifacts, higher talents, crucial constellations. Top up smart at BitTopup today!

