

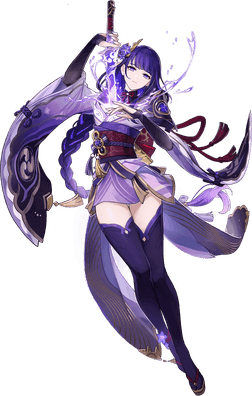
Raiden Shogun absolutely dominates the 2025 meta through three distinct archetypes: Hypercarry (hitting 200k+ on that first slash), National (with a whopping 63.64% community preference at C0), and Hyperbloom. You'll want 250+ Energy Recharge for optimal battery performance across all team compositions.
Why Raiden Shogun Still Rules the 2025 Meta
Here's the thing about Raiden – she's basically the Swiss Army knife of Genshin Impact. Her dual role as both energy battery and adaptable DPS creates three completely different team identities, which honestly? That's pretty rare in this game.
At C0, she absolutely shines in National variants, keeping Burst-heavy teammates like Xiangling and Xingqiu constantly topped off. But here's where it gets interesting: C2 completely transforms her damage scaling. We're talking about a constellation that makes Hypercarry compositions not just viable, but often superior to National in single-target scenarios. (And trust me, I've seen the damage screenshots – they're wild.)
The foundation of any Raiden team build starts with Energy Recharge requirements. That 250+ ER threshold isn't just a suggestion – it's what ensures your Burst rotations stay consistent while letting your teammates focus purely on damage substats. If you're looking to push her potential further, Genshin Impact Genesis Crystals top up through BitTopup offers secure constellation upgrades with competitive pricing and instant delivery.
Breaking Down Her Kit (And Why Constellations Matter)
Her Elemental Skill does something pretty clever – it marks enemies while providing Elemental Burst damage bonuses to your entire party. This synergy with Burst-focused characters like Xiangling is what makes National teams tick.
The Elemental Burst? That's where the magic happens. She transforms into an on-field DPS while simultaneously generating energy for your entire team. In optimized setups, we're seeing 200k+ initial slash damage consistently.
Now, about C2 – this is her most significant power spike, no contest. It increases Elemental Burst damage and ignores 60% of enemy DEF during her Burst state. Pair this with C6 Sara for Hypercarry potential, and you've got Electro damage bonuses that scale beautifully with her enhanced kit.
Raiden Hypercarry: When You Want Maximum DPS
The core structure here is pretty straightforward: Raiden as Main DPS, Kujou Sara for Electro amplification, Kazuha for resistance shred and grouping, Bennett for ATK buffs and healing. This setup absolutely demolishes non-Electro-immune enemies in single-target scenarios.

Character builds get specific here: Raiden runs Emblem 4pc with ER/Electro DMG/CRIT priority while maintaining that crucial 250+ ER threshold. Sara needs C6 for optimal performance (sorry, but it's true) with Emblem 4pc focusing ATK/Electro DMG/CRIT. Kazuha uses VV 4pc with triple EM main stats – pretty standard stuff. Bennett runs Noblesse 4pc with ER/HP%/HP% priority.
Want to really push this build's limits? Buy Genshin Impact recharge crystals from BitTopup to snag Engulfing Lightning. This weapon significantly enhances Hypercarry performance through increased ER and ATK scaling, and the platform offers secure payment processing with 24/7 customer support.
When You Don't Have the Perfect Characters
Lisa can replace Sara if you're missing that C6 – she offers Thrilling Tales ATK buff and DEF shred through her Burst. The downside? Her energy generation doesn't align perfectly with Raiden's field time, but it's workable.
Sucrose substitutes for Kazuha pretty well, providing VV resistance reduction and EM sharing at much lower investment costs. Mona's another interesting option, offering burst amplification through her Omen effect, though you'll need precise rotation timing to make it work.
The Rotation That Makes It All Click
Raiden Skill → 2. Kazuha Skill + Burst → 3. Bennett Skill + Burst → 4. Sara Skill + Burst → 5. Raiden Burst + Normal Attacks → 6. Repeat cycle
Timing is absolutely crucial here. Miss your buff windows during Raiden's damage phase, and you'll feel it in your clear times.
Raiden National: The Reliable Workhorse
This is where most players start, and honestly? There's good reason for that 63.64% community preference.
Classic setup combines Raiden, Xiangling, Xingqiu, and Bennett, mixing Vaporize reactions with Electro-Charged and Overload. Yelan can replace Xingqiu for enhanced damage scaling and longer Burst duration – though she's obviously harder to get. Kokomi offers an alternative Hydro source with built-in survivability through healing and TTDS buffs.

Character builds stay pretty consistent: Raiden uses Emblem 4pc prioritizing that 250+ ER/ATK/CRIT balance for her battery role. Xiangling runs Emblem 4pc with ATK/Pyro DMG/CRIT and R5 The Catch (if Raiden isn't using it). Xingqiu uses Emblem 4pc focusing ATK/Hydro DMG/CRIT. Bennett sticks with Noblesse 4pc and ER/HP%/HP%.
Rotation and Energy Management
Raiden Skill → 2. Xingqiu Burst → 3. Bennett Burst + Skill → 4. Xiangling Burst + Skill → 5. Xingqiu Skill → 6. Raiden Burst + Normal Attacks → 7. Repeat
If your Bursts aren't recharging completely, bump Raiden's ER beyond 250% through artifacts or weapon selection. It's better to sacrifice some damage for consistency.
Hyperbloom Raiden: Mastering Dendro Synergy
This variant completely flips Raiden's build priorities. Instead of focusing on her personal damage, she becomes the Electro trigger for Dendro cores, shifting toward Elemental Mastery while maintaining energy generation.
Nahida provides consistent Dendro application and EM buffs – she's pretty much irreplaceable here. Kokomi functions as both Hydro enabler and healer, applying Hydro for Bloom initiation while keeping everyone alive.
Team builds look different: Raiden uses Paradise Lost or Gilded Dreams 4pc with triple EM main stats while maintaining 200+ ER through substats. Nahida runs Deepwood or Gilded Dreams 4pc with EM optimization. Kokomi uses Tenacity or Ocean-Hued Clam 4pc prioritizing HP% with TTDS weapon.
Finding the EM vs ER Sweet Spot
You're aiming for 800+ Elemental Mastery while maintaining 200+ Energy Recharge for consistent Burst access. Paradise Lost provides optimal Hyperbloom scaling through EM and reaction damage bonuses. Dragon's Bane offers EM and reaction damage, while Iron Sting provides pure EM scaling – choose based on your substat rolls.
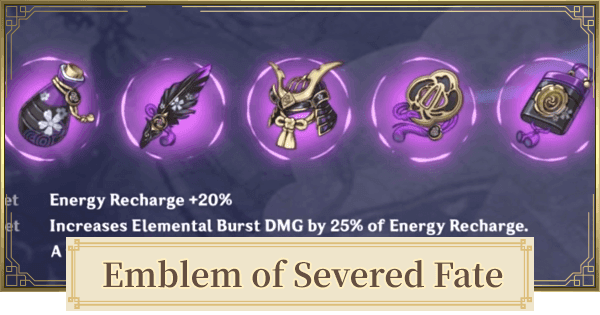
Artifact and Weapon Optimization
Emblem of Severed Fate remains the gold standard for Hypercarry and National builds, converting ER into Burst damage efficiently. Weapon selection varies significantly by archetype: Engulfing Lightning is optimal for traditional builds, while R5 The Catch offers F2P accessibility with surprisingly competitive performance.
Substat priorities shift by build: Traditional builds follow ER > CRIT Rate = CRIT DMG > ATK%. Hyperbloom variants prioritize EM > ER > CRIT stats. Always hit that 250+ ER threshold before focusing on damage optimization – trust me on this one.
Weapon Tier List (Based on Current Testing)
S-Tier: Engulfing Lightning (her signature for a reason), Grasscutter's Light

A-Tier: R5 The Catch (F2P optimal choice), Staff of Homa (CRIT DMG scaling), Primordial Jade Winged-Spear B-Tier: R5 Wavebreaker's Fin (team Burst scaling), Skyward Spine, Favonius Lance
Mastering Team Rotations and Damage Windows
Hypercarry rotations demand precise buff stacking before Raiden's damage window opens. Your setup phase (8-10s) establishes all support buffs, damage phase (7s) maximizes Burst potential, and transition phase (3-5s) prepares the next cycle.
National rotations focus more on energy funneling and reaction setup. Energy setup (6-8s) establishes team buffs, reaction phase (7s) optimizes Vaporize frequency, maintenance phase (3-5s) generates particles for the next rotation.
Investment Priority (Where to Spend Your Resources First)
Hypercarry: Raiden Burst (10) > Raiden Skill (8) > Sara Burst (8) > Bennett Burst (8) > Kazuha Burst (6) National: Xiangling Burst (10) > Bennett Burst (8) > Raiden Burst (8) > Xingqiu Burst (8) > Raiden Skill (6) Hyperbloom: Nahida Skill (10) > Raiden Skill (8) > Kokomi Skill (6) > Raiden Burst (6)
Spiral Abyss Performance (Where It Actually Matters)
Floor 12 optimization requires understanding enemy resistances and mechanics – something that changes every rotation cycle. National excels against heavy enemies where Overload doesn't disrupt positioning (looking at you, Ruin Guards). Hypercarry performs optimally against stationary high-HP targets.
Clear benchmarks from community data: C0 National achieves 90-second clear times with proper execution. C2 Hypercarry reaches 60-second benchmarks against favorable matchups. Your team selection should always consider energy requirements and buff uptime against specific enemy patterns.
FAQ
What's the best Raiden team for F2P players? Raiden National (Raiden, Xiangling, Xingqiu, Bennett) hands down. That 63.64% community preference exists for good reason – it uses accessible 4-star characters with consistent damage output and relatively low investment requirements.
How much Energy Recharge does Raiden actually need? 250+ Energy Recharge for optimal battery performance. This ensures consistent Burst rotations while letting your teammates focus purely on damage optimization instead of energy substats.
Is C0 Raiden viable for endgame content? Absolutely. C0 Raiden clears Spiral Abyss Floor 12 consistently in National teams. C2 enhances Hypercarry viability significantly, but C0 remains competitive in reaction-based compositions.
What artifacts should I prioritize? Emblem of Severed Fate 4pc for Hypercarry/National builds – it's her bread and butter. Paradise Lost or Gilded Dreams 4pc for Hyperbloom variants focusing on Elemental Mastery scaling.
Can I run Raiden without Bennett? Possible? Yes. Optimal? Not really. Bennett provides crucial ATK buffs and healing that are hard to replace. Alternative healers like Kokomi or Jean can substitute, but you'll see reduced damage optimization and need different rotation timings.
What's the real difference between Hypercarry and National? Hypercarry maximizes Raiden's personal damage through coordinated buffs (those 200k+ Burst hits). National emphasizes sustained team damage through reactions, with Raiden serving as energy battery and secondary DPS. Choose based on your roster and constellation level.