

Master Delta Force's Operations Mode with this comprehensive 2025 beginner guide covering top-tier operators like Luna and Raptor, optimal class selections, proven weapon loadouts including M4A1 and CI-19 builds, and strategic team compositions for successful extractions and competitive play.
Getting Started with Delta Force: Essential Basics
Look, I'll be straight with you—Delta Force isn't your typical run-and-gun shooter. This tactical extraction game will humble you fast if you dive in unprepared. But here's the thing: once you understand the fundamentals, it becomes incredibly rewarding.
Game Overview and Core Mechanics
Delta Force 2025 combines the intensity of PvP combat with strategic loot acquisition in a way that'll keep your heart racing. Operations Mode is where the real action happens—you're navigating maps, securing resources, and extracting successfully while managing team coordination and equipment loadouts. The stakes? Lose your gear if you mess up.

What I love about this game is the cross-progression across PC, PlayStation, and Xbox. Link your accounts and you're golden—no starting over when you switch platforms.
Season 6: War Ablaze dropped September 23, 2025, and honestly? It changed everything. Weapon balances, the new operator Raptor, system overhauls—the works. For enhanced gaming experience, Delta Force game credits top up through BitTopup provides instant premium content access with competitive pricing, fast delivery, and comprehensive customer support.
System Requirements and Setup
Here's where most beginners go wrong: they prioritize pretty graphics over performance. Don't.
Operations Mode demands optimal settings for competitive advantage. I recommend FOV between 95-105 (personally, I run 100), low mouse sensitivity for precise aiming, and competitive audio settings because hearing enemy footsteps can save your life. Graphics? Keep them low. Many pros reduce graphics settings to maintain consistent 120+ FPS during firefights.
Your network needs to be rock-solid too. Any packet loss will get you killed. Practice offline map layouts extensively—learn those choke points, flanking routes, and extraction zones before jumping into live matches where losing gear actually hurts.
Interface Navigation
The operator selection system organizes characters by specializations, and this matters more than you might think. Assault operators are your versatile front-line fighters, Recon handles enemy spotting and intelligence, Support keeps everyone alive and supplied, while Engineers manage tactical equipment and objectives.
My advice? Master one class initially. Seriously. You'll progress faster and unlock better gear instead of being mediocre at everything.
Loadout customization follows a priority system: recoil control attachments first, then optics, extended magazines, and muzzle devices. The attachment system has diminishing returns when you stack similar benefits, so strategic selection based on engagement ranges and map characteristics is crucial.
Understanding Delta Force Operators
Operator Roles and Specializations
The current roster includes eight core characters: Uluru, Hackclaw, Vyron, D-Wolf, Shepherd, Luna, Stinger, Sineva, plus Season 6's Raptor (Recon) and the upcoming Season 7's Gizmo (Engineer, launching November 18, 2025). Each brings distinct tactical advantages, and understanding these differences will make or break your team compositions.
Assault operators like D-Wolf excel in mobility—slide abilities and grenade deployment make them perfect for aggressive plays. Vyron offers propulsion systems that can get you out of sticky situations fast. Recon specialists? That's where Luna and Hackclaw shine. Silent scouting and superior detection for setting up those devastating ambushes.
Support operators focus on keeping your team alive and fighting. Stinger's rapid healing has saved my squad countless times, while Toxik provides enemy debuffs that can turn the tide of engagements.
Beginner-Friendly Operators
Luna ranks SS-Tier for Operations Mode, and there's a reason why. Her scouting abilities and ambush potential are exceptional—perfect for new players learning map awareness and enemy positioning. Her detection systems provide crucial intelligence that'll help your team make smart decisions during high-stakes extractions.

Stinger offers S-Tier support with quick healing deployment. Trust me, as a beginner, you'll take damage while learning positioning. Stinger's rapid heal ability provides forgiveness for those tactical mistakes we all make early on.
D-Wolf provides A-Tier assault capabilities with enhanced mobility through slide mechanics and grenade options. If you prefer aggressive playstyles, this is your operator. The mobility enhancements help new players reposition quickly when caught in bad spots.
Unlock Priority Strategy
Raptor emerged as the top Recon choice following Season 6 updates. EMP Grenades that disable enemy lasers, optics, and deployables? Yes, please. His Ultimate Trace Scanner provides 5x enemy pings, while the Passive Trace Tracker detects footprint trails for enhanced situational awareness.
Those EMP capabilities prove invaluable against meta laser attachments, especially during fog events with 30-40 meter visibility restrictions. Raptor synergizes beautifully with Luna for comprehensive intelligence gathering.
Season 7's Gizmo introduces Engineer capabilities that sound absolutely wild. Crawler Nest spawning three exploding spiders that apply Corrosion marks for increased bullet damage? Smoke Mine that slows and reveals enemies? The Ultimate Hunting Spider deploys webs that slow, disable gadgets, and mark targets. Can't wait to test this operator.
Mastering the Class System
Assault Class Fundamentals
Assault operators are your bread and butter—versatile front-line fighters who excel with assault rifles like the M4A1 and CI-19. These weapons offer balanced damage and manageable recoil, perfect for mid-range engagements while maintaining close-quarters effectiveness through proper attachments.
D-Wolf represents the premier Assault choice with that A-Tier ranking. Enhanced mobility through slide mechanics and explosives for area denial make this operator shine when securing high-value loot and controlling extraction points.
But here's a sleeper pick: Nox achieves S-Tier status through noise reduction. Silent movement during critical extraction phases? That stealth advantage proves invaluable when you're avoiding detection while carrying valuable loot toward extraction zones.
Support and Recon Classes
Support operators keep your team fighting. Stinger provides S-Tier healing through rapid deployment systems—this enables aggressive positioning while recovering from combat damage efficiently. Toxik offers SS-Tier support through debuff application and healing buffs, creating dual-purpose utility that weakens enemies while strengthening allies.
Recon specialists excel in intelligence gathering and long-range engagement. Luna achieves SS-Tier status through superior detection and ambush potential—I can't stress enough how game-changing good intel is. Hackclaw provides S-Tier silent scouting with hacking capabilities that disable enemy equipment and reveal tactical information.
Class Synergy in Teams
Optimal team composition balances four specializations: one Recon for enemy spotting, one Support for healing/resupply, one Engineer for barriers/equipment, one Assault for aggressive pushes.
Effective synergies? Luna's intelligence paired with D-Wolf's mobility enables rapid repositioning. Stinger's healing supports aggressive Assault operators during extended firefights. Engineer barriers provide defensive positions for Recon operators using long-range weapons.
Communication protocols should emphasize concise callouts using map landmarks and directional references. Develop standardized terminology for enemy positions, loot discoveries, and extraction timing coordination—your team will thank you.
Operations Mode Deep Dive
Mode Objectives and Rules
Operations Mode features three sub-modes, and understanding the differences is crucial. Hazard Operations requires teams to explore maps, secure loot, then extract before time limits—with gear loss risks. This mode's suitable for experienced players who can handle the pressure.
Hot Zone provides 3v3v3 PvP practice without gear loss. Perfect for beginners learning combat mechanics and team coordination without the stress of losing equipment.
Raid mode enables teams to bring personal gear through staged AI encounters with no gear loss upon death. This bridges practice and full-risk gameplay, allowing skill development with reduced consequences.
Map Knowledge Basics
Four primary maps support Operations: Dam, Forest, Space City (Easy/Normal/Hard difficulties), and Brakkesh (Normal only). Each requires specific tactical approaches based on terrain and engagement ranges.
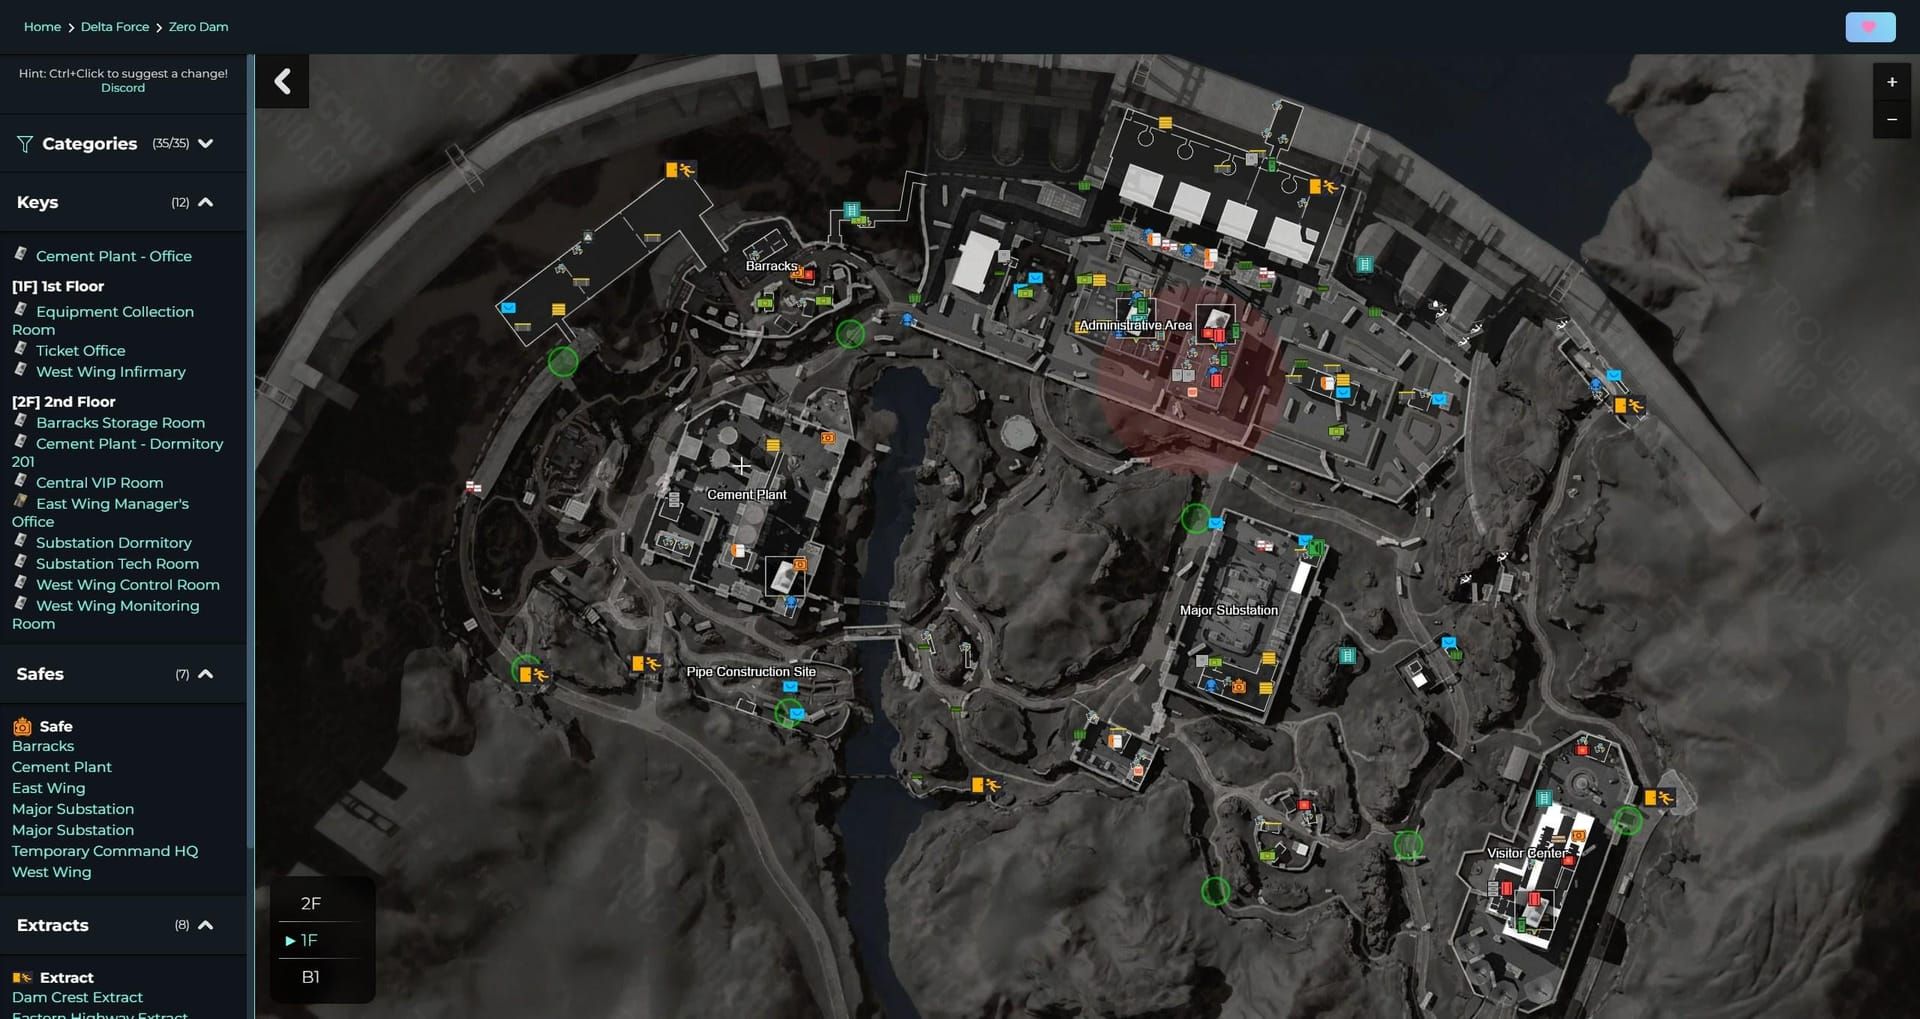
Urban environments like Space City favor close-quarters weapons—the SMG-45 absolutely dominates here. Open Desert areas benefit from long-range weapons like the AWM and CI-19 with extended barrels. Forest maps emphasize stealth using suppressed weapons like the SR-3M for those satisfying ambushes.
Mountain terrain around Dam provides elevation advantages for snipers. Control the high ground while managing those longer sight lines. Master insertion points, supply locations, extraction zones, and boss spawns for strategic advantages.
Winning Strategies
Here's what separates successful teams from the ones that rage quit: prioritize objective completion over eliminations. Focus on efficient loot acquisition and safe extraction rather than prolonged firefights. Establish clear roles with designated point operators, support personnel, and rear security maintaining formation during movement.
Wildfire Events introduce fog that reduces visibility to 30-40 meters. This favors shotgun and SMG loadouts over long-range configurations. Teams must adapt positioning and rely on audio cues for enemy detection—those headphones become your best friend.
For optimized gameplay, buy Delta Force online recharge through BitTopup ensures access to premium operators and equipment with instant processing, secure payments, and 24/7 support.
Building Your First Loadouts
Primary Weapon Selection
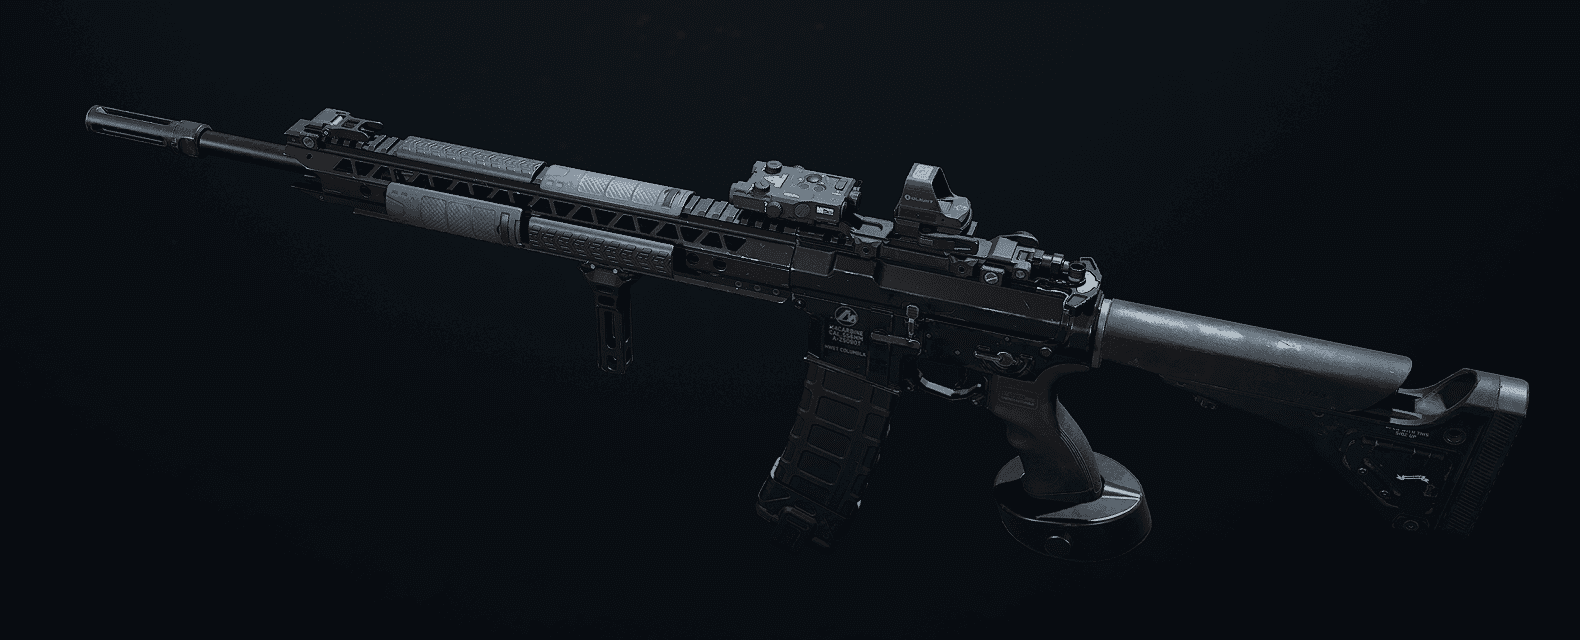
The M4A1 Assault Rifle serves as the optimal beginner choice. 25 damage per round at 672 RPM with balanced performance across all ranges—what's not to love? The low recoil pattern enables new players to maintain accuracy during sustained firefights while learning positioning and target acquisition.
CI-19 Assault Rifle offers enhanced accuracy and stopping power for mid-range engagements. With an 8.5% pick rate among competitive players, it supports 60-round drum magazines and benefits from attachments like the New Leviathan Tactical Long Barrel extending effective range to 55 meters.
SMG-45 Submachine Gun provides 6.1% pick rate performance with high fire rate optimized for close-quarters combat. Features a 40-round extended magazine and benefits from the SMG-45 Fission Long Barrel and Secret Order Bevel Foregrip for enhanced stability.
Secondary and Equipment Choices
Your secondary should complement your primary's limitations. The 93R pistol provides reliable backup for close-range emergencies. TAC Dagger offers silent eliminations when ammunition conservation becomes critical during extended operations.
Gadget selection should prioritize utility over damage—Anti-Personnel Launcher provides area denial, smoke grenades offer concealment during extraction. Equipment should support team roles rather than individual preferences, ensuring comprehensive tactical coverage.
Attachment Optimization
Follow this priority: recoil control first, then optics and extended magazines, finally muzzle devices and accessories. Sandstorm Vertical Compensator provides essential vertical recoil reduction for assault rifles. Secret Order Bevel Foregrip enhances overall stability.
DBAL-X2 Purple Laser-Light Combo enables Tactical Stance activation, providing breath hold for improved accuracy during precision shots. Particularly valuable for mid-range engagements where target acquisition speed determines outcomes.
Optic selection depends on engagement ranges—Cobra Accuracy Sight for mid-range, OSIGHT Red Dot for close-quarters. Avoid stacking similar benefits due to diminishing returns.
Best Beginner Loadout Configurations
Assault Loadout Setup
M4A1 Long Range Operations Build (Code: 6FINC4G0CQTV1IBVCBQVT) optimizes mid-long range stability. This build features Resonant Ergonomic Grip foregrip, Invasion Rear Grip, AR Gabriel Long Barrel Combo, Sandstorm Vertical Compensator, UR Spec Ops Tactical Stock, Recon 1.5/5 Adjustable Scope, M4 45-Round Extended Magazine, and DBAL-X2 Purple Laser-Light Combo.
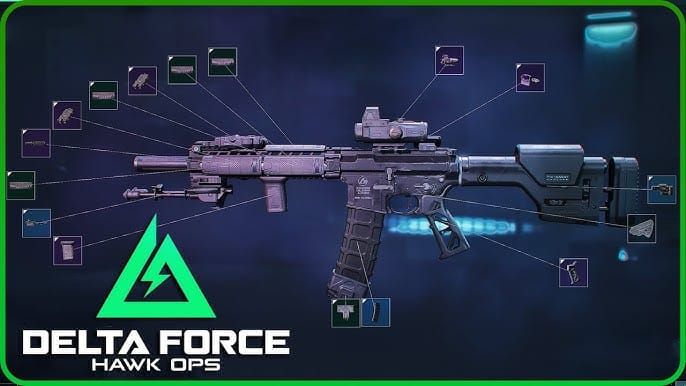
Secondary equipment includes the 93R pistol, TAC Dagger for silent eliminations, and Anti-Personnel Launcher for area denial. This configuration excels in mid-long range stability while maintaining laser activation for Tactical Stance precision. That 10.1% competitive pick rate demonstrates proven effectiveness.
Support Role Loadout
SMG-45 Close Range Operations Build (Code: 6HLOBLC09MFFCME3G7LT2) prioritizes close-quarters stability and stealth. Includes Secret Order Bevel foregrip, AR Heavy Tower rear grip, SMG-45 Fission Long barrel, SMG Echo Suppressor, UR Spec Ops Tactical stock, OSIGHT Red Dot, SMG-45 40-Round Extended magazine, and PEQ-2 Red Laser-Light Combo.
This build emphasizes close-quarters stability with suppressed operation for stealth during aggressive extractions. High fire rate provides quick time-to-kill in Hazard Operations, while the suppressor maintains concealment during team movements. That 6.1% pick rate reflects specialized urban environment effectiveness.
Versatile All-Purpose Build
CI-19 Long Range Operations Build (Code: 6FIN5OG0CQTV1IBVCBQVT) delivers superior damage for players mastering recoil management. Features Resonant Ergonomic Grip, Newtype Sword Heavy Grip, CI-19 Hadal Tactical Long Barrel, Titanium Contest Muzzle Brake, UR Spec Ops Tactical Stock, Viewpoint 3X Scope, 5.8 Newtype 60-Round Drum Magazine, CI-19 Newtype Stable Gas Block, and DBAL-X2 Purple Laser-Light Combo.
This rewards precise recoil control with enhanced damage and extended range. Ergonomic attachments support sustained accuracy during prolonged engagements, while the 60-round capacity reduces reload frequency. Budget alternative Code: 6FIO8R40CQTV1IBVCBQVT provides close-range optimization maintaining 8.5% competitive viability.
Weapon Tier List for New Players
Top Assault Rifles
S+ Tier includes SG552, CAR-15, M4A1 (10.1% pick rate), and CI-19 (8.5% pick rate) for damage output, recoil manageability, and versatility. The M4A1 provides 25 damage per round at 672 RPM with exceptional balance for learning shooting mechanics.
M7 achieves S-Tier through 4-shot kill potential and high damage, though it requires greater recoil control skills. QJB-201 offers mobile anchor capabilities for sustained fire support during team engagements.
A-Tier: ASh-12 delivering 56 damage with 43 accuracy for urban group engagements, though high recoil requires practice. SKS received Season 6 buffs increasing base damage to 44-48, improving semi-automatic precision viability.
Best SMGs and LMGs
SMG-45 leads with that 6.1% pick rate, high fire rate, and 40-round extended magazine. Excels in close-quarters team support and urban navigation where rapid target acquisition determines outcomes.
MP7 provides balanced close-range performance through optimized build Code: 6H4ST1O088K38R05C0LGG, featuring Poseidon Flash Hider, MP7 Stinger Long Barrel Combo, Phase Combat Foregrip, MP7 Balanced Rear Grip, Core Rail Stock, Hornet Handguard, and MP7 30-Round Magazine.
M250 Light Machine Gun delivers 550 RPM with 125-round capacity, 55 damage, 40-meter range, and 50 accuracy for suppression. Despite high instability, optimization through Resonant MKII Foregrip and Sandstorm Vertical Compensator enables effective area denial.
Sniper and Marksman Options
AWM Sniper Rifle provides 100 damage, 200-meter range, 23 accuracy with one-shot chest elimination up to 30 meters. Optimized build Code: 6F50VEC0CH8TK2MI8PG7U includes AWM Skyline Long barrel, Resonant Sniper Rifle Suppressor, Optical Sniper 8X Scope, Perst-7 Blue Laser-Light Combo, and AWM M-Lok Kit.
SV-98 offers balanced sniper performance through suppressed operation with SV-98 Dragonfly Light Barrel and DD Python Handguard for quick roaming mid-range capabilities. Suits Recon operators in Forest maps requiring mobility and one-shot potential.
SR-3M provides budget close-range burst through Code: 6FFVV9O02IUUSDGSUS7DN, featuring AK Stable rear grip, Cast Steel Tactical barrel, Combat Red Dot, PBS Russian Suppressor, VSS 45-Round magazine, and X25U Angled Combat Grip.
Team Composition and Communication
Effective Team Roles
Optimal four-person composition: Assault operator with M4A1/CI-19 for mid-range engagement, Support with SMG-45 for close-quarters healing, Engineer with M250 for suppression/barriers, Recon with SR-25 (85-meter falloff) for intelligence and respawn coordination.
Role synergies maximize effectiveness. Luna's intelligence paired with D-Wolf's mobility enables rapid repositioning. Stinger's healing supports aggressive Assault operators during extended firefights. Engineer barriers provide defensive positions for Recon long-range weapons.
Team balance requires one Recon for spotting, one Support for revives, one Engineer for barriers, one Assault for area control. This distribution ensures comprehensive tactical coverage while maintaining engagement flexibility.
Communication Essentials
Effective protocols emphasize concise callouts using standardized terminology for enemy positions, loot discoveries, and extraction timing. Essential callouts include Enemy at extraction, directional pings for threats, and resource status updates for decision-making.
Audio cue recognition proves critical—headphones detect enemy footsteps, reload sounds, equipment deployment. Teams should establish quiet communication during stealth while maintaining constant information sharing during active engagements.
Map-specific callouts use landmark references and directional indicators for precise enemy locations. Teams must practice callout consistency ensuring rapid response during high-pressure extraction scenarios.
Coordination Strategies
Tactical formation maintains team cohesion during movement with designated point operators, support personnel, and rear security. Teams should avoid clustering to prevent area-of-effect damage while maintaining mutual support distances for rapid assistance.
Extraction timing requires unanimous agreement before initiating final movement, ensuring all members complete loot acquisition and equipment preparation. Teams should establish contingency plans for early extraction under enemy pressure or time constraints.
Equipment sharing optimizes team loadout efficiency with designated ammunition carriers, medical supply distribution, and specialized equipment allocation based on operator capabilities and tactical requirements.
Common Beginner Mistakes to Avoid
Loadout Errors
Overloading gear creates mobility penalties that significantly impact extraction success. New players select maximum equipment without considering movement speed during emergency repositioning or rapid extraction. Solution? Use lighter configurations like MP5 or SMG-45 with minimal attachments—test mobility in the training range first.
Attachment stacking happens when players select multiple attachments providing similar benefits, resulting in diminishing returns and wasted slots. Prioritize diverse types: recoil control, optics, extended magazines, muzzle devices rather than multiple stability enhancements.
Weapon selection mismatches occur when choosing high-recoil weapons like AKM (40 damage, 53 accuracy) without sufficient recoil management experience. Beginners should prioritize controllable weapons like M4A1 over high-damage options requiring advanced skills.
Tactical Mistakes
Aggressive positioning without team coordination leads to isolated engagements and unnecessary elimination risks. New players pursue individual objectives rather than maintaining formation discipline, reducing extraction success and causing gear loss.
Ammunition conservation failures create vulnerabilities during extended operations. Players expend ammunition on non-essential targets rather than preserving resources for extraction-phase engagements. Practice strategic reload timing and target prioritization.
Map awareness deficiencies result in poor positioning and missed extraction opportunities. Players must study offline layouts extensively, learning choke points, flanking routes, supply locations, and extraction zones before live matches with gear loss risks.
Progression Pitfalls
Class commitment inconsistency slows progression as players switch between operator classes without mastering fundamental abilities and equipment unlocks. Focus on single-class specialization for 2-3 weeks before exploring alternatives.
Equipment investment errors occur when purchasing expensive attachments for unmastered weapons, resulting in poor performance despite high-quality gear. Test weapons extensively in training range and Hot Zone before investing in premium attachments.
Skill development impatience leads to premature advancement into high-risk modes without sufficient preparation. Complete structured progression: tutorials, aim training, Hot Zone practice, then gradual Hazard Operations with minimal gear investment.
Progression and Improvement Tips
Skill Development Path
Phase 1 (Weeks 1-2): Tutorial completion, 15-minute daily aim training, basic map learning, engagement practice. Test different classes while maintaining focus on 1-2 primary weapons like M4A1 for consistency.
Phase 2 (Weeks 3-4): Advanced movement including sprint-slide combinations, pre-aim positioning, attachment optimization. Specialize in 2-3 weapons maximum while developing muscle memory for recoil patterns and reload timing.
Phase 3 (Weeks 5-6): Team coordination through callout practice, coordinated defensive positioning, role specialization. Refine map-specific strategies and utility deployment timing for smoke grenades and tactical equipment.
Phase 4 (Weeks 7+): Advanced strategy analysis through professional stream observation, custom tactical development, tournament preparation. Focus on meta adaptation and seasonal update integration.
Performance Tracking
Optimize settings: FOV 95-105 for peripheral vision, low mouse sensitivity for precision, competitive audio for footstep detection, reduced graphics prioritizing frame rate over visuals.
Track metrics including extraction success rates, kill-death ratios, accuracy percentages, and team coordination effectiveness. Analyze death scenarios through killcam review, identifying positioning errors and tactical mistakes requiring correction.
Weapon mastery requires systematic practice with specific loadouts, measuring recoil control improvement, damage output consistency, and engagement range optimization. Focus on one operator like Luna for recon specialization during extraction learning.
Advanced Learning Resources
Season 7 introduces the MK4 Submachine Gun with 3-round burst or full-auto, 24-round magazine, 793 RPM, 34 base damage, 20-meter range, and 46 recoil control. Stats include 60 handling, 51 aiming stability, and 58 hip fire accuracy.
New Season 7 attachments include VMX Frameless Sight optics, Steel Muzzle Brake for Sentinel Lever-Action, EC Universal Front Grip, SR-25 Dominator Handguard, and MEO Micro Sight Riser for enhanced beginner builds.
Cross-progression enables seamless operator and loadout transfers across PC, PlayStation, and Xbox through linked accounts, allowing multi-platform practice while maintaining progression consistency and equipment investments.
Frequently Asked Questions
What are the best operators for Delta Force beginners in 2025? Luna (SS-Tier Recon) excels in scouting and ambushes, Stinger (S-Tier Support) provides quick healing, and D-Wolf (A-Tier Assault) offers enhanced mobility. Raptor (S-Tier Recon) from Season 6 adds EMP capabilities against enemy equipment.
Which weapon should I prioritize as a new Delta Force player? M4A1 Assault Rifle provides the best beginner experience with 25 damage per round, 672 RPM, and low recoil patterns. That 10.1% competitive pick rate demonstrates proven effectiveness, while balanced performance across all ranges supports learning proper engagement techniques.
How do I build effective loadouts for Operations Mode? Prioritize recoil control attachments first (Sandstorm Vertical Compensator), then optics (OSIGHT Red Dot for CQC, Cobra Accuracy Sight for mid-range), extended magazines (M4 45-Round), and laser attachments (DBAL-X2 Purple) for Tactical Stance. Avoid stacking similar benefits.
What's the difference between Operations Mode sub-modes? Hot Zone offers 3v3v3 PvP practice without gear loss—ideal for beginners. Hazard Operations requires extraction with gear loss risks. Raid mode allows personal gear progression against AI with no death penalties.
How should I approach team composition in Operations Mode? Optimal teams include one Recon (Luna/Raptor) for intelligence, one Support (Stinger) for healing, one Engineer (Shepherd) for barriers, and one Assault (D-Wolf) for aggressive pushes. Balance ensures comprehensive tactical coverage with role synergy.
What common mistakes should new Delta Force players avoid? Avoid overloading gear (reduces mobility), attachment stacking (diminishing returns), aggressive solo positioning (breaks formation), poor ammunition conservation (reload strategically), and class inconsistency (slows progression). Focus on single-class mastery and lightweight loadouts initially.