

The Radiant Moonfly is a challenging new field boss in Genshin Impact's Version 6.0 Luna I update, featuring 3.3M HP, high Pyro/Dendro resistance, and unique debuff mechanics requiring strong healers and strategic team compositions to defeat effectively.
Radiant Moonfly Boss Overview & Location
Boss Lore and Background
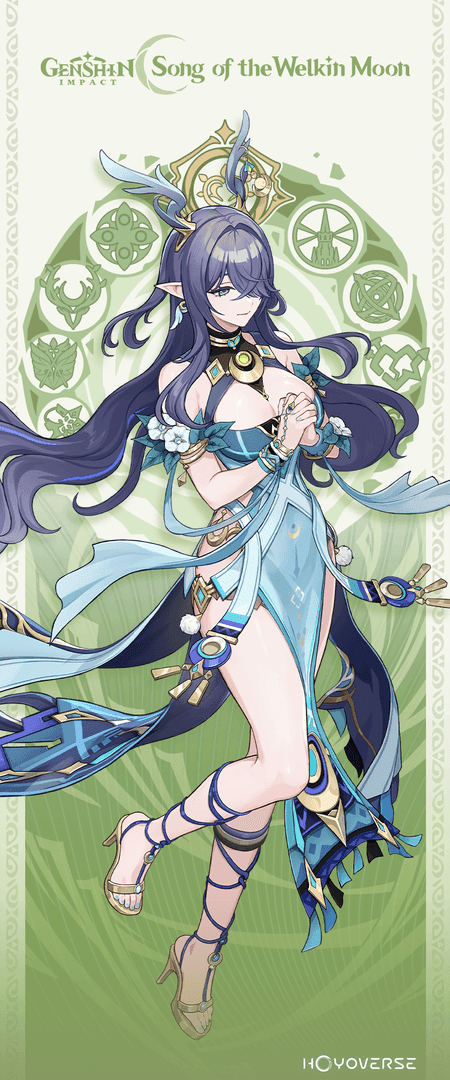
Here's what makes the Radiant Moonfly fascinating from a lore perspective—it's not just another world boss thrown into the mix. This butterfly-shaped nightmare emerged in Version 6.0's Song of the Welkin Moon: Segue update (dropped September 10, 2025), and honestly? It's one of the more thoughtfully designed encounters we've seen in a while.
The boss represents something bigger than just another HP sponge to farm. It's essentially our introduction to Kuuvahki energy influence in Nod-Krai, which—if you've been following the story beats—ties directly into the new Lunar Reactions system. And here's where it gets interesting: instead of the traditional Bloom mechanics we're all used to, Dendro and Hydro interactions now create Verdant Dew. Characters like Lauma can consume this stuff for devastating Lunar-Bloom damage that actually feels meaningful rather than just being another flashy number.
Where to Find Radiant Moonfly
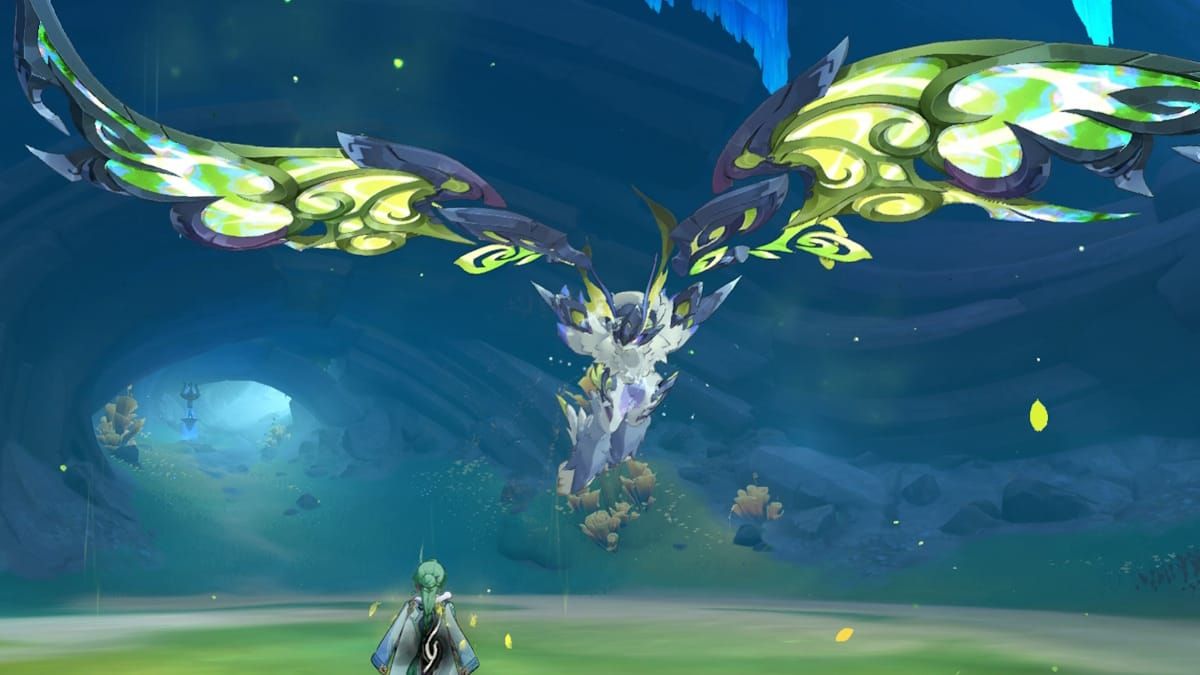
Getting to this boss isn't exactly intuitive (classic HoYoverse, right?). The Radiant Moonfly hangs out in a hidden cave system near Blue Amber Lake and Nothing Passage in Nod-Krai.

Here's the step-by-step that actually works: Start from Nasha Town—you'll want to head north through the passage. Follow the eastern shoreline of Blue Amber Lake, but don't go all the way to Nothing Passage. Instead, look for the mountain by the shore and hunt around for a small cave entrance. It's easy to miss if you're rushing.
Once you navigate through the cave system, you'll hit the boss arena. Pro tip from someone who's farmed this thing way too many times: unlock that internal teleporter immediately. Trust me on this one.
Unlock Requirements and Prerequisites
The good news? No weird Adventure Rank gates or convoluted quest chains. You just need to complete the initial Nod-Krai exploration questline to access the cave. After that, the boss scales with your World Level, so it's accessible whether you're mid-game or pushing endgame content.
Complete Mechanics Breakdown
Phase 1: Melee Form Combat
Right off the bat, you're looking at 3,327,601 base HP and 19,698 base ATK. Those aren't typo numbers—this boss hits hard and takes a beating.
The Melee Form throws three main attacks at you: Charging Flying Kick (brief windup, then it launches forward), Projected Blade Slash (ranged energy projectile after a charging animation), and Swift Double Kick (rapid consecutive hits that'll catch you off-guard if you're not ready).
The green flash telegraph system is your lifeline here. Learn it. Love it. Because timing becomes absolutely brutal as the fight progresses.
Phase 2: Green Butterfly Transformation
This is where things get spicy. The transformation sequence starts with a spinning roundhouse kick, rising uppercut, and shockwave before those wings spread out.
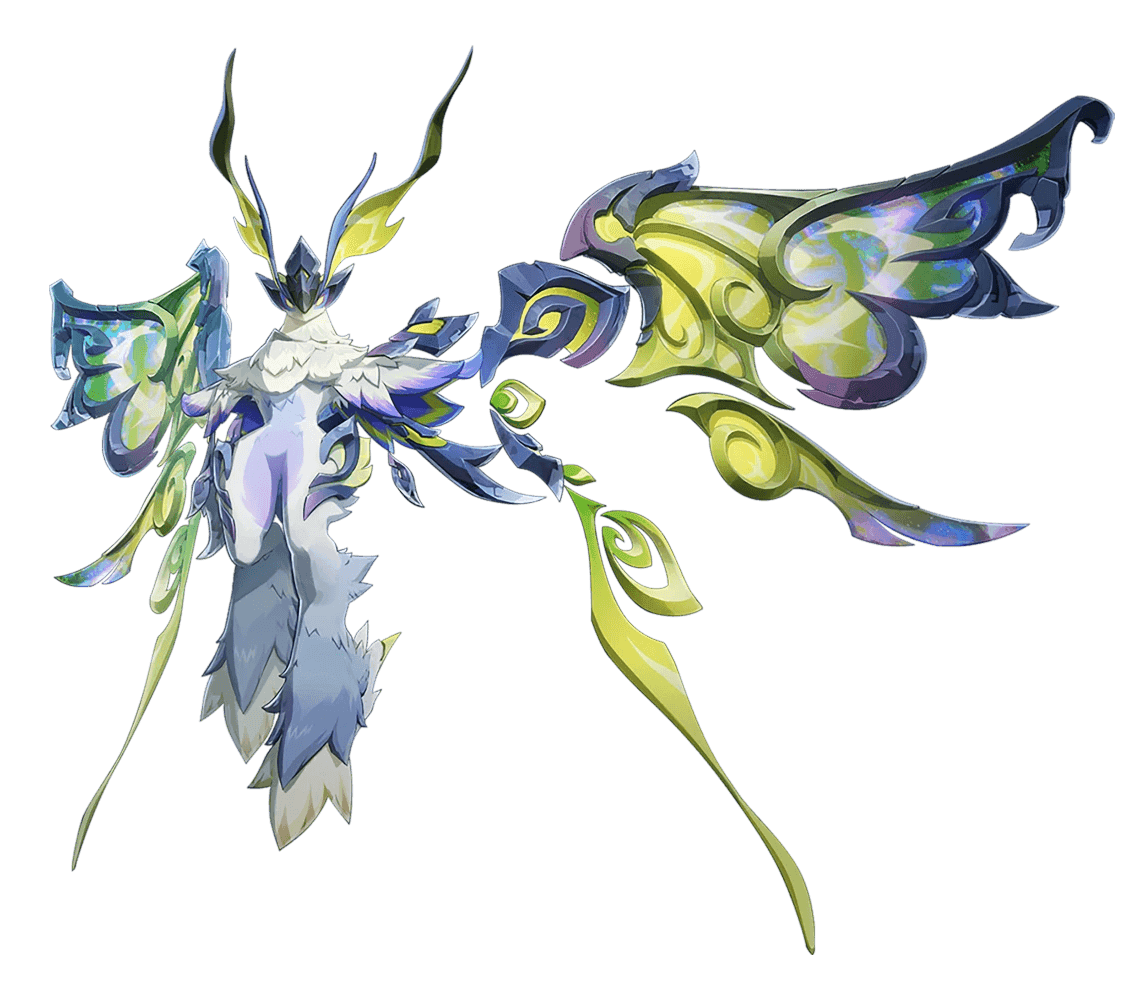
Post-transformation, you're dealing with: Wing Smash Dive (targeted aerial assault that hurts), Feather Barrage (projectiles coming from both wings—fun times), Impact Dive (AoE damage centered on wherever you're standing), and Homing Energy Blasts (two tracking projectiles followed by a wide-range explosion that'll ruin your day).
The Green Butterfly form keeps that green flash system, but now you need way better spatial awareness. The attack range and mobility jump significantly.
Phase 3: Orange Butterfly Enrage Mode
And here's where the Radiant Moonfly stops playing nice. The Orange Butterfly form introduces a persistent burning field that deals continuous damage to your entire party. You can't position your way out of this—it's just constant pressure that demands strong healing.
Combined with the debuff mechanics? This phase separates teams that can actually handle endgame content from those that just look good on paper.
Elemental Weaknesses & Counters
Resistance Profile Analysis
Here's the reality check: 70% resistance to both Pyro and Dendro. If you've been coasting with traditional meta teams built around these elements, you're in for a rude awakening.
Everything else—Hydro, Electro, Cryo, Anemo, Physical—sits at the standard 10% resistance. This resistance profile forces you to rethink team compositions, especially if you've been relying on Pyro carries or Dendro strategies.
Optimal Element Combinations
Hydro-Electro synergy consistently delivers through Electro-Charged reactions. Neuvillette, Nilou, and Yelan excel at Hydro application, while Raiden Shogun provides reliable Electro triggers.
Cryo-based compositions offer solid single-target damage without hitting resistance walls.
But here's the real game-changer: Lunar-Bloom reactions. When available, this is your optimal damage strategy. Lauma's kit specifically enables this new reaction type, converting Verdant Dew into substantial damage that bypasses traditional resistance calculations entirely.
Attack Patterns & Dodge Timing
Recognizing Telegraph Animations
The green flash system is consistent across all phases, but the timing windows compress as you progress. Critical windows to memorize: Melee attacks (0.8-1.2 second telegraph), Transformation sequence (2.5 second vulnerability—capitalize on this), Butterfly dives (0.5 second flash-to-impact), and Energy blasts (1.0 second tracking before lock-on).
Butterfly forms compress these timings while ramping up attack frequency. You need preemptive positioning and faster reactions.
I-Frame Usage and Positioning
Dash i-frames are your most reliable dodge method for tight timing requirements. Character burst animations offer extended invincibility that can completely negate high-damage attacks when timed correctly.
Positioning strategy that works: Medium range during Melee Form for reaction time. Arena edges during Butterfly phases for maximum dodge space. Keep healers away from primary target zones. Rotate positioning to avoid burning field concentration.
Best Characters for Radiant Moonfly
S-Tier DPS Recommendations
Lauma is the obvious choice here—she's both the Lunar-Bloom enabler and primary damage dealer. As a 5-star Dendro Catalyst user, her kit specifically addresses this boss's mechanics while providing substantial damage through the new reaction system.
Neuvillette offers exceptional single-target damage through Hydro application, though his self-damage mechanics require careful team building. You'll want dual healer support.
Nilou provides strong Hydro enablement for Lunar-Bloom teams while offering excellent survivability through her kit design.
Essential Support Characters
Kokomi emerges as the MVP healer for this encounter. Her healing output is powerful enough to quickly restore characters to maximum HP, and her consistent Hydro application contributes to reaction damage while maintaining team sustainability.
Baizhu offers that dual utility through both healing and shielding capabilities—invaluable for managing debuff mechanics and burning field damage.
Nahida remains essential for Dendro application and Elemental Mastery support, particularly in Hyperbloom compositions.
For players looking to enhance their character roster, Genshin Impact Top Up services provide convenient access to Genesis Crystals for character acquisitions and weapon pulls, ensuring optimal team compositions for challenging encounters like the Radiant Moonfly.
F2P Friendly Alternatives
Raiden Shogun provides excellent Electro application for Hyperbloom teams while offering energy regeneration support. Yelan delivers strong Hydro enablement with excellent damage scaling—accessible through standard banner acquisitions over time. Barbara serves as a budget healing option, though her healing output requires more careful management compared to premium alternatives.
Optimal Team Compositions
Meta Team Archetypes
Lauma-Nilou Lunar Bloom Composition: This setup maximizes the new Lunar-Bloom reaction system while providing essential healing for debuff management.
Main DPS: Nilou (Hydro Enabler), Sub DPS/Support: Lauma (Lunar-Bloom Enabler), Support/Sustain: Kokomi (Primary Healer), Support: Nahida (Dendro Support/EM Buffer).
Lauma-Neuvillette High DPS Variant: The dual healer setup addresses both Neuvillette's self-damage mechanics and the boss's debuff requirements while maintaining maximum damage output. Main DPS: Neuvillette (Hydro Carry), Sub DPS/Support: Lauma (Lunar-Bloom Support), Support: Kokomi (Primary Healer), Support/Sustain: Baizhu (Secondary Healer/Shielder).
Budget Team Options
Yelan-Nahida Hyperbloom Alternative: This provides strong performance without requiring new characters, utilizing established Hyperbloom mechanics for consistent damage output. Main DPS: Raiden Shogun (Electro Trigger), Sub DPS: Yelan (Hydro Enabler), Support: Nahida (Dendro Enabler), Support/Sustain: Baizhu (Healer/Shielder).
Electro-Charged Focus Team: This alternative avoids resistant elements entirely while providing strong sustained damage through Electro-Charged reactions. Main DPS: Tartaglia (Hydro Enabler), Sub DPS: Fischl (Off-field Electro), Support: Kazuha (VV Support/CC), Support/Sustain: Kokomi (Healer/Hydro Resonance).
Players seeking to optimize their teams through additional pulls can utilize Buy Genesis Crystals services for efficient resource acquisition, enabling access to premium characters and weapons for speedrun compositions.
Equipment & Build Recommendations
Artifact Sets by Role
For Lunar-Bloom DPS (Lauma): 4-piece Deepwood Memories for Dendro resistance shredding. Main stats: EM/EM/EM or EM/Dendro DMG/Crit Rate. Substats: Elemental Mastery > Crit Rate > Crit DMG > ATK%.
For Hydro Enablers (Nilou/Neuvillette): 4-piece Heart of Depth for Hydro damage optimization. Main stats: ATK%/Hydro DMG/Crit Rate. Substats: Crit Rate > Crit DMG > ATK% > Elemental Mastery.
For Healers (Kokomi/Baizhu): 4-piece Ocean-Hued Clam for damage conversion. Main stats: HP%/HP%/Healing Bonus. Substats: HP% > Energy Recharge > Elemental Mastery.
Weapon Tier List
Catalyst Options for Lauma: S-Tier: Blackmarrow Lantern (4-star craftable) - 221 EM main stat, 48-96% Bloom DMG bonus. A-Tier: Sacrificial Fragments for Energy Recharge and EM.
Support Weapon Options: Prospector's Shovel (4-star craftable) - 48-96% Electro-Charged DMG for Hyperbloom teams. Snare Hook/Master Key (4-star craftable) - ER main stat with 60-120 EM after reactions. Favonius series for energy generation support.
Stat Priority Guidelines
Elemental Mastery takes priority for reaction-based damage dealers—800+ EM provides optimal Lunar-Bloom and Hyperbloom scaling. Energy Recharge requirements generally range from 120-180% for consistent burst uptime. Healing effectiveness becomes crucial for debuff management, requiring 25,000+ HP on primary healers for reliable full-HP restoration under debuff conditions.
Step-by-Step Fight Strategy
Pre-Fight Preparation
Team positioning should place healers in slot 2 or 4 for quick access during debuff application. Energy management requires pre-charging bursts before engagement to ensure immediate healing availability.
Honestly? If your team composition is solid, you shouldn't need consumables. But if you're still learning the fight, healing foods and elemental resistance potions can provide a safety net.
Phase-by-Phase Execution
Melee Form Strategy (0-33% HP): Engage at medium range for optimal dodge timing. Watch for those green flash telegraphs and utilize dash i-frames for Flying Kick and Blade Slash attacks. Focus damage during post-attack recovery windows and prepare for debuff application as the phase transition approaches.
Green Butterfly Transition: This is critical—immediately switch to your primary healer upon debuff application. Heal each character to 100% HP to remove the debuff and gain that sweet damage buff. Coordinate burst rotations during the 2.5-second transformation window and maximize damage output with the +50% damage buff from debuff removal.
Orange Butterfly Management: Maintain consistent healing to counter burning field DoT. Prioritize dodge timing for dive attacks and energy blasts. Use shielding to mitigate unavoidable burning damage and focus on sustained damage rather than burst windows due to extended phase duration.
Common Mistakes & Troubleshooting
Positioning Errors to Avoid
Clustering during butterfly phases leads to unavoidable AoE damage and healing inefficiency. I've seen too many teams wipe because everyone stacked together during dive attacks.
Inadequate spacing prevents proper dodge execution for dive attacks and energy blasts. Healer positioning errors include placing healing characters in primary target zones—this leads to unnecessary damage and potential knockouts during critical healing windows.
Energy Management Pitfalls
Insufficient Energy Recharge on healers creates dangerous gaps in healing availability during debuff periods. This is probably the most common failure point I see in co-op runs.
Poor burst timing wastes damage buffs from debuff removal and transformation windows. Reaction timing errors reduce overall damage output and extend fight duration, increasing exposure to dangerous mechanics.
Team Synergy Issues
Inadequate healing output represents the most common failure point—this requires team composition adjustments or artifact optimization for healing effectiveness. Elemental application gaps reduce reaction consistency and damage output, particularly problematic in Lunar-Bloom compositions requiring precise timing.
Resistance oversight occurs when players attempt to use Pyro or Dendro carries without understanding the 70% damage reduction. This leads to extended fight durations and increased mechanical exposure.
For players experiencing consistent difficulties, Genshin Top Up Online services provide access to additional resources for character and weapon optimization, enabling more effective team compositions for challenging encounters.
Rewards & Farming Efficiency
Drop Rate Analysis
The Radiant Moonfly provides guaranteed drops of Lightbearing Scale-Feather—the exclusive ascension material for Lauma. This makes the boss mandatory for players investing in the new 5-star character, requiring 46 total materials for complete ascension.
Gemstone drops include: Nagadus Emerald series (Dendro) and Agnidus Agate series (Pyro). The dual gemstone drop pattern provides unusual versatility, though there's some irony in getting Pyro materials from a boss with high Pyro resistance.
Material Usage Guide
Artifact drops follow standard world boss patterns: 5-star and 4-star Gladiator's Finale, Wanderer's Troupe, Instructor sets, Berserker sets, and Adventurer pieces. Standard rewards include Adventure EXP, Mora, and Companionship EXP scaling with World Level.
Resin Optimization Tips
The boss respawns approximately 3 minutes after defeat and reward collection—you'll need to teleport to nearby waypoints to trigger the reset. Standard 40 Original Resin cost per claim maintains consistency with other world bosses.
Farming efficiency improves significantly after unlocking the internal cave teleporter. Seriously, do this on your first run. Resource planning should account for Lauma's complete ascension requirements when determining farming schedules, particularly for players planning immediate character investment upon acquisition.
Frequently Asked Questions
What are the minimum team requirements to defeat Radiant Moonfly? A strong healer capable of quickly restoring characters to full HP is absolutely essential due to the boss's debuff mechanics. Recommended healers include Kokomi, Baizhu, or well-built Barbara. Avoid Pyro and Dendro main DPS characters due to 70% resistance.
How does the debuff removal mechanic work exactly? The Radiant Moonfly applies a party-wide debuff causing continuous HP loss, -40% damage dealt, -40% incoming healing, and -100% Crit Rate. This debuff gets removed by healing any character to their maximum HP, which then grants that character +15% Crit Rate and +50% damage dealt.
Which team composition is most effective for F2P players? The Yelan-Nahida Hyperbloom team (Raiden Shogun, Yelan, Nahida, Baizhu) provides excellent performance without requiring new characters. This composition utilizes established Hyperbloom mechanics while avoiding the boss's Pyro/Dendro resistances.
What makes the Orange Butterfly phase so dangerous? The Orange Butterfly form adds a persistent burning field that deals continuous damage over time to all party members—you can't position your way out of this. Combined with existing debuff mechanics and increased attack frequency, this phase creates intense pressure on team sustainability.
How important is the new Lunar-Bloom reaction for this fight? While Lunar-Bloom teams with Lauma provide optimal damage output, they're not strictly necessary for victory. Alternative compositions using Hyperbloom or Electro-Charged reactions can achieve successful clears.
What's the most efficient farming strategy for Lightbearing Scale-Feather? Unlock the teleporter inside the boss cave during your first visit to minimize travel time for future farming runs. The boss respawns 3 minutes after defeat and reward collection. Plan for 46 total materials needed for complete Lauma ascension—that's 46 boss defeats at 40 Original Resin each.