

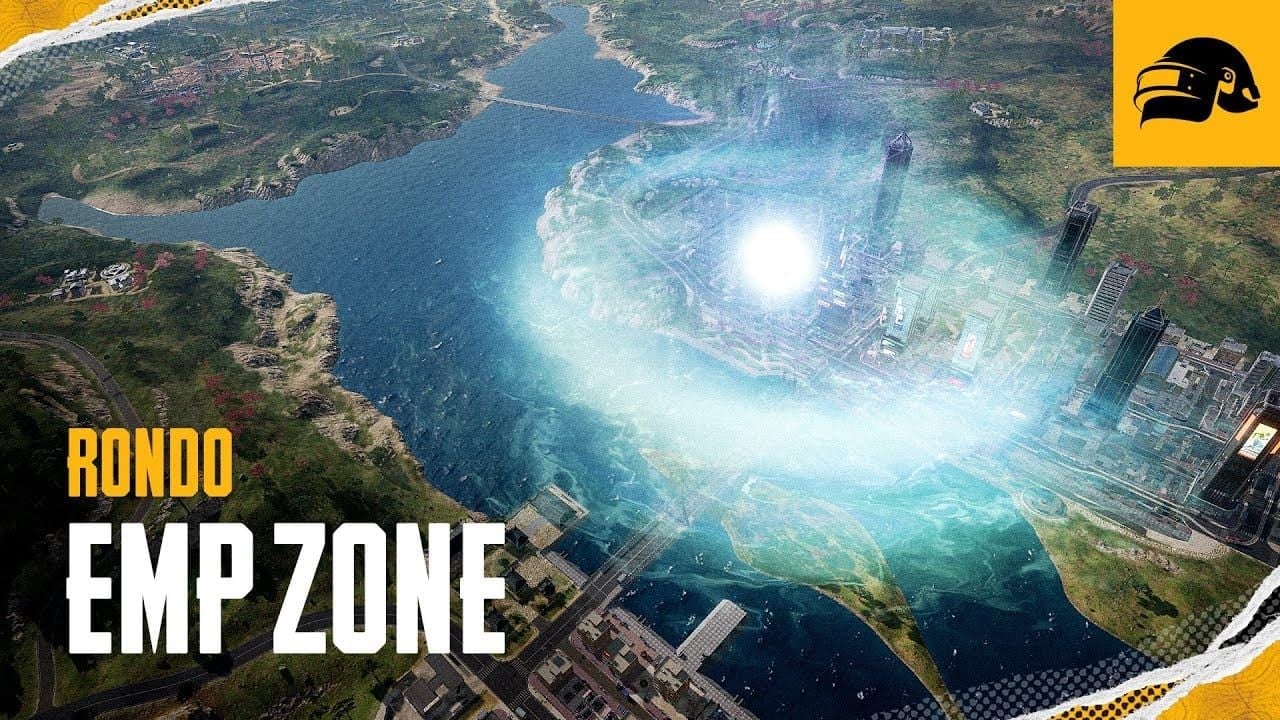
Quick Take: When that EMP Zone alert hits on the Rondo map (running March 6–May 6, 2025), bail from your vehicle right away. Swap to iron sights for those intense under-50m scraps, and weave through terrain-smart foot paths—think bamboo thickets or hill climbs—for cover that keeps you alive without relying on gadgets.
Getting a Grip on EMP-Proof Rotations in PUBG Mobile (2025 Meta)
What EMP-Proof Rotations Are—and Why They're Shaking Up Your Game
Picture this: You're rolling through Rondo in Version 3.7, and suddenly the EMP Zone kicks in from March 6 to May 6, 2025. It zaps electronic reticles on your scopes, kills vehicle engines, locks out stores, recall towers, and even signal jammer backpacks—but hey, it won't touch you or your gear directly. The zone fires up with a notification and hangs around until after the third Blue Zone shrink. Rondo's that compact 8x8 km playground, packed with spots like the vehicle-packed NEOX Factory (a total headache during EMP) or Jadina City's urban sprawl, where escalators let you stack vertical plays, and bamboo groves hide your sneaky footwork.
I've seen players get caught flat-footed here—it's brutal. But mastering this? It turns the tide.
How the EMP Meta Took Over: Peeking at the Pro Scene
In PMGC-level tourneys, the 2025 vibe is all about bold early lands and ditching wheels by mid-game. Top squads hit Jadina City for hot drops, snag loot, then ghost out using escalators and breakable terrain on foot. Data from matches shows this cuts your minimap pings by 30-50% compared to the roar of engines. PUBG Mobile dropped the EMP Zone to celebrate its 7-year bash, basically slapping down vehicle campers. And if you're gearing up with UC buys like the Forest Ghillie Suit or Battle Ready Kit, hit up safe PUBG UC top up sites like BitTopup—they've got killer prices, instant drops, rock-solid security, wide compatibility, top-notch support, and glowing reviews that hold up even in EMP chaos.
(Quick editor aside: I've topped up there mid-season; seamless, no drama.)
Core Rules: Stay Flexible, Eyes Open, and Always Have a Plan B
Keep a few paths in mind—maybe Tin Long Garden's rocky hills or Rin Jiang's floating eatery for that high ground edge. Watch the minimap like a hawk for EMP hints and Blue Zone ticks: early game (5-10 min) shrinks 10%, mid (10-20 min) hits 20%, late (20-30 min) 30%, and finals (30+ min) 50%. Hack away at destructible bamboo with your Pickaxe for custom trails, or pop an Emergency Cover Flare to throw up quick walls in wide-open spots. Players mess up big time by hanging onto vehicles too long (52% do it), prioritizing loot over moves (50%), or blanking on alerts (45%). Pro tip: Block out 2-3 minute slots per phase, and always put positioning first.
What if you could predict that ditch moment? It saves lives—literally, in-game.
EMP Grenade Lowdown: Mechanics No One Should Sleep On
How Long It Lasts and What It Hits—Broken Down
The EMP Zone blankets Rondo, triggered by notification and sticking until post-third Blue Zone—think 10-20 minutes smack in mid-game. It blanks electronic reticles (from Red Dot to 8x scopes), forcing you back to iron sights, and stalls vehicle engines on the spot. You get a heads-up on the minimap for 1-2 minutes to prep your exit. No one's taking direct hits from it, though—pure disruption.
Vehicles in the Crosshairs: Which Ones Get Screwed Hardest
That beefy Pico Bus or Blanc SUV? They're bricks in EMP, recovery be damned—dump 'em before rolling into the zone from NEOX Factory or Test Track. Motorcycles let you bolt early, but their buzz gives you away within 200m. If you're more than 1km from safety when it drops, kiss the ride goodbye and hug cover on foot. Squad rule: Stick to one vehicle max to dodge those engine blips on the map.
Ever heard a bike scream into silence? It's your cue to vanish.
Spotting EMP: Sounds and Sights That Tip You Off
Crank up 3D audio to catch the notification chime; the zone outline pops on minimap before it locks in. In Rondo's bamboo, those bird cages rustle if someone's creeping nearby during your hike. Stereo cans help nail footsteps inside 50m, perfect for lining up iron-sight shots. And listen—revving engines or screeching tires? That's unadjusted foes ripe for the picking.
Escape Timing: Nailing Your Bailout Window
Jump out in the first 30 seconds of the alert, scan for nearby trees, rocks, or buildings, then pick a route with ups and downs. The Signal Jammer Backpack buys you extra Blue Zone breathing room for late-game edges. Airdrops touch down every 5-7 minutes inside or near the safe zone—centers snag 'em 60% of the time, edges 30%. Get ahead on foot by eyeing flight paths.
Ditching the Wheels: Your Go-To Decision Tree
Five Make-or-Break Factors for Calling It Quits on Vehicles
Factor 1: How Far to the Safe Zone? Over 1km in live EMP? Ditch it—foot speed clocks 6.3 km/h, so 1km takes 10 minutes, tack on delays for hills or fights.
Factor 2: What's the Ground Like? Roll vehicles across open fields (Miramar's sands, Erangel's fields) up to 300m out; in thick stuff like Sanhok jungles or Rondo bamboo, switch now.
Factor 3: Where's the Heat? Kill feed lighting up your path? Bail, drop prone in grass or behind rocks, and ghost past gunfire under 300m.
Factor 4: Loot Check? Grab your ARs (M416) and SMGs (JS9) plus throwables first; use the ride briefly for hot loot zones, but cut it before EMP.
Factor 5: Squad Shape? Vehicles shine for scooping downed buds; in EMP, meet at landmarks or peaks in diamond setup for crossfire cover.
These aren't just tips—they're what separates survivors from roadkill.
Seven Real-World Spots Where You Gotta Ghost the Vehicle Now
Scenario 1: Alert Hits Mid-Drive – Out in 5 seconds, coast to the nearest building or tree line.
Scenario 2: Third-Party Jumps You – Bail opposite the shots, flip the vehicle for a shield; chuck 4+ smokes to slip away.
Scenario 3: Bridges in EMP Hell – Dump it 200m early on Erangel or Miramar spans; swim or detour land, pop meds for Blue ticks.
Scenario 4: Final Circles Begging for Wheels – Leave 'em at circle 4 (20-min mark) for edge crawls through dips.
Scenario 5: Squad's Dropping Fast – Exit on the wipe or push; space crossfire 30-50m at corners or boulders.
Scenario 6: Airdrop Beef – Stalk on foot from 100m in EMP; wheels only for the approach, then ditch for the grab.
Scenario 7: Hugging Zone Edges – Prone crawls in phases 5-7; Jammer lets you skirt Blue without the hurt.
For that edge in tight spots, snag PUBG Mobile UC digital delivery via BitTopup—quick access to Emergency Cover Flares or Battle Ready Kits, plus those sweet rates, secure vibes, full support, stellar service, and user love for clutch rotations.
Crunching Distance: Math to Map Your Moves
Plug in: Time Needed = (Meters ÷ 6300m/h) × 60. A 1.5km haul? 14.3 minutes on foot. Stack it against your HUD clock. Buffer 30% for scraps (2-3 min each) or rough terrain like rivers. Kick off a 10-min rotation 13 minutes early.
Reading the Room: Spotting Foes Before You Commit
Hunt muzzle flashes, dust kicks, or shadows; ping with compass—Enemy at 330°, 200m. EMP strips your zoom, so lean on ears and side-eye for foot traffic. Kill feed bunches (Pochinki C4, say) scream hot zones—offset your path 300-500m parallel.
Nailing Iron-Sight Fights in Tight Spots
Iron Sights Over Scopes: When Attachments Backfire
Under 50m, iron sights rule with wider FOV—Red Dots shrink your peripherals by 15%, Holographics block 20-25% of the target at 10-25m. For the AKM, 3-5 round bursts land 30m headshots on par with Red Dots. No zoom means 0.1-second ADS times versus 0.2-0.3 for scopes, killer in Jadina's towers.
Why fight the tool you can't trust? Embrace the raw.
2025 Weapon Rankings: Iron-Sight Champs
S-Tier: JS9 SMG (900 RPM shreds Jadina escalator traps, tracks like butter); M416 AR (5.56mm, sprays clean to 50m).
A-Tier: UMP45 SMG (tame recoil to 40m, 40-round stick for squad wipes); Vector SMG (1200 RPM to 15-25m, ext mag fixes the 19-round stock).
B-Tier: AKM AR (49 damage per pop, burst control for 300+ hour vets); S12K Shotgun (sub-10m room clears).
C-Tier: DMRs like SKS or Mini14 tank accuracy; bolt snipers (AWM, M24) just flop in EMP.
(Editor's pick: JS9's my go-to—feels alive in the chaos.)
Taming Recoil Sans Scopes
Dial gyro to 300% for no-scope side-to-side, 100% ADS hip-fire, 50% stability. Hit the Recoil Lab: 30-round M416 bursts at 25m for 80%+ hits. Crouch-fire drops vertical kick 20%; strafe A-D every 0.5 seconds. Jiggle-peek: Peek 0.3s, 3-round dump, pull back; team with 2-3 frags at doors.
Cheer Park Workouts: Sharpening Your Iron Aim
Drill 1: Silo zone, M416 taps—15/20 headshots in 60s at 30m, push to 50m.
Drill 2: Three dummies 5m apart at 25m: 10 rounds each, 25+ hits off a 30-mag.
Drill 3: Helipad movers: Strafe for 60%+ on side-steppers.
Drill 4: 180° ADS spins in 0.4s; tweak sensitivity 10% at a time. Replay your runs—spot flinching from high sens, lost targets from low, or slow ADS from bad setup.
Grind this, and those 20m duels become yours.
Map Breakdown: Foot Routes That Actually Work
Erangel: Cover-Rich Trails and Spots to Swerve
Route 1: Mylta to Pochinki—stick the eastern tree line, 30m off-road, 1.2km, 11 min with wiggle room.
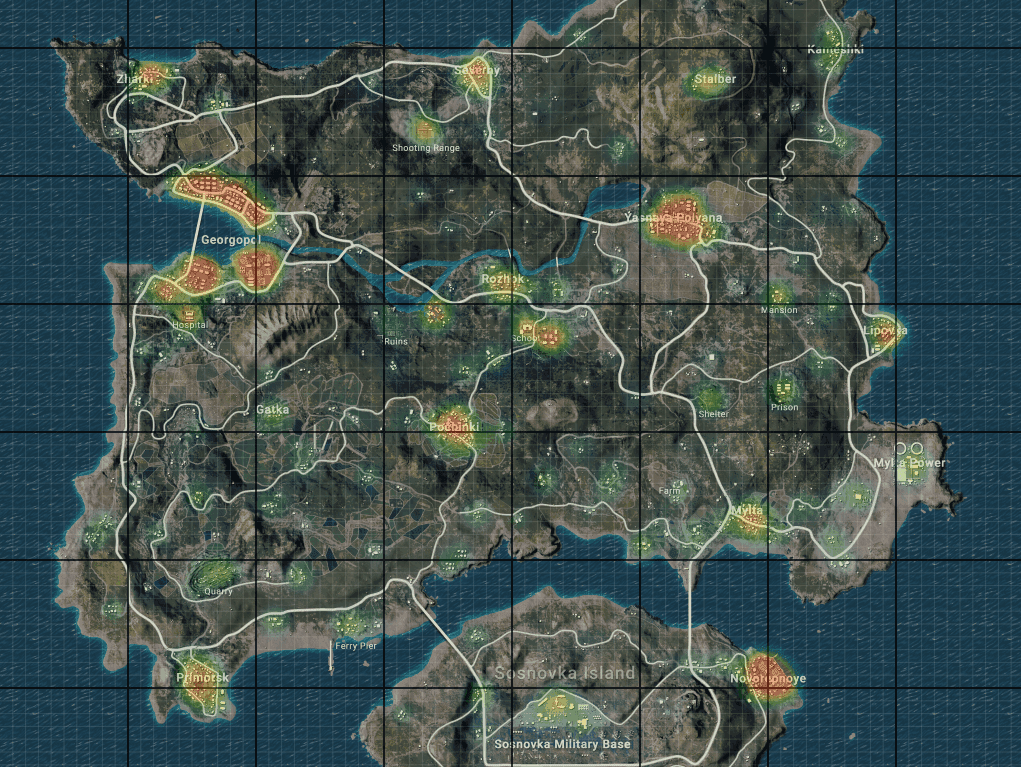
Route 2: School to Rozhok—hug the western riverbank, ford the northern rocks; skirt 300m south of bridge campers.
Danger Zone: Sosnovka bridges—swim 150m south in circles 1-3 (2% HP/s tick), pack 10+ bandages or energy.
High-Cover Path: Georgopol to Yasnaya—prone through central wheat (1.5m hide), shift during third-party bangs.
Erangel's forgiving if you play the shadows right.
Miramar: Turning Desert into Your Playground
Route 1: Los Leones to Pecado—crawl the western highway ditch (2m deep), pop out northern warehouses, dodge casino square.
Route 2: Hacienda del Patrón to San Martín—eastern ridgeline, peek from 50m rock piles; prone behind boulders on the move.
Terrain Hack: Claim Monte Nuevo or Torre Ahumada highs (50-100m edge), zigzag down to shake snipers.
Water Play: Oasis to Prison—40s swim the central river mid-shift, beach at rocky edges.
Sand sucks for speed, but those rocks? Gold.
Sanhok: Jungle Hides for Quick Maps
Route 1: Bootcamp to Paradise—triple-canopy jungle, 20m dashes tree-to-tree; 4x4 km means rotations under 800m average.
Route 2: Ruins to Quarry—1m deep stream bed, exit south entrance, skip northern road.
Dense Cover Move: Bamboo prone (90% invisible) plus Signal Jammer for 30s Blue edge hangs.
Risky Cut: Caves for total shield; frag exits ahead, only if the zone pulls you in.
Sanhok's a sprint-fest—love the chaos, hate the sweat.
Vikendi and Livik: Snow and Tropics Route Smarts
Vikendi Route: Cosmodrome to Castle—cut snow forests perp to main drags; Castle's 80m rise owns finals.
Livik Route: Midstein to Blomster—2x2 km, swim 20m river after circle 1 to ghost bridges.
Snow Hide: Prone in 1-2m drifts, minimap-mark for late tweaks.
Tropical Hustle: Ziplines for 100m pre-EMP bursts; after, waterfall noise masks your ground game.
Cold or hot, adapt or eat dirt.
Working the Land: Cover and Elevation Tricks
Height Hacks: Why a Little Rise Goes Far
Every 10m up stretches your sightlines 50m, baits uphill rushes, and crushes pushes. Lock highs in circles 2-3. At Rondo's Tin Long Garden, scramble 40-60m western slopes for ridgeline peeks. Drop during fights, prone-slide steep drops, frag base camps pre-aimed.
Elevation's free real estate—claim it.
Urban Hopscotch: Building to Building in Cities
Jadina City's escalators? Silent vertical gold versus clunky 20m stairs. Bail mid-floor for stair traps. Melee windows quiet-like, vault or prone to dodge snipers. Iron sights rule 5-15m rooms: Pre-aim doors, jiggle around furniture. Rooftop sprints bridge 2-5m gaps in rotations; first aids cover 20-40 HP from 10m drops.
Cities feel alive—until they don't.
Trees and Rocks: Hiding Like a Pro
Trees block eyes, not rounds—tuck full body behind 50cm+ trunks, peek alternate sides every 10s. Rondo bamboo: Pickaxe 3-5 stalks for 2m lanes, shift 20m for crossfire. Rocks (1-3m granite) stop bullets; prone-heal with 8s medkits. Calls: Foe behind split boulder, 270°, 80m.
Simple stuff, but it saves skins.
River Runs: Crossing Water Without Drowning Your Plans
Time swims for 200m shootouts, airdrop pulls, or Blue chases. Slip in at rocky shores, crouch-swim 15-20s submerged, surface by logs or boats; energy drinks fight the 5% drag every 10s. Skip EMP bridges; Erangel's 150m swim's 50s versus sniper hell—sync for circles 2-3 (5% HP/s, stock heals).
Water's a gamble, but calculated? It's escape.
Timing the Zones: Rotation Windows Per Phase
Early Grind (Phases 1-2): Milk Those Vehicles
Circles 1-2 (0-10 min, 60-70% map) scream vehicle time for loot runs: Snag UAZs or Dacias at NEOX or Georgopol in 60s. Hit 3-4 compounds in 5 min for kitted loadouts. Skirt edges 200m+ from pops; 90° whips at 80+ km/h on ambushes. Eye terrain for EMP overlap ditches.
Early game's your loot party—don't crash it.
Mid Shift (Phases 3-4): Mixing Wheels and Feet
Circles 3-4 (10-20 min, 30-40% map) blend vehicles for 1km+ hauls, feet for closes; EMP drops here—bail at 12 min if under 500m to core. Take Erangel: Wheel Mylta to Pochinki edge (2km, 3 min), ditch at warehouses, foot wheat central (400m, 4 min)—7 min total, buffered.
Hybrid's the sweet spot—until it's not.
Late Lockdown (Phase 5+): Feet Only, No Excuses
Circles 5-7 (20-30 min, 10-20% map, <100m endgames) nix vehicles for their noise (8-15 left). Jammer for 10-15s Blue flanks behind foes. Finals: Prone to 1m micros in 20s between 6-7; 3-4 smokes blanket 15m, shift 10m, iron-spray smoke counters.
Pure grit here—love the tension.
Bad Draws: Twisting RNG to Your Favor
Sucky zone? Eat 5-10% HP to medkit past chokes (30-40 HP swaps). Third-party hot zones for picks and gear. Airdrops predict 70%: Circle 2 D5 drop hints circle 3 nearby—foot the outskirts early.
RNG's a beast, but you can tame it.
Squad Sync: Pulling Off Vehicle-Free Moves Together
Callout Code: What to Yell, When
Keep it tight: Enemy type, bearing, distance, action—like Full squad, 045°, 150m, rotating left in under 3s. Bearings: North=000° or straight degrees (237°). Actions: Pushing, Holding, Rotating, Healing plus spots (Healing red warehouse, 180°). Drill compass in Training for gut reflexes.
Clear words win wars.
Formations: Diamond, Line, or Column?
Diamond (Open Ground): 20-30m spreads, point leads, flanks guard sides, rear eyes thirds; pincer on contact. Miramar or Erangel gold.
Line (Cities/Forests): 10-15m staggered behind cover, fold to L (2 fire, 2 flank 90°). Sanhok or Rondo style.
Column (Tight Spots): 5m file, front irons up, rear flanks; swap leads every 50m (cuts 40% front risk). Gaps 10m+ beat 5m nades.
Pick your poison based on the lay.
Roles: Scout, Fragger, Support, Overwatch
Scout: Light SMG kit, 30-50m ahead prone peeks; calls foes, terrain, paths (70+ FPS sweet).
Entry Fragger: M416 or JS9 iron-tuned, leads charges; 4+ frags/2 smokes, 300+ CQC hours.
Support: Flare or Jammer hauler, 15+ bandages; drops walls, heals, ammo shares 10-15m back.
Overwatch: High AR sprays, pre-aims lines; EMP iron swaps. Rotate gigs 2-3 games for balance.
Everyone pulls weight—or sinks the ship.
Split Up? Emergency Playbook
Play 1: Rally zone-center landmark or 200m peak; link in 90s.
Play 2: Hole up prone/cover, no heroics, ping every 15s (Solo, 045° rock, 200m rally).
Play 3: Revive if >3 min timer and foes >100m; else hold.
Play 4: Shots code: 3 pops=safe meet, full spray=back me up. Custom rooms for split drills under fire.
Splits happen—prep turns panic to power.
Pro Breakdowns: Stealing Tournament Gold
PMGC 2023: Dissecting the Top 3 Rotation Gems
Play 1: Nova Esports on Miramar edge (Finals Match 4)—prone 60m ridgeline circle 5, eats 15% Blue to dodge 3 squads, full health circle 6, 8 kills, 3rd finish.
Play 2: 4AM Erangel bridge (Semis Match 2)—swim 150m south circle 3, decoy ride pulls heat, flank nets 4 kills.
Play 3: Vampire Sanhok bamboo (Group Match 7)—400m diamond at 25m spacing circle 4, audio dodges 3 scraps, full kit, 12 kills for Chicken Dinner.
Pros make it look easy—it's not.
Nova vs. 4AM: Footwork Clinic in PMGC 2023 Match 6 Erangel
Both squads ditch at 15 min—Nova warehouses east, 4AM apartments west; circle 5 wheat forces the dance. Nova's scout prone-IDs 40m out, L-ambush: 2 M416 window sprays at 60m, 2 tree flanks. 4AM smokes to rocks for stalemate. Circle 6: 4AM 4-grenade 30m hall opener; Nova chills, thirds for 6 kills. Takeaway: Patience and ears beat blind rushes in no-vehicle late.
(Subjective take: Nova's timing? Chef's kiss—taught me to wait out the storm.)
Pro Moves You Can Swipe Now
Move 1: Hang 30-60s post-circle for thirds; circles 1-3 give 20-30s (10-15% HP).
Move 2: 100m drive fake, perp foot bail; fools audio in 3-4.
Move 3: Hole Jadina or Pochinki multi-floors circle 3-4; escalators/stairs flip levels, trap rushers.
Move 4: Torch spots: Slash tires/engines to deny rides, amp in EMP.
Move 5: Pre-plant circle 4-5 via drops/olds in 2-3; 60-70% hit, Jammer on misses.
Steal smart—evolve your game.
Rotation Pitfalls: Dodging the Dumb Stuff
Trap #1: Clinging to Vehicles Mid-to-Late
52% roll past circle 4, eating 35% more 200m+ audio ambushes. Fix: Bail by 4 or EMP; 10 zero-vehicle Classics bumps you from 30th to 15th+. Math: 1km=10 min foot +30% pad; wheels only if clock allows.
It's tempting, but deadly.
Trap #2: Tuning Out Audio on the Move
45% skip sounds, missing steps or rides. Force 3D headphones (40% direction boost); Training IDs: Footsteps 0-50m=duel ready, gunfire 50-300m=skirt or third, vehicles 100-400m=trap or dodge, drops=zone intel. Replay hunts 20m blindsides.
Ears up, or you're down.
Trap #3: Botched Timing and Zone Burns
50% kick off <2 min pre-close, losing 20-40% HP. Start at 50% timer (2 min on 4-min); rates: 1-2 2-5%/s (30s+ heal), 3-4 5-10%/s (15s cap), 5+ 10-20%/s (Jammer save). Under 60s/500m+? Sprint line, energy pop, heal on entry.
Time it wrong, pay in health.
Trap #4: Squad Chat Fails
37% die to bad talk. Pre-game 30s huddle: Roles, rallies, 2-min shifts; calls with bearing/dist/action. Check: Foe ping+dist, 10s heal cover, ammo tosses, move confirms. Customs drill calls, zap silence.
Talk or walk—solo.
Full Dodge List: Your Pre-Flight Check
Before Drop: 3D cans, roles/rallies, EMP recap (Rondo), iron guns.
Early (0-10 min): Wheels if >1km loot, minimap EMP watch, lock M416/JS9/UMP45, 4 smokes/3 frags.
Mid (10-20 min): Ditch 15-min/EMP, 50% timer go, terrain hug, bearing shouts.
Late (20-30 min): Foot/prone, Jammer edge, 3-4 smokes shifts, kill feed counts.
After: Replay audio blanks, timing slips, chat holes, sens tunes.
Run this, rank up.
Loadouts Built for Rotation Warriors
Gun Pairings: Primaries and Seconds That Flow
Loadout 1 (EMP Focus): M416 (iron, vertical grip, ext quickdraw, stock) + JS9 (ext mag, laser)—30-100m all-rounder, <30m CQC beast.
Loadout 2 (Aggro Close): UMP45 (ext mag, vertical, stock) + S12K (ext mag, choke)—40m sprays, <10m Jadina locks.
Loadout 3 (Mix): M416 (3x, iron swap EMP) + Kar98k (6x, drop for SMG in EMP).
Attach Order: 1. Ext quickdraw (reload holes), 2. Vertical (spray tame), 3. Stock (ADS zip), 4. Compensator.
Pair right, fight smart.
Throwables Stack: Smokes, Nades, and EMP Counters
Smokes (4-6): Triangle 10m for 25m halls, center-shift 3s toss, 15s for 50m runs.
Frags (3-4): Cook 2.5s (5s boom), 2-3 at corners/rocks pre-push.
Molotovs (1-2): Flush doors/windows, iron up exits; block final hides.
Stuns (If You've Got 'Em): Rondo Stun Gun + JS9 rush. Swap frags for meds on long hauls; smokes save lives first.
Nades aren't toys—they're tools.
Utility Kit: Boosts and Heals for Marathon Moves
Healing: 3-4 medkits (75 HP snap), 5-6 first aids (75/6s), 15+ bandages (10/4s), 5-8 energy (40/4s sprint), 3-5 painkillers (60/6s endgame).
Boost: 50%+ for 10% speed (6.3→6.9 km/h); sip in cover, skips 30m noise.
Signal Jammer (Rondo): Backpack slot, Blue-free; 5-10m edge circles 5-6, 10-15s flanks.
Emergency Flare (Rondo): 2m x 3m wall in fields, 60s cool, pack 2 for phases.
Battle Ready Kit: 8s full heal+energy finals; UC grab.
Stock deep—rotations drain.
Pack Discipline: Pack It, Ditch It
Tier 3 (270 slots): Guns/ammo 120 (M416 150 5.56, JS9 100 9mm), heals 80 (3 med/5 FA/15 band), boosts 30 (5 energy/3 pain), throws 40 (4 smoke/3 frag).
Drop: Excess 200+ primary ammo, frags (smokes stay), EMP scopes, solo heals.
Rule: No mid-move looting (10s=60m lag); minimap mark, hit >3 min pre-close.
Ammo Math: 30-mag M416=1 kill (50% hit), 150 rounds=5 frags.
Light and lethal.
Next-Level Plays: Decoys and Bait That Flip Scripts
Wrecked Rides as Traps
Decoy 1: Honk 3x near buildings, bail 50m to cover; 6/10 lures for iron hits.
Decoy 2: 200m zone-edge fake drive, perp foot; audio fool.
Decoy 3: Park exposed, 3m frag ring, 80m watch; pops reveal looters.
Counter: Suspicious park? Frag in or ghost.
Bait 'em, break 'em.
Fake-Out Rotations: Misdirect Masters
Tech 1: 5-10 rounds north, foot south; wrong-foots in 3-4.
Tech 2: 3 smokes one path, perp sneak; burns their eyes.
Tech 3: One loud drive pull, three foot flanks; bail pre-contact. Cap: 1-2 per match against sharp pros.
Misdirect's art—practice it.
Wheel Comebacks: When to Hop Back In
Spot 1: Circle 4-5, 2km+ <3 min—full throttle to 300m edge, ditch.
Spot 2: Solo after wipe—edge ride, prone survival ditch.
Spot 3: Outgunned third—serpentine 500m+ break, hard-cover exit. 70%+ death risk circles 5+; only if death's sure otherwise.
Rare, but clutch.
Grind Sessions: Building Rotation Muscle
Cheer Park: Iron Drills to Dial In
Drill 1 (10 min daily): Silo M416—20/20 30m heads, +10m weekly to 50m, 90%+ clip.
Drill 2 (15 min): Helipad UMP45—15/20 25m strafe sides, 75%+ A-D 0.5s.
Drill 3 (10 min): 25m three dummies 5m spread—10 rounds each, 25+ from 30-mag.
Drill 4 (20 min weekly): Recoil Lab ARs/SMGs—full-auto 10/25/50m, zero side at 25m gyro tweak.
Daily grind pays big.
Custom Setups: Rotation Sims
Setup 1: 8-player Rondo iron-only, no wheels post-10 min; 20 min/3 games, track spots over 10.
Setup 2: 4-player 100m+ splits, 5-min rally; mix points/AI, 80%+ link.
Setup 3: Outside circle 3 1.5km, foot 3-min center no hurt; ramp dist/cut time weekly.
Setup 4: 16-player Sanhok iron Bootcamp tourney; weekly team, win logs.
Customs build instincts.
VOD Scrubs: Picking Apart Your Deaths
Step 1: Pin cause—timing/route/fight/chat.
Step 2: Audio 30s pre-death, eyes shut: Catch missed steps/rides/shots, flag <20m ghosts.
Step 3: Pause choices, brainstorm 3 alts/outcomes, weigh best.
Step 4: 20 games, >40% repeat? Drill it.
Step 5: Aim off? ±10% gyro, Training test, weekly loop.
Review turns losses to lessons.
Tracking Progress: Numbers That Count
Survival: Top 10 60%+, 20+ min/game, <10% zone kills.
Fights: Iron kills beat scopes, 30%+ heads (vs 40% zoomed), 300+ dmg/round.
Moves: >60s early 80%+, ditch circle 4 90%+, <30% fight interruptions.
Log: Sheet with date/map/place/kills/why/time; weekly averages, monthly pushes (15th→12th).
Steps: Newb top 20/50% on-time; Mid top 15/70%/2+ kills; Pro top 10/85%/4+; Vet top 5/95%/8+ CD. Stuck? 50 games flat=refocus/VOD aid/loadout swap/3-day chill.
Measure, improve, repeat.
Your Burning Questions Answered
Q1: How long's the EMP Zone up on Rondo?
It triggers on alert, runs till post-third Blue (10-20 min mid, minutes 10-30). Zaps electronic reticles, engines, stores, towers, jammers—no player hurt. Track phases: Fades on fourth shrink. Plan: Wheels 1-2, ditch 3-4, reclaim post if alive; skip rides 5+ for noise.
Q2: Prime iron-sight loadout for EMP brawls?
M416 (main, ext quickdraw/vertical/tactical stock) + JS9 (side, ext mag/laser): 30-100m flex, <30m 900 RPM Jadina shred. Swap: UMP45 (40m easy recoil) + S12K (<10m buck). Ditch DMRs/snipers. Pack 4-6 smokes/3-4 frags for blocks and blinds.
Q3: Vehicle dump timing on rotations?
On EMP ping or 15-min (circle 4). Weigh: <1km (foot 6.3 km/h, 10 min/km +30% pad), open to 300m/dense now, path clear/loot done/squad split. Spots: Shots (opp bail/smoke), bridges 200m early (swim), finals feet only. If timer < need, ride; else hike.
Q4: Boosting iron accuracy for close scraps?
Gyro: 300% no-scope side, 100% ADS steady. Drills: Silo 20/20 30m heads (10 min), Helipad 75% 25m strafe (15 min), dummies 25+ 30-mag hits (10 min). Crouch -20% recoil, A-D 0.5s. Jiggle 0.3s/3-burst pull; 0.1s ADS edge. VOD: ±10% sens weekly for flinch/miss fixes.
Q5: Safest foot paths per map?
Erangel: Mylta-Pochinki tree 30m off (1.2km/11 min), School-Rozhok river ford; Sosnovka swim 150m south 1-3 (2-5% HP/s, 10+ bandages). Miramar: Los Leones-Pecado 2m ditch, Hacienda-San Martín ridgeline 50m rocks. Sanhok: Bootcamp-Paradise canopy 20m dashes (<800m avg), Ruins-Quarry 1m stream; bamboo 90% prone + Jammer. Rondo: NEOX-Jadina bamboo, Tin Long 40-60m west rises. Favor cover/highs, skip fields/bridges, time distractions; Jammer 5-10% Blue dodge.
Q6: Pro squad sync sans vehicles?
Pre-huddle: Roles (scout 30-50m SMG peek, entry M416/JS9 4+ frags push, support Jammer/heals, overwatch high AR), rallies (zone spot/200m rise), 2-min clocks. Calls: Type, bearing, dist, action (Squad, 045°, 150m, left). Forms: Diamond 20-30m open (pincer), line 10-15m cover (L-flank), column 5m tight (swap 50m). 10m+ vs nades; audio: 3 shots safe, spray aid. Split: Hide/15s ping, revive >3 min/>100m foes. Customs for splits.