

Primewood Barkle is an AI companion in PUBG Mobile's Primewood Genesis mode (Erangel/Livik, Jan 7-Mar 10, 2026). It offers 7 abilities: Attack, Defend, Revive, Search, Carry, Heal, Hide. Recruit via green map icons, control through command wheel or voice (English/Arabic/Turkish/Russian). Proper positioning and timing make this companion decisive in ranked survival.
What Is Primewood Barkle? Understanding the Companion System
Barkle launched in Version 4.2 (Jan 7, 2026) as an active combat AI exclusive to Primewood Genesis on Erangel and Livik. Each player gets one Barkle per match—no squad balance disruption. For UC-based unlocks and upgrades, PUBG Mobile UC top up at BitTopup offers secure, instant transactions.
Core Abilities:
Attack: Auto-throws rocks dealing 15-25 HP every 2 sec
Defend: 180° barrier blocking 200-300 HP damage
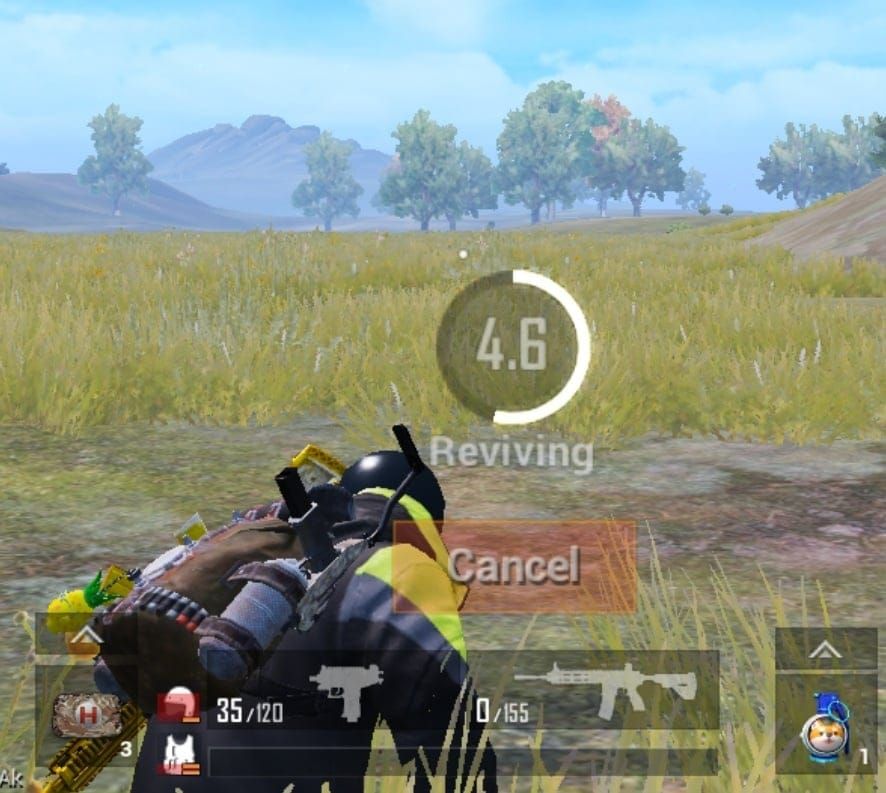
Revive: Auto-triggers within 50m, completes in 3-4 sec (vs manual 6-8 sec), grants 200 HP + 50% damage boost + 25% damage resistance
Search Supplies: 30m radius scan for Level 3 gear/crates
Carry: 3-sec transport to marked locations
Heal: Passive HP transfer to low-health allies
Hide: Conceals Barkle in foliage
Barkle follows at 5m distance. Auto-recall activates beyond 75m (2-3 sec, 25-30 sec cooldown).
AI Behavior
Prioritizes closest active shooters first, then flanking threats. Attack cycles continuously once engaged. Defend has 15-20 sec cooldown—use during grenades, vehicle approaches, or open crossings. Revive's 50% damage boost + 25% resistance creates comeback opportunities.
Meta Impact
Jan 16 patch fixed building-carry exploits, limiting Carry to outdoor mobility. Search's 30-45 sec cooldown covers 2-3 building clusters, reducing loot time 25-40%. Solo/duo players gain partial squad-level capabilities.
How to Recruit Primewood Barkle: Complete Unlock Requirements
Step-by-Step Recruitment
Select Primewood Genesis mode (Erangel/Livik only)
Enter matchmaking and deploy
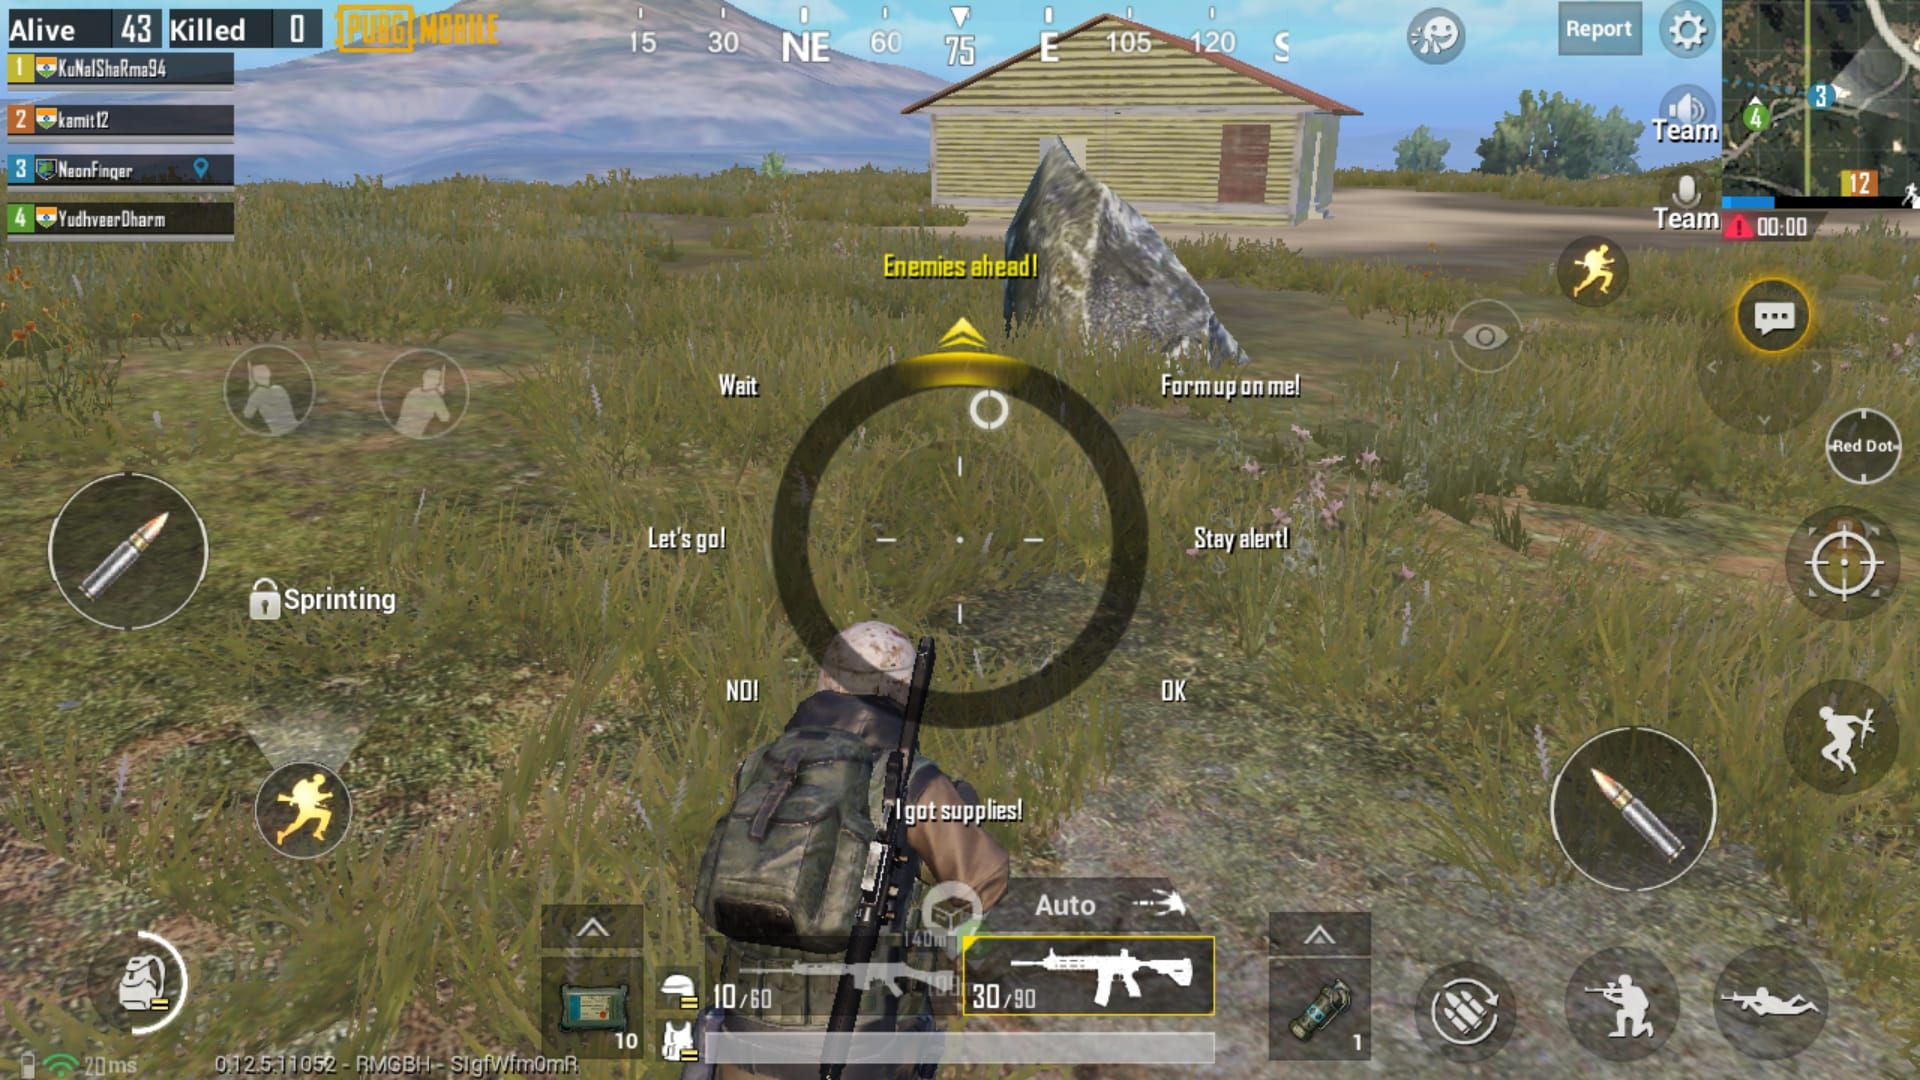
Locate green icons on minimap (visible from 50m)
Land within 20m of icon
Approach within 3m interaction range
Hold interaction button 1-2 sec
Spawn Locations:
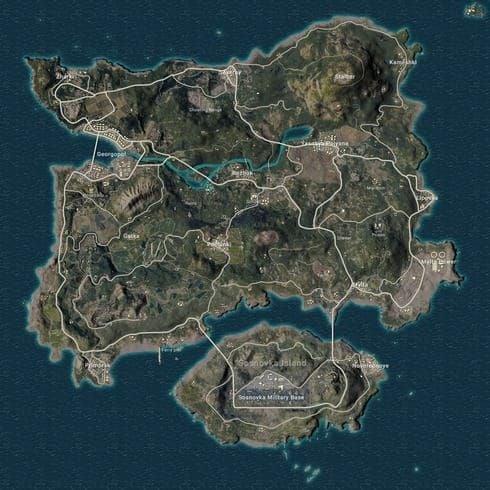
Erangel: Pochinki, Yasnaya Polyana, Mylta, Military Base, Hospital, Georgopol
Livik: Major compounds (proportionally distributed)
Early recruitment maximizes utility. Clear threats before recruiting—1-2 sec animation leaves you vulnerable.
UC Cost & Access
Primewood Genesis access is free. For premium content/cosmetics, buy PUBG UC recharge online at BitTopup—competitive pricing, fast delivery, secure payments.
Event runs through Mar 10, 2026. No permanent unlock—access depends on event availability. Each match resets recruitment. One companion per player; squads can have four total Barkles.
Mastering the Command Wheel: Control Like a Pro
Hold bottom-right ally icon for radial command menu. Optimal sensitivity: 100-120% for 5.5-6* screens, 80-100% for 6.5+* screens.
Command Layout
Clockwise: Attack (top-right) → Defend (right) → Revive/Heal (bottom) → Search/Carry (left) → Hide (top-left).
Performance Tip: 2-4GB RAM devices should disable AI Ally Effects to maintain 40+ FPS.
Essential Commands
Attack: Focuses specific targets, overriding autonomous behavior. Enables coordinated focus-fire on priority enemies (medics/snipers)
Defend: Barrier faces your aim direction—pre-aim toward enemy fire angles before activating
Follow: Resets to 5m trailing distance after tasks
Hold Position: Anchors Barkle at coordinates for crossfire setups
Advanced Combinations
Defend + Hold Position: Creates fortified static defense
Search + Carry: Accelerates loot acquisition (stagger cooldowns: 30-45 sec Search, 45-60 sec Carry)
Attack + Grenades: Sync rock throws with explosive impact for 40-50 combined damage in 2-3 sec
Voice vs Manual
Voice: 0.3-0.5 sec execution (Barkle, attack, Barkle, shield, Search supplies, Carry me to [location]) Manual: 0.8-1.2 sec execution
Voice works best solo in quiet environments. Squad voice channels cause cross-talk—use manual commands. Hybrid approach: voice for emergencies (Defend/Revive), manual for tactical setups (Hold Position/Search).
Primewood Barkle's AI Behavior: Combat Expectations
Autonomous Decision-Making
AI evaluates threats every 0.5 sec. Priority: enemies within 30m > threats damaging player/squad > distant enemies (ignored beyond 50m unless commanded).
Multiple enemies: targets closest first. If enemy retreats beyond 40m or covers 3+ sec, switches to next-closest. Downed teammates within 50m trigger auto-Revive, overriding all behaviors.
Aggression & Engagement
Moderate aggression—engages within 30m, won't push buildings or pursue beyond 50m. Auto-Attack activates at 25m with line-of-sight. Manual Attack extends range to 40m.
Auto-Defend triggers only when player takes 30+ HP damage within 2 sec. Manual Defend bypasses threshold for preemptive deployment.
Target Prioritization
Weighted scoring: distance (40%), damage output (35%), threat duration (25%). Focuses damage-dealers over distant snipers. Manipulate by positioning to control which enemies enter range first.
AI Limitations
Vertical terrain: Can't navigate multi-story buildings, elevated platforms, steep cliffs—gets stuck, requires recall
Predictive aiming: Targets current positions, not anticipated movement. Mobile enemies dodge easily
Priority blindness: Treats all enemies equally regardless of equipment/importance
Ranked Mode Strategies: When Barkle Saves Your Match
Early Game: Landing Zone Support
Search Supplies identifies Level 3 gear within 30m, accelerating equipment acquisition in hot-drops. Position Barkle near building entrances—autonomous Attack provides early warning (15-25 HP damage alerts + softens targets).
Defend counters shotgun rushes—block doorways/stairwells, forcing 3-5 sec delay or alternate routes.
Mid Game: Rotation Security
Position Barkle 20-25m behind firing line for flank detection (default 5m too close). Use Carry for dangerous open terrain—3-sec transport reduces exposure 60-70% vs sprinting. Reserve for 2-3 critical rotations (45-60 sec cooldown).
Search maintains value for airdrops/compound loot. 30m radius covers entire small compounds, reducing search time 25-40%.
Final Circles: Positioning & Distraction
Place Barkle in cover 20-25m from your position—creates secondary threat dividing enemy attention. Defend becomes match-deciding with limited natural cover. Coordinate barriers with smoke for layered concealment.
Attack's 15-25 HP every 2 sec forces enemies to eliminate Barkle (exposing to player fire) or accept continuous damage. Reduces enemy effective HP 30-50 points in final engagements.
Clutch Scenarios: 1v4 Situations
Trade knockdowns deliberately—get knocked after downing one enemy, rely on auto-Revive for 200 HP + 50% damage boost + 25% resistance. Enables 1v3 comebacks.
Use Hide to conceal Barkle, reveal strategically for surprise factor disrupting enemy coordination.
Primewood Barkle Abilities Deep Dive
Attack: Damage Output
450-750 damage/min under continuous engagement. Reduces time-to-kill from 3-4 sec to 2-2.5 sec in close range. Projectiles travel 40 m/sec—effective against stationary/slow targets within 30m.
Defend: Barrier Mechanics
180° arc: 2m wide, 1.5m tall. Crouch for full-body protection (standing exposes head). Absorbs 8-12 AR shots or 2-3 sniper rounds. 15-20 sec cooldown = 15-20 deployments per 20-25 min match.
Position perpendicular to enemy fire (not direct-facing) for maximum coverage width protecting multiple squad members.
Revive: Auto-Trigger & Buffs
50m radius = 7,850 sq meters (3-4 large compounds). 3-4 sec revive beats manual 6-8 sec by 40-50%. 200 HP restoration + 10-15 sec buff window enables aggressive counter-pushes.
Trade knockdowns deliberately when Revive available—revived player with damage boost eliminates 1-2 enemies during buff.
Search Supplies: Loot Efficiency
30m scan identifies gold-tier Level 3 gear/airdrops through walls. Marks visible 15-20 sec. 30-45 sec cooldown = 40-50 scans per match. Empty buildings indicate prior looting/recent enemy presence.
Carry: Mobility Applications
3-sec transport covers 40-60m (60-70% time reduction vs sprinting). 45-60 sec cooldown = 2-3 transports per match. Can't enter buildings (Jan 16 patch)—outdoor repositioning only. Mark destinations behind cover for safe arrival.
Heal & Hide: Passive Support
Heal transfers 5 HP/sec to players below 50% health—reduces bandage/medkit consumption 20-30%. Hide reduces visual profile 70% while maintaining full functionality.
Advanced Positioning Tactics
Defensive: Crossfire Angles
Position Barkle 20-25m perpendicular to your firing position—creates L-shaped crossfire forcing enemies to expose to either damage source. Increases hit probability 40-50% vs parallel positioning.
Building defense: place Barkle opposite sides from your position. Prevents single grenades damaging both.
Offensive: Leading Pushes
Advance Barkle 15-20m ahead as damage sponge (200-300 HP effective health with Defend). Forces enemies to reveal positions. Works best with squad covering fire—solo risks losing companion.
Zone Edge: Circle Advantage
Position Barkle on zone edge facing outward—auto-Attack engages blue zone rotators, alerting + softening targets. Allows focus on safe zone threats while Barkle monitors approach vector.
Common Mistakes to Avoid
Over-Reliance on AI
Barkle supplements damage, doesn't secure eliminations alone. Exploit companion fire through aggressive follow-up. Revive reliability creates complacency—maintain positioning discipline regardless.
Poor Command Timing
Command wheel during firefights diverts attention 0.8-1.2 sec—often fatal. Execute during enemy reloads/heals/repositions. Preemptive Defend before exposure > reactive after damage.
Ignoring Final Zone Positioning
Default 5m distance in final circles creates clustered target for grenades. Manual positioning at 20-25m forces divided enemy attention. Use Defend as mobile cover during position changes.
Wasting Abilities
Search in fully-looted areas wastes cooldown—restrict to fresh compounds. Carry for 10-15m movements wastes 45-60 sec cooldown. Attack beyond 40m rarely produces eliminations—reserve for close-range threats.
Squad Coordination: Team Tactics
Communication Protocols
Callouts: Barrier north side, Barkle reviving [name], Level 3 helmet marked, 25m east. Prevents duplicate abilities, enables coordinated execution.
Designate roles: point players = forward scouting, mid-squad = flank security, rear = backline protection.
Combined Fire Strategies
Coordinate Attack commands—four Barkles deliver 60-100 combined damage/cycle, eliminating enemies in 2-3 sec without player fire.
Stagger Defend barriers for continuous cover during advances—leapfrog technique enables 30-40m pushes in open terrain.
Bait Tactics
Position multiple Barkles visibly while squad hides. Enemies engaging companions reveal positions for devastating ambushes. Sacrifice Barkles to bait grenade usage, then push before enemies resupply.
Competitive Compositions
Assign aggressive fraggers to Attack-focused Barkles, support players to Revive-priority, snipers to Search-emphasis. Four-Barkle squads = 8 total combatants vs standard 4 = 2:1 numerical superiority in final circles.
Best Maps & Modes for Barkle
Erangel: Open Field Advantages
8x8km map with extensive open terrain—ideal for Carry (40-60m transport reduces exposure 60-70%) and Defend (creates cover in exposed areas). Major cities host consistent spawn locations.
Vehicle-heavy meta conflicts with Barkle (companions can't enter vehicles). Recruit after vehicle rotations conclude for mid-to-late game.
Livik: Fast-Paced Combat
2x2km map compresses matches to 15-18 min (30-40% less utility duration vs Erangel). Constant combat = 50-60% more Defend/Revive activations per minute.
Shorter rotations diminish Carry value. Dense loot makes Search critical. Abundant natural cover reduces Defend impact—prioritize Attack/Revive.
Ranked vs Classic Performance
Ranked opponents prioritize eliminating Barkle early (40-50% reduced survival time vs Classic). Revive's combat buffs more impactful in evenly-matched fights.
Classic's mixed skill distribution allows Barkle to operate freely. Skill disparities mean player skill > temporary buffs.
Performance Optimization
Graphics Settings
Enable high-quality graphics for companion visibility (projectiles/barrier clarity). Maintain 40+ FPS for responsive commands—lower FPS adds 0.2-0.4 sec input lag.
RAM Management
2-4GB RAM: disable AI Ally Effects to prevent performance drops. 6GB+ RAM: maintain full effects without penalties.
Network Considerations
Ping below 80ms ensures responsive commands. Higher latency adds 0.3-0.5 sec delays—issue defensive commands preemptively. Voice commands require extra bandwidth—use manual on limited data.
FAQ
How do I recruit Primewood Barkle? Enter Primewood Genesis (Erangel/Livik), locate green icons (visible 50m), land within 20m, approach within 3m, hold interaction button 1-2 sec.
Most useful abilities? Revive (auto 50m range, 3-4 sec, 200 HP + 50% damage + 25% resistance), Defend (180° barrier, 200-300 HP), Attack (15-25 HP every 2 sec).
Works in ranked? Yes, when Primewood Genesis available in ranked (Jan 7-Mar 10, 2026). Functions identically to classic mode.
How to control positioning? Hold ally icon, select Hold Position to anchor at coordinates. Sensitivity: 100-120% (5.5-6* screens), 80-100% (6.5+* screens).
Works on all maps? No—exclusive to Primewood Genesis on Erangel/Livik. Not available on Miramar/Sanhok/Vikendi.
What if Barkle dies? Can't recruit again that match. One companion per game—protect by positioning 20-25m behind lines, use Hide during vulnerable moments.
Dominate Primewood Genesis and maximize ranked performance with Barkle. Secure UC instantly at BitTopup—trusted platform for PUBG Mobile top-ups with competitive rates, instant delivery, secure payments, 24/7 support. Level up today!