

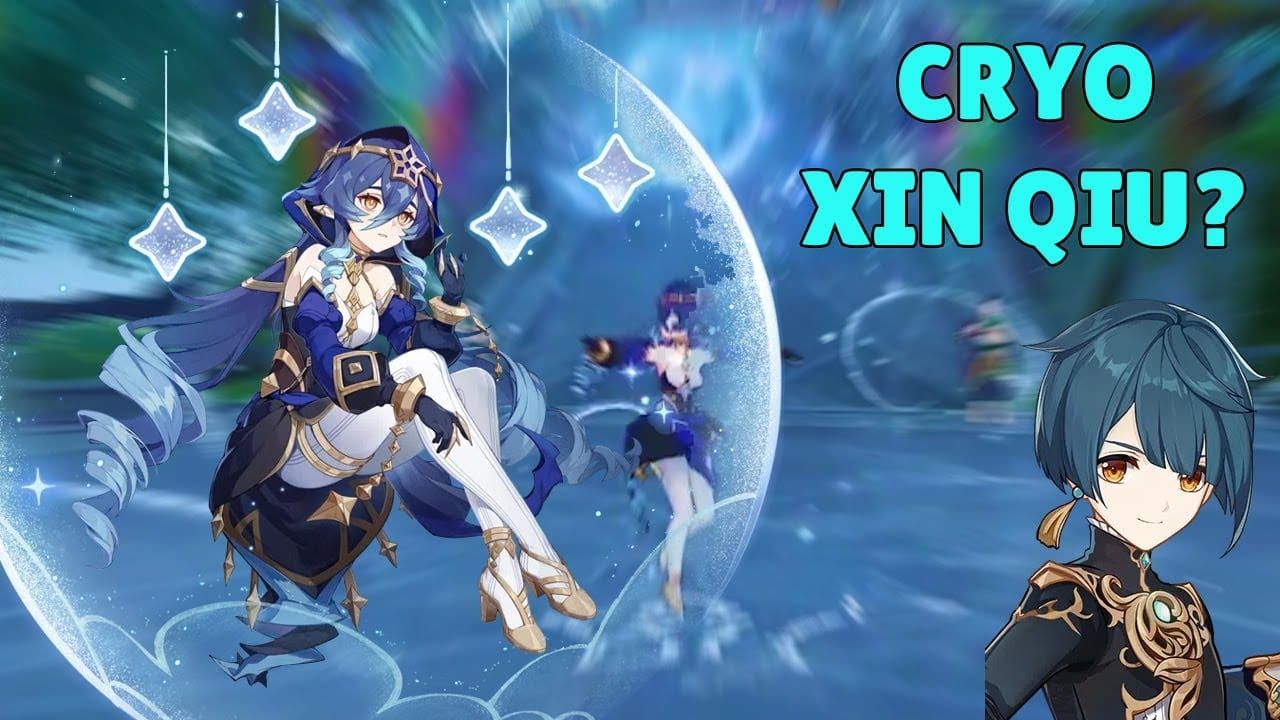
Quick Answer: Lauma's a 5-star Dendro Catalyst support who completely flips Bloom reactions on their head. You'll want 800-1000+ EM, 140-180% ER, her signature weapon Nightweaver's Looking Glass, and the Silken Moon's Serenade artifact set. Her game-changing Lunar-Bloom mechanic lets Bloom reactions actually CRIT for the first time ever—making her absolutely essential for Nilou and Hyperbloom teams. Release date: September 10, 2025.
Lauma Character Overview & Role Analysis
Character Abilities Breakdown
Here's where things get interesting. Lauma doesn't just support Bloom teams—she revolutionizes them through her Lunar-Bloom conversion mechanic.
Her Elemental Skill Runo: Dawnless Rest of Karsikko (yes, that's quite the mouthful) creates a Frostgrove Sanctuary that applies Dendro off-field.
But the real magic happens with the hold version. It consumes up to 3 Verdant Dew stacks, dealing a hefty 273.6% EM per stack at Level 10. Each stack also grants Moon Song stacks while dealing Lunar-Bloom damage—and trust me, you'll want to understand this mechanic inside and out.
Her Elemental Burst costs 60 energy and provides 18 base Pale Hymn stacks, plus 6 more per Moon Song stack you've accumulated (capping at 36 total). Each consumed stack increases Bloom/Hyperbloom/Burgeon damage by 500% EM and Lunar-Bloom damage by 400% EM at Level 10. Those are some serious multipliers.
The Nature's Chorus passive automatically converts your party's Bloom reactions into Lunar-Bloom while generating those crucial Verdant Dew stacks. Then there's the Moonsign mechanics—this is where team building gets strategic:
Nascent Gleam (solo Nod-Krai character): Enables Bloom/Hyperbloom/Burgeon to CRIT with 15% Rate and 100% Damage
Ascendant Gleam (2+ Nod-Krai characters): Adds +10% CRIT Rate and +20% CRIT Damage specifically for Lunar-Bloom
Don't sleep on the Frostgrove Sanctuary either. It provides 25% Dendro/Hydro RES shred for 10 seconds with a 15-second duration and 12-second cooldown—solid utility that benefits the whole team.
Strengths and Limitations
Strengths: She's literally the first character to make transformative reactions CRIT. That alone is groundbreaking. Add substantial EM-scaling team buffs, consistent off-field Dendro application, and meaningful RES shred for both Dendro and Hydro, and you've got a support that changes the meta.
Limitations: Her kit's incredibly specialized—if you're not running Bloom reactions, she's not bringing much to the table. She demands specific team compositions, has pretty high ER requirements (140-180%), and her personal damage took a hit during beta testing. She's also practically useless for Spread/Aggravate teams.
Energy Recharge Requirements & Optimization
ER Thresholds by Team Type
Getting Lauma's energy right is crucial—mess this up and your rotations fall apart.
Solo Dendro (no resonance): You'll need 180%+ ER. Without Dendro resonance, particle generation is rough.
Dual Dendro (with resonance): Around 160% ER works well, especially with partners like Nahida who generate decent particles.
Premium teams with Favonius weapons: 140-150% ER becomes possible when your supports are feeding energy.
Nilou Bloom teams: Expect 160-170% ER since Hydro-focused rotations don't help with Dendro particles.
Hyperbloom compositions: 140-160% ER with Dendro resonance—the sweet spot for most players.
Here's the thing about Lauma's energy generation: she only produces 3-4 Dendro particles per 12-second skill cooldown. That's... not great. C4 helps by providing 4 energy when the sanctuary hits opponents (every 5 seconds), but that's a hefty investment for energy management.
Best Artifact Sets for Lauma Builds
Silken Moon's Serenade (Best-in-Slot)
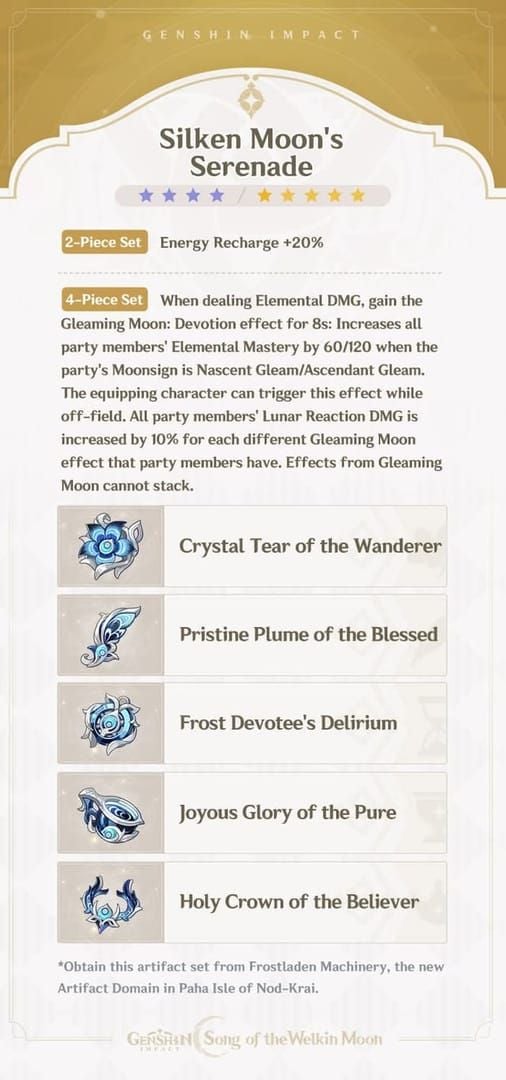
This is her tailor-made set, and it shows. The 2-piece gives 20% Energy Recharge (addressing her biggest weakness), while the 4-piece increases party EM by 60-120 depending on your Moonsign status and amplifies Lunar Reaction damage.
What makes this set perfect? It triggers off-field, which is exactly how you'll be playing Lauma. The EM sharing synergizes beautifully with her support role, and the signature mechanic enhancement is just chef's kiss.
Alternative Sets
Deepwood Memories: When no one else on your team can hold this set, the 30% Dendro RES shred benefits both personal and team damage. It's a solid generalist option.
Gilded Dreams: Maximizes personal EM in diverse teams. You get 50 EM per different element (150 maximum) plus 14% ATK per same-element character. Math gets interesting with mixed comps.
Flower of Paradise Lost: Gives 80 EM plus 40% Bloom/Hyperbloom/Burgeon damage, with an additional 25% when you're the one triggering reactions. Good if you're playing her more actively.
Substat Priority: EM (800-1000+) > ER (140-180%) > CRIT Rate/DMG > ATK%
That EM target isn't negotiable—her entire kit scales off it.
Weapon Recommendations & Tier List
Nightweaver's Looking Glass (Signature)

542 Base ATK and 264.6 EM at Level 90. The R1 passive provides stacking EM buffs plus 120% Bloom damage, 80% Hyperbloom/Burgeon damage, and 40% Lunar-Bloom damage for all party members.
Here's why it's so good: it functions completely off-field and covers all the Lunar-Bloom multipliers. Without this weapon, your Lunar-Bloom damage drops by 25-40%. That's a significant gap.
5-Star Alternatives
A Thousand Floating Dreams: 265 EM with team EM buffs based on element diversity. Expect about a 20% damage gap from the signature, but it's still very solid.
Sunny Morning Sleep-In: 265 EM with conditional EM buffs after skill/burst usage. Requires more active management.
Starcaller's Watch: 265 EM with a base 100 EM increase. Simple and effective.
4-Star Options
Blackmarrow Lantern (Craftable): 221 EM and directly increases Bloom/Lunar-Bloom damage. At R5, this achieves roughly 90% of the signature weapon's performance—incredible value for a craftable.
Etherlight Spindlelute: 45.9% ER with 200 EM for 20 seconds after skill usage (R5). Great for meeting ER requirements.
Sacrificial Fragments: 221 EM with skill cooldown reset potential. RNG-dependent but powerful when it procs.
Favonius Codex: Team energy support, though you'll need to invest in CRIT Rate to make the passive reliable.
For premium Genesis Crystals to pull Lauma's signature weapon, Buy Genesis Crystals Online through BitTopup offers competitive pricing and instant delivery with secure transactions and 24/7 customer support.
Optimal Team Compositions
Premium Lunar-Bloom Setup

Team: Lauma + Aino + Nilou + Baizhu
Two Nod-Krai characters activate Ascendant Gleam for that juicy +10% CRIT Rate and +20% CRIT Damage. Nilou creates Bountiful Cores, Lauma converts them to Lunar-Bloom for massive damage, and Baizhu keeps everyone alive. It's expensive but devastating.
Premium Bloom (Crit-Enabled)
Team: Lauma + Nahida + Nilou + Kokomi
Lauma as the sole Nod-Krai character enables all Bountiful Cores to CRIT (15% Rate, 100% Damage). Nahida provides EM buffs and consistent Dendro application, while Kokomi ensures you actually survive the chaos. This is probably the most accessible premium option.
Premium Hyperbloom
Team: Lauma + Nahida + Yelan/Xingqiu + Raiden/Kuki
Nascent Gleam enables Hyperbloom to CRIT—something that was impossible before Lauma. Dual Dendro provides application, Hydro creates cores, and your EM-built Electro character triggers enhanced reactions. Raiden brings more personal damage; Kuki brings healing.
F2P Alternative
Team: Lauma + Xingqiu + Barbara + Kuki Shinobu
Budget composition with Lauma driving on-field (not ideal, but workable). Dual Hydro for consistent core creation, full EM Kuki for Hyperbloom triggers and healing. It's not pretty, but it gets the job done.
Lunar-Bloom DPS Optimization
Damage Scaling
The hold skill deals 273.6% EM per Verdant Dew stack (maximum 3 stacks). Her signature weapon adds 40% Lunar-Bloom damage on top of that. Burst enhancement provides an additional 400% EM scaling. And yes, it can CRIT with 15% Rate and 100% Damage.

Benchmarks (because everyone loves numbers):
800 EM: ~50,000 Hold skill damage per rotation
1000 EM: ~65,000 Hold skill damage per rotation
1200 EM: ~80,000 Hold skill damage per rotation
Those numbers assume proper setup and signature weapon. Your mileage may vary.
Rotation Sequence
Trigger Bloom reactions to convert them to Lunar-Bloom for Verdant Dew generation
Lauma Hold E: Consume those stacks for damage and Moon Song accumulation
Lauma Burst: Convert Moon Song to Pale Hymn team buffs
DPS Phase: Swap to your main dealers for enhanced reactions
The Sanctuary generates shooting stars every 2 seconds with large AoE tracking, dealing 172.8% ATK + 345.6% EM at Level 10. It's not massive damage, but it adds up over the duration.
Constellation & Investment Guide
Key Breakpoints
C0: Complete functionality. You get Lunar-Bloom conversion, burst buffing, RES shred, and CRIT enabling. She's perfectly usable here.
C1: Healing based on 500% EM when Lunar-Bloom triggers. This eliminates the need for a dedicated healer in Bloom teams, freeing up a team slot for more damage or utility.
C2: Massive damage spike. Adds 500% EM to Bloom/Hyperbloom/Burgeon and 400% to Lunar-Bloom. This is your biggest power increase by far.
C6: Transforms her into a potent sub-DPS with additional Lunar-Bloom instances and Normal Attack conversion. Expensive but transforms her role entirely.
Investment Priority
C1 vs Signature Weapon (the eternal question):
Choose C1 if: Your team lacks healing, you want flexibility in team building, or you're on a budget.
Choose Signature if: Survivability is already covered, damage is your priority, or you're thinking long-term investment.
Efficiency Rankings: C0 + Signature (highest damage) > C1 + 4-star (best comfort) > C2 + Signature (premium damage) > C0 + 4-star (budget baseline)
For constellation investments, Genshin Impact Top Up through BitTopup provides secure Genesis Crystal purchases with competitive rates and instant delivery.
Talent Priority & Resources
Leveling Strategy
Priority Order: Elemental Skill (Level 10) > Elemental Burst (Level 10) > Normal Attack (Level 6)
The skill provides your primary personal damage and Lunar-Bloom foundation—max this first. Burst offers team damage amplification that scales significantly with levels. Normal attacks? They have minimal impact for support builds, so Level 6 is fine.
Material Requirements (1→90)
Ascension: 420,000 Mora, 168x Moonfall Silver, 46x Lightbearing Scale-Feather, Warrant series drops, Nagadus Emerald gems
Talents: 1,652,500 Mora per talent, Crown of Insight, 6x Eroded Scale-Feather, Moonlight talent books, Warrant drops
That ascension provides 115.2 EM bonus, making Level 90 highly valuable for EM scaling characters like Lauma. Don't skip it.
Advanced Strategies & Meta Analysis
Spiral Abyss Applications
She absolutely shines on multi-enemy floors where Bloom reactions trigger frequently. The CRIT-enabling transforms what used to be fixed-damage reactions into scalable damage sources—incredibly valuable against high-HP enemies that have been power-crept in recent Abyss cycles.
Team Positioning: Hyperbloom for single-target chambers (usually First Half), Bloom for AoE situations (Second Half). She's adaptable to whatever the Abyss throws at you.
Meta Impact
This is a paradigm shift. Introducing CRIT to transformative reactions changes everything. She revitalizes Nilou compositions that had been struggling, enhances Hyperbloom damage ceilings significantly, creates entirely new Lunar-Bloom strategies, and establishes the foundation for future Nod-Krai synergies.
vs Other Dendro supports: More specialized than Nahida but with higher Bloom impact, superior damage to Baizhu but with less utility, and significantly outperforms Dendro MC in every meaningful way.
Common Optimization Errors
Build Mistakes: Prioritizing CRIT stats over EM (rookie mistake), insufficient ER leading to rotation issues, choosing ATK weapons over EM options.
Rotation Issues: Using Hold skill without Verdant Dew stacks (wasting damage), poor burst timing that misses the damage window, inadequate Bloom setup before her rotation.
Team Building: Mixing incompatible reactions (Bloom + Aggravate doesn't work well), insufficient Hydro application for consistent cores, overlooking survivability in favor of damage.
Investment Priorities: Pulling constellations before optimizing artifacts, weapon pulls without proper budget planning, neglecting talent levels for shiny new characters.
For cost-effective optimization resources, Cheap Genshin Top Up through BitTopup provides budget-friendly Genesis Crystal packages with reliable service.
Frequently Asked Questions
What Energy Recharge does Lauma need in different teams?
Solo Dendro requires 180%+ ER—it's rough out there without resonance. Dual Dendro with resonance needs around 160% ER, which is much more manageable. Teams with Favonius weapons can operate at 140-150% ER. The key is maintaining those 15-second burst rotations for consistent team buffs.
How does Lunar-Bloom conversion work exactly?
Her Nature's Chorus passive automatically converts your party's Bloom reactions to Lunar-Bloom, generating Verdant Dew stacks (max 3) that fuel her Hold skill damage. This enables the first-time transformative reaction CRIT capability in the game, transforming fixed damage calculations into scalable CRIT-based ones.
Which artifact set actually performs best?
Silken Moon's Serenade is best-in-slot with that 20% ER and team EM buffs. Deepwood Memories works as a solid generalist option for the 30% Dendro RES shred when no other team member can hold it. The choice depends on your team composition.
Is the signature weapon essential or just nice-to-have?
Nightweaver's Looking Glass provides a 25-40% damage advantage with unique multipliers you can't get elsewhere. A Thousand Floating Dreams achieves roughly 80% of its performance, while the craftable Blackmarrow Lantern reaches about 90% at R5. Essential? No. Highly recommended? Absolutely.
How should I prioritize constellations?
C1 provides healing (500% EM scaling) that eliminates the need for dedicated healers. C2 offers the largest damage spike with 500% EM to standard Bloom reactions and 400% to Lunar-Bloom. Choose C1 for team flexibility, C2 for pure damage investment.
What teams actually maximize her effectiveness?
Premium Bloom (Lauma/Nahida/Nilou/Kokomi) enables Bountiful Core CRIT for the first time ever. Hyperbloom (Lauma/Nahida/Xingqiu/Kuki) provides excellent single-target damage. Lunar-Bloom teams with Aino activate those Ascendant Gleam buffs for maximum synergy. Each serves different content needs.