

Quick Answer: Kuuvahki fields are ancient lunar energy manifestations in Nod-Krai appearing as red or blue unipolar fields. Same colors repel, different colors attract. Players enter a charged state to interact with fields, enabling Powered Jumps, puzzle solving with Repeaters and Modular Blocks, and accessing new Lunar-Bloom and Lunar-Charged combat reactions for enhanced damage output.
Understanding Kuuvahki Fields: Basic Mechanics
What Are Kuuvahki Fields
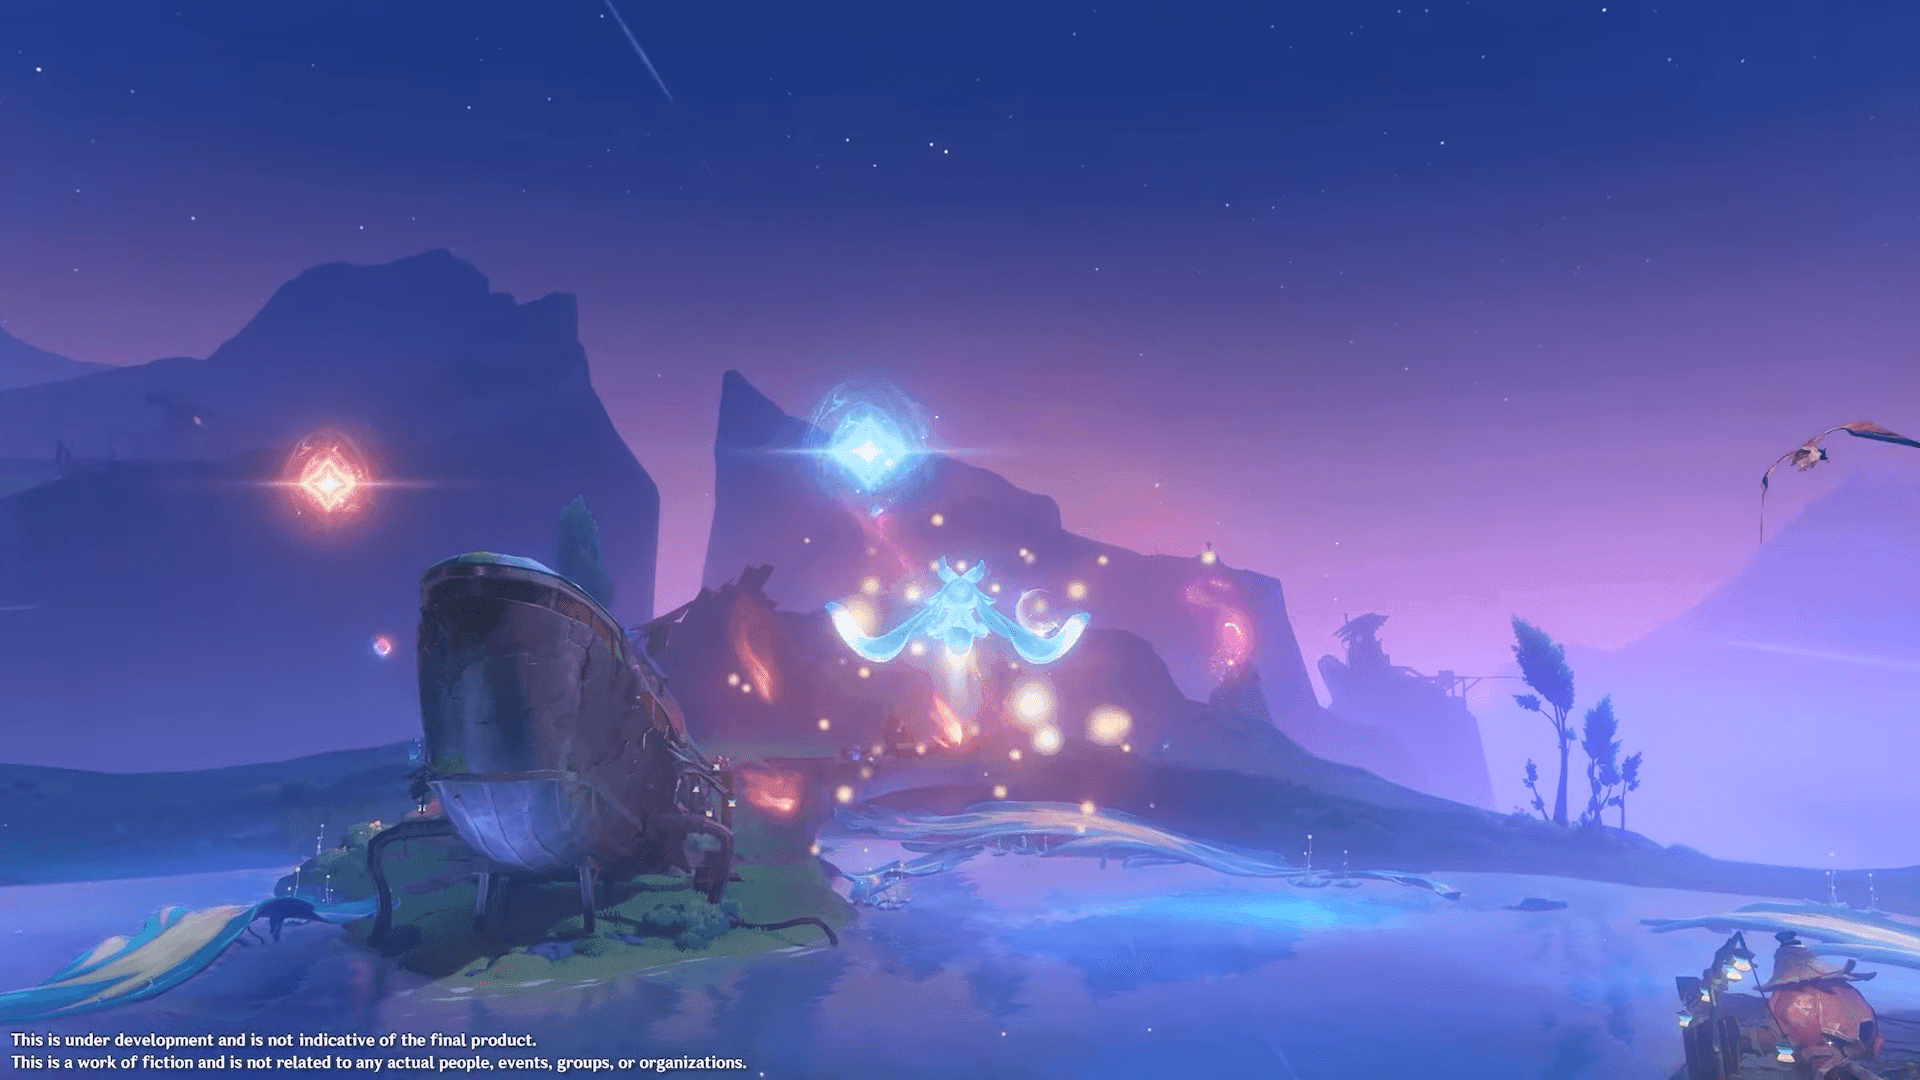
So here's the thing about Kuuvahki – it's basically ancient elemental energy that showed up in the Nod-Krai region when Version Luna I dropped on September 10. Think of it as lunar power drawn from three fallen moon deities, but instead of just being mystical background lore, it actually manifests as these red or blue unipolar fields scattered across Lempo Isle (where Nasha Town sits), Hiisi Island, and Paha Isle.
These aren't just pretty light shows either. The fields serve as both environmental puzzle elements and combat enhancement tools, fundamentally changing how you explore and fight throughout the southernmost parts of Snezhnaya. What's fascinating is how this energy seeps into everything – local plants, animals, weather patterns, even technological devices get affected.

It's similar to the phlogiston systems we've seen before, powering gadgets in urban areas while appearing naturally in wilderness regions. But Kuuvahki goes deeper, actually affecting the fabric of reality to enable transformation abilities and enhanced mobility that feel genuinely game-changing.
Unipolar System Overview
The core principle is elegantly simple: same color fields repel each other, different colors attract. Red fields generate repulsive forces against red while attracting blue fields. Blue fields repel blue energy while drawing red fields closer.
This enables some seriously clever environmental object manipulation and opens up previously unreachable locations. But here's where it gets interesting – the system extends way beyond basic attraction and repulsion. You're also dealing with charged states for interacting with Modular Blocks and Bipolar Objects, which adds layers of complexity that honestly took me a while to fully grasp.
Understanding these polarity relationships isn't just helpful; it's essential for progression through the more complex puzzle sequences and combat encounters later on.
Field Activation Basics
Players need to enter a charged state through various sources: Moonshine Violet plants, elemental creatures, robots with unipolar fields, or special zones with ancient element connections. Once charged, you gain shape-changing abilities, object manipulation powers, and enhanced mobility including the Powered Jump technique.
But there's a catch – your charged state depletes over time and through usage. This adds a strategic resource management layer that keeps you thinking ahead. You'll need to locate additional charging sources or complete specific actions to refresh your Kuuvahki reserves, which honestly makes exploration feel more purposeful than just wandering around collecting chests.
Red Unipolar Fields: Properties and Effects
Red Field Mechanics
Red fields create repulsive forces against red-charged objects and players. When you're red-charged and enter a red zone, you activate the Powered Jump – essentially a boosted leap that provides significant vertical mobility and reveals paths you couldn't access before.
The repulsion works bidirectionally, which opens up complex puzzle solutions involving moving red-charged Modular Blocks or clearing blocked pathways. What I appreciate about red fields is their consistency – they maintain steady energy output regardless of environmental conditions, making them reliable interaction points for precise platforming sequences.
Combat Buffs Provided
This is where things get spicy. Red field interactions enhance combat through the Lunar-Charged damage type, which particularly benefits Electro characters. Your Electro attacks gain Lunar-Charged properties, dealing increased damage against those annoying Knuckle Duckle combat machines, Automatons, and Fatui enemies throughout Nod-Krai.
The combat buffs stack with existing elemental reactions too – you're combining traditional Electro-Charged with Lunar-Charged effects for multiplicative damage increases. This synergy becomes crucial for defeating high-level enemies and completing those timed combat challenges within Clink Clank Clash events.
Activation Requirements
You'll need red energy sources like specific Moonshine Violet variants, red-charged creatures, and specialized robots with red unipolar signatures. Here's the tricky part – you must approach while uncharged, because conflicting blue energy results in neutralization. The charging process requires 2-3 seconds of continuous contact, leaving you vulnerable to attacks.
Red charges persist for 300 seconds real-time or until depleted through interactions, Powered Jumps, or object manipulation. You can refresh charges by returning to compatible sources, but you can't switch from red to blue without first neutralizing your current charge.
Blue Unipolar Fields: Properties and Effects
Blue Field Mechanics
Blue fields generate attractive forces toward red-charged objects while repelling blue-charged elements. When you're blue-charged and approach red fields, you experience pulling effects that enable rapid horizontal movement across varied terrain – it's honestly pretty exhilarating once you get the hang of it.
The attractive mechanism allows remote manipulation of red Modular Blocks for puzzle solutions without direct contact, which opens up some creative problem-solving approaches. Blue fields also interact with Bipolar Objects that respond to both charges simultaneously, letting blue-charged players attract, move, and throw these objects while destroying standard unipolar objects through sustained energy application.
Combat Buffs Provided
Blue fields unlock the Lunar-Bloom combat reaction, transforming Dendro-Hydro Bloom reactions into significantly more powerful damage sources. With Lauma (5-star Dendro Catalyst) in your team, blue energy enables Bloom conversion to Lunar-Bloom variants that create Verdant Dew resource for substantial damage with critical hit potential.
The Lunar-Bloom system actually reduces enemy Dendro and Hydro resistance when executed properly, creating vulnerability windows for sustained damage phases. You can chain multiple reactions by maintaining blue field proximity and managing Verdant Dew resources effectively – though it takes practice to nail the timing.
Activation Requirements
Blue energy requires interaction with blue-variant Moonshine Violet plants, blue-charged lifeforms, and mechanical devices with blue unipolar indicators. You must ensure complete neutralization before blue acquisition if you were previously red-charged. Neutralization occurs automatically after expiration or through neutral Kuuvahki sources near major landmarks.
Blue charges maintain that same 300-second duration with depletion through field interactions, ability usage, and environmental manipulation. Strategic charge management becomes essential for extended exploration or complex puzzle sequences requiring sustained blue energy access.
Kuuvahki Puzzle Solutions Guide
Basic Puzzle Types
Let me break down the main puzzle categories you'll encounter. Modular Block puzzles feature red/blue charged blocks that become faulty – you'll throw Repeater items at malfunctioning blocks to reactivate their force fields, restoring polarity interactions.
Sniffer Mole puzzles are pretty clever. You give Repeaters to these creatures who then locate hidden unipolar fields and mark their locations on your map. Dew Drop Kuuvjaki puzzles use charged water elements to manipulate crystals and plant life – contact causes objects to rise or open, revealing pathways or treasures.
Step-by-Step Solutions
Modular Block Restoration:
Identify faulty blocks by their dim or flickering energy signatures
Locate Repeaters in nearby attack mechanism cores
Extract Repeaters by disabling or destroying the host mechanisms
Throw Repeaters at the faulty block centers
Verify restoration through renewed energy field visibility
Sniffer Mole Protocol:
Locate the distinctive Sniffer Moles near puzzle areas
Acquire Repeaters from nearby sources
Present Repeaters through direct interaction
Wait for the search pattern to complete
Check your map for newly revealed field locations
Advanced Puzzle Strategies
Multi-stage puzzles require switching between red and blue charges mid-solution, demanding careful energy management and timing coordination. My advice? Identify all required charge types before beginning, and locate multiple energy sources to avoid mid-puzzle depletion – trust me on this one.
Dangerous Device encounters require redirecting enemy attacks using your charged abilities, attracting bipolar charges from attack mechanisms into device cores. Lightning puzzles during rain use Repeaters as attractors, drawing strikes to destroy obstacles or activate mechanisms while keeping you safe from personal damage.
Combat Buff Optimization
Buff Stacking Mechanics
Here's where the math gets interesting. Kuuvahki buffs stack multiplicatively with elemental reactions. Lunar-Charged from red fields combines with Electro-Charged reactions, exceeding standard scaling limitations. Lunar-Bloom from blue fields stacks with Dendro bonuses, creating cascading damage when multiple Bloom reactions convert simultaneously.
The Verdant Dew system allows controlled buff timing – you can accumulate multiple charges before consuming them for maximum damage windows. Strategic management enables burst phases that coincide with enemy vulnerability or time-limited challenges.
Duration Management
Buffs maintain 300-second effectiveness with extensions through field re-interaction or energy renewal. The combat efficiency from Lunar-Charged persists throughout your charged duration, enabling reliable damage planning for challenging encounters that require specific DPS thresholds.
Lunar-Bloom windows depend on Verdant Dew availability rather than strict time limits, allowing tactical timing control for optimal enemy defeat sequences and resource conservation.
Team Synergies
Electro teams benefit massively from red field positioning, with Flins (5-star Electro Polearm) specializing in Lunar-Charged output through his flexible dual-Burst system. Dendro-Hydro compositions maximize blue benefits through Lauma's Lunar-Bloom conversion, creating synergies that exceed traditional reaction limits.
Mixed element teams can utilize both field types by rotating positioning, switching between Lunar-Charged and Lunar-Bloom based on enemy weaknesses. It requires careful positioning management, but provides maximum optimization opportunities for players willing to put in the effort.
For players looking to enhance their Genshin Impact experience with reliable resource acquisition, Genshin Impact Top Up services provide secure and efficient access to Genesis Crystals and other premium currencies. BitTopup offers competitive pricing, fast delivery, and comprehensive customer support for all your gaming needs.
Character Synergies with Kuuvahki Fields
Best Characters for Red Fields
Flins emerges as the premier red field specialist, designed specifically for Lunar-Charged optimization through Electro Polearm combat. His dual Burst system allows frequent energy expenditure, maximizing red field buff utilization through consistent Lunar-Charged opportunities.

Aino (4-star Hydro Claymore) offers solid red field support through her mechanical understanding – plus she's available free through Nod-Krai Archon Quest completion, which is nice for F2P players. Really, any Electro character from other regions gains significant benefit as their standard attacks convert to Lunar-Charged variants when properly positioned.
Best Characters for Blue Fields
Lauma stands as the definitive blue field character, with her entire kit designed around Lunar-Bloom conversion and Verdant Dew management. This 5-star Dendro Catalyst user's abilities include enemy resistance reduction for Dendro and Hydro elements, creating vulnerability windows that amplify blue field damage potential.

The Frostmoon Scions Moonchanter possesses transformation abilities, shifting to cervitaur form for enhanced mobility while maintaining blue charge states. Hydro support characters gain enhanced value through fast application rates that generate substantial Verdant Dew resources.
Team Composition Tips
Balanced Kuuvahki teams include both red and blue specialists to maximize damage across varied enemy types. Flins and Lauma form excellent core compositions, with supporting characters chosen for elemental application rates and energy generation.
Energy management becomes crucial since both reaction types require consistent skill and burst usage. Positioning coordination requires practice – maintaining field proximity while avoiding attacks and hazards takes time to master. I'd recommend practicing field switching during exploration to develop combat positioning muscle memory.
When building optimal teams for Kuuvahki field utilization, consider securing additional characters through Buy Genesis Crystals for wish pulls. BitTopup's reliable platform ensures quick crystal delivery with secure payment processing and excellent customer service ratings.
Advanced Strategies and Techniques
Field Effect Combinations
Advanced players can combine multiple field types within single encounters through environmental positioning and charge switching. Strategic movement between red and blue zones enables reaction switching mid-combat, adapting your damage output to enemy vulnerability phases.
Kuuhenki transformation provides enhanced field interaction, allowing free gliding between zones while maintaining charged states. In Kuuhenki form, you can interact with mist patches using attraction and repulsion principles, creating aerial positioning advantages that feel almost unfair (in the best way).
Moonlane utilization enables rapid field-to-field movement through bright light trails – essentially fast-travel options that keep combat flowing smoothly.
Timing Optimization
Charge management requires precise timing to maximize field duration while minimizing vulnerability during those 2-3 second acquisition windows. Identify safe charging locations near combat zones that enable quick renewal without enemy exposure.
Burst coordination is essential for Kuuvahki teams since reactions provide maximum benefit when synchronized with ultimate abilities. Practice your rotation timing to ensure field buffs remain active during peak damage windows – it makes a noticeable difference in clear times.
Resource Management
Repeater conservation involves identifying renewable sources versus limited availability items. Prioritize extracting from attack mechanisms rather than consuming environmental sources to ensure adequate supplies for complex sequences.
Verdant Dew accumulation requires balancing immediate consumption against conservation for sustained encounters. Assess enemy health pools and encounter duration to determine optimal usage timing for maximum efficiency.
Common Mistakes and Troubleshooting
Activation Failures
Charge conflicts occur when you attempt opposing energy acquisition without neutralization. Allow current charges to expire or interact with neutral sources before switching types – this caught me off guard initially. Insufficient contact duration causes failures too, so wait for visual and audio confirmation before proceeding.
Environmental interference can prevent charging in areas with conflicting signatures or specific weather conditions. If your attempts fail, relocate to alternative sources since some factors temporarily disable acquisition capabilities.
Buff Management Errors
Premature consumption occurs without proper preparation for sustained usage. Kuuvahki buffs provide maximum value during coordinated rotations rather than immediate single-character actions. Avoid unnecessary interactions that waste duration on non-essential activities.
Team positioning errors reduce effectiveness when characters remain outside influence zones during critical windows. Practice maintaining proximity while avoiding attacks and hazards that disrupt positioning – it's trickier than it sounds initially.
Puzzle Solution Mistakes
Incorrect polarity application causes failures when using wrong charge types. Always verify required polarity before attempting sequences to avoid wasting time and resources. Repeater misuse includes throwing at incorrect targets or using limited items for non-essential interactions.
Sequence timing errors occur when attempting multi-stage puzzles without understanding proper order. Complex puzzles require specific interaction sequences – observe environmental cues and mechanism responses to determine correct progression.
Location Guide and Field Variations
Kuuvahki Field Locations
Lempo Isle contains the highest concentration of introductory fields near Nasha Town for easy access and experimentation. These feature clear indicators and minimal hazards – perfect for getting your bearings.
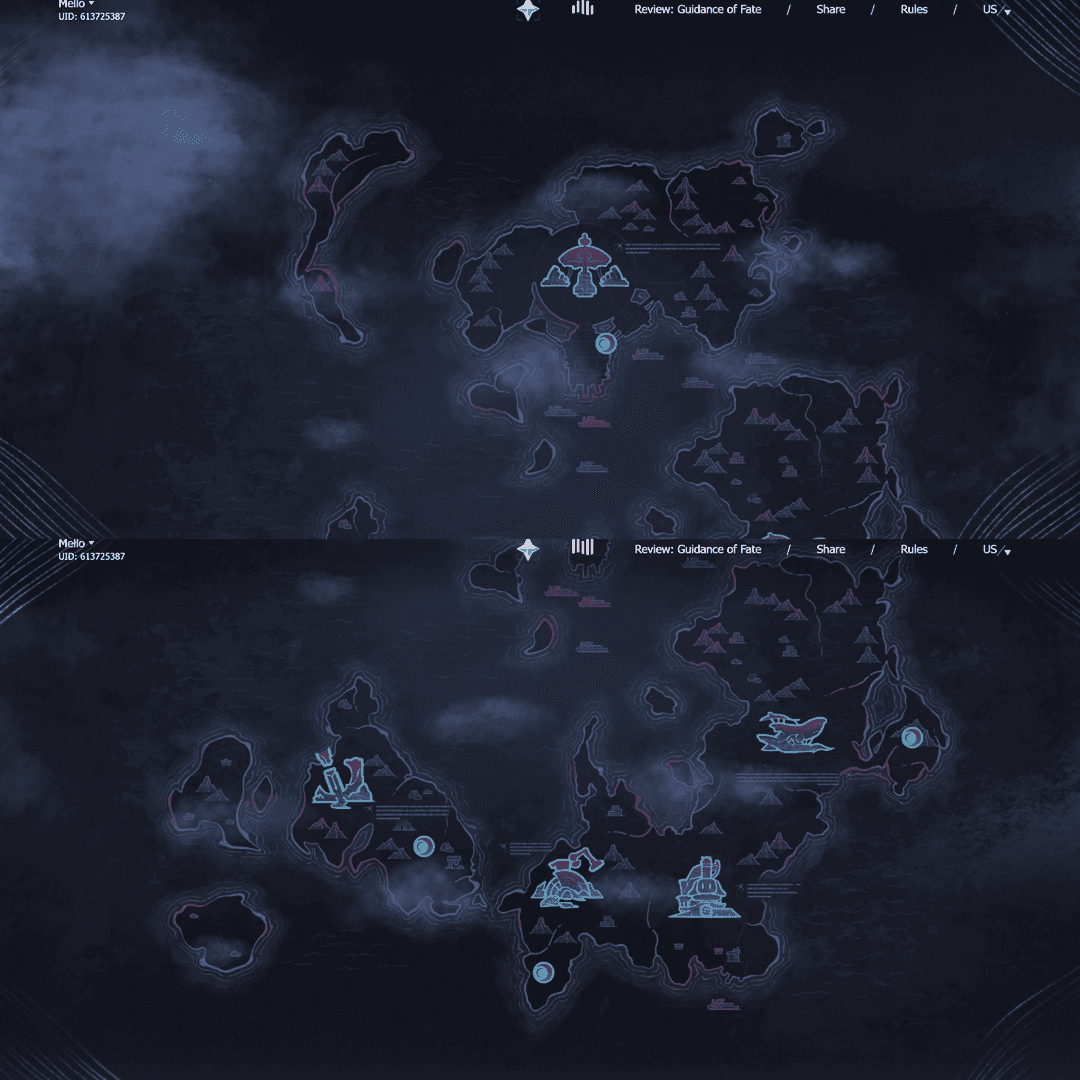
Hiisi Island hosts more complex arrangements, including the Frostmoon Scions' sacred areas where energy reaches maximum intensity with enhanced buff effects. Paha Isle features the most challenging configurations around the Kuuvahki Experimental Design Bureau, where Fatui conduct research. These combine field puzzles with combat encounters requiring simultaneous buff management and enemy engagement.
Regional Variations
Weather-dependent effects occur throughout Nod-Krai – rain conditions enable lightning solutions through Repeater conductor properties, which creates some genuinely clever puzzle designs. Elevation-based intensity varies across vertical terrain, with higher altitudes providing stronger concentrations and extended durations.
Proximity to ancient sites influences behavior, with areas near fallen deity locations exhibiting unique patterns and enhanced reaction potential. Sacred zones provide maximum benefits but feature increased difficulty and complex access requirements.
Accessibility Tips
Prerequisite completion ensures proper access – certain areas require Mondstadt Archon Quest Prologue: Act III – Song of the Dragon and Freedom before Nod-Krai becomes available. Transportation planning is essential for efficient utilization since island geography requires boat travel and specialized traversal.
Safety preparation involves understanding environmental hazards and enemy patrol patterns around field locations. Many powerful fields exist in dangerous areas, so assess your combat readiness and escape route availability before high-risk interactions.
For seamless exploration of Nod-Krai's Kuuvahki fields, ensure adequate resources through Genshin Top Up Online services. BitTopup provides instant delivery, competitive rates, and secure transactions to support your Genshin Impact adventures with reliable customer satisfaction.
FAQ
What are Kuuvahki fields and how do they work? They're ancient lunar energy manifestations appearing as red or blue unipolar fields in the Nod-Krai region (introduced Version Luna I, September 10). The basic principle: same colors repel, different colors attract. You charge via Moonshine Violet plants, elemental creatures, or specialized robots. Charged state lasts 300 seconds, enables Powered Jumps, object manipulation, and unlocks Lunar-Bloom/Lunar-Charged combat reactions.
How do I solve Kuuvahki field puzzles? Three main mechanics to master: Extract Repeaters from attack mechanisms and throw them at faulty Modular Blocks to restore functionality. Give Repeaters to Sniffer Moles to locate hidden fields that get marked on your map. Use charged states to manipulate Bipolar Objects for environmental solutions. Always verify your charge type matches puzzle requirements before beginning sequences.
Which characters work best with each field type? Red fields optimize Electro characters, especially Flins (5-star Electro Polearm) who specializes in Lunar-Charged damage with his dual-Burst system. Blue fields maximize Dendro-Hydro teams centered on Lauma (5-star Dendro Catalyst), who converts Bloom to Lunar-Bloom variants. Aino (4-star Hydro Claymore) supports both types and is obtainable free through the Archon Quest.
How long do buffs last and do they stack? Buffs last 300 seconds from charge acquisition and are renewable through field re-interaction. They stack multiplicatively with elemental reactions – Lunar-Charged combines with Electro-Charged, Lunar-Bloom stacks with Dendro bonuses. Verdant Dew from Lunar-Bloom accumulates for strategic burst timing beyond strict time limits.
Where are Kuuvahki fields located? Lempo Isle (near Nasha Town) has introductory fields with clear indicators. Hiisi Island features complex arrangements around sacred areas with enhanced effects. Paha Isle contains challenging configurations near the Experimental Design Bureau. Rain enables lightning puzzles, elevation increases intensity. Requires Mondstadt Prologue: Act III completion for access.
What's the difference between red and blue field effects? Red fields enable Powered Jumps for vertical mobility with matching charges and provide Lunar-Charged buffs that enhance Electro attacks against Automatons and Fatui. Blue fields create attractive forces for horizontal movement and remote manipulation, enabling Lunar-Bloom reactions that convert Bloom effects into high-damage variants with critical potential.