

Quick Overview: Sangonomiya Kokomi leans hard into Max HP scaling for both her healing chops and damage output. Go with Ocean-Hued Clam (OHC) if you want her pumping out personal DPS, or Tenacity of the Millelith (ToM) to buff the whole team. Slap on Thrilling Tales of Dragon Slayers (TTDS) for those juicy 48% ATK swaps, and aim for 180-220% Energy Recharge (ER). This guide breaks down the sets, fine-tunes your swaps for Freeze, Bloom, and Taser squads, and helps you squeeze every bit of sustain and DPS out of her in Spiral Abyss.
Diving into Kokomi's Healer-DPS Sweet Spot
Why Go Hybrid? It's a Game-Changer
Ever wonder why Kokomi feels like the ultimate multitasker in Genshin? Her talents all scale off Max HP—hitting a base of 13,471 at Level 90—which lets her heal like a boss while dishing out damage through reactions such as Bloom or Electro-Charged. She spreads Hydro with Normal Attacks during her Burst, dropping 0.81% Max HP +77 heals per hit. Getting her ascended means hunting down 168 Sango Pearls from the Sangonia Pearl boss and 46 Dew of Repudiation in Inazuma, plus shelling out 420,000 Mora to hit Level 90. Her Burst, Nereid's Ascension, costs 80 Energy but amps up NA damage by 4.8% of her Max HP and gives her some solid interrupt resistance.
The Stats You Can't Ignore
At Level 90, Kokomi's base kit gives her 13,471 HP, 234 ATK, 657 DEF, and a 28.8% Hydro DMG Bonus. Push for 30,000+ HP, 180-220% ER when she's off-field, and at least 100 EM to make those reactions pop. Talent priorities? Level her Burst first (at Lvl. 10, it kicks off with 10.4% Max HP initial damage), then her Normal Attack (that 3-hit combo totals 224.2% Hydro DMG at max). You'll burn through 4,957,500 Mora and 3 Crowns of Insight—grab Philosophies of Transience from the Momiji-Dyed Court domain. If your ER dips below 200% in Freeze teams, slot in an ER Sands to keep her Skill (Kurage's Oath, lasting 12 seconds) rolling via Burst refreshes.
Oh, and if you're looking to top up for those extra pulls or resources, check out the Genshin top up promo on BitTopup. They've got competitive prices, delivery in minutes, full game policy compliance, safe Genesis Crystal buys no matter your region, and killer user reviews—makes grinding a bit less painful.
Breaking Down the Big Artifacts: OHC and Tenacity
How Ocean-Hued Clam Works Its Magic
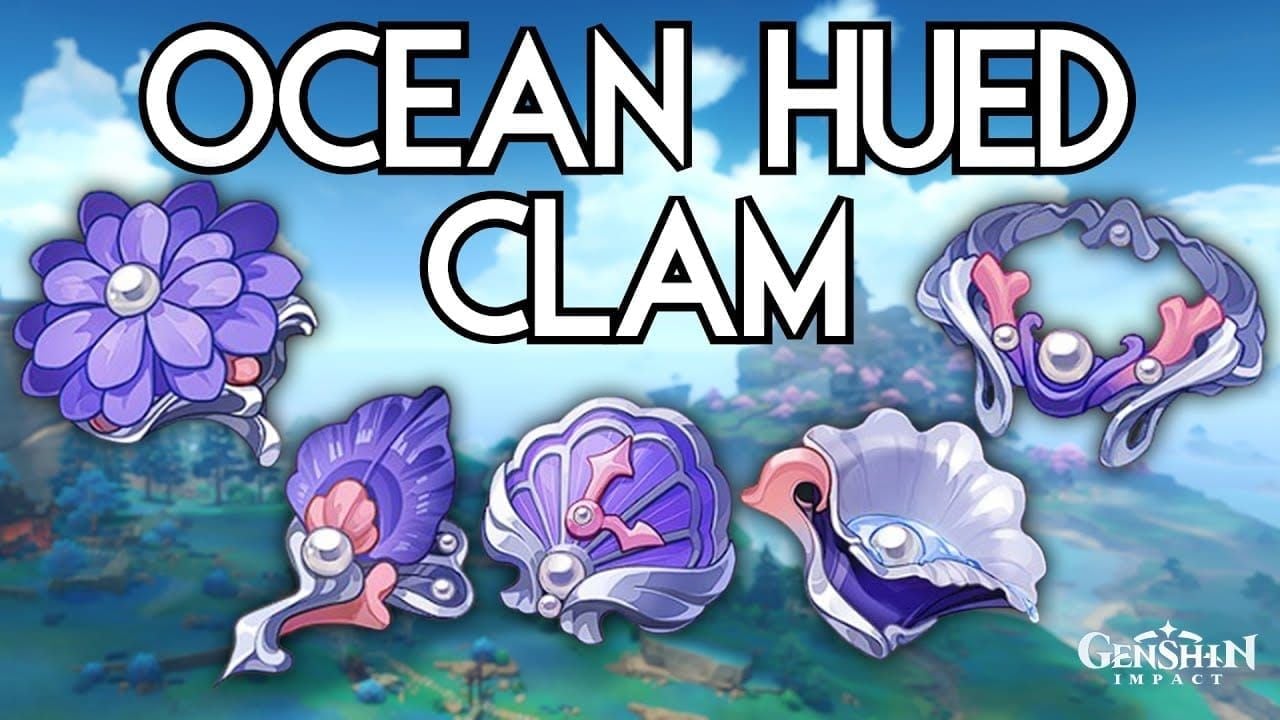
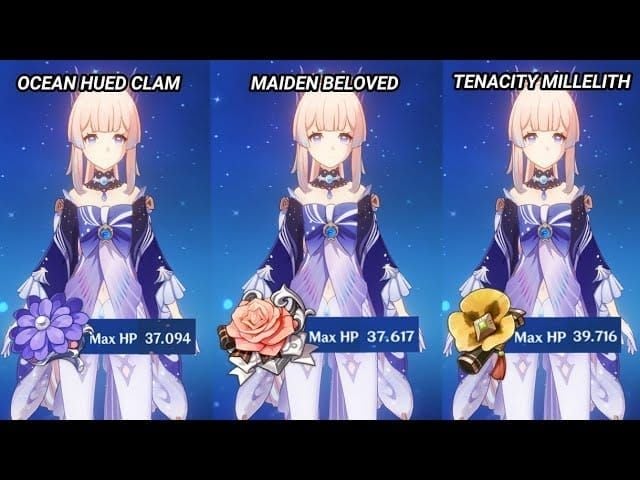
OHC's 2-piece set bumps your Healing Bonus by 15%, and the 4-piece? Any excess healing turns into Foam that can stack up to 30,000 HP, then explodes for 90% of that value as damage (with a 3.5-second cooldown, and only one active at a time). In Bloom teams, her jellyfish pulses can crank out multiple Foams, netting you about 7.7k DMG per second. Surveys show 60.22% of players dig it for budget builds. Farm it from the Slumbering Court domain on Seirai Island, and it pairs nicely with Husk of Opulent Dreams. Go for HP% on Sands (or ER if needed), Hydro DMG% on Goblet, and Healing Bonus on Circlet; substats should chase HP% first, then ER and EM. Once you're AR 45, craft pieces in the Strongbox with 3 Mystic Offerings, and upgrade every four levels to max out that 30k Foam cap.
Tenacity of the Millelith: The Team Player
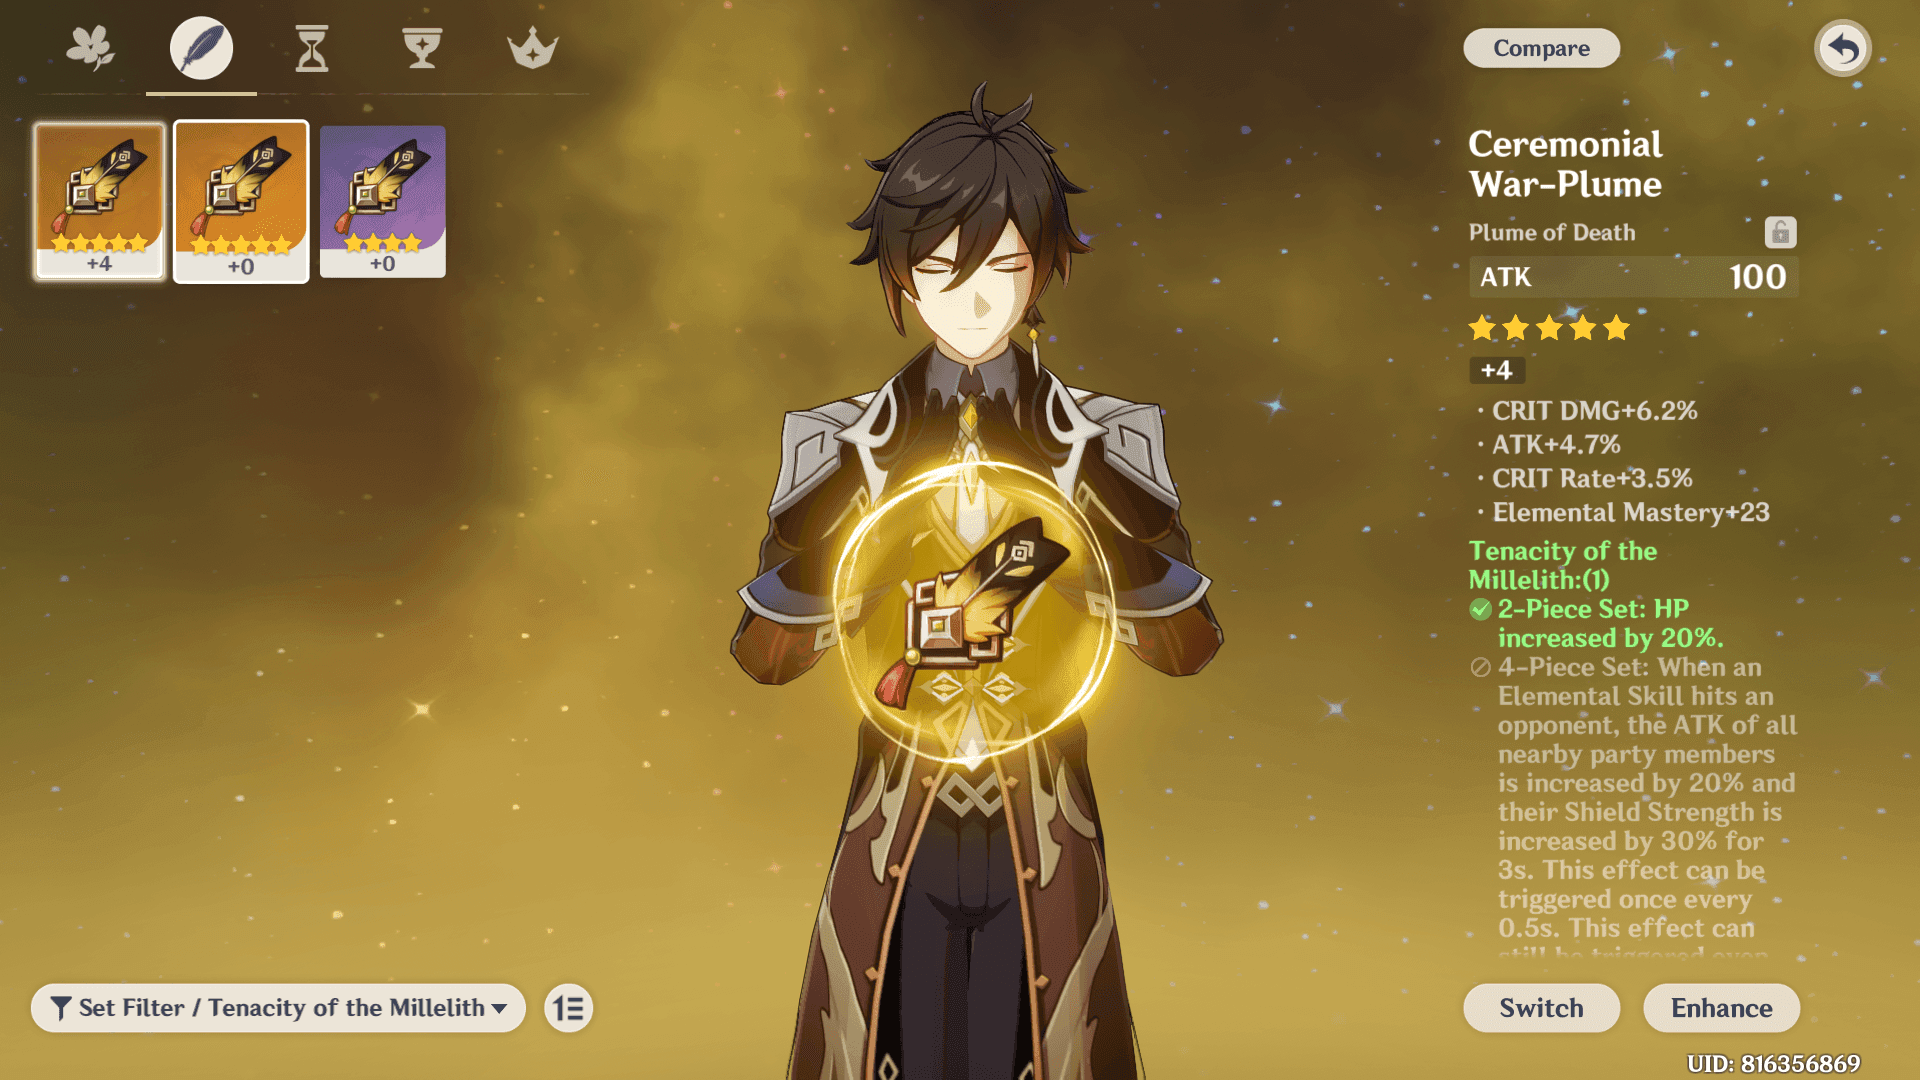
ToM's 2-piece gives a flat 20% HP boost, while the 4-piece has her Skill hits granting the party +20% ATK and +30% Shield strength for 3 seconds (and it triggers every 0.5 seconds even off-field). Stack it with TTDS, and you're looking at +68% total ATK without her needing to stay on-field. In Freeze comps, it snapshots on Ayaka's Burst for a 14-18% team DPS uplift. About 39.78% of folks in polls pick it for easy investment. Pull it from the Ridge Watch domain in Liyue. Main stats: HP% or ER on Sands, HP% on Goblet, Healing Bonus on Circlet; prioritize ER subs (180-220%) over HP%. Trigger it with her Skill every 0.5 seconds off-field, and mix in Hydro Resonance for that extra +25% HP.
Head-to-Head: OHC or Tenacity for Your Kokomi?
Who's Winning on Damage?
OHC shines by turning her overheals into Foam explosions (90% of healed HP, up to 27k every 3 seconds), perfect for on-field Taser runs where she lands 2-3 NAs during Burst. ToM, on the other hand, pumps team ATK buffs (+20% every 0.5 seconds) for off-field Freeze reactions. Based on community data, OHC pulls ahead by 30% in Bloom setups compared to ToM's 20% team-wide kick. OHC's upsides? It's versatile for co-op or Hydro-resistant enemies. Downsides: It caps at one Foam and thrives on overheal. ToM keeps it simple and cheap, but skimps on her personal damage and leans on team triggers. In Abyss tests, I've equipped OHC for solo DPS pushes (aiming for 35k HP), then swapped to ToM for buffing Ayaka or Shenhe teams—night and day.
Healing Showdown
Both sets amp her already S-tier healing (4.4% Max HP +424 per Skill tick). OHC's +15% Healing Bonus juices up her Burst heals (0.81% Max HP per hit), while ToM's +20% HP boost gets amplified by resonance. OHC converts overheals straight to damage; ToM throws in shields for extra tankiness. With OHC, you keep 100% bubbles bubbling in rotations; ToM handles sustain without forcing on-field NAs. Build to 35k+ HP either way. In practice, lead with Skill for ToM triggers, then Burst for OHC Foam buildup. For EM-light teams, a hybrid 2-piece (ToM + OHC) nets +20% HP and +15% Healing—solid middle ground.
How They Fit Your Squad
OHC clicks with Nahida in Bloom teams (grab EM from Gilded Dreams) for those off-field ticks. ToM loves TTDS for +68% ATK in Freeze (think Ayaka and Kazuha). OHC needs some field time to stack; ToM hums along off-field. Take Nilou Bloom (Kokomi/Nilou/Nahida/Traveler) for core gen with OHC, or Double Cryo (Ayaka/Shenhe/Kokomi/Kazuha) with ToM for buffs. Quick rule: On-field play? OHC. Off-field support? ToM. Tweak ER to 130-160% for OHC DPS, 200%+ for ToM. In Dendro teams sans Deepwood, mix 2-piece sets.
Smoothing out your progress? Hit up Genesis Crystals online purchase on BitTopup—fast top-ups, secure deals, support for all servers, top-notch service, great prices, and instant delivery to keep things hassle-free.
Unpacking Thrilling Tales of Dragon Slayers (TTDS)
The Basics and How to Get It
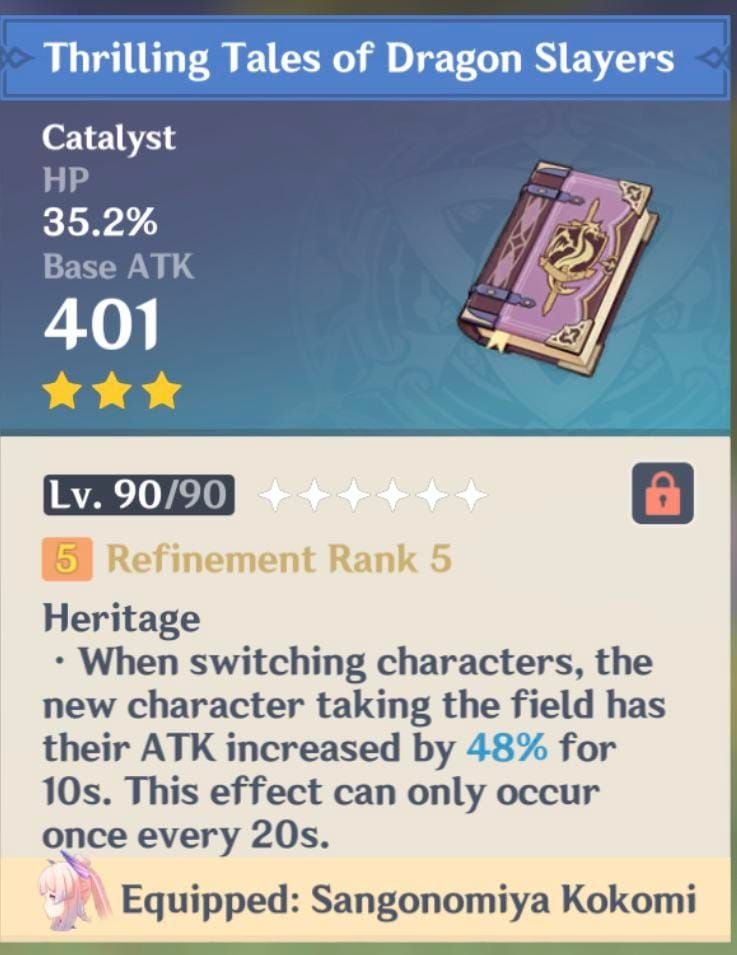
TTDS is your trusty 3-Star Catalyst: 401 Base ATK, 35.2% HP substat, and it hands a +48% ATK buff to the next character on swap (10 seconds long, 20-second CD at R5). It juices Ayaka's normals by 14-18% in Freeze. Craft it from blueprints or snag via gacha; refine to R5 for peak performance. If you're ER-hungry, Prototype Amber (41.3% HP, regenerates 4 ER every 2 seconds post-Burst) steps in nicely. Refine that to R5 too, and use it on Kokomi for Skill-then-swap flows.
Making Those Swaps Count
TTDS snapshots on Burst users like Fischl, holding the buff even after swaps. It squeezes rotations into 10-second windows, teaming up with ToM for that +68% ATK total. Polls put it at 41.3% preference; Prototype pulls ahead in drawn-out fights with 22-second Burst cycles. Slot it into quick rotations—like a 25-second Sukokomon: Skill, then swap to Xiangling. Steer clear of ER-heavy teams; pair with Sacrificial Fragments for Skill resets.
Nailing TTDS Swap Windows in Your Rotations
Smart Timing Tricks
Sync TTDS's 20-second CD to your rotation: Swap right after Skill to give your DPS the full 10 seconds (say, Ayaka's Burst in Freeze). In 25-second cycles, slide it in late for snapshotters like Beidou. The buff hits on switch and sticks for 10 seconds—picture Kokomi Skill, then Fischl Burst for Electro-Charged sustain. Kick off with Fischl Skill > Kokomi Skill > swap to Xiangling (buff live). Mid-cycle: Kokomi Burst plus 2 NA chains > swap to Sucrose. Wrap it by aligning with the CD for repeats, locking in 100% Skill uptime through refreshes.
Funneling ER Like a Pro
Shoot for 200-250% ER off-field to nail that 80-cost Burst; funnel it with Prototype or her Skill particles (every 2 seconds). ER Sands shine in non-battery teams; Sacrificial Fragments resets Skill for extra particles, dropping needs to 160%. Example funnel: Hydro Resonance plus Yelan for a partial battery. Skip Favonius if Crits aren't landing; target 170-220% overall.
Pitfalls to Dodge
Swapping mid-DPS? It kills your field time—wait for the full 10 seconds on normals. Overlooking ER leads to Burst droughts; test with 22-second cycles. In Bloom, EM can overshadow TTDS—save it for ATK boosts in Freeze.
Your Step-by-Step Kokomi Build Blueprint
Where to Farm Artifacts
Hunt OHC in Slumbering Court on Seirai Island; ToM from Ridge Watch in Liyue. Burn 55 Resin for drops like the Sea-Dyed Blossom (fixed HP Flower). Hit AR 45 for Strongbox crafting. Chase substats hard: Up to 4 rolls per piece (HP%, ER, EM). For hybrids, 2pc ToM + 2pc OHC balances HP and Healing.
Weapon Options Beyond the Best
BiS is Everlasting Moonglow (49.6% HP, +20% Healing, post-Burst ER regen). F2P picks: Prototype Amber or TTDS. Bloom lovers? Mappa Mare (110 EM, +16% DMG after reactions). Craft Prototype with billets. Refine TTDS to R5 for support roles. Ditch Crit weapons; Hakushin Ring amps Electro-Charged (+20% DMG).
Talent Leveling Order
Top priority: Skill (★★★★★, 109.2% Ripple DMG + heals) over Burst (★★★★, NA buffs by 4.8% HP) over NA (★★★, 224.2% combo). Stock up on 93 Spectral Nucleus and 18 Hellfire Butterfly from Signora. Max Skill for that off-field turret (Hydro every 2 seconds, no ICD). Pump Burst for 10-second duration and walk-on-water vibes. NA gets love for on-field: N2C cancels speed things up.
Team Setups That Highlight Kokomi's Hybrid Power
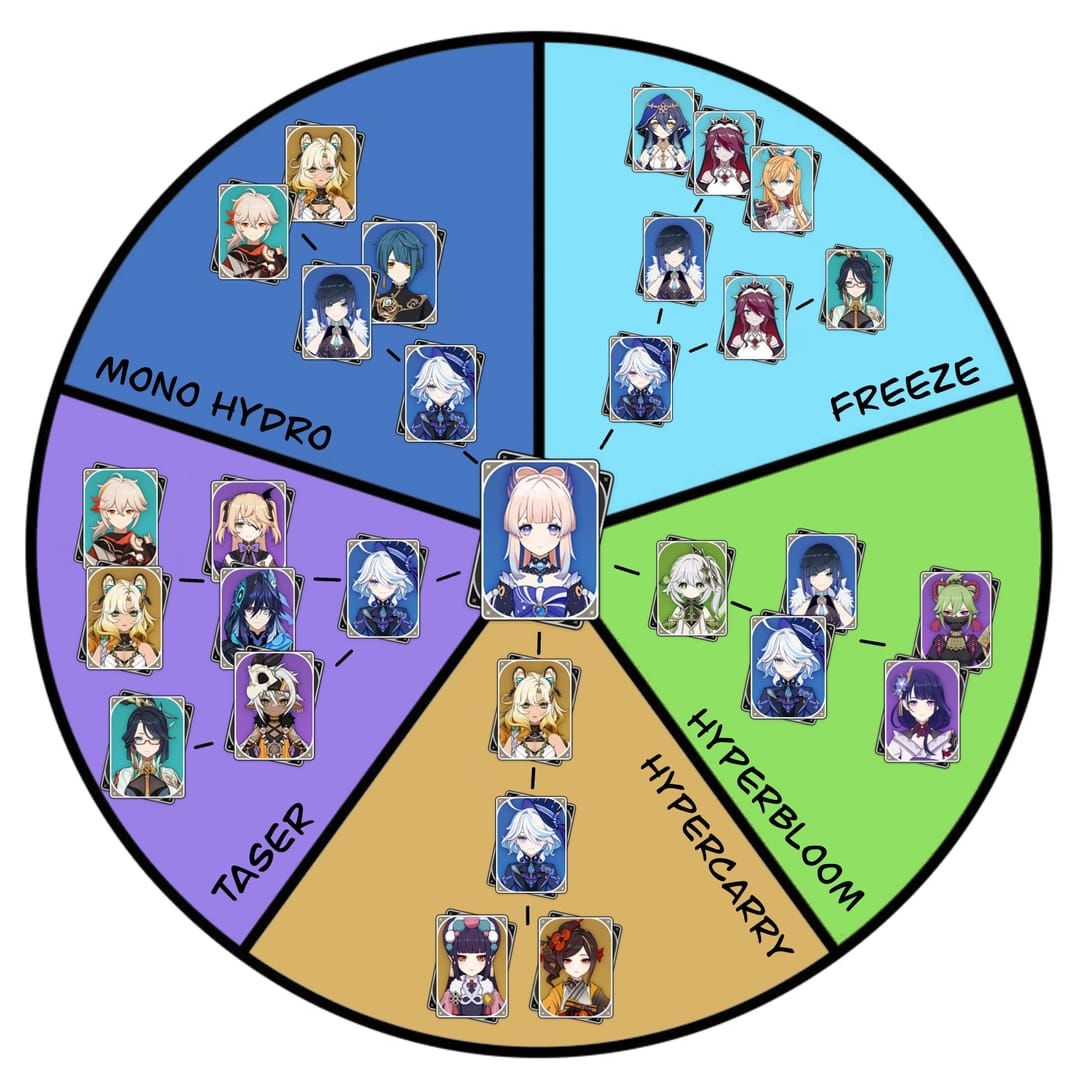
Vaporize with TTDS Twists
Kokomi/Fischl/Sucrose/Xiangling: TTDS supercharges Xiangling for over-vape; OHC adds Electro-Charged punch. Kokomi leads with Burst NAs. Rotation: Skill > TTDS swap to Xiangling Burst. Hit 200% ER; her heals counter vaporize DoT.
Freeze Squads Loving OHC
Ayaka/Shenhe/Kokomi/Kazuha: OHC for her on-field sub-DPS; ToM as a buff swap-in. Wide Hydro locks in Freeze. Kokomi Skill > Kazuha Burst > Ayaka normals (TTDS buffed). ER at 180%; C1 tacks on 30% HP to fish DMG.
Tweaking the National Team
Kokomi/Beidou/Fischl/Xiangling (Sukokomon): OHC Kokomi subs as DPS with TTDS swaps. A 25-second rotation cranks high Electro-Charged. Fischl Skill > Kokomi Skill/Burst + NAs > Xiangling Burst. ToM triggers +20% ATK every 0.5 seconds.
Measuring Up: Performance and Tests
What to Watch For
Keep tabs on healing (35k HP goal: 2 heals per second with cancels), DPS (OHC ticks at 7.7k/s), and ER (220% for uptime). Key metrics: Burst every 22 seconds; +14% team DPS from TTDS.
Genshin Optimizer and Such
Plug in your stats for sims: OHC gives a 30% personal boost, ToM 20% team-wide. Run rotation tests for 100% jellyfish uptime.
Real Abyss Runs
OHC Kokomi speeds through Freeze floors with 27k Foams; ToM keeps Taser steady for 9-star clears. Her last rerun? Version 3.8 Phase 2 (July 25–August 15, 2023)—figure 1-2 per year.
Keeping Kokomi Meta-Relevant: Updates and Shifts
How Patches Shake Things Up
Since 3.0, Hydro Resonance's +25% HP supercharges her scaling; 4.0 left artifacts untouched, but Fontaine events eased farming. OHC stays king for hybrids post-Dendro.
Building for the Long Haul
Chase C1 (★★★, fish DMG) and C4 (★★★★, +10% NA speed + ER per hit) for smoother rotations. ER funnel with shields for tough content.
What the Community Says
Polls lean Prototype over TTDS (58.7%) for reliability; OHC adapts to meta twists like a champ. (Editor's take: It's held up through Dendro chaos—versatile picks win.)
For deeper dives, check our Genshin Impact Kokomi Complete Build Guide and Best Healers in Genshin Impact.
FAQs: Quick Fixes for Kokomi Woes
What's the top artifact set for Kokomi as a Healer-DPS in Genshin Impact?
OHC takes the crown for hybrid output, flipping overheals into 90% DMG ticks (up to 30k cap) in on-field Bloom or Taser. ToM suits off-field support with +20% team ATK every 0.5 seconds. Pick OHC for personal DPS (60% community fave); mains are HP%/Hydro DMG/Healing Bonus, targeting 35k HP and 180% ER.
OHC vs. Tenacity—how do they stack up for Kokomi?
OHC dominates damage (Foam pops at 7.7k/s) and healing (+15% Bonus), but demands field time. ToM dishes team buffs (+68% with TTDS) sans swaps, ideal for Freeze. OHC wins on reaction versatility; its con is the one-Foam limit. ToM's easy sustain shines—use it in Ayaka teams for 14-18% DPS gains. (Subjective note: OHC feels more fun if you like her on-field flair.)
When's the right time to swap TTDS on Kokomi?
After Skill, to buff DPS for the full 10 seconds (like late in a 25-second Sukokomon to Xiangling's Burst). Match the 20-second CD to cycles; for snapshotters like Fischl, hit it pre-Burst. Don't swap mid-DPS to avoid ER issues—max field time, and Prototype Amber cuts Burst needs to 22 seconds.
Can Tenacity of the Millelith work for Kokomi DPS?
Absolutely, especially off-field hybrid in Freeze (Ayaka/Shenhe/Kokomi/Kazuha), with +20% ATK every 0.5 seconds via Skill and +68% total via TTDS. It lags on personal DPS compared to OHC, but it's a low-investment beast—prioritize 200%+ ER and HP Goblet for scaling.
ER needs for Kokomi with OHC?
Aim 180-220% off-field for reliable 80-cost Bursts; drop to 130-160% on-field thanks to Everlasting Moonglow's regen (0.6 ER/0.1s). Stack it with ER Sands, subs, and Skill particles; Sacrificial Fragments adds resets in non-Hydro crews.
Does TTDS hold up in end-game teams for Kokomi?
Yep, shines in tight rotations like National (Kokomi/Fischl/Beidou/Xiangling), where +48% ATK snapshots on Bursts for 14-18% team DPS. It's Abyss gold for fast clears; pair with ToM, swap to Prototype for marathons, and R5 refine for max bang.