

Master the Serenitea Pot housing system with comprehensive blueprint acquisition strategies, optimal Adeptal Energy farming techniques, and efficient realm currency generation methods.
Getting Started: Serenitea Pot Basics That Actually Matter
What You Need to Unlock This System
Here's the deal – you'll need Adventure Rank 35, completion of Archon Quest Chapter 1 Act 3: A New Star Approaches, and that world quest A Teapot to Call Home with Madame Ping. Pretty straightforward stuff.
The system runs on three core mechanics that'll make or break your experience. Adeptal Energy determines how much realm currency you generate (we're talking 4-30 per hour across 10 different tiers). Trust Rank unlocks new areas and features – think of it as your housing progression system. And Load limits? They're basically your furniture placement budget.
Blueprint Rarity Breakdown
This part's crucial for planning your crafting queue. 2-Star (Green) blueprints give you 30 Trust EXP and take 12 hours to craft. 3-Star (Blue) bump that up to 60 Trust EXP with 14-hour crafting times. 4-Star (Purple) blueprints are your heavy hitters – 90 Trust EXP but they'll tie up your crafting slot for 16 hours.
Here's something the game doesn't tell you clearly: each blueprint only gives Trust EXP the first time you craft it. You'll see blue icons marking uncrafted blueprints. Materials like Fabric and Dyes? Those craft instantly through Tubby. Wood and ores require actual world gathering – which honestly becomes a bit of a grind.
Adeptal Energy: The Foundation of Everything
Ten energy tiers ranging from Bare-bones (0-299 energy, measly 4 currency/hour) all the way up to Fit for a King (20,000+ energy, maximum 30 currency/hour).

Critical point here – only your highest-energy realm contributes to currency generation. Not the combined total. This changes everything about how you should approach layout planning.
Load limits use those colored indicators (green, orange, red) as your primary constraint for furniture placement. Think of Load as your furniture budget for each area.
Where to Actually Find Every Blueprint
Tubby's Shop: Your Weekly Routine
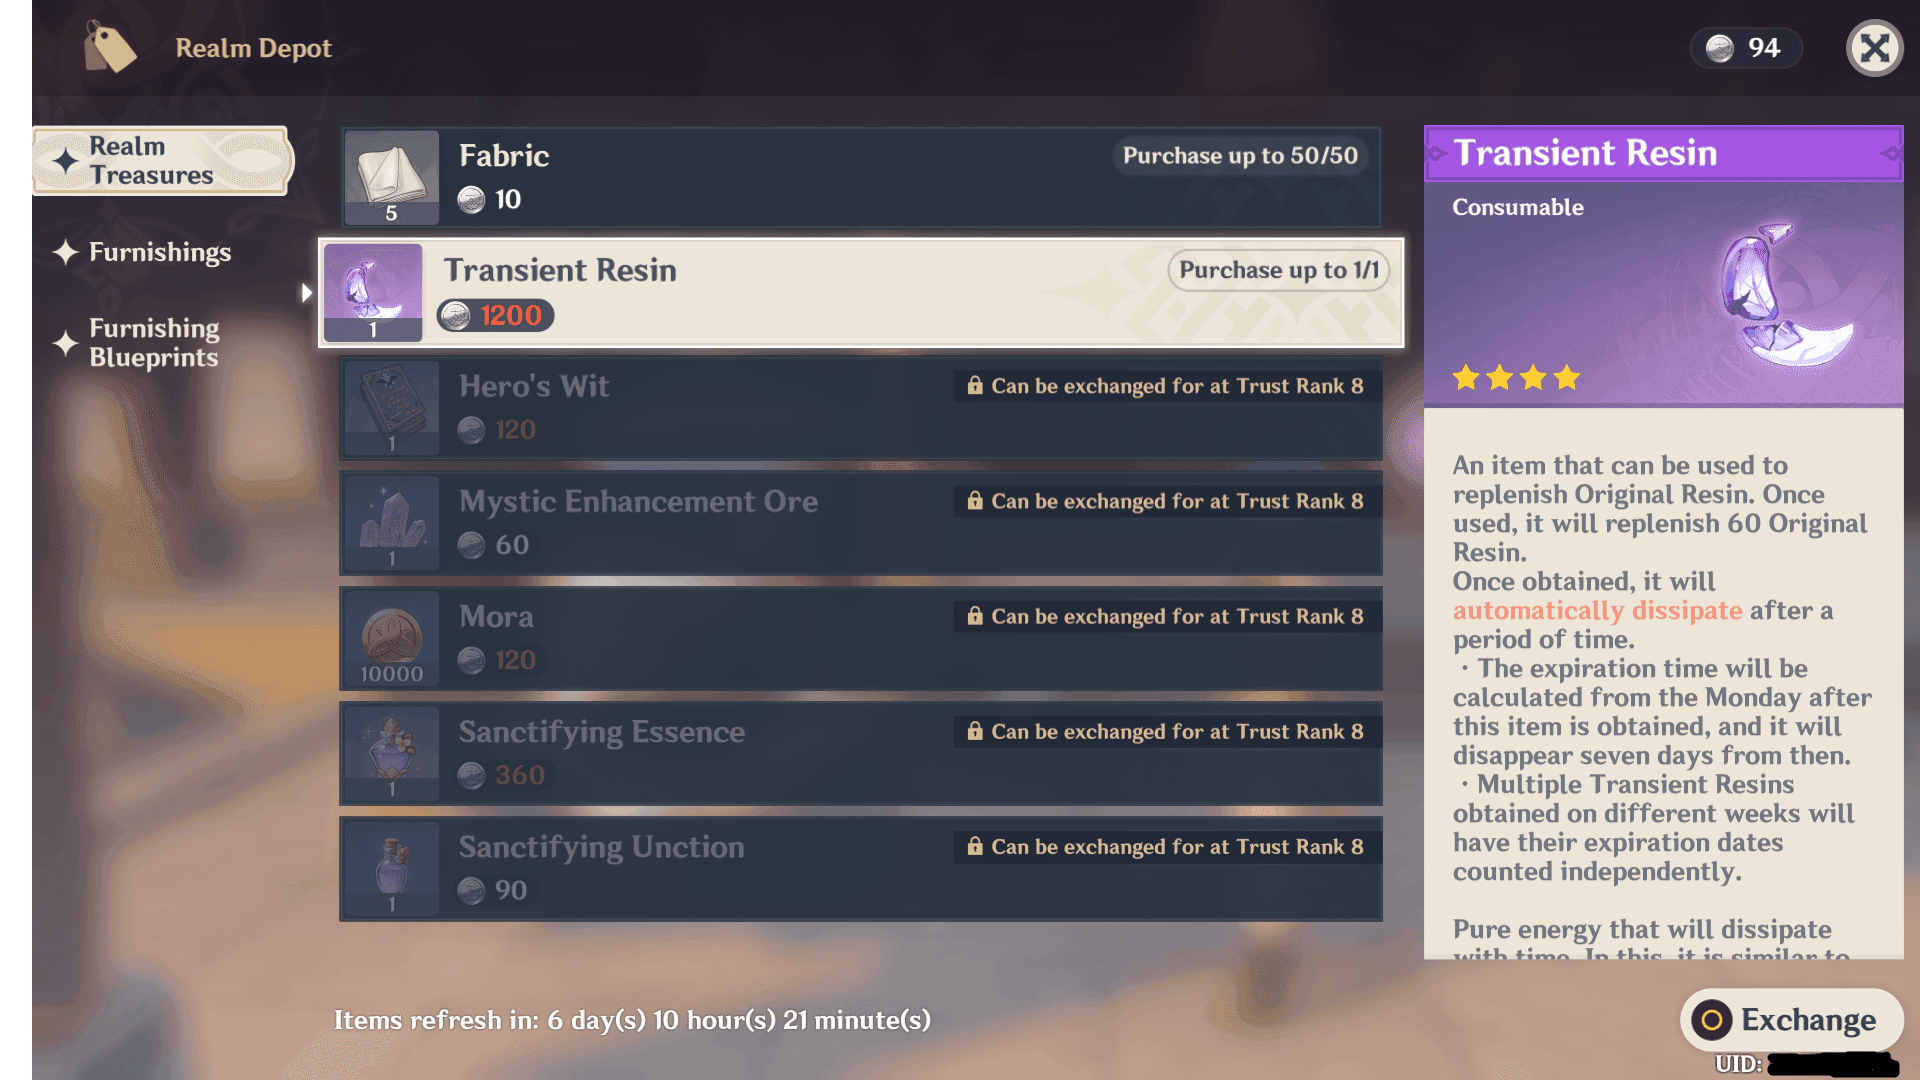
The Realm Depot rotates blueprints you can buy with Realm Currency. My recommendation? Always grab those 5 daily Vial of Adeptal Speed items first – they're game-changers for progression. Then focus on new blueprints.
Weekly shopping list includes Transient Resin (1 for 1,200 currency – actually decent value), Hero's Wit (20 for 30 each), Mystic Enhancement Ore (20 for 10 each), and Mora (10,000 for just 10 currency, which is honestly pretty generous).
Secret Vendors Most Players Miss
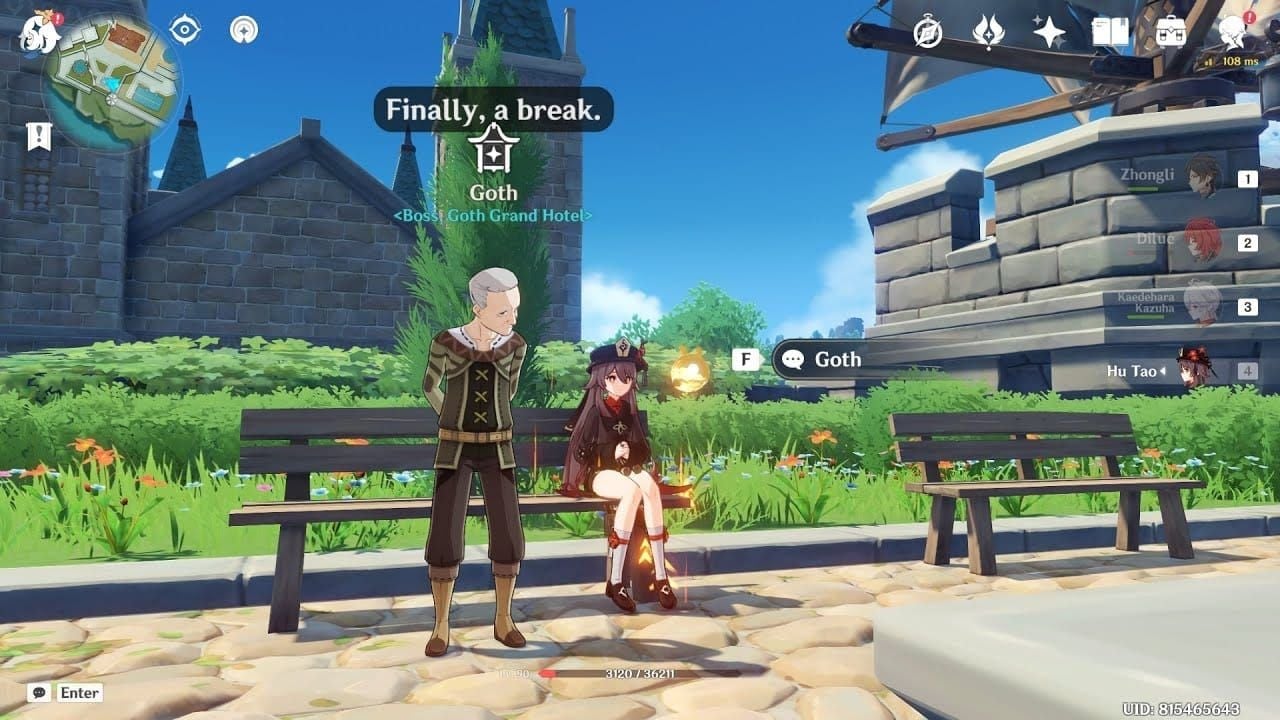
Goth hangs out in southern Mondstadt City from 8:00 AM to 5:00 PM. He's selling Deadwood Road Sign (25,000 Mora), Lightning Protective Tent (50,000 Mora), Simple Single-Person Tent (50,000 Mora), and Adventurer Camp (50,000 Mora). Those prices sting early game, but these blueprints are exclusive to him.
Master Lu in Qingce Village (daytime only) offers The Adventurer's Burdens (25,000 Mora), Lone and Cautious Adventurer (50,000 Mora), and Dialogue Twixt Ancient Tree and Rock (50,000 Mora).
Pro tip: if these NPCs aren't showing up, check your in-game time. They're strict about their business hours.
Event Blueprints: Don't Miss These
Adeptal Mirror events provide 'Tea Talk' set blueprint and 'Assiduous Calligraphy' blueprint for Round 1 completion. These events are your best source for unique blueprints.
Remarkable Chests in Inazuma – especially on Tsurumi Island – contain blueprints you literally cannot get anywhere else. Missing event blueprints creates permanent gaps in your collection, which drives completionists crazy.
Fish-for-Blueprints Vendors
Jiawei in Liyue Harbor and Loumelat in Port Ormos (Sumeru) will trade 'Pool of Sapphire Grace' and 'Shaded Charity' blueprints for 10 Medaka fish each. Honestly, fishing 20 Medaka is way easier than farming thousands of Mora for other vendors.
The Inazuma Souvenir Shop unlocks at Sacred Sakura Level 50 – that's a serious time investment. But you'll get Simple Otogi Workshop (5 Electro Sigils), Scarlet Torii Gate (10 Sigils), Maple Wood White Kitsune (10 Sigils), and Ancestral Sword Rack (20 Sigils).
Mastering Adeptal Energy: The Numbers Game
Understanding the Tier System
Let me break down these energy tiers because they're not intuitive:
Bare-bones (0-299, 4/hour) – basically useless Humble Abode (300-599, 8/hour) – still pretty weak
Cozy (600-899, 12/hour) – getting somewhere Queen's Size (900-1199, 16/hour) – decent progress Elegant (1200-1599, 20/hour) – solid tier Exquisite (1600-1999, 22/hour) – good stuff Extraordinary (2000-2999, 24/hour) – very respectable Stately (3000-4999, 26/hour) – excellent Luxury (5000-19999, 28/hour) – top tier Fit for a King (20000+, 30/hour) – maximum efficiency
Your storage capacity scales with Trust Rank from 300 at the start to 2400 at Rank 10. That's actually a huge quality-of-life improvement.
Furniture Efficiency vs. Aesthetic Sets
Here's where strategy gets interesting. Pine Folding Screen: Billowing Sails gives you optimal energy-to-Load ratio for just 12 Pine Wood, 3 Fabric, and 3 Red Dye per unit. For outdoor spaces, Stone Lion Statues (12 White Iron Chunk each) are your best bet.

Spamming high-value items beats completing furniture sets for pure energy generation. I know it looks boring, but the math doesn't lie.
Realm Layout Strategy
You unlock three realm layouts total: your initial choice (Floating Abode/Emerald Peak/Cool Isle), a second at Trust Rank 8, and a third at Trust Rank 10. Newer layouts like 'Swirling Isles' cost 1,000 Realm Currency.
Placement limits are 200 different furnishing types per area and 99 copies of the same furnishing per area. That's actually quite generous once you understand the system.
Blueprint Priority: What to Craft First
The Trust EXP Hierarchy
Always prioritize 4-Star blueprints (90 Trust EXP), then 3-Star (60 EXP), then 2-Star (30 EXP). The progression gates are real: Rank 5 gets you Exterior Area 2, Rank 7 unlocks Exterior Area 3 plus a second mansion, and Rank 9 gives you 8 character companions and 5 creation queue slots.
Each rank-up rewards 60 Primogems plus additional goodies. That adds up fast.
Smart Currency Management
Purchase order that actually makes sense: grab those 5 daily Vials of Adeptal Speed first (seriously, these are crucial), then new blueprints, then weekly limited items if you have currency left over.
Skip easily obtainable items like Fabric – you can craft that stuff yourself. Weekly priorities should be Transient Resin (significant resin value), Hero's Wit and Mystic Enhancement Ore (consistent character progression), and wood purchases only if you're feeling lazy about farming.
For players looking to enhance their Genshin Impact experience with additional Genesis Crystals, Buy Genesis Crystals Online through BitTopup offers competitive pricing and instant delivery, ensuring optimal Serenitea Pot progression without resource constraints.
Daily Workflow That Works
Collect Realm Currency and Bounty immediately to prevent hitting the cap. Purchase daily Vials and any new blueprints. Use those Vials on 4-Star blueprints for maximum efficiency. Queue up new uncrafted items before logging off.
Weekend bonus: visit friends' Traveling Depot (Chubby shows up Friday 4:00 AM through Monday 4:00 AM) for unique inventory and easy Battle Pass completion.
Furniture Placement: Making Every Piece Count
Load Management Reality Check
Dynamic items like animals, characters, and lighting effects consume way more Load than static furniture. Interior and Exterior furnishings can't cross environments – the game's pretty strict about this.
Grid snapping and rotation give you precise positioning within area boundaries. My advice? Design one high-energy realm purely for currency generation, then maintain separate aesthetic realms for fun.

Space Optimization Tricks
Each area has independent Load limits, so you can strategically distribute furniture across multiple spaces. Exterior areas offer higher Load capacity than interior rooms – use this to your advantage.
Furniture removal returns items without penalty, so don't be afraid to experiment with layouts. And here's a time-saving tip: set those 14-16 hour crafts to start right before bed.
Character Companions: More Than Decoration
Character companions generate Companionship EXP as Realm Bounty after you complete the Idle Teapot Talk quest. You can place a maximum of 8 characters once you hit Rank 9.
Favorite Furniture Sets trigger special character interactions that reward Primogems, Mora, and character materials as one-time gifts. It's not huge, but free stuff is free stuff.
Trust Rank Progression: Your Roadmap to Success
Key Milestones Worth Knowing
The progression breaks down like this: Rank 1 gives you Exterior Area 1 and 1 Creation Queue slot. Rank 5 unlocks Exterior Area 2 and bumps currency storage to 1400. Rank 7 is huge – Exterior Area 3, second mansion, and 7 companion slots.
Rank 8 unlocks your second realm layout. Rank 9 gets you Exterior Area 4, 5 queue slots, and that 8th companion slot. Rank 10 finally unlocks the third realm layout.
Each advancement rewards 60 Primogems plus rank-specific items. The Primogem income alone makes this progression worthwhile.
Efficient Trust Farming
Craft every blueprint once, prioritizing those 4-Star items for maximum EXP value. Adeptal Mirror events provide structured progression with specific tasks and rewards – don't sleep on these.
Keep those creation queues active and use Vials to accelerate crafting. The time savings really add up over weeks of progression.
Currency Economics: Getting the Most Bang for Your Buck
Generation Rate Reality
Fit for a King status generates 30 currency per hour, maxing out at 720 daily. Storage limits mean you need to collect regularly for maximum efficiency.
The system generates both Realm Currency and Realm Bounty continuously, even when you're offline. Just don't let it cap out.
Purchase Strategy That Makes Sense
Optimal allocation starts with daily Vials (highest ROI for progression), then new blueprints to maintain crafting activity, then weekly limited items once you've established stable income.
Transient Resin converts currency to resin pretty effectively. Hero's Wit and enhancement materials support character progression without requiring additional farming time.
For players seeking to maximize Genshin Impact progression, Genshin Impact Top Up services from BitTopup provide secure Genesis Crystal purchases, complementing Serenitea Pot currency generation with instant premium resource access.
Weekly Earning Breakdown
Weekly resets include Transient Resin (1 for 1,200 currency), Hero's Wit (20 total for 600 currency), Mystic Enhancement Ore (20 total for 200 currency), and Mora (10,000 for just 10 currency).
Players hitting maximum generation rate (720 daily) accumulate 5,040 weekly currency. That covers all weekly purchases plus a healthy blueprint budget.
Advanced Layouts: Beyond the Basics
Energy Farming Setups
Pure energy farming uses repetitive Pine Folding Screen placement indoors or Stone Lion Statue grids outdoors. These approaches prioritize function over form for maximum currency generation.
Advanced players often dedicate entire realms to energy farming while maintaining separate aesthetic realms. It's not pretty, but it's effective.
Themed Design Approaches
The dual mansion system (unlocked at Trust Rank 7) enables complex themed designs across multiple buildings. You can create region-specific areas with Mondstadt, Liyue, or Inazuma themes while still achieving respectable energy through strategic high-value item selection.
Community Resources
The Teapot Replication system (added in Version 3.2) lets you share layouts through Replica IDs, though you need 90% blueprint ownership to use most replicas.
Community calculators provide energy calculations, Load management tools, and completion checklists. These are honestly essential for comprehensive progression planning.
Common Mistakes (And How to Avoid Them)
Blueprint Acquisition Pitfalls
Those secret vendors (Goth and Master Lu) only appear during daytime hours (8:00 AM-5:00 PM). If they're not there, manually adjust your in-game time.
The high Mora costs (25,000-50,000 per blueprint) can strain early-game finances. Plan accordingly.
Missing exclusive event rewards creates permanent collection gaps – there's currently no way to obtain these blueprints later.
Energy Optimization Errors
Furniture sets often reduce efficiency compared to spamming individual high-value items. Pine Folding Screen repetition consistently outperforms diverse set completion for pure energy generation.
Don't spread energy across multiple realms – only your highest-energy realm contributes to currency generation. Focus your efforts.
Layout Planning Mistakes
Insufficient Load management limits your energy potential. Animals and characters consume disproportionate Load compared to static furniture.
Neglecting Trust Rank progression limits area access and creation queue slots, which seriously hampers your efficiency.
Tools and Resources for Blueprint Tracking
Community Calculators and Trackers
Third-party tools provide Adeptal Energy calculations and Load management assistance that the game sorely lacks. Blueprint collection trackers help maintain completion status across all sources.
Integration with Trust Rank calculators enables comprehensive progression planning. These tools are honestly game-changers for serious teapot builders.
Systematic Collection Approach
Cover all sources systematically: Realm Depot rotations, secret vendors, fishing associations, souvenir shops, events, and exploration rewards.
Regional organization helps track location-specific requirements like Sacred Sakura Level 50 for Inazuma shop access.
For enhanced Genshin Impact experience while building your perfect Serenitea Pot, Cheap Genshin Top Up options from BitTopup ensure premium content access without budget constraints, featuring competitive rates and reliable service.
Staying Updated
Version updates regularly introduce new blueprints, realm layouts, and system modifications. New layouts like Fontaine's 'Swirling Isles' require currency reserves for immediate access.
Patch analysis helps identify blueprint additions and vendor changes that affect collection strategies. Stay informed to avoid missing limited-time opportunities.
Frequently Asked Questions
How do I unlock all Serenitea Pot blueprints in Genshin Impact? You'll need to hit multiple sources: purchase rotating items from Tubby's Realm Depot, visit secret vendors Goth (Mondstadt) and Master Lu (Qingce Village) during daytime hours, exchange fish with Fishing Association members, buy from regional souvenir shops after meeting unlock requirements, participate in limited events, complete Adeptal Mirror challenges, and discover Remarkable Chests throughout the world.
What's the maximum Adeptal Energy possible in Serenitea Pot? Fit for a King tier starts at 20,000 Adeptal Energy and provides maximum 30 currency per hour generation. You can achieve this through strategic Pine Folding Screen placement indoors or Stone Lion Statue grids outdoors, optimized within Load constraints across multiple areas.
How does Adeptal Energy actually affect realm currency generation? The system uses ten tiers from Bare-bones (0-299 energy, 4/hour) up to Fit for a King (20000+ energy, 30/hour). Only your single highest-energy realm contributes to generation – not combined totals. This makes focused optimization way more effective than spreading efforts across multiple layouts.
Where can I find those rare blueprints everyone talks about? Check secret vendors Goth and Master Lu (daytime only, 25,000-50,000 Mora each), Fishing Association members (10 Medaka fish trades), Inazuma Souvenir Shop (requires Sacred Sakura Level 50, costs Electro Sigils), limited-time events, and Remarkable Chests in newer regions like Inazuma and Sumeru.
What furniture gives the most Adeptal Energy per Load space? Pine Folding Screen: Billowing Sails (costs 12 Pine Wood, 3 Fabric, 3 Red Dye) for indoor areas, Stone Lion Statues (12 White Iron Chunk each) for outdoor spaces. Spamming identical high-value items maximizes energy within Load constraints better than diverse furniture arrangements.
How do I calculate optimal furniture placement for energy generation? Balance Adeptal Energy output against Load constraints across all available areas. Each area has independent limits (200 different furniture types, 99 copies per type maximum). Prioritize 4-Star furnishings, utilize all unlocked areas efficiently, and focus one entire realm purely for energy farming while keeping others for aesthetics.