

Radiant Moonfly Overview: Location, Requirements & Basic Info
Boss Location and Map Coordinates
So you’re hunting for this thing? Good luck finding it initially. The Radiant Moonfly lurks in an underground cave system on Hiisi Island - that’s in Nod-Krai, Snezhnaya’s newest region dropping September 10, 2025.

This isn’t just a walk up and fight situation. You’ll need to solve environmental puzzles just to access the cave entrance. Once you’re in? The arena’s cramped. Really cramped. Which means you’re stuck in close quarters with a boss that loves applying party-wide debuffs. Fun times.
Adventure Rank and World Level Requirements
Minimum Adventure Rank 28, plus you need either Mondstadt’s Prologue: Act III or Liyue’s Chapter I: Act III completed. Pretty standard stuff.
But here’s what matters: World Level 8. Don’t even think about serious farming below this. Why? Because WL8 guarantees those sweet 5-star artifact drops and optimal ascension material rates. Trust me, your resin efficiency will thank you later.
Resin Cost and Respawn Timer
40 Original Resin per kill. No, you can’t use Condensed Resin - I tried. The silver lining? That 10-second respawn timer is actually incredible for back-to-back farming sessions.
Quick math: Lauma needs 46 materials for full ascension. That’s 1,840 Resin total, or about 12-15 days of natural regen. Alternatively, burn through 31 Fragile Resin if you’re impatient like me.
Radiant Moonfly Drops and Rewards Analysis
Character Ascension Materials Drop Rates
One thing, one character: Lightbearing Wings for Lauma. That’s it for now.
The drop rate’s roughly 1:1 per kill once you hit level 30+, so no RNG nightmare here. Just pure resin investment. Lauma’s a 5-star Dendro Catalyst user, by the way - her kit revolves around enhancing Bloom reactions through something called Lunar-Bloom mechanics.
Artifact and Mora Rewards
At World Level 8, you’re guaranteed 5-star artifacts from the usual suspects (Gladiator’s Finale, Wanderer’s Troupe) plus two new sets that actually matter:
Silken Moon’s Serenade: +20% ER, +60/120 party EM
Night of the Sky’s Unveiling: Synergizes with Lunar Reactions
These new sets are specifically designed for the enhanced elemental interactions coming with Version 6.0. Worth farming even if you’re not building Lauma immediately.
Which Characters Need These Materials
Currently? Just Lauma. But her investment requirements are substantial - we’re talking 7+ million Mora, 418 Hero’s Wit, 168 Moonfall Silver, plus 18 weekly boss drops on top of those 46 Lightbearing Wings.
Her Lunar-Bloom mechanic converts standard Bloom reactions into guaranteed crits with fixed 15% CRIT Rate and 100% CRIT DMG. Interesting kit, but expensive to build properly.
Combat Mechanics and Attack Patterns Guide
Phase 1: Initial Assault Patterns
Three core attacks to memorize:
Forward Flying Kick: 0.8-second telegraph, decent damage
Projected Blade Slash: Ranged energy projectile, easy to dodge
Swift Double Kick: Rapid combo, animation canceling helps
But here’s the real problem - that party-wide debuff. It reduces your damage by 40%, cuts incoming healing by 40%, sets your Crit Rate to zero, and causes percentage-based HP loss. Brutal stuff.
Phase 2: Enhanced Abilities
Transformation hits at 70% HP. You’ll see spinning roundhouse kicks, rising uppercuts, ground shockwaves - the works.
Post-transformation brings the pain:
Diving Wing Smash: High-damage AoE that’ll one-shot squishies
Feather Projectile Barrage: 1.5-second telegraph, wide spread
Enhanced AoE Dive: Massive area denial
Dual Homing Energy Blasts: Consecutive targeted attacks
Shield Mechanics and Break Strategies
No traditional elemental shields here. The defensive mechanic is that debuff system I mentioned.
Here’s the key: heal affected characters to 100% Max HP to cleanse the debuff. Successfully doing this grants +15% Crit Rate and +50% Damage Dealt. That’s your damage window right there.
Pro tip: animation canceling works wonders. Dash cancels with Hu Tao, jump cancels with Claymore users - maximize those buff windows.
Best Team Compositions for Radiant Moonfly
Meta DPS Teams
Survival Focus: Bennett, Zhongli, Ganyu, Kazuha
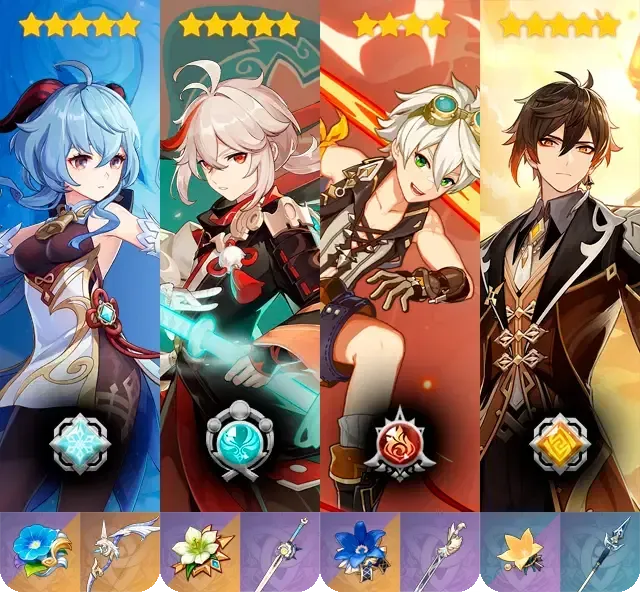
This is my go-to setup. Bennett provides rapid party healing (essential), Zhongli offers interruption resistance, Ganyu exploits that 10% Cryo resistance, and Kazuha enables resistance shred. Solid, reliable, effective.
Burst Strategy: Hu Tao, Kokomi, Sucrose, Thoma
Higher risk, higher reward. Hu Tao maximizes damage during those precious buff windows, Kokomi ensures reliable healing, Sucrose provides EM buffs, and Thoma contributes shielding plus Pyro Resonance.
F2P Friendly Compositions
Budget Team: Barbara, Noelle, Kaeya, Sucrose
Don’t let anyone tell you this boss requires 5-stars. Barbara offers consistent Hydro healing, Noelle provides backup healing and shields, Kaeya exploits Cryo effectiveness, Sucrose handles crowd control.
When building teams, consider securing adequate Genshin Top Up Deals to ensure your characters have sufficient resources for optimal performance.
Elemental Reaction Synergies
Here’s where it gets tricky. The boss has 70% resistance to both Pyro and Dendro, which severely limits reaction strategies.
What works: Freeze (Hydro + Cryo), Electrocharged (Hydro + Electro), Swirl-focused builds with Anemo characters.
What doesn’t: Lunar Reaction teams. I know, I know - thematically it makes sense, but that Dendro resistance kills the strategy.
Character Build Recommendations
DPS Character Optimization
Prioritize CRIT Rate and CRIT DMG for those buff windows. Here’s what I’m running:
Ganyu: Blizzard Strayer (4pc) with ATK%/Cryo DMG/CRIT DMG
Ayaka: Blizzard Strayer with Freeze synergy
Hu Tao: Crimson Witch (4pc) with HP%/Pyro DMG/CRIT Rate
Weapons should emphasize CRIT substats and high base ATK. No exceptions.
Support and Healer Builds
This is where the fight’s won or lost.
Bennett: HP% main stats with Energy Recharge substats
Kokomi: HP%/Hydro DMG/Healing Bonus with Ocean-Hued Clam (4pc)
Jean: Viridescent Venerer (4pc) with ATK%/Anemo DMG/CRIT Rate
Energy Recharge is crucial for healing burst availability. I cannot stress this enough.
Artifact Set Priorities
Healers: Ocean-Hued Clam (4pc) or Maiden Beloved (4pc)
DPS: Element-specific sets for damage windows
Support: Viridescent Venerer (4pc) for Anemo, Noblesse Oblige (4pc) for burst support
The new Silken Moon’s Serenade provides valuable ER and party EM for reaction teams. Worth considering for support builds.
Step-by-Step Combat Strategy
Pre-Fight Preparation
Team requirements checklist:
Dedicated healer with 100% HP restoration capability
Primary DPS using Hydro/Electro/Cryo/Anemo/Geo elements
Shield support for interruption prevention
Energy management through proper artifacts
Your healer needs 180%+ Energy Recharge minimum. Test this beforehand - don’t discover energy issues mid-fight.
Phase-by-Phase Tactics
Opening (100-70% HP): Maintain distance during debuff application. The moment that debuff hits, immediately switch to your healer.
Heal your primary DPS first for buff utilization, then execute your burst rotation during the buff window.
Transformation (70-40% HP): Use i-frames during the animation sequence. Position to avoid enhanced AoE attacks. Debuff frequency increases here, so prioritize healing multiple characters.
Final (40-0% HP): Maintain consistent healing rotation. Use environmental positioning. Focus on steady DPS over risky bursts. Keep emergency healing ready for damage spikes.
Emergency Recovery Strategies
Critical HP situations? Switch to healer immediately. Use burst healing over gradual restoration. Always prioritize DPS character healing first. And yes, food buffs actually matter for survivability here.
For optimization, explore Buy Genesis Crystals options for weapon and character enhancements.
Efficient Farming Routes and Schedule
Daily Farming Route Optimization
Here’s my optimal sequence: Start at Knuckle Duckle on Paha Isle (40 Resin), travel to Radiant Moonfly on Hiisi Island (45-second travel time), complete the encounter (40 Resin), repeat using that 10-second respawn timer.
Minimizes downtime while maximizing material acquisition. Simple but effective.
Weekly Schedule Integration
Monday-Wednesday: Radiant Moonfly focus (2-4 kills daily, 80-160 Resin)
Thursday-Friday: Alternate both Nod-Krai bosses (4-6 total kills, 160-240 Resin)
Weekend: Artifact domains and weekly bosses
Balances immediate needs with long-term progression. Adjust based on your specific character priorities.
Multi-Boss Route Planning
Route A (Lauma Focus): 70% resin allocation to Radiant Moonfly
Route B (Balanced): 50/50 split between new bosses
Route C (Efficiency): Include existing regional bosses for gemstone collection
Remember your daily regeneration: 180 natural + 60 from dailies = 240 total.
Common Mistakes and Pro Tips
Positioning Errors to Avoid
Critical Mistake #1: Standing too close during debuff application. Maintain medium range - you need that 0.8-second telegraph for healing reaction time.
Critical Mistake #2: Attempting the fight without proper healer investment. I’ve seen too many players with underbuilt healers wondering why they’re struggling. Test your healing output beforehand.
Critical Mistake #3: Using Pyro/Dendro main DPS. That 70% resistance isn’t a suggestion. Build secondary DPS options for flexibility.
Energy Management Tips
180%+ Energy Recharge on healers. Non-negotiable.
Use energy-generating weapons (Favonius series works wonders). Coordinate particle generation through skill rotations. Prepare energy before transformation phases - you’ll need it.
Time-Saving Techniques
Animation Canceling: Use dash/jump cancels during buff windows
Optimal Healing Priority: Always heal primary DPS first for damage buff utilization
Debuff Prediction: Learn to anticipate based on HP thresholds and attack patterns
For enhanced farming efficiency, Genshin Impact Top Up services provide necessary resources for optimal builds.
Co-op vs Solo Strategies Comparison
Solo Clear Advantages
Complete control over team composition and rotation timing. No waiting for other players’ questionable build choices.
Benefits: full character switching control, ability to pause and strategize, no dependency on others’ builds, consistent execution of practiced rotations.
Optimal setup: balanced team with healer, DPS, shield support, elemental enabler.
Co-op Team Coordination
Role specialization with enhanced communication requirements.
Player 1: Dedicated healer (Bennett, Kokomi, Jean)
Player 2: Primary DPS (Ganyu, Ayaka, Childe)
Player 3: Shield support and sub-DPS (Zhongli, Albedo)
Player 4: Elemental support (Kazuha, Sucrose)
Critical success factors: healer communicates debuff cleansing priority, DPS coordinates burst timing with buff windows, support maintains energy generation, everyone understands positioning for AoE avoidance.
Communication and Role Assignment
Pre-fight checklist:
Confirm roles and character selection
Establish debuff management protocol
Verify healer build capability
Plan emergency protocols
During combat: call out debuff applications, coordinate burst timing, alert to transformation phases, manage energy sharing.
Frequently Asked Questions
What does Radiant Moonfly drop in Genshin Impact?
Lightbearing Wings (Lauma’s ascension material), various gemstones, 5-star artifacts including those new Silken Moon’s Serenade and Night of the Sky’s Unveiling sets, plus the usual Mora and EXP. You need 46 Lightbearing Wings for full Lauma ascension - that’s 1,840 Resin across 46 kills.
Where is Radiant Moonfly located in Genshin Impact?
Underground cave system on Hiisi Island in Nod-Krai, Snezhnaya. Requires puzzle-solving for access. Available with Version 6.0 on September 10, 2025. Need Adventure Rank 28 and early Archon Quest completion.
What are the best teams to fight Radiant Moonfly?
You absolutely need a dedicated healer (Bennett, Kokomi, Jean) with non-Pyro/Dendro DPS due to that brutal 70% resistance. I recommend Bennett/Zhongli/Ganyu/Kazuha for survival or Hu Tao/Kokomi/Sucrose/Thoma for burst strategy. The healer isn’t optional - that debuff will destroy you otherwise.
How often does Radiant Moonfly respawn?
10-second respawn timer after claiming rewards. Perfect for efficient back-to-back farming. Each kill costs 40 Original Resin (Condensed doesn’t work here).
What is Radiant Moonfly weak against?
10% resistance to Hydro, Electro, Cryo, Anemo, and Geo. 70% resistance to Pyro and Dendro. Main weakness? Healing characters to 100% HP cleanses the debuff and grants +50% DMG and +15% Crit Rate buff. That’s your damage window.
How much Resin does Radiant Moonfly cost?
40 Original Resin per kill (Condensed unusable). Full Lauma ascension requires 1,840 total Resin - equivalent to 12-15 days of natural regeneration or 31 Fragile Resin. Guarantees 5-star artifacts at World Level 8, so there’s that.