

Understanding Lunar-Bloom Reaction Mechanics
Here’s where things get interesting. After years of Bloom reactions being purely EM-dependent, HoYoverse just flipped the script entirely.
Basic Reaction Formula
Lunar-Bloom triggers when you combine Dendro and Hydro with at least one Nod-Krai character in your party. But here’s the kicker—unlike traditional Bloom reactions that scale purely on EM and character level, Lunar-Bloom functions as direct damage. That means it benefits from CRIT Rate, CRIT DMG, and DMG% bonuses.
The damage calculation looks like this: [Base Core DMG + (Lauma's EM × 4.608)] × Resistance Multiplier × Level Multiplier. So if you’ve got 1000 EM on Lauma, you’re looking at Base Core DMG (5,632) + EM Bonus (4,608) = 10,240 base damage before multipliers.
Pretty substantial, right?
Damage Scaling Factors
Lunar Cores absolutely demolish standard Dendro Cores in every metric that matters:
Detonation Time: 1.2s vs 2s for standard cores (faster is better for aggressive positioning)
AoE Radius: 3.5m vs 2m (nearly double the coverage area)
Base Damage Multiplier: 1.7x standard Bloom damage
Additional Effects: Creates ‘Moon Eclipse’ fields that apply continuous Dendro DMG for 2s post-detonation
CRIT Capability: Can achieve critical hits and ignore enemy DEF
The enhanced cores also generate this resource called ‘Verdant Dew.’ When Lauma consumes up to 3 stacks via Hold Elemental Skill, she deals Lunar-Bloom damage equivalent to 1404% of her Elemental Mastery. Yeah, you read that right.
ICD and Elemental Gauge Interactions
The Moonsign system provides different buffs based on your party composition—and honestly, this is where team building gets really strategic. Nascent Gleam (one Nod-Krai character) grants standard Bloom, Burgeon, and Hyperbloom reactions 15% CRIT Rate and 100% CRIT Damage baseline.
Ascendant Gleam (two+ Nod-Krai characters) adds +10% CRIT Rate and +20% CRIT Damage specifically for Lunar-Bloom reactions.
Lunar Cores maintain a 6-second field duration but can initiate subsequent reactions through Electro or Pyro application, creating Hyperbloom or Burgeon variants with damage bonuses from the initial Lunar-Bloom trigger. The flexibility here is honestly impressive.
Best Characters for Lunar-Bloom Teams
Dendro Enablers Tier List
Lauma (5-Star Dendro Catalyst) is the undisputed queen of Lunar-Bloom. She’s got +115 EM ascension stat (totaling +315.2 with progression), but more importantly, her passive ‘Light for the Frosty Night’ automatically converts all party Bloom reactions into Lunar-Bloom while granting foundational CRIT capabilities.

Her Elemental Skill ‘Runo: Dawnless Rest of Karsikko’ creates Frostgrove Sanctuary lasting 15s with a 12s cooldown. The Hold variant? That’s where the magic happens—it consumes Verdant Dew stacks for substantial Lunar-Bloom damage while applying 25% Dendro and Hydro RES shred for 10s at Talent Level 10.
Legacy Dendro Characters received some significant updates too. Nahida’s C2 now provides +10% CRIT Rate and +20% CRIT DMG specifically for Lunar-Bloom reactions. Even Collei and Tighnari have updated talents that trigger off Lunar-Bloom reactions. (Editor’s note: Finally, some love for the older Dendro roster!)
Hydro Applicators Ranking
Aino (4-Star Hydro Claymore) emerges as Lauma’s ideal partner—and get this, she’s a free character you obtain upon reaching Nod-Krai. Her consistent Hydro application combined with her Nod-Krai origin enables Ascendant Gleam when paired with Lauma, providing that crucial +10% CRIT Rate and +20% CRIT Damage party-wide bonus.
Nilou maintains exceptional value through her passive creating Bountiful Cores, which convert to ‘Bountiful Lunar Cores’ that explode instantly with larger AoEs. Her updated C2 shreds enemy Dendro RES by 35% for 10s after dealing Bloom or Lunar-Bloom damage.
Kokomi and Furina provide sustained Hydro application with additional utility. Kokomi offers healing that’s crucial for managing Bloom self-damage, while Furina contributes Sub-DPS capabilities and party-wide buffs.
Support Character Options
Baizhu becomes absolutely essential in high-core generation teams. His updated talent increases Lunar-Bloom damage by 0.7% per 1,000 Max HP, reaching 35% damage bonus at 50,000 HP while providing crucial healing and shields. That’s some serious utility right there.
Kazuha excels as Anemo grouper and buffer, with EM sharing and Viridescent Venerer resistance shred amplifying reaction damage. As a non-Nod-Krai character, he contributes to the damage bonus system based on his EM stat.
For players seeking Genshin Top Up Online, BitTopup offers competitive pricing and instant delivery for Genesis Crystals, ensuring efficient optimal Lunar-Bloom team building.
Top Lunar-Bloom Team Compositions
Premium Meta Teams
Lauma + Aino + Furina + Kazuha represents the premier composition, maximizing buffs, resonance, and elemental coverage. This activates Ascendant Gleam through two Nod-Krai characters while benefiting from non-Nod-Krai damage contributions.
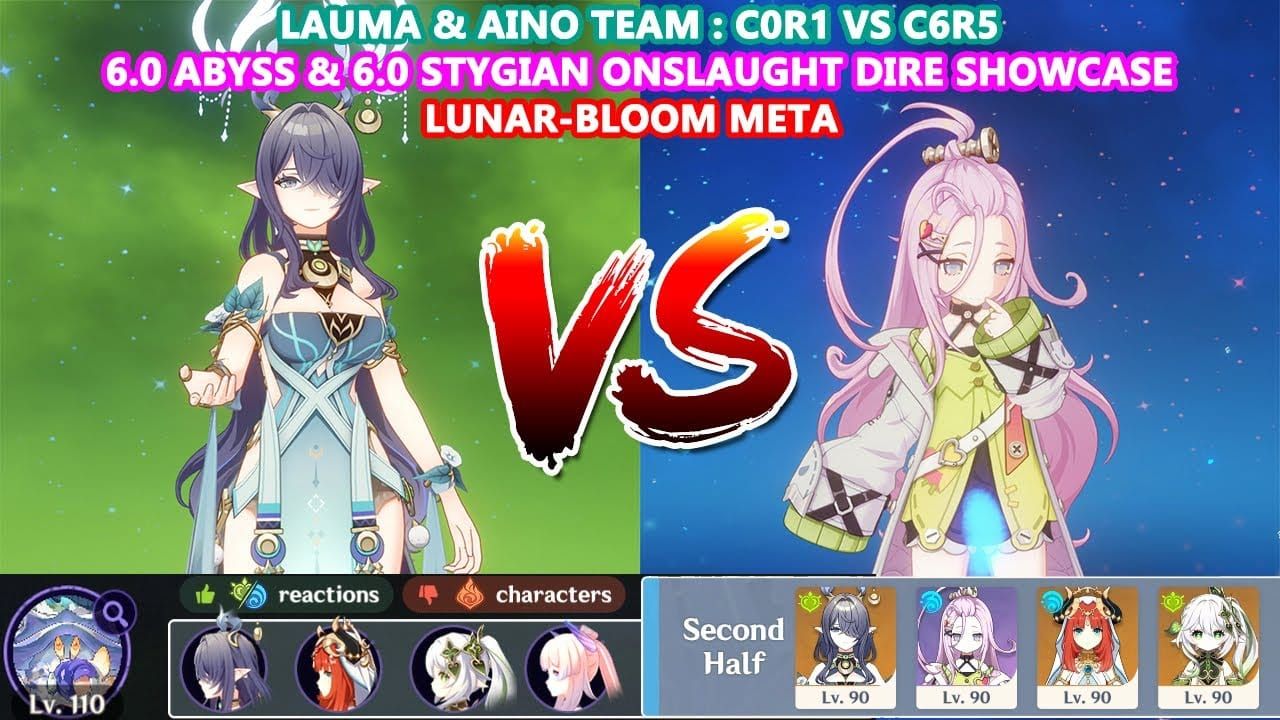
The rotation flows like this: Kazuha E→Q for grouping/VV shred → Furina skill → Lauma Hold E→Q combo → Aino sustained Hydro application. Smooth as butter.
Lauma + Aino + Nilou + Baizhu focuses on Bountiful Lunar Core generation, leveraging Nilou’s passive for instant-exploding cores with enhanced AoE. Baizhu provides survival against the increased self-damage while his HP-scaling talent provides substantial damage amplification.
F2P Friendly Options
Lauma + Aino + Kaveh + Xingqiu offers an accessible entry point while maintaining Ascendant Gleam benefits. Kaveh serves as on-field driver with self-healing, while Xingqiu provides consistent off-field Hydro application.
Lauma + Barbara + Kaveh + Xingqiu demonstrates pure F2P viability. While you lose Ascendant Gleam bonuses, you still benefit from Nascent Gleam’s CRIT-enabled standard reactions, providing significant damage improvements over traditional Bloom teams.
For budget-conscious players looking to Buy Genesis Crystals, BitTopup’s competitive rates and secure payment options make acquiring key characters more accessible.
Optimal Rotation Strategies
This is where most players mess up, honestly.
Standard Rotation Sequences
The foundational Lauma rotation prioritizes Hold Elemental Skill before Burst activation. This maximizes ‘Pale Hymn’ stack generation: Hold E consumes Verdant Dew stacks while generating ‘Moon Song’ stacks, which convert to 6 additional ‘Pale Hymn’ stacks when activating Burst.
Premium Team Rotation: Kazuha E→Q → Furina E → Lauma Hold E→Q → Aino field time → swap cycling for buff maintenance.
Nilou Team Rotation: Baizhu E → Lauma Hold E→Q → Nilou E→Q → Aino sustained field time → Baizhu Q for healing/buffs.
Energy Management Tips
Lauma’s 80 energy cost requires careful management—don’t underestimate this. C0-C3 builds need 160-180% ER, while C4+ reduces requirements to 140-160% through constellation energy regeneration.
Here’s what works: utilize Favonius weapons on supports, consider ER Sands if needed, incorporate battery characters, and time skill rotations for maximum particle generation.
Timing and Animation Cancels
Lauma’s skill maintains 15s duration with 12s cooldown, enabling high uptime. Hold E animation cancels into Burst activation for seamless combo execution. Lunar Cores detonate after 1.2s, allowing for precise reaction timing. Moon Eclipse fields persist 2s post-detonation, enabling follow-up reactions.
Artifact Sets and Stat Priorities
Best Artifact Sets Comparison
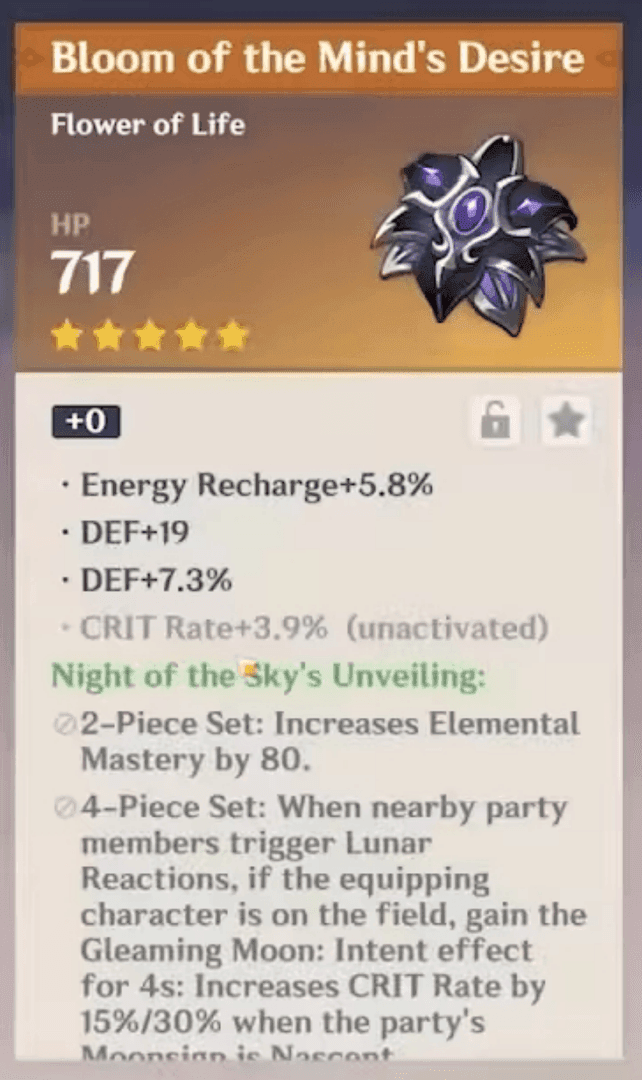
Night of the Sky’s Unveiling serves as Lauma’s BiS, providing +80 EM from 2-piece. The 4-piece grants ‘Gleaming Moon: Intent’ when triggering Lunar Reactions, providing 15% CRIT Rate with Nascent Gleam or 30% with Ascendant Gleam. All party members gain 10% Lunar Reaction damage per different ‘Gleaming Moon’ effect active.
Silken Moon’s Serenade offers +20% ER from 2-piece and party-wide EM buffs from 4-piece. It grants 60 EM with Nascent Gleam or 120 EM with Ascendant Gleam while increasing party Lunar Reaction damage.
Legacy Sets remain viable options. Gilded Dreams 4-piece provides substantial EM scaling, while Flower of Paradise Lost offers Bloom-specific damage bonuses.
Elemental Mastery vs Other Stats
Here’s the thing—hybrid EM/CRIT builds consistently outperform pure EM stacking due to Lunar-Bloom’s unique CRIT scaling. The optimal distribution prioritizes reaching EM thresholds before investing heavily in CRIT statistics.
Stat Priority: EM Sands, Dendro DMG% or EM Goblet, CRIT Rate/DMG Circlet.
Substats: CRIT Rate/DMG > EM > ER.
Target: 800-1000+ EM, 60-70%+ CRIT Rate, 140-180%+ CRIT Damage.
Weapon Recommendations by Role
Dendro Character Weapons
Nightweaver’s Looking Glass (Lauma’s signature) provides 542 Base ATK and +264.6 EM. R1 grants 60 EM for 4.5s on E hit and 60 EM for 10s on party Lunar-Bloom trigger. When both activate? Party receives +120% Bloom DMG, +80% Hyperbloom/Burgeon DMG, +40% Lunar-Bloom DMG.
4-Star Options: Blackmarrow Lantern (Craftable) R5 provides +96% Bloom DMG and up to +48% Lunar-Bloom DMG, achieving ~90% signature performance. Not bad for a craftable weapon. Sacrificial Fragments enables 100% resistance shred uptime through skill reset.
Hydro Character Weapons
Nilou: Key of Khaj-Nisut for HP scaling/EM sharing, or Freedom-Sworn for party buffs. Iron Sting provides a solid budget EM option.
Kokomi: Everlasting Moonglow for optimal healing/damage, Prototype Amber as an excellent F2P alternative providing energy regeneration.
Aino: Sacrificial Greatsword for extended skill uptime, Favonius Greatsword for energy particles.
Counter Strategies and Weaknesses
Enemy Resistances to Consider
Dendro-resistant enemies pose the primary challenge—and there are quite a few in the later Abyss floors.
Resistance management strategies include: Lauma’s Hold E (25% Dendro/Hydro RES shred), Viridescent Venerer 4-piece (40% reduction), Nilou’s C2 (35% Dendro RES shred), Deepwood Memories 4-piece (30% Dendro RES reduction).
Team Positioning Tactics
Bloom reactions generate self-damage, requiring careful positioning and healing. Bountiful Core teams face particularly high self-damage risks—seriously, don’t underestimate this. The 3.5m AoE of Lunar Cores demands strategic positioning for maximum enemy coverage while minimizing friendly fire.
Key tactics: maintain distance from core detonation points, utilize grouping abilities, position healers centrally, coordinate movement with core timing.
Spiral Abyss Applications
Floor-Specific Strategies
Floor 12 First Half: Grouped enemies favor AoE damage. Nilou Bloom teams excel through massive area damage from Bountiful Lunar Cores with instant detonation and enhanced AoE.
Floor 12 Second Half: Single-target emphasis where Hyperbloom variants provide consistent high single-target DPS. CRIT-enabled Hyperbloom maintains competitive damage against high HP bosses.
Energy Management: Adjust ER targets upward by 20-40% compared to overworld content for consistent rotation cycles under Abyss energy penalties. Trust me on this one.
Time Management Tips
Well-built Lauma teams achieve 200-400% increased Bloom damage compared to standard teams. That 1.2s detonation time allows for more aggressive positioning and faster clear times.
Pro tips: pre-cast buffs before enemy spawns, utilize animation cancels, coordinate burst windows with vulnerability phases.
Common Mistakes and Troubleshooting
Let me save you some headaches here.
Rotation Errors to Avoid
Energy Management Failures: Underestimating that 80 energy cost leads to inconsistent Burst uptime. Solution: reach appropriate ER thresholds (160-180% C0-C3, 140-160% C4+).
Incorrect Skill Sequencing: Activating Burst before Hold E misses ‘Moon Song’ stack conversion. The optimal sequence is always: Hold E → Burst for maximum ‘Pale Hymn’ stacks.
Timing Misalignment: Failing to coordinate elemental application with 15s buff windows reduces reaction damage during enhanced periods.
Stat Distribution Problems
ATK% Over-Investment: Damage primarily scales from EM and CRIT statistics, making ATK% substats significantly less valuable than you might think.
Pure EM Stacking: This fails to capitalize on Lunar-Bloom’s unique scaling. Hybrid EM/CRIT builds consistently outperform due to diminishing returns on EM.
Energy Recharge Neglect: Calculate ER requirements based on team composition, weapon choice, and constellation level rather than assuming generic values.
FAQ
What makes Lunar-Bloom different from regular Bloom reactions?
Lunar-Bloom functions as direct damage, enabling CRIT Rate, CRIT DMG, and DMG% bonuses. It requires a Nod-Krai character, creates enhanced cores with 1.2s detonation, 3.5m AoE, and 1.7x base damage multiplier.
Which characters are essential for optimal Lunar-Bloom teams?
Lauma serves as the primary enabler, converting Bloom to Lunar-Bloom while providing CRIT capabilities. Aino acts as the ideal Hydro partner, enabling Ascendant Gleam. Nilou, Baizhu, and Kazuha provide specialized utility.
How should I build Lauma for maximum effectiveness?
Go for a hybrid EM/CRIT build: 800-1000+ EM, 60-70%+ CRIT Rate, 140-180%+ CRIT Damage, 160-180% ER (C0-C3). Use EM Sands, Dendro DMG% Goblet, CRIT Circlet. Night of the Sky’s Unveiling is BiS, with Nightweaver’s Looking Glass as her signature weapon.
What are the main weaknesses of Lunar-Bloom teams?
Dendro-resistant enemies require resistance shred from multiple sources. Self-damage from Bloom reactions necessitates adequate healing. Energy management for that 80-cost Burst requires careful ER balancing.
How do F2P players access Lunar-Bloom gameplay?
Aino’s provided free upon reaching Nod-Krai. Teams like Lauma + Aino + Kaveh + Xingqiu maintain strong performance. Blackmarrow Lantern R5 provides near-optimal performance as a craftable weapon.
What rotation should I use for maximum damage output?
Begin with Lauma Hold E to consume Verdant Dew and generate Moon Song stacks, immediately followed by Burst to convert into maximum Pale Hymn stacks. Full rotation: supports setup → Lauma Hold E→Q → maintain elemental application through the 15s buff window.