

The Luna II meta has completely flipped the script on character rankings, and honestly? It's about time. Mavuika, Nefer, and Flins now dominate the S+ tier thanks to new Lunar reactions that reward smart investment over throwing resources at everyone. Here's what actually works in November 2025.
Luna II Meta Overview and Impact on Character Rankings
Understanding Luna II Mechanics
Let me break down why Luna II changed everything. Since launching October 22, 2025, this meta centers on Lunar reactions that scale with party damage distribution—100% from your highest-damage character, 50% from second-highest, and a measly 1/12 from the rest. Translation? Stop spreading your resources thin.

Lunar-Bloom reactions need a Lauma enabler but ignore DEF entirely while scaling with CRIT Rate/DMG. (Finally, a reaction that rewards proper stat building.) Enhanced reactions detonate in 1.2 seconds versus traditional Bloom's sluggish 2-second timer, plus they hit a 3.5-meter AoE instead of the standard 2-meter radius.
Here's where it gets interesting: Blessing of Abyssal Moon triggers True DMG every 3 seconds on Dendro reactions, capping at 1,500,000 damage for teams using 6+ Hermit Seeds. That's not a typo.
Nod-Krai enemies require 2+ Nod-Krai characters for Ascendant Gleam activation, enabling 90% HP reduction on Grief-Stricken status. This mechanic alone explains why Nefer and Flins shot up the rankings.
Meta Shift from Previous Versions
Version 6.0's September 10 Lunar-Charged introduction elevated Flins to SS Tier—and for good reason. Lauma and Aino's powercreep significantly boosted Lunar-Bloom strategies, though I'll admit the power gap feels a bit excessive compared to older units.
Nahida maintained relevance by providing 30% single-target damage increases for Nilou teams, shifting to S Tier from her previous SS placement. Still strong, just not broken anymore.
November 2025's Spiral Abyss rotation (active since 2025/11/16 04:00) heavily favors Bloom teams. We're talking 60% Electro/Dendro bonuses on Floor 11 and 200% Bloom plus 75% Lunar-Bloom buffs on Floor 12's first half. Enemy HP scaling increased 375% across 6.x versions, so casual builds won't cut it for 36-star clears requiring 420+ seconds remaining.
Genshin Impact Genesis Crystals top up through BitTopup provides competitive pricing and instant delivery for securing essential characters and constellations. BitTopup's secure payment processing and 24/7 customer support make it the preferred choice for serious players.
Key Changes in 6.1 Update
The 6.1 update runs until December 2, 2025. Phase 1 banners feature Nefer and Furina reruns until November 11—grab Nefer if you haven't already. Phase 2 introduces Zhongli and Arlecchino reruns, though Zhongli's utility has diminished compared to Xilonen's superior RES shred. (Sorry, Geo Daddy.)
New artifact sets are reshaping builds completely. Night of Sky's Unveiling provides 80 EM and 15-30% CRIT Rate during Lunar reactions, with 4-piece bonuses granting 20% Lunar DMG increases. Silken Moon's Serenade offers 20% ER and 60-120 EM for sub-DPS optimization—basically mandatory for current meta.
S-Tier Characters: Meta Dominators
S-Tier DPS Analysis
Mavuika (Pyro Claymore) leads S+ DPS through exceptional Vaporize synergy.

Her kit works beautifully with A Thousand Blazing Suns and Obsidian Codex 4-piece artifacts. Optimal builds require level 80/90 with 8/8/8 talents, targeting 2000+ ATK and 60-70% CRIT ratios. Bennett's ATK buffs and Xilonen's RES shred amplify burst damage—expect to invest 2000-3000 resin for proper builds.
Nefer (Dendro Catalyst) specializes in Lunar-Bloom reactions using Reliquary of Truth (88.2% CRIT DMG, 16% CRIT Rate) with Night of Sky's Unveiling 4-piece.
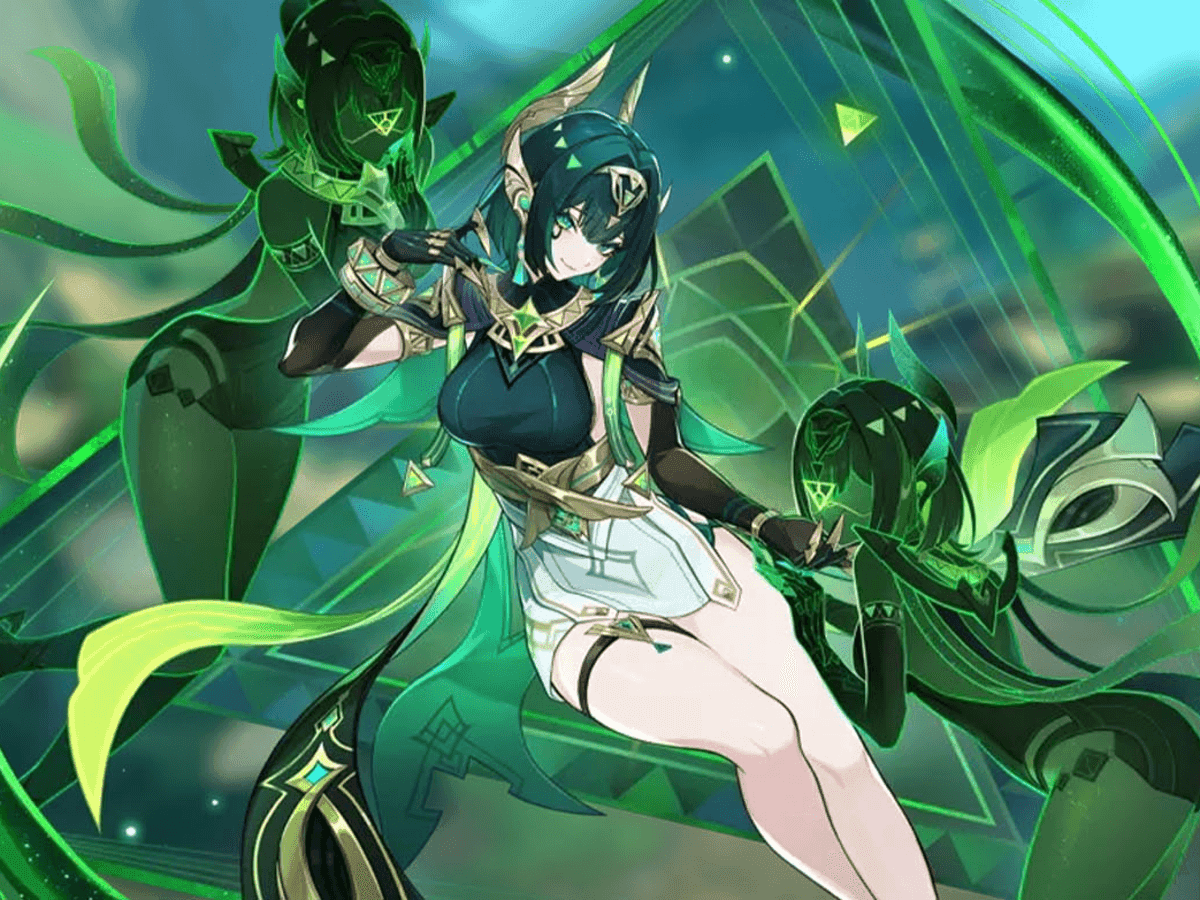
Her balanced EM/CRIT builds enable Bloom-to-CRIT conversions, achieving 75% damage increases over traditional Bloom teams. That's not incremental improvement—that's a paradigm shift.
Her Elemental Skill enters Shadow Dance for 9 seconds with 2 charges, consuming Verdant Dew for 3 special charged attacks delivering 2 Dendro DMG plus 3 Lunar Bloom DMG. The numbers speak for themselves.
Flins (Electro Polearm) dominates Electro DPS through Bloodsoaked Ruins artifacts (674 ATK, 22.1% CRIT Rate, 36% Lunar-Charged bonus). Builds prioritize ATK% over Electro DMG—counterintuitive but mathematically superior. Signature weapons achieve 100% synergy while 4-star alternatives reach 80-90% effectiveness at R5. Pairs optimally with Ineffa for Lunar-Charged reactions.
S-Tier Support Characters
Bennett maintains SS-Tier support status because some things never change. Inspiration Field HP regeneration and Pyro resonance through Skyward Blade with Noblesse 4-piece. Level 80/90 with ER Sands provides essential ATK buffs for Mavuika teams, while C6 adds Pyro infusion capabilities.
Furina delivers SS-Tier off-field Hydro application through Golden Troupe 4-piece, functioning as both Sub-DPS and universal Support. Her versatility enables consistent Hydro enablement for Vaporize and Bloom reactions across multiple team archetypes. Basically, she fits everywhere.
Lauma provides crucial SS-Tier Dendro support with 100% Dendro uptime and 25% RES shred via Nightweaver's Looking Glass. Her kit enables Lunar-Bloom conversions while maintaining 18 Pale Hymn stacks for 40-50% damage boosts, plus 10% CRIT Rate and 20% CRIT DMG buffs. Essential for current meta.
A-Tier Characters: Strong Meta Performers
Versatile DPS Options
Alhaitham maintains Hyperbloom viability through Nahida's C2 (250 EM burst) synergy with Gilded Dreams 4-piece. Teams featuring Nahida, Xingqiu, and Kuki Shinobu provide consistent clear potential with level 70/80, 6/6/6 talents requiring 2000-3000 resin investment. Still solid, just not broken.
Neuvillette shifted to A-tier while retaining single-target relevance in Furina/Kazuha/Bennett compositions. His self-healing Charged Attacks maintain utility despite Luna II meta favoring reaction-based specialists. The dragon's still good—just not overpowered anymore.
November 2025 tier additions place Nefer in S Tier alongside Arlecchino (Pyro DPS for mono-pyro) and Baizhu (Dendro healer for bloom). Rankings reflect community usage data from Spiral Abyss performance metrics, not theorycrafting.
Reliable Sub-DPS Choices
A-Tier Sub-DPS provide consistent off-field damage with 180% ER requirements and CRIT/EM focus. 1000 EM grants +40% Hyperbloom effectiveness—worth the investment. Optimal builds prioritize Energy Recharge through Emblem 4-piece, achieving +75% Burst damage scaling.
Character roles break down simply: Main DPS (on-field like Neuvillette with 1:2 CRIT ratios), Sub-DPS (off-field like Yelan with 180% ER), and Supports (buffs/heals like Bennett with 200% ER). This classification optimizes team building across 80+ available characters.
Buy Genshin Impact crystals online through BitTopup offers cost-effective constellation and weapon access. With instant delivery and competitive exchange rates, BitTopup ensures premium builds without overspending on official channels.
Consistent Support Picks
A-Tier supports focus on 200% ER with EM/HP scaling priorities. Kokomi utilizes HP% Healing Bonus Circlet for sustained survival while maintaining Hydro application—simple but effective. These characters require 60/70 ascension with specialized artifact farming for +5.8% efficiency rolls.
Energy funneling demands specific thresholds: 180% ER for Burst DPS, 160% for particle supports, 200% for characters without batteries. Favonius weapons provide 20% party energy generation, while Raiden offers team-wide energy support for sustained rotations.
DPS Character Deep Dive and Comparisons
Damage Output Analysis
Main DPS stat priorities haven't changed much—1:2 CRIT ratios (50% Rate/200% DMG), ATK%, and Elemental DMG scaling remain king. Arlecchino benefits from ATK% Sands providing +30% output compared to Neuvillette's HP scaling requirements.
Nefer's optimal team features Nefer/Lauma/Nahida/C6 Aino, where Lauma provides 40-50% damage boosts via 18 Pale Hymn stacks and 25% Dendro RES shred. F2P alternatives substitute Dendro Traveler and C0 Aino with Sucrose—requires careful positioning and rotation timing, but it works.
EM thresholds for Bloom reactions establish breakpoints at 200/400/600/800 EM with diminishing returns beyond 1,000 EM. Dendro Resonance provides +50 EM baseline, while Kuki Shinobu requires 800+ EM with Flower of Paradise Lost 4-piece for +80 EM and +60% Bloom DMG.
Rotation Complexity
Lunar-Bloom rotations follow specific patterns: Lauma Skill → Aino Burst → Nilou Skill. Lauma Hold Skill for Dendro application, Aino Burst for Hydro setup, Nilou triple Skill for core generation. Maintaining 20-second cycles ensures 100% uptime for Abyss clears—requires 180% ER on key units.
Hyperbloom rotations utilize Nahida Skill → Yelan Burst → Kuki Skill → Kazuha sequences. Nahida Skill provides 25-second Dendro application, Yelan Burst delivers 15-second Hydro coverage, Kuki Skill triggers at 800+ EM for 3-second cycles, Kazuha shares EM through 20-second rotation windows.
F2P alternatives employ Dendro Traveler + Xingqiu + Kuki + Fischl for 8:30+ clears with Level 90 characters, 8/8/8 DPS talents, and 1/8/8 support talents using Emblem artifacts. Not glamorous, but functional.
Team Composition Recommendations by Tier
S-Tier Team Combinations
SS-Tier Team: Nilou/Lauma/Aino/Baizhu achieves 500% Bloom damage with 1.5M caps through Lauma's 100% Dendro uptime and 25% RES shred. Rotation sequences convert 6 Hermit Seeds for 40% RES reduction, optimized for Spiral Abyss Floor 12 first half with 200% Bloom and +75% Lunar-Bloom buffs. This team is absolutely disgusting in the best way.
SS-Tier Team: Flins/Ineffa/Aino/Sucrose delivers 600% Electro-Charged damage, breaking 3 shields within 30 seconds. Requires 2+ Nod-Krai characters for Ascendant Gleam activation, following Aino Skill → Flins Skill → Ineffa Burst → Sucrose Burst rotations against Fireblade Shock Trooper shields.
Budget-Friendly Alternatives
F2P Hyperbloom teams still work: Dendro Traveler + Xingqiu + Kuki + Fischl with Level 90 characters, 8/8/8 DPS talents, 1/8/8 support talents. Emblem artifacts enable 8:30+ clear times with proper energy management. Not meta, but reliable.
Budget Bloom alternatives feature Collei + Yaoyao + Barbara + Aino requiring 400+ EM and 180% ER distribution. Kaveh serves as underrated F2P Bloom DPS—seriously, give him a try. National team compositions (Xiangling + Xingqiu + Bennett + Sucrose) still provide 40,000+ DPS.
Nilou Bloom teams substitute with Nilou + Yaoyao + Barbara + Dendro Traveler, demanding 180%+ ER and 200+ EM for functional performance. Budget builds require careful artifact farming and talent investment, but they're achievable.
Character Investment Priority Guide
Resource Allocation Strategy
Character investment follows a clear hierarchy: Main DPS to 80/90 with 8/8/8 talents, enablers to 70/80 EM-focused builds, supports to 60/70 (Bennett/Kazuha to 80/90 for scaling). Investment costs range 2000-3000 resin for A-Tier performance—favor 4-star craftable weapons when possible.
Constellation priorities favor diversity over C1 investments requiring 150-180 pulls (24,000-28,800 Primogems). C1 Nefer extends Shadow Dance duration, though C0 performance remains S+ viable with proper artifact optimization. Don't chase constellations unless you're whaling.
My 5-Step Build methodology: 1) Identify role/team (Flins Lunar DPS, 70% field time), 2) Cross-reference sources (patch notes, databases), 3) Validate stats (1:2 CRIT, 180% ER), 4) Test scenarios (20-second rotations), 5) Adjust for F2P alternatives.
Artifact Farming Focus
Artifact sets for 6.0 prioritize Silken Moon's Serenade (+60 EM Elemental DMG Lunar) for sub-DPS and Obsidian Codex (+40% CRIT Nightsoul Natlan) for main DPS. Universal Emblem 4-piece provides +75% Burst ER scaling, Viridescent Venerer 4-piece offers -40% RES for support optimization.
Farm efficiency targets 20 Resin runs at AR 45+ for 6% 5-star drop rates. Enhance artifacts to +16 before +20 for resource efficiency—trust me on this one. Main DPS artifacts prioritize Crimson Witch 4-piece (+40% Vaporize) while supports utilize Noblesse 4-piece for team ATK buffs.
Insufficient ER causes rotation downtime below 180% thresholds. Calculate Base + gear totals, use Favonius weapons for 60+ cost bursts, employ ER Sands for +30% uptime improvements. Xiangling specifically requires 200% ER for consistent burst availability—no exceptions.
FAQ
What makes Luna II meta different from previous versions? Luna II introduces Lunar reactions scaling with party damage distribution (100% from highest damage character, 50% from second-highest), favoring focused investment over spreading resources. Lunar-Bloom ignores DEF, scales with CRIT, detonates faster (1.2s vs 2s) with larger AoE (3.5m vs 2m). It's a complete paradigm shift.
Who are the current S+ tier DPS characters in November 2025? Mavuika (Pyro Claymore), Nefer (Dendro Catalyst), and Flins (Electro Polearm) dominate S+ tier. Mavuika excels in Vaporize teams, Nefer specializes in Lunar-Bloom with 75% damage increases, Flins leads Electro DPS with Lunar-Charged synergy. These three are in a league of their own.
What team composition works best for Spiral Abyss Floor 12? Nilou/Lauma/Aino/Baizhu achieves 500% Bloom damage for first half with 200% Bloom +75% Lunar-Bloom buffs. Flins/Ineffa/Aino/Sucrose delivers 600% Electro-Charged damage for second half, breaking shields in 30 seconds. Both teams are absolutely broken for current rotation.
How much should F2P players invest in meta characters? F2P builds require Level 90 characters with 8/8/8 DPS talents and 1/8/8 support talents, costing 2000-3000 resin for A-tier performance. Prioritize 4-star craftable weapons and avoid constellation chasing—focus on artifact optimization instead. Your resin is precious.
Which artifacts are essential for Luna II meta? Night of Sky's Unveiling (80 EM, 15-30% CRIT Rate during Lunar reactions) for DPS and Silken Moon's Serenade (20% ER, 60-120 EM) for sub-DPS. Universal Emblem 4-piece provides +75% Burst ER scaling. These sets are basically mandatory now.
What ER requirements do characters need for optimal rotations? Main DPS requires 180% ER for Burst availability, supports need 200% ER without batteries, sub-DPS targets 160% ER with particle generation. Use Favonius weapons and ER Sands to meet thresholds—Xiangling specifically requires 200% ER. Don't compromise on these numbers.