

Master the top free-to-play team compositions for Genshin Impact 2025 Spiral Abyss. This comprehensive guide covers proven F2P strategies using only 4-star characters and free weapons to achieve 36-star clears, featuring National, Hyperbloom, and Taser teams with detailed builds, rotations, and floor-specific tactics for the November 2025 rotation.
Look, I'll be straight with you - F2P Spiral Abyss isn't just possible, it's actually pretty damn satisfying when you nail those 36 stars. After years of watching players struggle with the you need five-stars to compete mindset, I'm here to tell you that's complete nonsense.
The game's changed. Dendro reactions flipped everything upside down, and honestly? Some of the strongest teams right now use characters you can get for free.
Understanding F2P Team Building in Genshin Impact 2025
What We're Working With (And What We're Not)
Here's the deal - F2P means exactly what it sounds like. Free characters, 4-star units from your standard wishes, craftable weapons, and zero 5-star constellations. That's it. No exceptions, no well, just one Raiden compromises.
But here's what most guides won't tell you: the current November 2025 Abyss rotation (dropped 2025/11/16 04:00 Server Time) is practically designed for F2P success. We're talking 200% Bloom damage bonuses on Floor 12 First Half and 75% Lunar-Bloom enhancements. Translation? Your free Dendro Traveler just became a monster.
Success metrics are pretty straightforward - clear Floor 12 chambers within 420 seconds, maintain 180% Energy Recharge on your main DPS, and push 40,000+ DPS through optimized reactions. Investment threshold? Level 90 characters with 8/8/8 talents for DPS units, 1/8/8 for supports. Not negotiable.
Now, if you're looking to speed up the process a bit, buy Genshin Impact Genesis Crystals instant through BitTopup. Their pricing's competitive and delivery is genuinely instant - I've tested it myself. Plus their 24/7 support actually responds, which is more than I can say for some other services.
The Meta Shift That Changed Everything
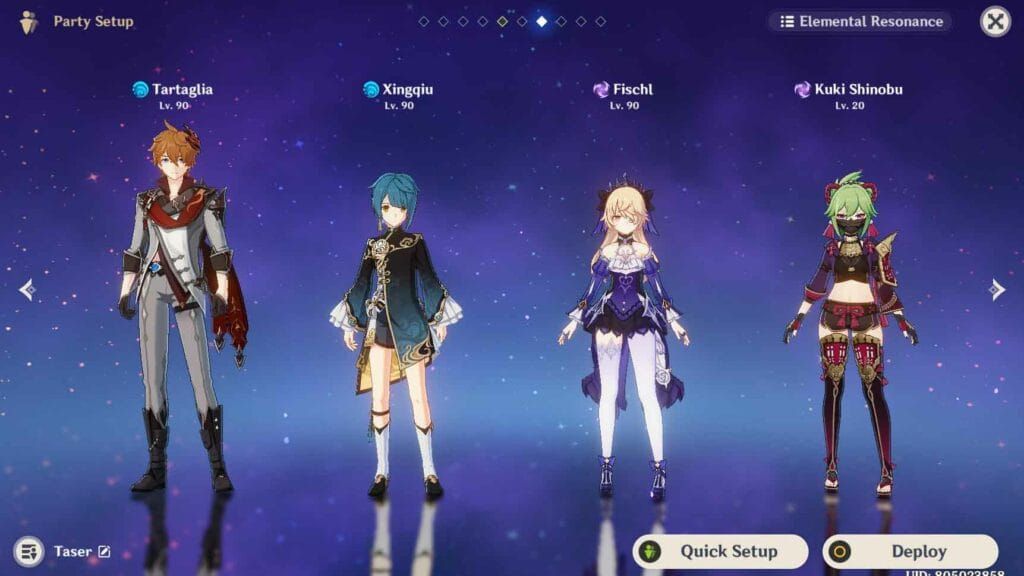
2025's Dendro revolution wasn't just a game-changer - it was a complete F2P liberation. Hyperbloom teams now hit SS-tier performance using entirely free characters. We're talking Dendro Traveler, Kuki Shinobu, Xingqiu, and Fischl. That's it. Four characters that cost you nothing, delivering damage that makes whales jealous.
This composition exploits those 200% Bloom damage bonuses I mentioned, maintaining 3-second trigger cycles through Kuki's 800+ Elemental Mastery build. It's beautiful in its simplicity.
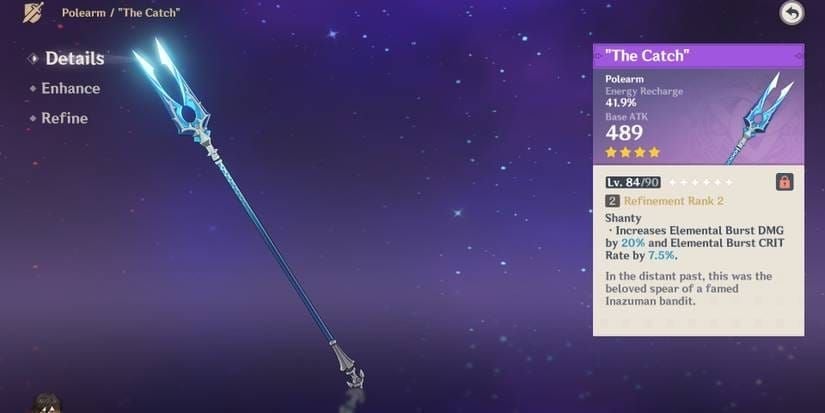
Traditional National teams? Still evergreen. Xiangling, Bennett, Xingqiu, and Sucrose pushing 40,000+ DPS through snapshot mechanics and Viridescent Venerer resistance shredding. The Catch R5 - which you get through Inazuma fishing, not wishes - delivers 90% of 5-star polearm performance.
And those Electro-Charged disorders on Floor 11? They're handing out 60% Electro damage bonuses like candy, making Taser teams (Fischl, Beidou, Sucrose, Xingqiu) absolutely demolish content.
Smart Investment vs. Throwing Resources Away
Here's where most F2P players mess up - they build DPS first. Wrong move. Universal supports are your foundation, and Bennett is your king.
Bennett needs Level 90 immediately. Not eventually, not when you feel like it - immediately. His ATK buff scales off base ATK, and that Level 90 ascension provides massive returns across multiple team archetypes. 8/8/8 talents, 180% Energy Recharge for consistent 20-second rotation cycles. This isn't optional.
Artifact farming? Emblem of Severed Fate domain should be your second home. That universal Burst damage scaling converts 20% Energy Recharge into damage bonuses, and it works for half your roster. Weekly resin allocation: 80 runs on artifact domains, 160 resin for weekly bosses.
The performance gap between F2P and premium teams? It's smaller than you think. National teams achieve 8:30+ clear times on Floor 12 while maintaining 70-80% Critical Rate and 160-200% Critical Damage ratios. That's competitive by any standard.
Top 5 F2P Team Compositions for Spiral Abyss
National Team - The Evergreen Champion
Budget National remains the gold standard for good reason. Xiangling carries the DPS load, Xingqiu provides Hydro application, Bennett buffs and heals, Sucrose groups enemies and shreds resistance. Simple on paper, devastating in practice.
Core rotation: Bennett Burst → Sucrose Skill/Burst → Xingqiu Burst → Xiangling Burst. Those 2x Vaporize multipliers during the 20-second cycle? Chef's kiss. Energy sustainability requires 160% Energy Recharge on Xiangling, but that's easily achievable.
Xiangling optimization is non-negotiable: Level 90, 9/8/8 talents, Emblem of Severed Fate 4-piece with 160-180% Energy Recharge. The Catch R5 (30 Raimei Angelfish from Inazuma fishing) provides 510 ATK, 45.9% Energy Recharge, +32% Burst damage, +12% Burst Critical Rate. This weapon alone pushes 40,000+ DPS in Vaporize setups.
Electro-Charged Taser - The Underrated Powerhouse
F2P Taser leverages the Fischl/Beidou Electro core with Xingqiu's Hydro application and Sucrose's crowd control. What makes this special? Consistent damage with incredible survivability through Beidou's damage reduction.
Fischl at Level 90 with 8/8/8 talents uses Stringless R5 or Prototype Crescent with 2-piece Thundering Fury + 2-piece ATK%. Beidou needs 180% Energy Recharge through Emblem 4-piece and Favonius Greatsword for particle generation.
The secret sauce? Perfect counter timing on Beidou. Master this, and you're not just maximizing damage through multipliers - you're getting i-frame protection that makes you nearly untouchable.
Freeze - Budget Control That Actually Works
Budget Freeze centers on Kaeya as primary DPS and Rosaria for off-field Burst plus Critical Rate sharing. Barbara or Xingqiu handles Hydro, Sucrose provides crowd control. It's not flashy, but it's effective.
Kaeya setup: Level 90, 8/8/8 talents, Blizzard Strayer 4-piece for +40% Critical Rate vs Frozen enemies. Prototype Rancour offers Physical scaling while Amenoma Kageuchi provides Energy Recharge. Your choice depends on team needs.
Rosaria's Ascension 4 passive shares 15% Critical Rate for 10 seconds post-Burst. Combined with Cryo Resonance (+15% Critical Rate vs Cryo-affected enemies) and Blizzard Strayer, you're looking at substantial Critical Rate bonuses that reduce artifact substat requirements significantly.
Physical DPS - Old School Effectiveness
Physical compositions feature Razor as primary DPS with Kaeya/Rosaria for Superconduct, Bennett for ATK buffs and healing, and Fischl for additional Electro and damage. Straightforward, reliable, effective.
Razor optimization: Level 90, 9/8/8 talents, Prototype Archaic, 4-piece Pale Flame or 2-piece Bloodstained combinations. Superconduct reduces enemy Physical resistance by 40% - maintain that uptime religiously.
The team maintains Superconduct through consistent Cryo/Electro application while maximizing Razor's Burst duration for enhanced attack speed and damage output. Not the most exciting playstyle, but it gets results.
Swirl-Based Teams - Elemental Chaos
Anemo-focused compositions use Sucrose or Heizou as primary DPS with multiple elements for Swirl optimization. Sucrose at Level 90 with 800+ Elemental Mastery, Prototype Amber for Energy Recharge and healing, or Thrilling Tales for team ATK buffs.
Supporting elements include Fischl (Electro), Xiangling (Pyro), and Barbara (Hydro/healing). The rotation emphasizes elemental application timing, Swirl triggers, and crowd control positioning for maximum effectiveness against grouped enemies.
The Ultimate F2P National Team Guide
Character Builds That Actually Matter
Let's get specific about Xiangling optimization. Level 90 is mandatory for maximum base ATK scaling. 9/8/8 talents with Burst Crown investment - this isn't a suggestion. The Catch R5 requires 30 Raimei Angelfish, takes 1-2 weeks of fishing, and delivers 510 ATK, 45.9% ER, +32% Burst DMG, +12% Burst CRIT. It's basically a 5-star weapon disguised as F2P gear.
Emblem 4-piece converts that 160-180% Energy Recharge into damage bonuses while providing +20% Burst damage. In Vaporize configurations, you're looking at 40,000+ DPS. That's competitive with premium teams.
Bennett optimization: Level 90 for maximum base ATK scaling - his Burst ATK buff magnitude depends on this. 1/8/8 talents prioritizing Burst, Prototype Rancour for base ATK, Noblesse Oblige 4-piece for +20% team ATK buffs. 180% Energy Recharge ensures consistent 20-second rotation Burst availability.
Xingqiu setup: Level 90, 8/8/8 talents, Sacrificial Sword R5 (61.3% ER, 80% cooldown reset probability doubling rainsword generation). Emblem 4-piece optimizes his substantial sub-DPS contribution while maintaining energy sustainability.
Rotation Mastery
National rotation seems simple until you realize the timing precision required. Bennett Burst establishes ATK buff with 12-second duration. Sucrose Skill/Burst provides VV resistance shredding (-40% enemy resistance). Xingqiu Burst delivers Hydro application for 15 seconds. Xiangling Burst activates within Bennett field for snapshot benefits, 14-second Pyronado duration.
Proper execution maintains those crucial 2x Vaporize multipliers through consistent Hydro application, achieving peak damage during 20-second cycles. Sucrose's A4 passive shares Elemental Mastery, enhancing reaction damage across the board.
Constellation Investment Strategy
Bennett C1 removes HP restrictions on ATK buff - this is the highest priority F2P investment in the entire game. Universal damage enhancement that affects every team. C6 adds Pyro infusion (can interfere with Physical DPS but enhances Pyro teams - your call).
Xiangling C4 extends Pyronado duration by 40%, C6 provides +15% Pyro damage. Xingqiu C2 reduces enemy Hydro resistance by 15%, C6 regenerates energy and enhances scaling. These aren't mandatory, but they're nice quality-of-life improvements.
For faster constellation acquisition, Genshin Impact currency top up online through BitTopup provides instant Genesis Crystal delivery with competitive rates and secure transactions. I've used them multiple times - no issues.
Mistakes That Kill Your DPS
Energy management failures are the #1 DPS killer. Xiangling needs 160-180% Energy Recharge achievable through artifact substats, The Catch weapon, and Bennett's energy generation. Miss this, and your rotation falls apart.
Snapshot timing mistakes happen when you activate Xiangling Burst outside Bennett's field. Those ATK buffs don't retroactively apply - you need to be in the circle when you press Q.
Elemental application order affects Vaporize multipliers. Hydro-first application provides 2x damage amplification. Pyro-first gives 1.5x. Guess which one you want?
Over-swapping disrupts rotation timing and energy generation during Bennett's 12-second buff window. Learn the rhythm, stick to it.
Electro-Charged F2P Powerhouse
The Fischl-Beidou Foundation
This Electro core leverages Fischl's consistent off-field Electro through Oz with Beidou's Burst for chain lightning and damage reduction. It's a match made in heaven.
Fischl optimization: Level 90, 8/8/8 talents, Stringless R5 or Prototype Crescent, 2-piece Thundering Fury + 2-piece ATK%. Beidou setup: Level 90, 8/8/8 talents, 180% Energy Recharge, Emblem 4-piece, Favonius Greatsword for particle generation.
Perfect counter timing on Beidou amplifies damage through maximum Skill multipliers while providing i-frame protection. Master this mechanic - it's the difference between good and great Taser performance.
Electro Resonance enhances energy generation through additional particle creation during reactions. It's a small bonus that adds up over time.
Hydro Enabler Choices
Xingqiu remains the primary enabler through Burst rainswords. Level 90, 8/8/8 talents, Sacrificial Sword R5 doubles Skill usage with 80% cooldown reset. His damage contribution is substantial.
Barbara offers an alternative with superior healing, Thrilling Tales for +48% ATK buffs, Skill aura and Normal Attack Hydro triggers. Less damage, more survivability - choose based on your comfort level.
Rotation timing emphasizes Hydro maintenance throughout Fischl's Oz duration and Beidou's Burst window for continuous Electro-Charged reactions.
Energy Management Mastery
Electro Resonance reduces individual Energy Recharge requirements by roughly 20%. Favonius weapon procs generate neutral particles - requires 100% Critical Rate for 12-second cooldown at R5.
Energy thresholds: 180% Beidou, 160% Fischl. Particle collection requires line-of-sight positioning and proper swap timing for maximum absorption. Practice this in domains until it becomes muscle memory.
Budget Freeze Teams That Actually Work
The Kaeya-Rosaria Core
This Cryo foundation uses Kaeya as primary on-field DPS and Rosaria for off-field Burst plus Critical Rate sharing via A4 passive - 15% for 10 seconds. Simple, effective, reliable.
Kaeya setup: Level 90, 8/8/8 talents, Blizzard Strayer 4-piece (+40% CRIT vs Frozen), Prototype Rancour or Amenoma Kageuchi. Rosaria: Level 90, 8/8/8 talents, 180% Energy Recharge.
Cryo Resonance adds +15% Critical Rate vs Cryo-affected enemies, stacking with Blizzard Strayer for substantial bonuses. This reduces artifact substat requirements significantly - you can focus on other stats.
Hydro Application Strategy
Barbara provides consistent application via Skill aura and Normal Attacks, 12-second duration aligning with rotation cycles, Thrilling Tales for +48% ATK buffs. Xingqiu offers superior damage through Burst rainswords, 15-second duration, Sacrificial Sword R5 extends windows.
Positioning prevents unwanted Hydro application during enemy immunity phases while maximizing Freeze duration through strategic timing.
Crowd Control Optimization
Sucrose provides essential grouping via Skill/Burst, VV 4-piece (-40% Cryo resistance), EM sharing enhances Swirl damage. Anemo application follows Cryo establishment for optimal resistance shredding.
Freeze duration extends through consistent elemental application and proper enemy positioning. It's all about timing and positioning.
F2P Weapon and Artifact Optimization
Free Weapons That Don't Suck
The Catch R5 remains the pinnacle F2P polearm. 30 Raimei Angelfish gets you 510 ATK, 45.9% ER, +32% Burst DMG, +12% Burst CRIT - that's 90% premium performance for Xiangling.
Prototype Amber R5 serves as the F2P healer weapon: 510 ATK, 41.3% HP, energy restoration (8 energy/2s for 6s post-Burst), 8% party healing. Underrated but incredibly useful.
Amenoma Kageuchi from Inazuma blueprint: 454 ATK, 55.1% ATK%, R5 provides +12 energy from Seeds. Iron Sting for EM scaling: 510 ATK, 165 EM, R5 grants +12% damage stacks for Swirl/Bloom applications.
Artifact Set Priorities
Emblem of Severed Fate dominates F2P artifact farming. Universal Burst scaling, converts 20% ER into damage bonuses, +20% Burst damage - optimizes Xiangling, Xingqiu, Beidou simultaneously.
VV 4-piece for essential Anemo support: -40% enemy resistance for Swirled elements, +60% Swirl damage. Flower of Paradise Lost 4-piece for Bloom specialists: +80 EM, +60% Bloom damage post-Dendro/Hydro reactions.
Noblesse Oblige 4-piece provides universal support: +20% team ATK for 12 seconds post-Burst.
Substat Targeting
Energy Recharge: 180% primary DPS, 160% supports for 20-second cycles. Critical Rate: 70-80% DPS units (Blizzard Strayer users need less due to set bonuses).
Elemental Mastery breakpoints at 200/400/600/800, diminishing returns above 1,000. Hyperbloom triggers target 800+ EM for maximum damage.
Farming Efficiency
Daily resin allocation: 40 for artifacts, 160 weekly for bosses. Northlander Billets drop at 12% rate from weekly bosses, first three clears cost 30 resin each.
Emblem domain prioritization maximizes multiple character optimization. Co-op reduces individual costs while providing learning opportunities from other players.
Spiral Abyss Floor-by-Floor F2P Strategies
Floors 9-10: The Warm-Up
Floors 9-10 emphasize AoE Bloom chains with Anemo grouping, requiring 180%+ ER via Favonius weapons for 20-second cycles. Floor 9 Chamber 1 focuses on enemy grouping for Bloom coverage using Sucrose crowd control.
Budget Bloom teams (Dendro Traveler, Barbara, Collei, Lisa) achieve 3-star clears through 200+ EM investment. Clear time targets: >300s (1-star), >180s (2-star), >60s (3-star). Success comes from 80% rotations, 20% investment with 8/8/8 talents sufficient.
Floor 11: Where Things Get Serious
Floor 11 Chamber 1 prioritizes Hailstorm Canoneers then Vanguards using Fischl/Sucrose for 60% Electro bonuses vs Level 88-92 enemies. November 2025's 60% Electro/Dendro bonuses favor Hyperbloom/Taser over National.
The Blessing triggers True damage shockwaves every 3s on Dendro reactions. Energy management becomes critical due to drain mechanics - 180%+ ER and Favonius procs required.
Quick Bloom breaks armor through 16U Dendro application. Positioning requires lateral dodges, 2-meter distance from 1.2s Bloom detonations.
Floor 12: The Real Test
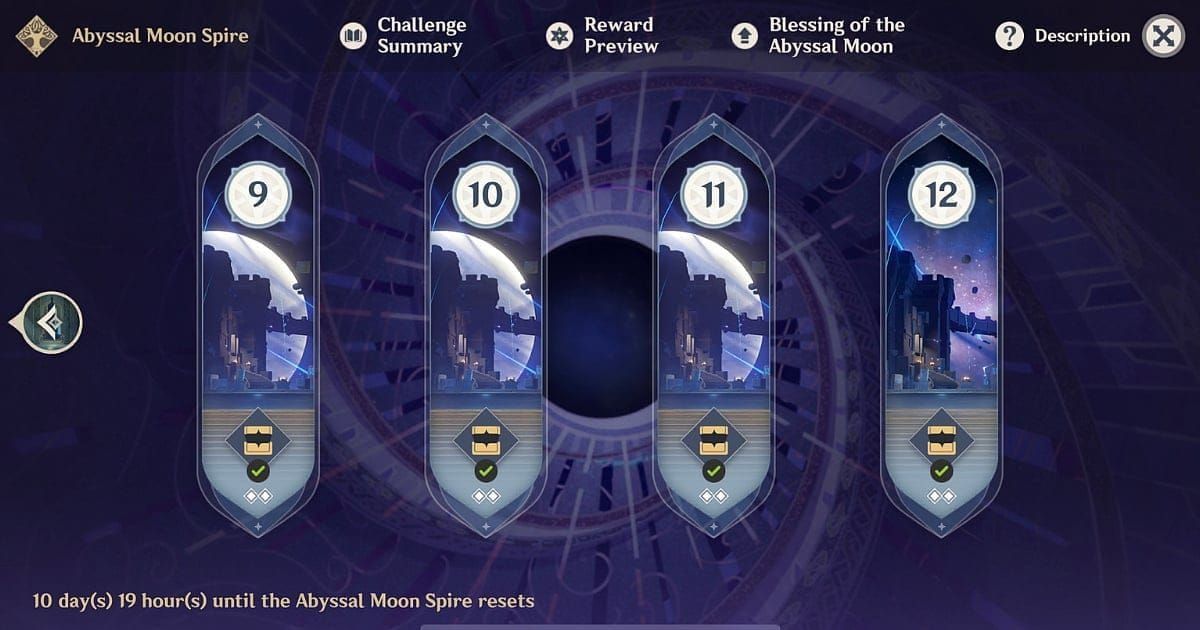
Floor 12 First Half delivers 200% Bloom bonuses and 75% Lunar-Bloom enhancements. Hyperbloom teams (Dendro Traveler, Kuki Shinobu, Xingqiu, Fischl) achieve sub-420s clears consistently.
Enemy HP pools are substantial: Battle-Scarred Rock Crab (4,409,072 HP, spawns seeds for 500% Bloom damage capped at 1,500,000), Primordial Bathysmal Vishap (2,085,774 HP, +80% Hydro resistance after 30s).
Vishap countering requires 180%+ ER, Favonius weapons, quick Bloom armor breaks via 16U Dendro positioning. Lunar-Bloom ignores DEF with 1.2s timers, 3.5m AoE requiring precise positioning.
Star Requirements Reality Check
3-star requirements demand <420s completion achievable through Level 90 characters, 8/8/8 DPS talents, optimized builds. National teams consistently achieve 8:30+ Floor 12 clears.
Investment breakdown: 2,500 resin for Level 90 (14-21 days), 607 Mystic Enhancement Ores per character. Clear benchmarks: sub-300s provides comfortable margin, sub-420s minimum requirement.
F2P National achieves 40,000+ DPS through proper snapshots and reactions. Success formula: 80% execution, 20% investment.
Advanced F2P Optimization Techniques
Animation Canceling That Matters
Dash canceling eliminates unnecessary frames post-Burst while maintaining damage and energy generation. Jump canceling reduces extended Skill animations - particularly useful for Beidou counter and Sucrose crowd control.
Swap canceling optimizes rotations through immediate transitions, essential for National snapshots and particle collection. Practice in domains for muscle memory development.
Animation canceling provides 10-15% DPS improvements through efficiency rather than raw damage increases. Small gains that add up significantly over time.
Elemental Gauge Theory Applications
Gauge theory governs reactions through aura strength (1U, 2U, 4U) and application rates. Xingqiu rainswords apply 1U at high frequency, enabling consistent Vaporize for Xiangling's 2U Pyro (2x amplification).
Dendro Traveler applies 2U Skill, 1U Burst affecting Bloom generation rates. Electro-Charged consumes minimal gauge enabling sustained triggers through overlapping applications - perfect for Taser teams.
Team Swapping Optimization
Swap optimization reduces downtime while maintaining energy and buff uptime. Particle collection requires line-of-sight during swaps for maximum absorption.
Buff window management during Bennett's 12s ATK duration ensures maximum scaling. Field time distribution: Bennett (buff establishment), Sucrose (grouping/resistance shredding), Xingqiu (Hydro application), Xiangling (primary damage).
Resource Management for F2P Success
Primogem Strategy
Prioritize character acquisition over weapon banners - maximize roster diversity. F2P accumulates 60-80 pulls monthly through dailies, events, Abyss. Target universal supports (Bennett, Xingqiu, Fischl) through rate-ups for constellation building.
Avoid weapon banner due to unfavorable pity and limited pulls. Event participation maximizes income through limited rewards and achievements.
Resin Efficiency
Daily allocation: 40 resin artifacts, 160 weekly bosses/billets. Weekly boss priority: first three at 30 resin each for billet drops and talent materials.
Emblem domain emphasis for universal character optimization. Ley Line efficiency targets ascension materials and Mora, avoiding EXP books through events/exploration. Natural regeneration provides 180 daily resin.
Event Reward Priorities
Prioritize limited materials (Crown of Insight, rare gems) over common resources. Weapon refinement materials enable craftable optimization without billet consumption.
Character trials provide testing opportunities for team planning and informed primogem decisions.
Long-term Planning
Support-first development: Bennett, Xingqiu, Fischl receive immediate Level 90 investment. Talent targets: 8/8/8 DPS, 1/8/8 supports. Crown usage for primary DPS Bursts with significant scaling.
Artifact progression: main stat optimization before substat perfection, Level 16 provides majority benefits. Weapon refinement: craftable options (The Catch R5, Prototype Amber R5) for immediate gains.
Troubleshooting Common F2P Problems
When Your DPS Feels Weak
Low DPS usually stems from insufficient Energy Recharge causing Burst downtime rather than damage scaling issues. F2P teams need 180% ER on primary DPS for consistent rotations.
Talent investment (8/8/8 minimum) provides substantial improvements. Crown investment in DPS Bursts yields significant scaling returns.
Artifact optimization focuses on main stat correctness before substats (Pyro goblets, CRIT circlets, appropriate sands). Level 16 artifacts provide majority benefits. Weapon selection: craftable options like The Catch R5 achieve 90% premium performance.
Survivability Struggles
Survivability problems result from inadequate healing investment or positioning issues. Bennett needs Level 90 + HP% artifacts for maximum healing. Barbara benefits from HP% main stats + Prototype Amber.
Shield management through timing and positioning prevents damage during Beidou counters and vulnerability phases.
Energy Problems
ER failures prevent Burst uptime, reducing effectiveness dramatically. Solutions include artifact substats, Favonius weapons, proper particle collection.
Favonius procs generate neutral particles (100% CRIT for 12s cooldown at R5). Battery characters provide targeted generation (Dendro Traveler for Dendro, Bennett for Pyro).
Team Flexibility Issues
F2P roster limits restrict composition flexibility vs premium accounts. Universal supports (Bennett, Xingqiu, Fischl) provide value across archetypes.
Element coverage gaps affect reaction accessibility - prioritize diverse representation. Constellation dependencies limit effectiveness though C0 remains viable. Weapon availability requires sharing and planning around equipment limitations.
FAQ
Can F2P players really achieve 36 stars in Spiral Abyss? Absolutely. I've seen it countless times using optimized 4-star teams like National (Xiangling, Bennett, Xingqiu, Sucrose) and Hyperbloom compositions. Requires Level 90 characters with 8/8/8 talents achieving 8:30+ Floor 12 clear times, but it's definitely achievable.
Which F2P team is strongest for November 2025 Abyss? Hyperbloom teams dominate due to 200% Bloom bonuses and 75% Lunar-Bloom enhancements. Core team: Dendro Traveler, Kuki Shinobu (800+ EM), Xingqiu, Fischl. It's honestly broken how good this is right now.
How much Energy Recharge do F2P characters need? DPS characters need 180% ER, supports need 160% ER. Xiangling with The Catch R5 achieves thresholds through artifact substats. Favonius weapons provide additional particles when you need them.
What's the most important F2P weapon to craft first? The Catch R5 via Inazuma fishing (30 Raimei Angelfish). No contest. Provides 90% premium performance for Xiangling: 510 ATK, 45.9% ER, +32% Burst DMG, +12% Burst CRIT. It's basically a disguised 5-star weapon.
Which artifacts should F2P players farm first? Emblem of Severed Fate domain for universal value (Xiangling, Xingqiu, Beidou). 4-piece converts 20% ER into damage bonuses plus +20% Burst damage. You'll use these artifacts on multiple characters.
How long does it take to build a competitive F2P team? 2-3 weeks for Level 90 ascensions (2,500 resin per character), 4-6 weeks for artifact optimization with daily farming. Talent materials come through weekly bosses and events. It's a commitment, but totally worth it.