

Genshin Impact 6.x Spiral Abyss introduces Lunar reactions with massive Ley Line buffs: Bloom/Lunar-Bloom teams dominate Floor 12's first half (200% damage boost), Electro-Charged/Lunar-Charged excel in second half. SS-tier teams: Nilou/Lauma/Aino/Baizhu for Lunar-Bloom, Flins/Ineffa/Aino/Sucrose for Lunar-Charged. Current reward cycle: 600 Primogems for 36-star clears.
The 6.x Meta Just Hit Different
Look, I've been covering Spiral Abyss rotations for years, and this one's genuinely wild. Floor 12's Ley Line Disorders aren't messing around – we're talking 200% Bloom damage increases on the first half, with an additional 75% boost for Lunar-Bloom variants. The second half? 200% Electro-Charged amplification plus 75% for Lunar-Charged reactions.
But here's the kicker (and why your old teams might be struggling): enemy HP got cranked up by 375%. That Battle-Scarred Rock Crab you're facing? It's sitting pretty at 4,409,072 HP. The Battle-Hardened Fireblade Shock Trooper? Even beefier at 4,765,990 HP. Three-star clears now demand you finish with 420+ seconds remaining – no pressure, right?
The Blessing of the Abyssal Moon throws another wrinkle into the mix. Every 3 seconds, Dendro reactions trigger True Damage shockwaves. This means reaction frequency matters more than raw damage numbers – something that completely flips traditional DPS calculations on their head.
What's Actually Changed Since 5.x
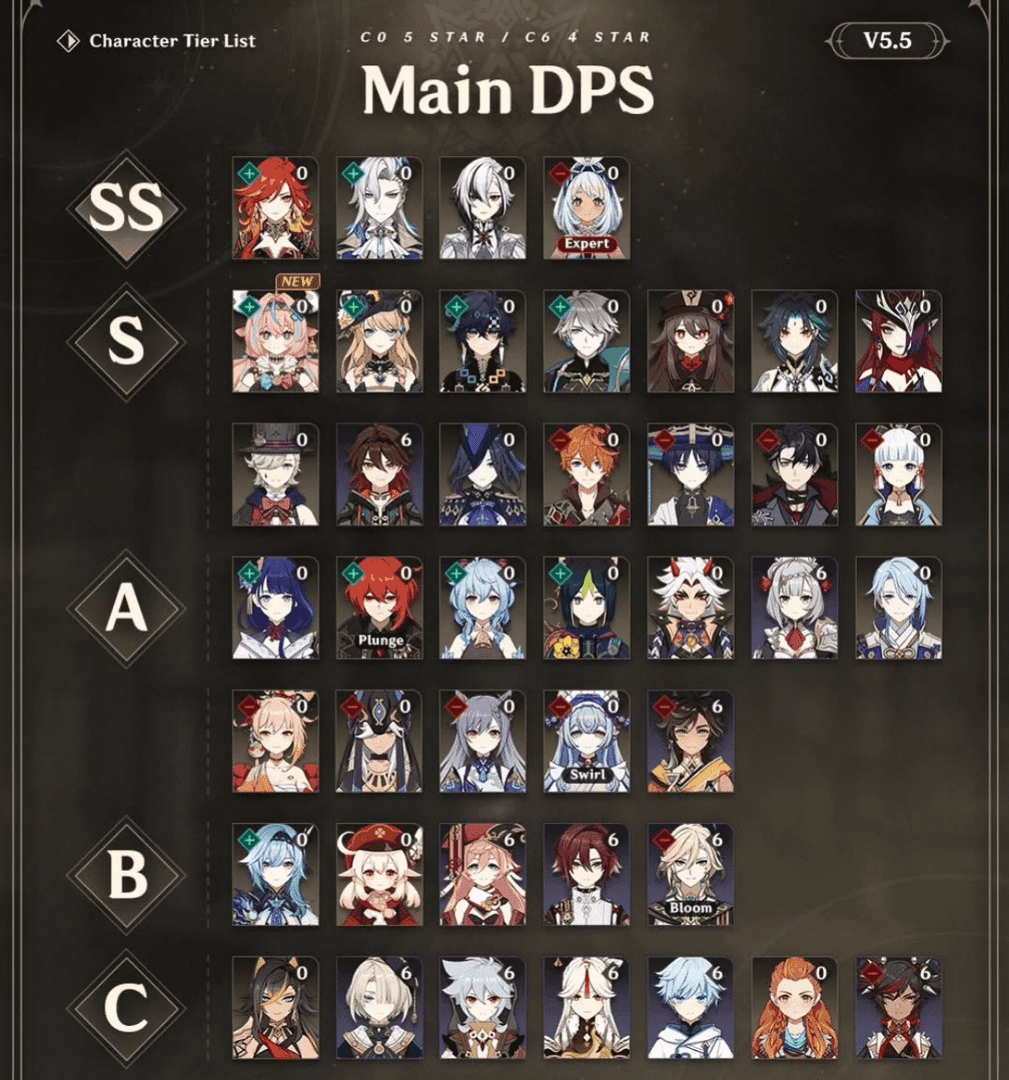
Version 6.1 brought some serious shake-ups. Nefer landed as an SS-tier Main DPS and honestly? She's revolutionizing Lunar-Bloom with shadow attacks that consume Dendro cores without detonation. It's as broken as it sounds.

Mavuika's maintaining her SS-tier status through what I can only describe as absurd Burst scalings in Vaporize/Melt teams. Meanwhile, Neuvillette – and this might sting for some players – dropped from SS to S-tier. The meta's shifted toward frontloaded burst damage, and his sustained DPS style just doesn't hit the same anymore.
Here's something crucial that took me way too long to figure out: Lunar reactions scale with your entire party's stats. The highest-damage member contributes 100%, second-highest adds 50%, and remaining teammates chip in 1/12 each. This completely changes how you should approach investment – balanced teams over hyper-carries.
Oh, and that Grief-Stricken mechanism? Wild Hunt enemies basically get a second life bar. They'll recover to maximum HP when they hit zero unless you deplete their grey HP bar first. Without Moonsign abilities, you're looking at dealing 238.46% of their base HP. With Ascendant Gleam from Lunar characters? Just 100%. Yeah, it's that significant.
Genshin Primogems top up through BitTopup offers competitive rates and instant delivery for meta character acquisition.
The Teams That Actually Work (SS-Tier)
Nilou/Lauma/Aino/Baizhu - The First Half Monster

This comp absolutely demolishes the first half, and I mean demolishes. Nilou's Bountiful Cores get enhanced AoE treatment, Lauma provides that crucial 100% Dendro uptime plus RES shred, Aino keeps Hydro application consistent, and Baizhu? He's your lifeline against those HP-draining mechanics that'll otherwise wreck your day.
Against the Battle-Scarred Rock Crab specifically, this team shines. Those Hermit Seeds convert via Bloom reactions, and each one deals 500% Bloom damage with a 1.5M cap. It's beautiful to watch.
Flins/Ineffa/Aino/Sucrose - Second Half Supremacy
For the second half, this Lunar-Charged optimization is chef's kiss. Flins' Thunderous Symphony provides AoE Electro infusion that just melts through enemy groups. Ineffa amplifies reaction damage with EM buffs, and Sucrose brings that VV shred plus crowd control against multiple Wilderness Hunters.
The synergy here is what makes it work – each character fills a specific role without overlap.
The Mavuika Alternative
Mavuika/Bennett/Furina/Xilonen deserves a mention for burst encounters. Mavuika's Obsidian Codex synergizes perfectly with Bennett's attack buffs, Furina provides reliable off-field Hydro, and Xilonen contributes universal RES shred across Pyro/Cryo/Electro/Hydro/Geo.
It's not as specialized as the Lunar teams, but it's incredibly versatile.
Investment Reality Check
Let's talk numbers because this is where most players stumble. SS-tier teams need focused investment – no getting around it. Nilou functions fine at C0 with Splendor of Tranquil Waters and Tenacity 4pc, but Lauma needs Nightweaver's Looking Glass plus Deepwood 4pc to really shine.
Flins is energy-hungry. We're talking 160-180% ER with Bloodsoaked Ruins and Night of Sky's Unveiling 4pc. Nefer emphasizes CRIT/EM balance with Reliquary of Truth plus Night of Sky's Unveiling 4pc.
Genshin Primogems recharge through BitTopup provides secure transactions with 24/7 support for limited-time banner access.
A-Tier: Still Solid, Just Not Optimal
The Reliable Workhorses
Alhaitham/Nahida/Xingqiu/Kuki Shinobu still delivers consistent Hyperbloom performance. It handles the first half effectively despite lacking Lunar-Bloom optimization. The strength here lies in established rotations and consistent output – perfect for players transitioning into the new meta.
Neuvillette/Furina/Kazuha/Bennett maintains viability through sustained Charged Attack damage and self-healing. Those beam mechanics provide consistent DPS against high-HP enemies, and Furina enables Vaporize with Bennett's Pyro infusion.
Budget-Friendly Options
Kaveh/Yaoyao/Barbara/Aino offers F2P Bloom damage for the first half. Kaveh's EM scaling maximizes core detonation, while Yaoyao contributes Dendro application and healing. It's not glamorous, but it works.
Ororon/Xingqiu/Fischl/Sucrose delivers budget Electro-Charged for second-half shields. Ororon provides Electro battery support, Fischl adds off-field damage, and you get consistent reactions through Hydro application.
Character Tier Breakdown (The Real Talk)
DPS Rankings That Matter
SS-Tier: Mavuika leads through explosive Burst scalings with A Thousand Blazing Suns plus Obsidian Codex 4pc. Nefer rivals established DPS in Lunar-Bloom teams with those shadow attack mechanics. Flins dominates Lunar-Charged with Electro infusion and Thunderous Symphony.
S-Tier: Neuvillette maintains strong performance through self-healing and consistent Charged Attacks. Arlecchino provides powerful Pyro damage in Mono-Pyro/Overload compositions.
A-Tier: Alhaitham faces meta challenges despite excellent Hyperbloom performance. Lower investment requirements preserve accessibility – which honestly might be more important for most players than chasing the absolute meta.
Support Priorities (Where Your Primos Should Go)
SS-Tier: Bennett's universal attack buffs maintain the highest pick rates with Skyward Blade plus Noblesse 4pc. Some things never change. Furina provides semi-infinite off-field Hydro with Golden Troupe 4pc. Lauma enables Lunar-Bloom with 100% Dendro uptime and RES shred via Nightweaver's Looking Glass plus Deepwood 4pc.
S-Tier: Nahida's C2 provides 250 EM Burst buffs with A Thousand Floating Dreams plus Deepwood 4pc. Xilonen contributes universal RES shred across Pyro/Cryo/Electro/Hydro/Geo with conditional healing.
Floor-Specific Strategy Guide
Floors 9-10: The Warm-Up
These floors require moderate investment with 4-star viability. The 60% Electro/Dendro bonuses favor Quicken/Aggravate teams. Floor 9 benefits from AoE damage with Kazuha grouping plus Electro/Dendro carries. Floor 10's single-target focus rewards hypercarry compositions like National variants.
Floors 11-12: Where It Gets Serious
Floor 11 maintains that 60% Electro/Dendro bonus to all party members. Chamber 1 Upper enemies sit at 852,422 HP. Leverage Aggravate teams here – Keqing/Fischl/Nahida/Kazuha or Tighnari/Fischl/Nahida/Zhongli work beautifully.
Floor 12 is where the new meta really shows its teeth. First-half Lunar-Bloom exploits those 200% Bloom buffs against the Tainted Water-Splitting Phantasm (851,787 HP) and Primordial Bathysmal Vishap (2,085,774 HP).
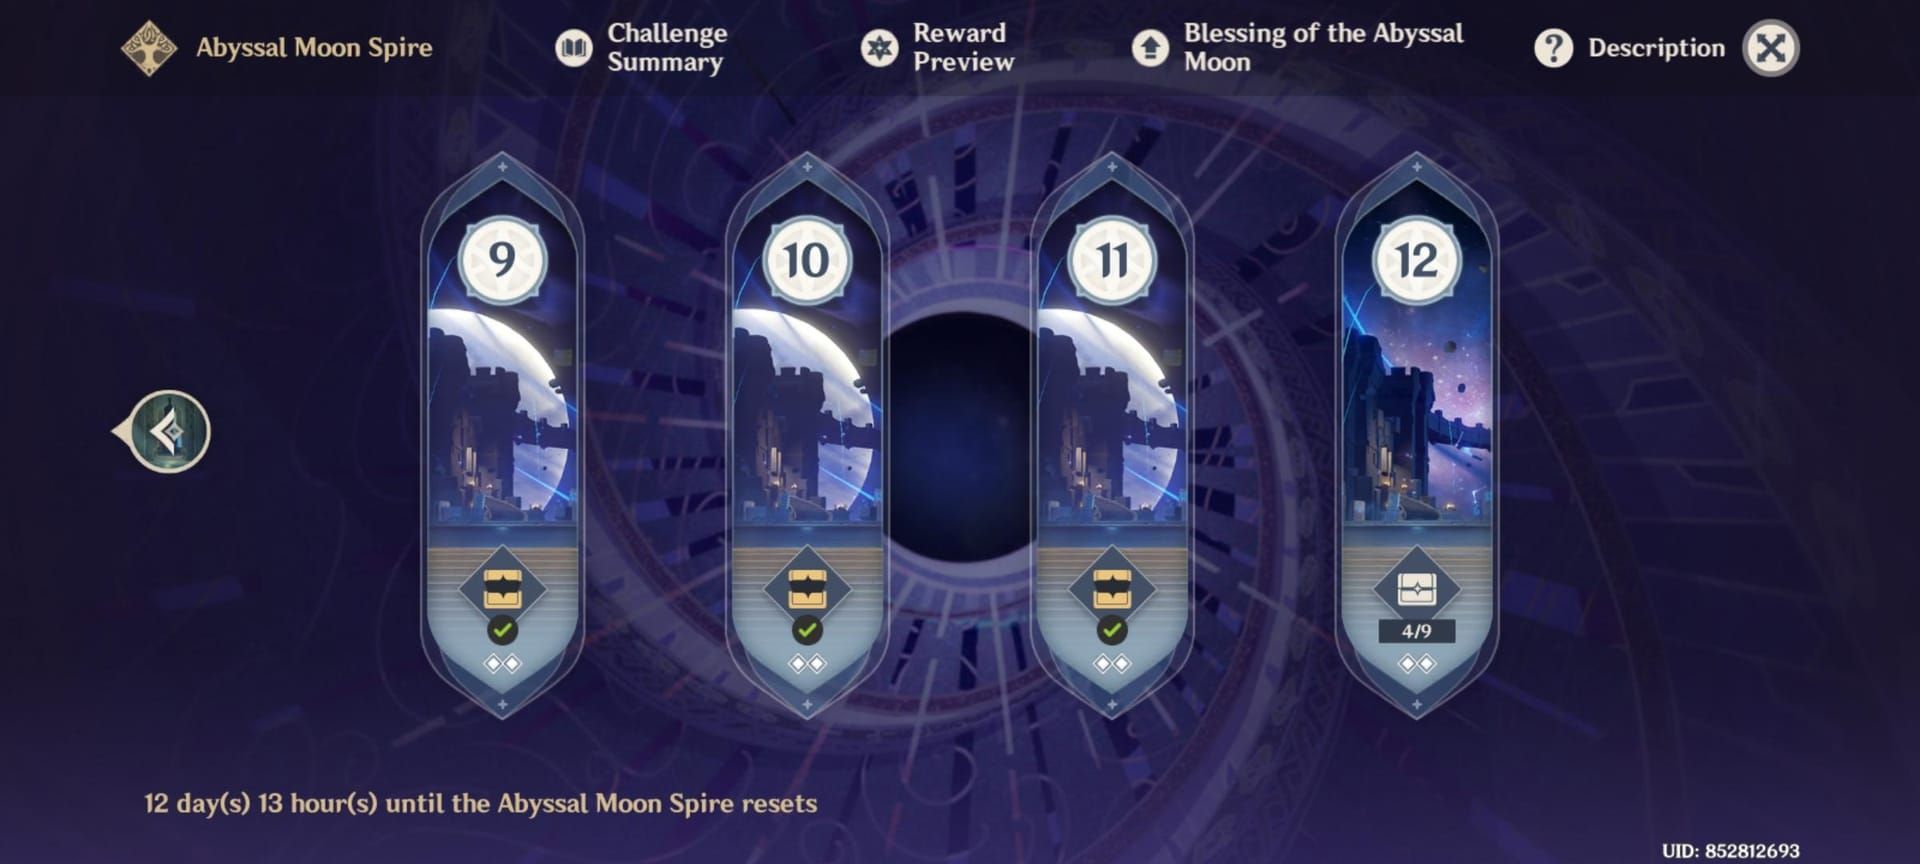
Second-half Lunar-Charged targets the Fireblade Shock Trooper's three shield layers.
Enemy-Specific Counters
Primordial Bathysmal Vishap: Burst before the 30-second armor generation to avoid that nasty 16U Hydro Armor and Energy-draining Aura Field. Trust me on this one.
Battle-Scarred Rock Crab: Convert all 6 Hermit Seeds via Bloom reactions for shield break and 40% RES reduction. It's not optional.
Fireblade Shock Trooper: Break those three shield layers within 30 seconds using Electro-Charged (600% damage) or Lunar-Charged (200% damage). Miss this window and you're in for a long fight.
Building Teams That Actually Function
Core vs Flex Philosophy
First-Half Core: Dendro + Hydro + Reaction Trigger + Flex. Lauma handles Dendro consistency, Aino provides Hydro application, Nilou enhances cores, and your flex slot accommodates healing (Baizhu) or additional support (Nahida).
Second-Half Core: Electro + Hydro + Amplifier + Flex. Flins brings Electro DPS, Aino enables with Hydro, Ineffa amplifies reactions, and flex includes crowd control (Sucrose) or buffs (Kazuha).
Energy Management Reality
Flins demands 160-180% ER for consistent Bursts – this isn't negotiable. Bloom teams prioritize EM over ER, which actually makes artifact farming easier. Battery characters like Fischl (Electro) or Faruzan (Anemo) enable lower ER requirements while contributing off-field damage.
Investment Guide (Where to Spend Your Resources)
Character Leveling Priority
Priority 1 - Main DPS: Ascend to 80/90 for base stats and talent access. Focus Normal Attack and Elemental Burst talents first – this is where your damage comes from.
Priority 2 - Key Enablers: Level reaction triggers like Kuki Shinobu (Hyperbloom) or Nilou (Bloom) to 70/80. EM scaling characters benefit more from artifacts than levels, so don't go crazy here.
Priority 3 - Supports: Maintain at 60/70 unless specific scaling demands higher. Bennett's base attack and Kazuha's Swirl damage justify 80/90 investment, but most supports function fine at lower levels.
Artifact Farming Route (My Recommended Path)
Week 1-2: Main DPS sets – Obsidian Codex (Mavuika), Night of Sky's Unveiling (Flins/Nefer), Marechaussee Hunter (Neuvillette). Get your damage dealers sorted first.
Week 3-4: Support artifacts – Deepwood Memories (Dendro supports), Golden Troupe (off-field DPS), VV (Anemo), Noblesse (burst supports). This is where teams start clicking.
Week 5-6: Optimize substats and secondary sets – Tenacity (HP scalers), Gilded Dreams (EM characters), specialized niche sets. The polish phase.
Weapon Priorities That Matter
5-Star: Prioritize signatures for main DPS – A Thousand Blazing Suns (Mavuika), Tome of Eternal Flow (Neuvillette), Splendor of Tranquil Waters (Furina). These make or break performance.
4-Star: Craft accessible options – Prototype Amber (healers), Iron Sting (EM characters), Prototype Rancour (physical DPS). Refinement significantly impacts effectiveness here.
Level 90 main DPS weapons for maximum base attack. Level 80 support weapons for ER and secondary stats. Level 70 utility weapons function adequately – don't overthink this part.
Execution Tips (The Stuff That Actually Matters)
Rotation Optimization
Lunar-Bloom: Begin with Dendro application (Lauma Skill) → Hydro enabling (Aino Burst) → core generation (Nilou Skill) → maintain through reapplication. Avoid early Bursts that disrupt core timing – I see this mistake constantly.
Lunar-Charged: Establish Hydro aura (Aino Skill) → apply Electro (Flins Skill) → trigger reactions (Ineffa Burst) → amplify with crowd control (Sucrose Burst). Maintain consistent Hydro to prevent interruption.
Energy Funneling: Generate particles with battery characters before switching to energy-hungry DPS. Fischl's Oz provides consistent Electro particles for Flins – use this.
Common Mistakes I Keep Seeing
Shield Breaking: Target immediately upon appearance. Fireblade Shock Trooper shields regenerate if not broken within 30 seconds. Rock Crab requires 6 seed conversions for optimal damage windows – no shortcuts.
Burst Timing: Align damage Bursts with vulnerability phases. Primordial Bathysmal Vishap becomes dangerous after 30 seconds, requiring frontloaded damage. Plan accordingly.
Grief-Stricken Management: Use Moonsign: Ascendant Gleam abilities for immediate Grief-Stricken states rather than depleting full HP bars. Lunar characters provide efficient grey bar damage – this saves so much time.
Troubleshooting Poor Performance
Insufficient Damage: Verify artifact main stats align with character scaling (ATK% for attack scalers, EM for reaction triggers, HP% for HP scalers). Upgrade weapons to appropriate levels, ensure talent priorities match usage patterns.
Energy Problems: Increase ER through substats/weapons. Use battery characters effectively, optimize rotation timing for particle generation and collection. This is usually the culprit.
Survivability Issues: Include dedicated healers for HP-draining encounters. Kokomi, Baizhu, Sigewinne provide healing and elemental application. Don't try to tank everything.
Time Management: Focus consistent damage over burst windows. Maintain reaction uptime, minimize character swap delays. Smooth rotations beat perfect ones.
FAQ (The Questions Everyone's Asking)
What are the most important characters for 6.x Spiral Abyss success? Lauma and Flins represent the highest priority pulls. Lauma enables Lunar-Bloom with 100% Dendro uptime and essential RES shred, while Flins provides premier Lunar-Charged DPS with exceptional endgame scaling. Mavuika offers an alternative burst-oriented Vaporize/Melt gameplay style.
How much investment do characters need for 36-star clears? Main DPS: level 80/90, 8/8/8 talents, optimized artifacts with correct main stats. Supports: level 70/80, 1/6/8 talents focusing Burst/Skill. Weapons: level 90 main DPS, level 80 supports. 4-star alternatives remain viable through refinements.
Which team should I prioritize for one optimal composition? Focus Lunar-Bloom teams for first-half optimization. Nilou/Lauma/Aino/Baizhu provides comprehensive coverage with healing, reaction damage, and enemy counters. It remains viable across multiple rotations and adapts well to meta shifts.
What's the difference between traditional Bloom and Lunar-Bloom? Lunar-Bloom can critically strike and scales with party statistics (100% highest damage, 50% second, 1/12 others), while traditional Bloom relies solely on the triggering character's EM. Lunar-Bloom also benefits from a 75% damage bonus in current Ley Lines.
How do I counter Grief-Stricken effectively? Use Lunar characters like Flins/Lauma to trigger Moonsign: Ascendant Gleam abilities, immediately activating Grief-Stricken states and reducing damage requirements by 90%. Without Lunar characters, focus on depleting the grey HP bar after initial defeat.
What are common mistakes preventing Abyss success? Bursting too early in multi-wave encounters causes energy deficits during crucial phases. Neglecting healing against HP-draining enemies like Primordial Bathysmal Vishap causes team wipes. Poor shield-breaking timing allows enhanced defensive states that dramatically extend clear times.