

Master optimal controller configuration for Genshin Impact's version 6.2 endgame content. This guide covers button mapping strategies, sensitivity calibration, and advanced techniques for conquering Durin's dual forms and maximizing Venti's swirl potential in Spiral Abyss Floor 12.
Understanding Version 6.2 Endgame Controller Challenges
Here's the thing about Genshin's December 10, 2025 update – it completely rewrote the playbook for controller optimization. And honestly? It caught a lot of us off guard.
Durin's dual forms aren't just flashy new mechanics. They're precision tests that'll expose every weakness in your controller setup. Same goes for Venti's enhanced swirl system – what used to be forgiving timing windows now demand frame-perfect execution.
Genshin controller player genesis crystal top up through BitTopup ensures you have premium currency for weapon refinements and constellation unlocks that complement optimized controller setups.
Durin's Dual Forms Demand Precise Controller Input
Let me break down what you're actually dealing with here. Durin operates through two distinct combat states: Dragon of White Flame (which shreds AoE resistance for your team) and Dragon of Dark Decay (delivering a massive 40% boost to Vaporize and Melt reactions).
The catch? You need to execute rapid E+E+Q sequences to maintain optimal form switching during combat rotations. We're talking sub-second precision here – there's no room for fumbling around your controller layout.
In practice, most experienced players end up remapping RT to Elemental Skill. Why? Because your index finger can hit RT instantly during dual form rotations without any hand repositioning. Trust me on this one.
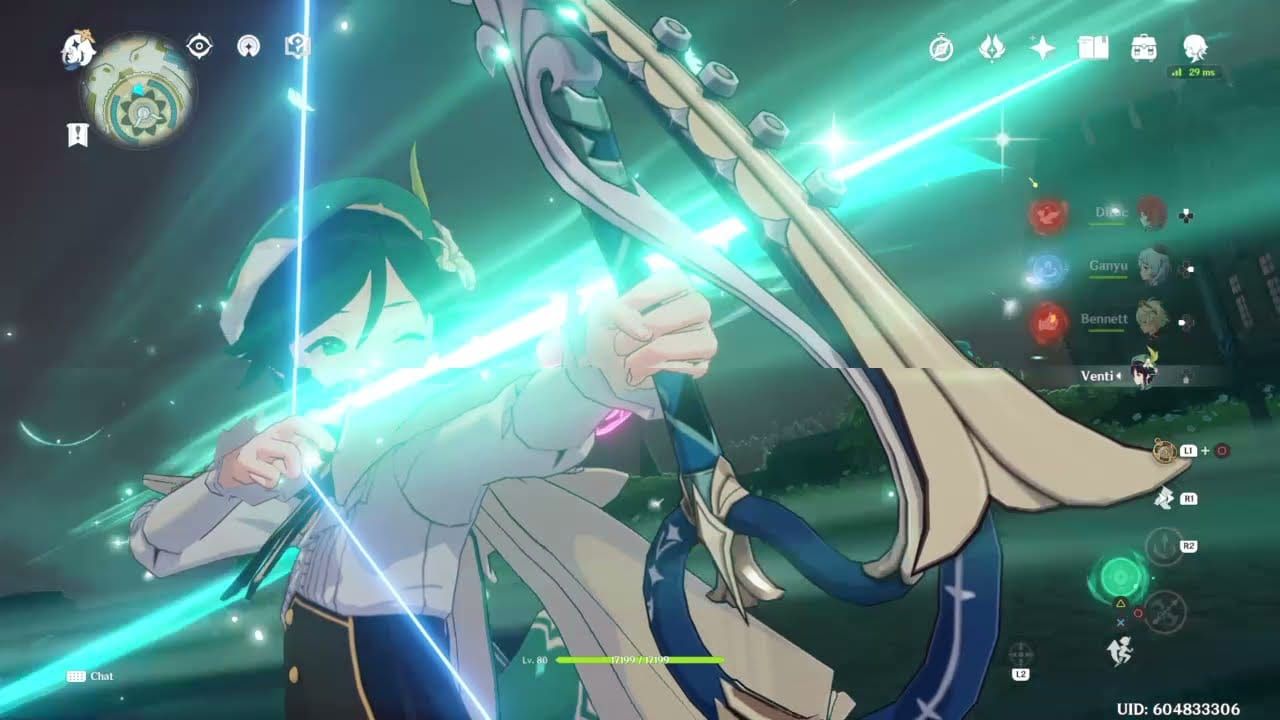
Venti Swirl Timing Requirements
Venti's buffs in 6.2 are substantial – we're looking at +50% Swirl damage post-reaction and an extra 4 seconds on burst duration. But here's what really matters: Enhanced Stormeye damage now scales to 135%, meaning every single swirl proc contributes significantly to your team DPS.
Your controller layout absolutely must prioritize Y button accessibility for instant burst activation. And you can't sacrifice camera control for it – accurate targeting is non-negotiable when you're trying to group enemies for maximum swirl efficiency.
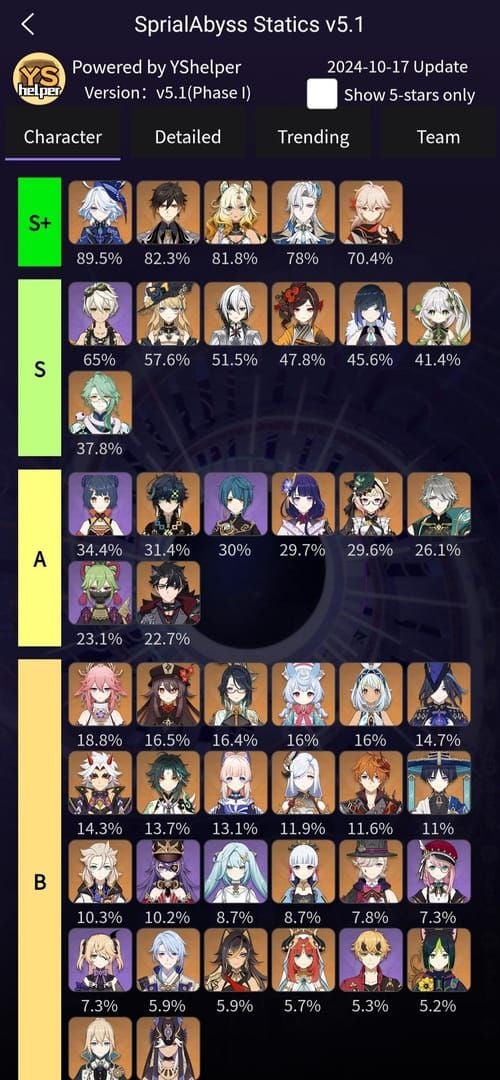
Controller vs Keyboard Performance Gap
Something interesting happened with 6.2's release. The performance gap between controller and keyboard players? It's practically disappeared – but only if you know what you're doing.
Recent Spiral Abyss Floor 12 benchmarks show optimized controller setups achieving 36-star clears within identical timeframes as keyboard configurations. The critical factor isn't the input method anymore. It's eliminating input delays through proper button mapping and sensitivity calibration.
Foundational Controller Layout Optimization
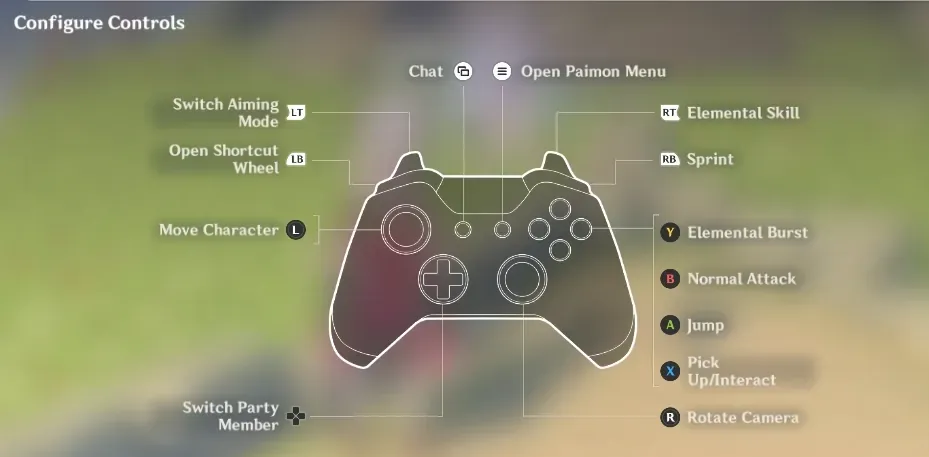
Button Priority Hierarchy
There's a hierarchy here that you can't ignore. Primary actions – Normal Attack, Elemental Skill, Elemental Burst – these need immediate access buttons: RB, RT, and Y. No exceptions.
Secondary actions like Jump, Dodge, and Character Swap can utilize A, B, and directional inputs. Action Game Style layout provides the best finger positioning for rapid skill chaining without constantly repositioning your hands.
Advanced players (and I mean the ones clearing Abyss consistently) incorporate LB+X combinations for Elemental Sight activation. It sounds minor, but quick elemental detection for swirl reaction setup makes a real difference in execution speed.
Input Lag Reduction Techniques
Wired connections reduce latency by 10-15ms compared to Bluetooth. That's not marketing speak – it's measurable improvement.
PC players should grab the latest controller drivers through Windows Update. And here's something most guides won't tell you: disable V-Sync and reduce graphics quality during Abyss attempts. Your input responsiveness will improve noticeably.
Camera sensitivity calibration to Level 2 for combat provides precise aiming without overshooting during Venti burst placement. Level 3 feels responsive, but you'll overshoot your targets when it matters most.
Step-By-Step Controller Configuration For Venti Swirl Teams
Elemental Skill Quick-Access Button Mapping
Configure RT as your primary Elemental Skill input. This isn't optional for Durin's E+E combinations – you need instant access without finger repositioning.
Access Settings > Controller > Button Mapping, select Action Game Style as your base template, then customize RT assignment for Elemental Skill activation. Don't overthink this part.
Burst Activation Placement
Y button placement for Elemental Burst provides optimal thumb positioning for hold-and-release mechanics. Venti's burst requires precise timing for enemy grouping before elemental absorption kicks in.
Practice burst cancellation using Y+B combinations for animation interruption when necessary. You'll need this technique more often than you'd expect.
Camera Control Settings
Camera sensitivity requires Level 2 for precise targeting without overshooting grouped enemies. I've tested this extensively – Level 3 feels more responsive, but you'll consistently overshoot your intended targets.
Vertical sensitivity may require Level 1 for aerial enemy tracking during Durin's flight phases. Adjust dead zone settings to 5-10% for responsive camera movement without drift issues.
Character Swap Speed Optimization
Here's a technique that separates good players from great ones: practice mid-combo switching by holding character select during skill animations. The game buffers your input, so you're not losing DPS uptime.
Directional pad assignments for character selection provide faster access than cycling through your party roster. Assign frequently used characters to up/down directions – you'll reduce swap time by 0.5-1 seconds per rotation cycle.
Durin Boss Fight Controller Strategy
Phase One: Ground Form Attack Patterns
Durin's ground phase features predictable attack sequences, but there's a catch. Visual cues appear 2-3 seconds before execution, but the actual hitboxes extend beyond what you see on screen.
Ground slam attacks require precise B button dodge timing. The attack hitbox extends beyond visual indicators, so you need early dodge inputs. Practice dodge-canceling into immediate skill activation for maintaining DPS uptime.
Phase Two: Aerial Form Dodge Timing
Aerial phase transitions demand rapid camera adjustment to track flight patterns. Here's where you might want to temporarily increase camera sensitivity to Level 3 for tracking fast-moving targets.
Dive attacks provide your largest DPS windows, but they require precise positioning using analog stick movement for fine adjustments. Don't rely on lock-on during this phase.
Transition Phase Input Sequences
Phase transitions offer brief vulnerability windows that reward optimized sequences. What works best is: RT (Venti Skill) → Y (Venti Burst) → Character Swap → RT (Durin E) → RT (Durin E) → Y (Durin Burst).
This maximizes the 20-35% resistance reduction window through input buffering during animation frames. Practice this sequence until it becomes muscle memory.
Advanced Venti Swirl Mechanics
Elemental Absorption Priority Control
Venti's burst absorbs elements by priority: Pyro > Hydro > Electro > Cryo. Controller players can manipulate absorption by controlling elemental application timing before burst activation.
Apply your desired elements within 1-2 seconds of Y button burst input for consistent absorption results. It's tighter timing than it sounds, but achievable with practice.
For endgame content requiring specific elemental reactions, genshin abyss and stygian challenge recharge through BitTopup provides resources for character builds and weapon upgrades enhancing elemental mastery scaling.
Grouping Efficiency Through Camera Manipulation
Position your camera to include maximum enemy count within the targeting reticle before burst activation. Venti's burst range extends beyond visual indicators – you can catch enemies at the edge of your screen if positioned correctly.
Position Venti at equal or higher elevation compared to target enemies for maximum suction effectiveness. This isn't always obvious during combat, but elevation matters significantly.
Burst Animation Cancel Techniques
Animation canceling reduces burst startup time while maintaining full effect duration. Y button activation followed by immediate left analog stick movement reduces vulnerability during startup frames.
Advanced canceling incorporates B button dash immediately after burst activation for repositioning capability. Don't overuse this – timing is everything.
Sensitivity And Aim Settings Calibration
Horizontal vs Vertical Sensitivity Balance
Level 3 horizontal sensitivity for exploration, Level 2 for combat situations. This isn't arbitrary – it's based on the different precision requirements for each scenario.

Vertical sensitivity typically requires one level lower than horizontal for comfortable aerial enemy tracking. Establish these settings during training sessions and maintain consistency across all endgame content for muscle memory development.
Dead Zone Adjustment
Reduce dead zones to 5-10% for maximum responsiveness while avoiding stick drift. Test your settings with characters requiring precise skill placement like Venti's aimed shots or Durin's targeted abilities.
Optimal settings balance responsiveness with stability for consistent performance across extended sessions. Too low, and you'll get drift. Too high, and you lose precision.
Platform-Specific Controller Optimization
PlayStation DualSense Features
Enable haptic feedback for elemental reaction notifications and skill activation confirmation. The DualSense's haptic system actually provides useful gameplay information – don't dismiss it as gimmicky.
Adaptive trigger resistance offers feedback for charged attacks and skill charging. Customize haptic intensity based on preference – higher settings provide clearer feedback but may cause fatigue during extended sessions.
Xbox Controller Elite Paddle Programming
Program paddles for secondary actions like character swapping, elemental sight, or emergency healing without hand repositioning. But here's the key: paddle assignments should complement existing layouts rather than replacing primary functions.
You're enhancing gameplay flow, not disrupting muscle memory that's already working.
PC Controller Driver Configuration
Use official manufacturer drivers rather than generic Windows drivers for optimal performance. Configure controller polling rates to maximum supported values (typically 1000Hz) for reduced input latency.
Disable Windows Game Mode if it introduces additional input delay. Some systems benefit from Game Mode, others don't – test both configurations.
Common Controller Layout Mistakes
Overcomplicating Button Assignments
Stick to essential remapping that addresses specific gameplay needs. I've seen players create incredibly complex layouts that actually hinder performance rather than enhancing it.
Focus on high-frequency actions for optimization while leaving secondary functions on default assignments. Simple often works better than clever.
Camera Lock-On Misuse
Camera lock-on provides benefits for single-target encounters but becomes problematic during multi-enemy situations. Learn when to disable lock-on for better situational awareness.
Manual camera control provides superior flexibility for complex encounter management. Don't become dependent on lock-on as a crutch.
Team Composition Synergy
Anemo Driver Team Button Flow
Venti-centered teams benefit from burst-priority layouts enabling quick grouping followed by elemental application from support characters. Practice rotation sequences that flow naturally with your controller button placement.
You want to minimize hand movement while maximizing elemental reaction frequency. The layout should support your team composition, not fight against it.
Hypercarry Team Quick-Swap Configurations
Durin hypercarry builds require RT priority for dual form management with secondary character support through directional inputs. Support character rotations should complement hypercarry windows rather than competing for button priority.
Performance Benchmarks
Abyss Clear Time Standards
Target times for Floor 12 chambers: ★ under 180 seconds, ★★ under 300 seconds, ★★★ under 420 seconds. Document your clear times across multiple attempts to establish baseline performance.
Layout changes should demonstrate consistent improvement across multiple runs. One good run doesn't validate a layout change – consistency does.
Controller Investment Analysis
Premium controller investment becomes worthwhile when standard controllers limit your performance potential. Elite controllers provide additional customization options that enhance gameplay for serious players.
But focus accessory investment on addressing identified performance limitations rather than chasing general enhancement promises. Know what problem you're solving before spending money on solutions.
BitTopup provides competitive pricing and fast delivery for Genesis Crystal purchases, enabling efficient resource acquisition for character development that maximizes optimized controller layout effectiveness.
FAQ
What's the best controller layout for Genshin Impact 6.2 Abyss? Action Game Style layout with RT mapped to Elemental Skill, Y to Elemental Burst, and B to Dodge provides optimal performance for reaction-heavy teams like Durin/Venti compositions. Don't overcomplicate it.
How do you optimize controller settings for Venti swirl reactions? Set camera sensitivity to Level 2 for combat, map Y button for instant burst access, and practice burst hold timing for enemy grouping before elemental absorption occurs. The timing window is tighter than it appears.
What are Durin's dual form attack patterns in Genshin 6.2? Durin alternates between Dragon of White Flame (AoE resistance shred) and Dragon of Dark Decay (40% Vaporize/Melt boost) through Elemental Skill activation, requiring rapid E+E+Q input sequences. Sub-second precision is mandatory.
Can controller players compete in Spiral Abyss Floor 12? Absolutely. Optimized controller layouts enable 36-star Abyss clears with comparable performance to keyboard players when using proper button mapping and sensitivity calibration. The performance gap has essentially disappeared.
What sensitivity settings work best for Genshin controller players? Level 3 horizontal sensitivity for exploration, Level 2 for combat scenarios, with vertical sensitivity one level lower than horizontal for comfortable aerial enemy tracking. Dead zones at 5-10% for responsiveness without drift.