

Genshin Impact 6.1 introduces Lunar reactions, S+ tier DPS characters Nefer and Mavuika, and specialized teams for Nod-Krai content. This tier list covers optimal builds, character rankings, and strategies for Spiral Abyss Floor 12, emphasizing Lunar-Bloom and Lunar-Charged reaction teams.
The 6.1 Meta Shakeup: What Actually Changed
October 22, 2025 hit us with version 6.1, and honestly? It's been a wild ride. Lunar reactions completely flipped the script on team building – and I mean completely.
Here's the thing about Lunar scaling that caught everyone off guard: it pulls from your entire party, but not equally. Your highest-damage character contributes 100%, second-highest gives 50%, and the other two... well, they're basically along for the ride at 1/12 each. Sounds weird on paper, but it works.
Spiral Abyss Floor 12 is where things get spicy. We're looking at 200% Bloom and Electro-Charged buffs (which is already nuts), plus 75% Lunar bonuses on top. The catch? Enemy HP jumped 375% in 6.x. Yeah, you read that right.
Nefer's dominating Lunar-Bloom reactions with a 75% damage increase over traditional Bloom teams. That's not a typo – it's genuinely that significant. Meanwhile, Flins brings Lunar-Charged to the table through her Thunderous Symphony, and Lauma's become the Dendro enabler we didn't know we needed.
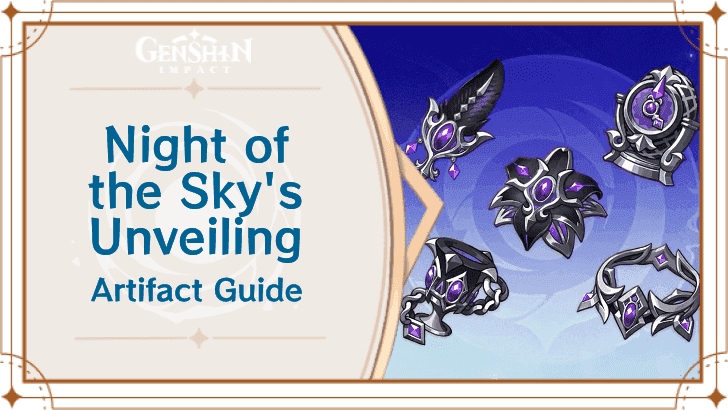
The new artifact sets are game-changers too. Night of Sky's Unveiling and Silken Moon's Serenade aren't just stat sticks – they're practically mandatory for serious Lunar team optimization.
S-Tier Powerhouses (And Why They Matter)
Mavuika sits comfortably at S+ tier, and frankly, she deserves it. Pair her with A Thousand Blazing Suns and Obsidian Codex 4-piece, and you're looking at consistent performance that scales beautifully. The investment's steep – level 80/90, 8/8/8 talents, 2000+ ATK with that crucial 60/70% CRIT ratio – but worth every resin.
Her synergy with Bennett's ATK buffs and Xilonen's universal RES shred creates damage windows that feel almost unfair. Almost.
Nefer revolutionized how we think about Dendro DPS. Before 6.1, Dendro was mostly about enabling reactions for others. Now? Nefer's Lunar-Bloom specialization makes her the star of the show.

Reliquary of Truth provides that sweet 88.2% CRIT DMG and 16% CRIT Rate, but the real magic happens with Night of Sky's Unveiling 4-piece.
The EM/CRIT balance took some figuring out (trust me, I've seen the theorycrafting spreadsheets), but converting Bloom reactions into CRIT-capable variants was the breakthrough moment.
Flins dominates Electro DPS in ways that surprised even veteran players.
Bloodsoaked Ruins gives her 674 ATK and 22.1% CRIT Rate, plus that 36% Lunar-Charged damage bonus that makes her rotations feel smooth as butter.
One thing I learned the hard way: prioritize ATK% over Electro DMG due to how Lunar-Charged scaling works. Counter-intuitive? Absolutely. Effective? You bet.
For players looking to secure these meta-defining characters, Genshin Impact Genesis Crystals top up through BitTopup offers competitive pricing and instant delivery – because let's face it, nobody wants to miss out on limited banners.
Night of Sky's Unveiling isn't just good; it's practically essential. That 80 EM and 15-30% CRIT Rate during Lunar reactions? Chef's kiss. Signature weapons hit 100% synergy ratings, though 4-star alternatives like Prospector's Shovel can reach 80-90% performance at R5.
A-Tier: Still Solid, Just Different
Alhaitham dropped from his previous heights but maintains strong Hyperbloom performance. Paired with Nahida's C2 for that 250 EM burst, he's still clearing content reliably. Gilded Dreams 4-piece remains his go-to, focusing on EM scaling that actually matters.
The classic Alhaitham/Nahida/Xingqiu/Kuki Shinobu comp? Still crushing Spiral Abyss first-half encounters. Not flashy, but consistent.
Neuvillette took a hit in the transition from SS to A-tier, but his self-healing Charged Attacks keep him relevant. Single-target encounters still favor Neuvillette/Furina/Kazuha/Bennett compositions. Arlecchino holds her ground in Mono-Pyro setups, even with reduced Lunar synergy.
A-tier characters are more forgiving investment-wise. Level 70/80 with 6/6/6 talents gets you there, requiring about 2000-3000 resin over 2-3 weeks. Weapon requirements lean toward 4-star options with craftable alternatives – budget-friendly without sacrificing performance.
Team Compositions That Actually Work
SS-Tier: Nilou/Lauma/Aino/Baizhu optimizes Lunar-Bloom reactions in ways that feel almost broken.
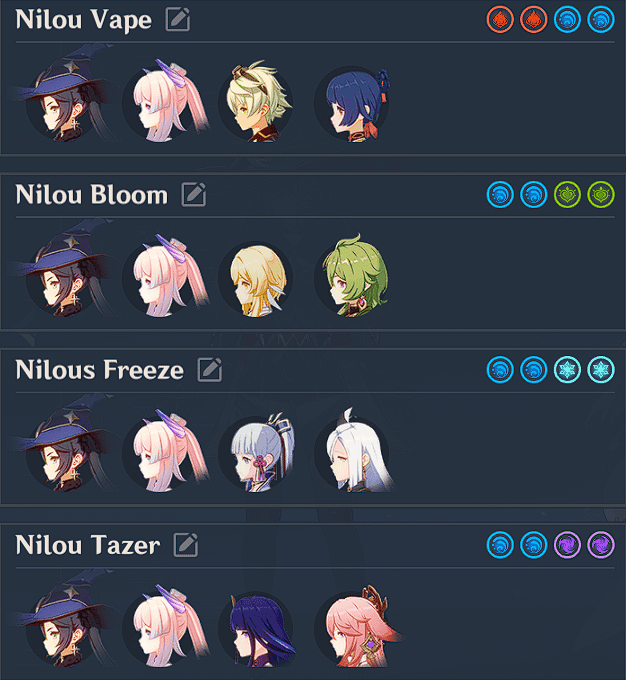
Nilou enhances Bountiful Cores to 500% Bloom damage with a 1.5M cap (which you'll hit more often than you'd think). Lauma provides 100% Dendro uptime and 25% RES shred.
The rotation's elegant: Lauma Skill → Aino Burst → Nilou Skill. Converting 6 Hermit Seeds for 40% RES reduction becomes second nature after a few runs.
SS-Tier: Flins/Ineffa/Aino/Sucrose dominates through Lunar-Charged optimization. This team counters Fireblade Shock Trooper shields with 600% Electro-Charged damage, breaking 3 shields within 30 seconds. Requires 2+ Nod-Krai characters for Ascendant Gleam activation – non-negotiable.
For optimizing these team compositions with proper investments, buy Genshin Impact recharge crystals from BitTopup ensures reliable access to constellation upgrades and weapon refinements through competitive rates and secure transactions.
A-Tier: Mavuika/Bennett/Furina/Xilonen offers versatility for burst encounters when you need raw damage output.
A-Tier: Alhaitham/Nahida/Xingqiu/Kuki Shinobu provides budget-friendly Hyperbloom consistency. Minimal investment, maximum reliability.
Nod-Krai Enemies: Know Your Targets
Frostnight Herra requires 50 damage instances to exit Gloomveiled state. Sounds simple until you're frantically counting hits mid-rotation. Flins/Ineffa/Yelan/Sucrose excels through rapid Lunar triggers that make this mechanic manageable.
Battle-Hardened Lightkeeper demands Ascendant Gleam for Max HP drain mechanics. This one's tricky – Nefer/Lauma/Aino/Kuki Shinobu provides optimal coverage, requiring 238.46% base HP without Moonsign or 100% with Ascendant Gleam. The math matters here.
Veteran Frost Operative favors Bond of Life characters. Clorinde/Chevreuse/Mavuika/Iansan procs weapons pre-Shield and breaks shields for damage windows that actually feel satisfying.
For exploration? Mavuika/Xilonen/Lauma/Yelan combines fast Burgeon setup with superior traversal. Quality of life matters.
Lunar-Bloom rotations follow a rhythm: Lauma Skill → Aino Burst → Nilou Skill maintains core generation. Lunar-Charged rotations need tighter timing: Aino Skill → Flins Skill → Ineffa Burst → Sucrose Burst ensures continuous triggers without gaps.
Floor 12: Where Theory Meets Reality
First half features those 200% Bloom buffs with 75% Lunar-Bloom bonuses. Nilou/Lauma/Aino/Baizhu achieves optimal performance against Tainted Water-Splitting Phantasm (851,787 HP) and Primordial Bathysmal Vishap (2,085,774 HP).
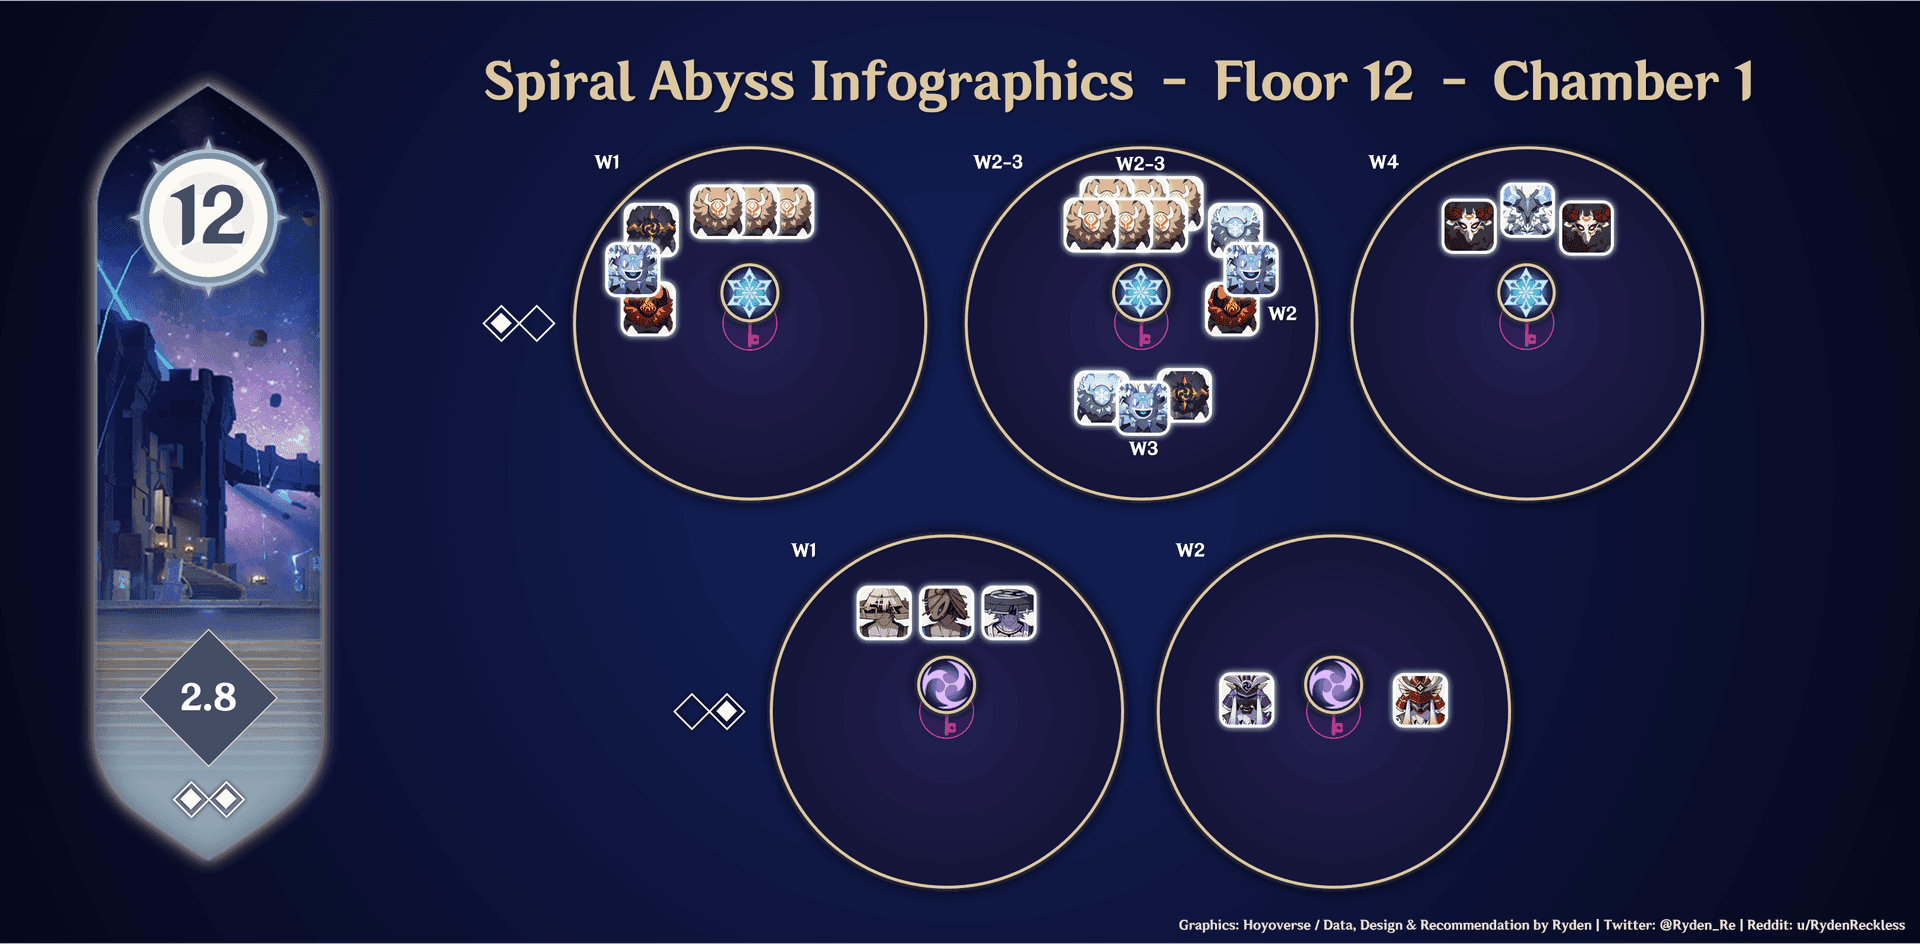
The timing window's crucial – you need burst timing within 30 seconds before 16U Hydro Armor activation. Miss that window, and you're in for a slog.
Second half emphasizes 200% Electro-Charged with 75% Lunar-Charged bonuses. Flins/Ineffa/Aino/Sucrose counters Fireblade Shock Trooper (4,765,990 HP) shields effectively. Flins needs Bloodsoaked Ruins with Night of Sky's Unveiling 4-piece, 2000-2200+ ATK, 60-70% CRIT Rate, 160-180% ER.
Three-star clears require 420+ seconds remaining. Total reward: 600 Primogems for 36-star completion. Common mistakes I see constantly: early burst usage causing energy shortages, ignoring healing requirements, delayed shield breaks.
Support Rankings: The Unsung Heroes
SS-Tier: Bennett provides ATK buffs with Skyward Blade and Noblesse 4-piece. His C6 constellation adds Pyro infusion benefits that actually matter now.
SS-Tier: Furina delivers consistent off-field Hydro with Golden Troupe 4-piece scaling that feels smooth in practice.
SS-Tier: Lauma specializes in Dendro uptime and 25% RES shred through Nightweaver's Looking Glass. She's become indispensable.
S-Tier: Nahida maintains relevance through C2's 250 EM burst and A Thousand Floating Dreams synergy. Still strong, just not dominant.
S-Tier: Xilonen provides universal RES shred across all elements with healing capabilities. Versatility incarnate.
A-Tier: Sucrose offers VV shred and crowd control with Sacrificial Fragments. Reliable, if unexciting.
A-Tier: Kuki Shinobu provides Electro application and healing in Hyperbloom compositions with 4-star accessibility. Budget-friendly excellence.
Building Teams That Actually Function
Energy Management isn't glamorous, but it's essential. Generate particles with battery characters before DPS switches. Maintain 160-180% ER on main DPS through substats and weapons. Favonius weapons work wonders for particle generation at 50%+ CRIT Rate.
Investment Priority follows a hierarchy: Level main DPS to 80/90 with 8/8/8 talents first. Enablers require 70/80 with EM focus. Supports function at 60/70, though Bennett and Kazuha benefit from 80/90 for base stat scaling.
Artifact Efficiency means focusing main stats before substats. Enhance to +16 before +20 upgrades – the resin efficiency matters. Prioritize Sands/Goblet over Circlet. Farm Nod-Krai domain for new sets while maintaining existing builds.
Constellation Priorities: What's Worth It?
Nefer C1 enhances Shadow Dance duration and energy generation. Quality of life improvement that feels significant in practice.
Flins C2 provides ER recovery on Lunar-Charged reactions, reducing requirements to 140-160%. Game-changing for rotation fluidity.
Lauma C4 reduces ER needs while improving Dendro application consistency. Not essential, but noticeable.
Most S+ characters achieve optimal performance at C0. C1 averages 150-180 pulls (24,000-28,800 primogems). Prioritize C0 acquisition over constellation upgrades for roster diversity. Focus weapon upgrades and artifact optimization before pursuing constellations – the math supports this approach.
FAQ
What are the best DPS characters in Genshin Impact 6.1? S+ tier includes Mavuika, Nefer, Flins, Neuvillette, Arlecchino, Skirk, and Varesa. These excel in Spiral Abyss Floor 12 with Lunar reaction synergies.
How do Lunar reactions work? They scale with party statistics: 100% from highest-damage member, 50% from second, 1/12 from others. Requires 2+ Nod-Krai characters for Ascendant Gleam bonuses.
Which teams are best for Floor 12? First half: Nilou/Lauma/Aino/Baizhu for Lunar-Bloom. Second half: Flins/Ineffa/Aino/Sucrose for Lunar-Charged. Both leverage 200% reaction buffs with 75% Lunar bonuses.
What artifacts should I prioritize? Night of Sky's Unveiling for DPS (80 EM, 15-30% CRIT Rate). Silken Moon's Serenade for Sub-DPS (20% ER, 60-120 EM). Dual sets provide 20% Lunar DMG bonus.
Are constellations necessary? Most S+ characters perform optimally at C0. High-impact options: Nefer C1, Flins C2, Lauma C4. Prioritize roster diversity over constellation upgrades.
How to build Nod-Krai teams? Include 2+ Nod-Krai characters for Ascendant Gleam. Focus Lunar enablers (Lauma for Bloom, Flins/Ineffa for Charged). Maintain 160-180% ER on main DPS.