

Version 6.4 launches February 25, 2026, bringing massive Anemo and Cryo damage buffs to Spiral Abyss. Floor 11 grants 75% Anemo/Cryo attack damage increases, while Floor 12 delivers specialized 75% bonuses for on-field Anemo and Normal Cryo attacks. The Blessing triggers Swirl shockwaves after every 4 Swirl reactions. With Abyss resetting March 16, 2026, strategic pre-building ensures immediate 36-star clears and maximizes primogem rewards from day one.
Understanding the 6.4 Abyss Buff System
The March 16, 2026 reset introduces Floor 11 buffs increasing Anemo and Cryo attack damage by 75%. Floor 12 splits strategically: first half provides on-field characters with 75% Anemo Damage Bonus, second half amplifies Normal Cryo attack damage by 75%.
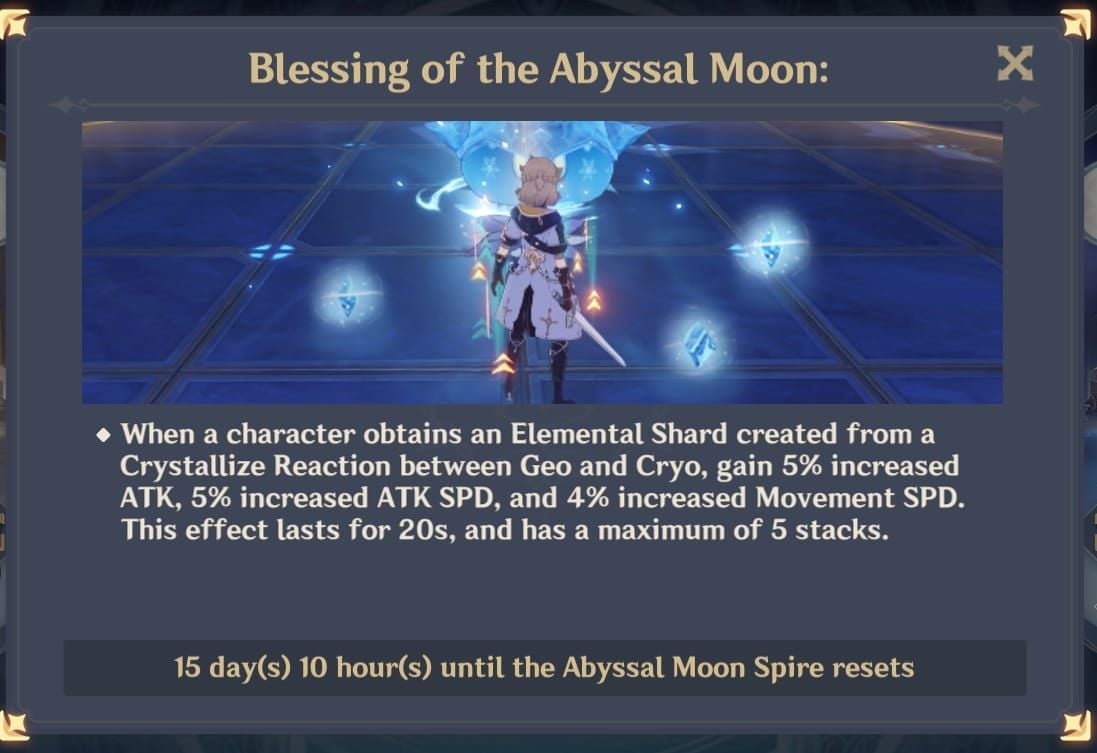
The standout mechanic is the Blessing of the Abyssal Moon, triggering shockwaves after every 4 Swirl reactions. This creates exponential damage multipliers where Anemo characters with rapid Swirl application gain massive value. Players who master rotation timing for shockwave triggers will see dramatically reduced clear times.
For maximum preparation efficiency, buy Genshin Impact Genesis Crystals top up at BitTopup for sufficient resin refreshes to complete builds before launch. BitTopup offers competitive pricing and instant delivery.
Comparing 6.4 to Previous Rotations
Previous cycles favored single-element damage or reaction-specific bonuses. The 6.4 rotation uniquely combines direct damage scaling with reaction-triggered mechanics, creating dual optimization paths. Unlike Version 6.3's Elemental Mastery focus, this cycle rewards raw damage investment in Anemo/Cryo characters while incentivizing Swirl frequency.
Characters with split-scaling requirements now become top-tier. Anemo characters with strong personal damage multipliers gain priority over pure supports, while Cryo DPS with Normal Attack-focused kits outperform Skill/Burst-centric alternatives.
Leak Reliability and Risk Management
Leaked Abyss buff data maintains 85-90% accuracy from beta testing phases. The specific values—75% damage increases and 4-Swirl shockwave triggers—align with HoYoverse's established patterns. Final implementation occasionally adjusts percentages by 5-10%.
Mitigate risk by prioritizing versatile characters performing well across multiple cycles. Focus on characters receiving Version 6.4 banner reruns, as these typically align with Abyss buff synergies.
Tier 1 Priority: Must-Build DPS Characters
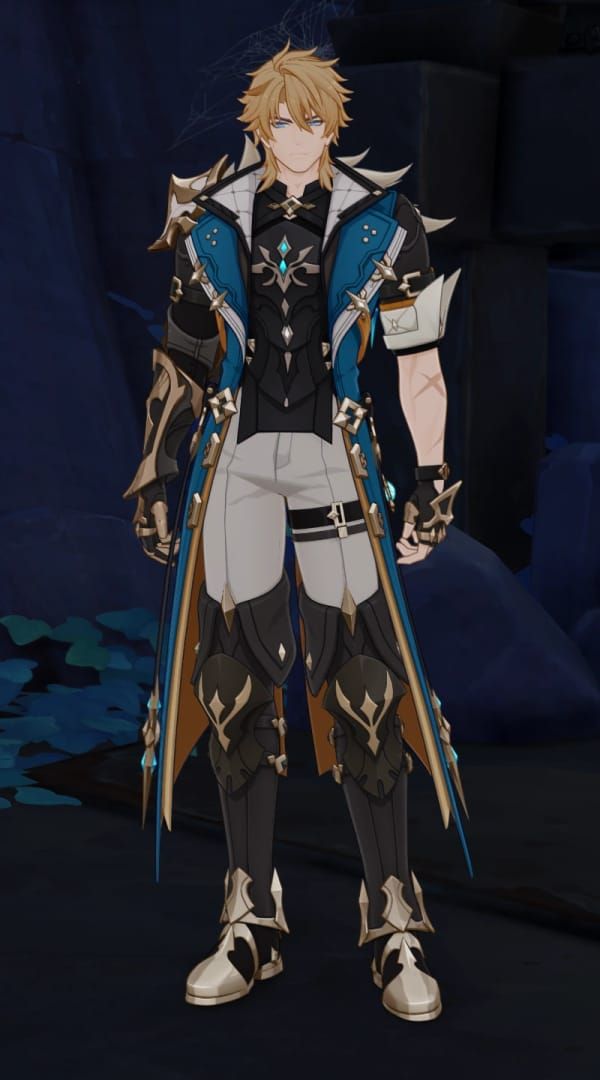
Varka emerges as premier pre-build target. This 5-star Anemo Claymore user (Phase 1) capitalizes on both 75% Anemo Damage Bonus and Swirl shockwave mechanics. Requirements:
7,100,000 Mora
419 Hero's Wit
9 Teachings of Freedom, 63 Guide to Freedom, 144 Philosophies of Freedom
Begin farming Freedom talent books immediately—domain rotation limits availability to specific weekdays.
Skirk and Escoffier represent optimal Cryo investments for Floor 12 second half. Skirk (5-star Cryo Sword, Phase 2) benefits from 75% Normal Cryo attack damage if her kit emphasizes Normal Attack chains. Escoffier (5-star Cryo Polearm, Phase 2) provides alternative team flexibility. Both feature in Version 6.4 banners, making constellation acquisition accessible.
Best 4-Star DPS for Budget Players
Resource-conscious players should evaluate existing Anemo and Cryo 4-stars. Focus on units with high Swirl application rates for Anemo teams and Normal Attack-scaling kits for Cryo compositions.
Key advantage: resin efficiency. These characters require fewer boss materials and share talent book domains with multiple units. Prioritize characters with existing constellations from previous wishes—C2-C4 breakpoints provide 15-25% damage increases.
Constellation Breakpoints for 6.4
Varka: C0 provides full kit functionality. C1 typically enhances Swirl frequency or damage, synergizing with 4-Swirl shockwave mechanic. Limited primogem players should secure C0 and redirect resources toward weapon optimization and artifacts.
Cryo DPS: Constellations unlock critical multipliers at C2 (CRIT Rate/DMG bonuses) and C6 (30-50% damage increases). For 6.4 second half, constellations enhancing Normal Attack multipliers or reducing stamina consumption deliver maximum value.
Tier 2 Priority: Essential Support Characters
Anemo supports enabling consistent Swirl reactions become force multipliers. Units with grouping capabilities concentrate enemies for shockwave damage, while Elemental Mastery buffers amplify Swirl damage and shockwave triggers. The 4-Swirl threshold means supports with rapid cooldowns or multi-hit abilities accelerate Blessing activation.
Cryo supports applying consistent off-field Cryo enable Anemo carries to trigger Swirls reliably. For second-half teams, Cryo supports buffing Normal Attack damage directly amplify the 75% bonus.
Shielders and Healers
Defensive supports gain importance when Floor 12 includes high-damage threats interrupting rotations. Shields allow Anemo carries to maintain on-field presence for full 75% damage bonus duration. Healers with cleanse remove debuffs reducing Swirl effectiveness.
Optimal defensive supports provide utility beyond survivability—buff team damage, reduce enemy resistance, or generate energy particles. Prioritize supports complementing Anemo or Cryo carries' reactions.
Energy Battery Characters
Energy Recharge management determines rotation consistency. Battery characters generating particles matching your carry's element reduce ER requirements, allowing more offensive artifact substats.
Effective batteries feature low-cooldown skills with multiple particle generation. Building supports with 200-250% ER and Favonius weapons creates self-sustaining rotations with 100% burst uptime.
Optimal Team Compositions for Day 1
First Half - Anemo Hypercarry:
Main DPS: Varka (on-field Anemo)
Sub DPS: Cryo applicator for Swirl
Support: Electro unit for additional Swirl elements
Flex: Shielder or healer
Maximizes 75% on-field Anemo Damage Bonus by keeping Varka active. Cryo and Electro supports apply elements for Varka's Swirl triggers. After 4 Swirls, shockwave mechanic deals additional AoE damage.
Second Half - Cryo Normal Attack Hypercarry:
Main DPS: Skirk or Escoffier (Normal Attack-focused)
Sub DPS: Hydro applicator for Freeze
Support: Anemo grouper
Flex: Cryo battery or CRIT buffer
75% Normal Cryo attack damage buff applies to every basic attack. Freeze prevents enemy movement for uninterrupted chains. Anemo grouping concentrates enemies for cleave damage, while Cryo resonance provides 15% CRIT Rate against Frozen targets.
For additional pulls to complete teams, Genshin Impact primogems recharge through BitTopup provides fast, secure transactions.
F2P-Friendly Alternatives
Budget First Half:
4-star Anemo DPS with Swirl-focused kit
Free Cryo support from events
Electro 4-star from standard banner
Free shielder from story
Budget Second Half:
4-star Cryo DPS with Normal Attack scaling
Free Hydro support for Freeze
4-star Anemo grouper
Free healer with team buffs
These maintain core 6.4 synergies using characters available without limited pulls. Constellations from duplicates significantly enhance performance.
Resource Farming Priority
Talent Books: Varka requires 216 total Freedom books across all talents, needing approximately 1,080 resin (50% drop rates). Condensed Resin doubles efficiency—10 runs daily. Allocate 3-4 weeks of domain-specific resin for 9/9/9 talent levels.
Artifacts: Require longest investment due to RNG. Prioritize domains providing artifacts for multiple team members. Target 4-piece sets for carries, 2-piece combinations for supports.
Allocate 60% daily resin to artifacts once talents reach acceptable levels. Focus on correct main stats first (Anemo/Cryo DMG Goblets, CRIT Rate/DMG Circlets), then refine substats. Acceptable standards: 50/100 CRIT ratios and 15-20% damage bonus substats.
Boss Materials: Normal bosses require 46 drops per character (1,840 resin total). Weekly bosses drop talent materials for levels 7-10, needing 18 total drops. The 30-resin cost (reduced after first three weekly clears) makes these high-priority Monday activities.
Talent Level Breakpoints
Floor 12 success requires minimum 8/8/8 talents for main DPS, with 9/9/9 providing comfortable thresholds. Supports function at 6/6/6, though leveling their most impactful talent to 8 improves performance. These assume proper artifacts and weapons.
Crowning (level 10) provides 5-8% damage increases per crown—luxury investment. Reserve crowns for characters used across multiple cycles. For 6.4, crown Varka's Normal Attack or Skirk's Normal Attack to maximize 75% damage buff effectiveness.
Which Talents to Crown
Anemo carries benefit from crowning primary damage talent—typically Normal Attacks for on-field units or Bursts for quickswap. The 75% on-field Anemo Damage Bonus applies to all damage instances.
Cryo DPS focused on Normal Attacks should crown that talent first—75% Normal Cryo attack damage buff directly scales with talent multipliers. Secondary priority: Bursts providing self-buffs during Normal Attack windows.
Balancing Multiple Builds
Adopt tiered approach: bring primary DPS to full investment (90/90, 9/9/9 talents, optimized artifacts), then raise supports to functional levels (70/80, 6/6/6 talents, acceptable artifacts) before polishing secondary builds.
This ensures at least one complete team reaches Floor 12 viability. Once first team achieves consistent 3-star clears on Floors 9-11, redirect resources to second team's core DPS.
Artifact Sets and Main Stats
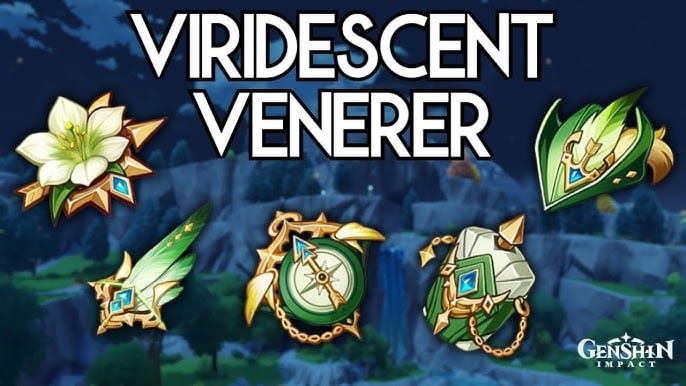
Anemo DPS: Viridescent Venerer 4-piece (60% Swirl damage, 40% elemental resistance shred). Main stats: Anemo DMG Goblet, CRIT Rate/DMG Circlet, ATK% Sands.
Cryo DPS: Blizzard Strayer 4-piece for Freeze (40% CRIT Rate against Frozen enemies). Allows substats to focus on CRIT DMG and ATK%, reaching 200%+ CRIT DMG. Alternatives: Gladiator's Finale or Shimenawa's Reminiscence (18% ATK, 50% Normal Attack damage).
Acceptable Substitute Sets
Use 2-piece combinations providing 18% ATK or 15% elemental damage when lacking perfect 4-pieces. Prioritize correct main stats over set bonuses—CRIT Rate Circlet with wrong set outperforms ATK% Circlet with correct set.
Supports function with generic 2-pieces focusing on ER, EM, or HP%. Noblesse Oblige 4-piece remains valuable for burst supports (20% ATK team buff).
Main Stat Priority
DPS:
Correct elemental DMG Goblet (Anemo/Cryo)
CRIT Rate/DMG Circlet (1:2 ratio)
ATK% Sands (or ER% if burst uptime issues)
Substats: CRIT Rate > CRIT DMG > ATK% > ER% > Flat ATK
Support:
ER% Sands (until burst uptime achieved)
Elemental DMG or HP% Goblet (role-dependent)
CRIT Rate, Healing Bonus, or HP% Circlet (role-dependent)
Substats: ER% > Role-specific stats > CRIT (for Favonius users)
Weapon Selection
Varka's signature weapon likely releases with Phase 1 banner, providing 20-35% damage increases over 4-star alternatives. Weapon banner pity requires 240 pulls for guaranteed featured weapon.
Cryo DPS weapons vary by attack style. For Normal Attack-focused Cryo characters, weapons providing CRIT stats and Normal Attack damage bonuses deliver maximum value.
Best 4-Star Alternatives
F2P weapons provide 70-80% of 5-star performance when refined:
The Catch (free R5 polearm)
Amenoma Kageuchi (craftable sword)
Prototype Archaic (craftable claymore)
Refinement levels provide 5-10% damage increases per refinement. R5 4-stars compete with R1 5-stars in specific scenarios. Battle pass weapons at R5 often outperform standard 5-stars at R1.
Should You Pull Weapon Banner?
Weapon banner value depends on character roster completeness. Players lacking featured characters should prioritize character banners. Established rosters gain more from weapon upgrades.
Epitomized Path guarantees chosen featured weapon within 240 pulls—equals 1.5 featured character guarantees. Evaluate whether 25% damage increase on one character outweighs acquiring entirely new character.
Pre-Building Timeline
Version 6.4 launches February 25, 2026; Abyss resets March 16, 2026. Players have 3 weeks post-launch to complete builds. Optimal preparation begins immediately—4-6 week pre-patch period allows talent books, artifacts, and boss materials without time pressure.
Week 1-2: Talent books and boss materials for primary DPS. 120 resin daily to talents, 60 to normal bosses, remaining to weekly bosses and artifacts.
Week 3-4: Artifact optimization for primary DPS, begin secondary DPS and support talents. 100 resin to artifacts, 80 to talents, 40 to bosses.
Week 5-6: Complete secondary teams, refine artifacts, stockpile enhancement materials. Balance resin: artifacts (100), talents (60), ley lines (60).
Daily and Weekly Checklist
Daily:
4 daily commissions (60 primogems)
Spend 160+ resin on priority domains/bosses
Craft Condensed Resin
Complete battle pass dailies
Check parametric transformer
Weekly:
Clear 3 weekly bosses for discounted materials
Complete battle pass weeklies
Purchase teapot traveling salesman items
Craft weapon ores from magical crystals
Consistent execution accumulates 10,000+ resin over 4 weeks—sufficient for 2-3 characters to Floor 12 viability. Missing 3 days costs 480 resin (24 domain runs).
Backup Plans If Buffs Change
Diversified investment mitigates risk. Build characters with strong baseline performance across cycles. Avoid hyper-specialized units unless excess resources exist.
Monitor official announcements 1-2 weeks before launch. If leaked buffs change significantly, redirect resources toward newly-favored elements, prioritizing characters closest to completion.
Day 1 Execution Strategy
Abyss resets at server refresh March 16, 2026. Pre-practice rotations in current floors or overworld. Muscle memory reduces clear times by 10-20 seconds per chamber—often determining 3-star success.
Floor 12 enemy lineups feature 2-3 chambers per half. The 6.4 buffs suggest multiple targets for Swirl shockwaves in first half, tanky single-target or duo enemies in second half for sustained Cryo Normal Attack damage.
Rotation Practice
Record team rotations, analyzing footage for wasted time, missed reactions, or suboptimal sequences. Optimal rotations minimize support field time (2-3 seconds) while maximizing carry damage windows. Practice quick-swap timing to trigger skills/bursts immediately after switching.
Energy management practice ensures bursts activate on cooldown. Count particles generated, adjusting ER% if bursts miss availability windows. Proper energy funneling—catching particles on characters needing energy—improves fluidity.
Common Mistakes to Avoid
Ignoring enemy patterns and taking avoidable damage
Failing to group enemies before burst damage
Mistiming buff windows and damage rotations
Neglecting elemental reaction setups
FAQ
What are the leaked Abyss buffs for Genshin 6.4?
Floor 11: 75% Anemo/Cryo attack damage. Floor 12 first half: 75% Anemo Damage Bonus to on-field characters. Second half: 75% Normal Cryo attack damage. Blessing triggers shockwaves after every 4 Swirl reactions.
Which characters benefit most from 6.4 Abyss blessings?
Varka (5-star Anemo Claymore) for first half. Skirk and Escoffier (5-star Cryo Sword/Polearm) for second half with Normal Attack-focused kits. Existing Anemo/Cryo characters with appropriate damage profiles also gain value.
Should I pre-build characters based on Abyss leaks?
Pre-building versatile characters minimizes risk. Leaked buffs maintain 85-90% accuracy. Prioritize characters receiving Version 6.4 banners—these typically align with buff synergies.
How much resin do I need to build a character for 6.4 Abyss?
3,500-4,000 resin raises one character to Floor 12 viability (level 90, 8/8/8 talents, acceptable artifacts). Includes 1,840 for ascension, 1,080 for talents, 1,000-1,500 for artifacts.
What talent levels are required for 6.4 Floor 12?
Main DPS: minimum 8/8/8, recommended 9/9/9. Supports: 6/6/6, though leveling most impactful talent to 8 improves performance. Crowning provides 5-8% increases but remains optional.
Can F2P players get 36 stars in 6.4 Abyss?
Yes, using well-invested 4-stars and strategic team building. Requires higher artifact quality, proper rotation execution, and understanding elemental reactions. The 6.4 buffs favor accessible Anemo/Cryo characters.
Don't let resource shortages slow your 6.4 Abyss preparation! Top up Genesis Crystals at BitTopup for the best rates and instant delivery. Refill your resin, secure those pulls, and build your dream team before Day 1. Visit BitTopup now for exclusive discounts and excellent customer service!