

Nail Floor 12 using Bloom/Lunar setups for the first half (+200% Bloom DMG, +75% Lunar-Bloom); switch to Pyro NA comps for the second (+75% Pyro NA DMG). Full clear all chambers for those sweet 9★ rewards: 60k Mora, 200 Primogems. Standout teams? Lauma/Nefer/Kokomi/Aino or Arlecchino/Yelan/Bennett/Zhongli. F2P options hold up strong. Eyes on Xilonen for 6.2 (Dec 3/10 2025). Full-star strategies, step by step.
Introduction to Genshin Impact 6.1 Spiral Abyss
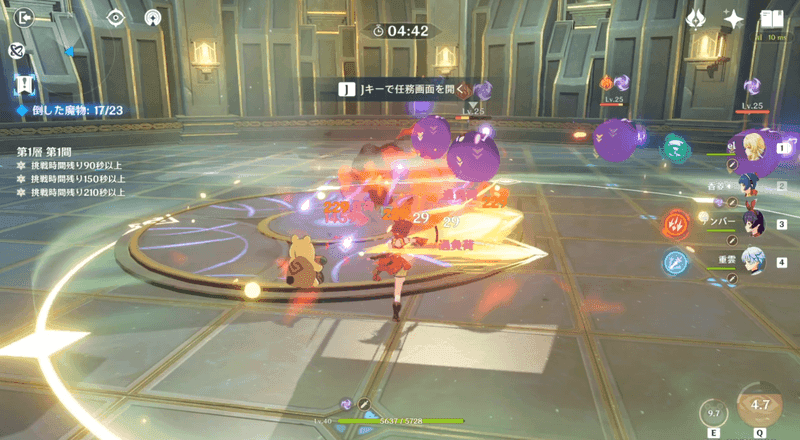
Floor 12 Overview
Enemies hit levels 95-100—tough, but beatable. ★1 clears clock in over 180s per chamber; ★★ over 300s; ★★★ over 420s. Watch for Oathbound Moon: it spits True DMG shockwaves whenever Bond of Life shifts. Full 9★ haul? 60k Mora, 200 Primogems, plus a Domain Reliquary Tier I x1 and Tier II x2 per chamber (that's +25k Mora, 3 Adv Exp, 2 Hero Wit, 6 MEO).
Key Challenges in Chambers 1-3
First half screams Dendro+Hydro—Bloom and Lunar reactions all the way. Second half? Pyro Normal Attacks dominate. Yumkasaur tanks 5.21M HP with 70% Dendro RES; Coppelius boasts 2.55M HP and 70% Ice/Wind RES. Keep ER at 180%+; lean on pre-burst iframes; stick to 15-20s rotations, shields up.
Why Prep for 6.2 Banners Now
6.2 drops Dec 3/10 2025. Phase 1: Durin (5★ Pyro Sword), Venti rerun, 4★ Jahoda/Gaming/Chevreuse. Phase 2: Varesa/Xilonen reruns. Xilonen? She's T0 Geo support—shields and RES shred that crush Floor 12. F2P folks, stash 14,400 Primogems (90 pulls) from Abyss and events (~5,700/month). Track that pity; farm for the guarantee.
Need a quick boost? Grab fast recharge Genesis Crystals for Genshin Impact from BitTopup—instant top-up, killer prices, secure, 24/7 support, global servers in a flash, zero account risks.
Best Team Comps for Floor 12
First Half Optimal Teams (Chambers 1-3 Bloom/Lunar)
+200% Bloom DMG bonus (6 seeds, 500% multiplier to bosses, 1.5M cap). Cluster those seeds at 2m distance; convert 6 for that -40% RES break.
Lauma/Nefer/Aino/Kokomi: Lunar-Bloom phases? Skipped.
Lauma/Xingqiu/Kokomi/Furina: Spam attacks high-frequency.
Nahida/Xingqiu/Kokomi/Furina: AoE cores everywhere.
Quick steps: 1. Drop Dendro near seeds. 2. Hydro to Bloom. 3. Lunar Zenith (2 Nod-Krai) slashes 95% Max HP on Wilderness Hunter.
F2P swap: Kaveh/Yaoyao/Barbara/Aino.
Second Half Optimal Teams (Pyro NA Buff)
+75% Normal Attack Pyro DMG; light up 3 Flamegranates (-5% Max HP each, 300k AoE).
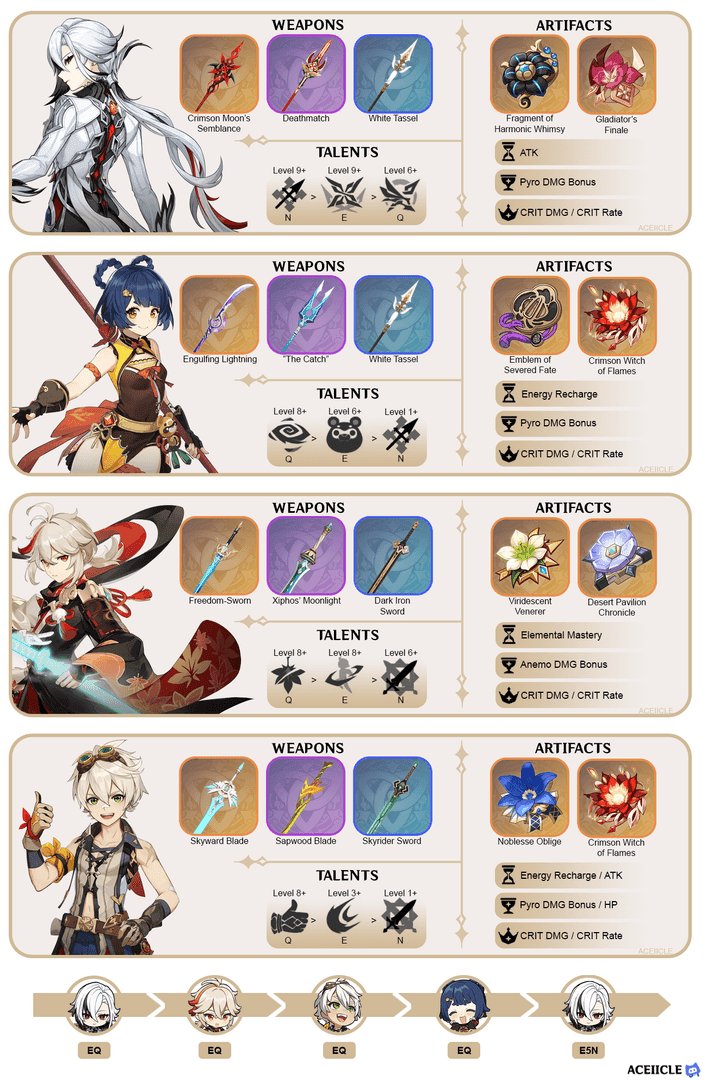
Arlecchino/Yelan/Bennett/Zhongli: Bonds trigger like clockwork.
Arlecchino/Xingqiu/Bennett/Citlali: Vaporize melts faces.
Arlecchino/Fischl/Chevreuse/Thoma: Overload shatters.
Steps: 1. Pneuma/Pyro on Coppelius Meks. 2. Ousia to interrupt. 3. Shield through spins and claws.
F2P killer: Yanfei/Diona/Lynette/Xingqiu (Vaporize + shields). Stars of the show: Nefer (Lunar), Furina (Ousia), Arlecchino (Pyro Bond), Zhongli (shields).
Stock up on Genesis Crystals with Genshin Impact Genesis Crystals global top up via BitTopup—fastest delivery, lowest rates, every server covered, top user vibes, solid after-sales.
Chamber-by-Chamber Strategies
Chamber 1 Breakdown
First wave: Sternshield/Battle-Scarred Rock Crab—Bloom seeds in air phase. 1. Group 'em. 2. Convert 6 for -40% RES. 3. Lauma/Nefer phase-skip (~9:15 auto).
Second: Coppelius Ice Shield—Overload with Chevreuse/Bennett. 1. Pneuma Meks. 2. Pyro/Ousia break. 3. Zhongli/Layla hold shields vs. spins.
Chamber 2 Breakdown
First: Frostnight Herra (120% RES Gloomveiled, 50 hits; Lunar multiplies 6x). 1. Skip mixed elements. 2. Flins/Nefer Lunar breaks. 3. Burst after shield drops.
Second: Yumkasaur—Pyro grenades right after swallow. 1. Dodge the opener. 2. Ignite 3 (blocks Ultimate). 3. Chip down 5.21M HP.
Ever wonder why Herra feels unfair? (Editor note: It's that absorption—Lunar dominance flips the script.)
Chamber 3 Breakdown
First: Wilderness Exile/Hunter—Gleam early; Lunar skips the Grief bar. 1. Zero HP on Gleam Hunter. 2. Lunar Zenith for 95% reduction. 3. Shields and heals locked in.
Second: Hunter-Seeker/Cryo Primo Geovishap—Night Soul -50% RES; Geo resonance shines. 1. Trigger Night Soul on Hunter-Seeker. 2. Zhongli/Albedo shields. 3. Ranged Primordial Shower (-50% RES for 5s).
Artifact Builds & Survival Tips
DPS at Lvl90/ascended, CRIT-heavy. Supports? 180%+ ER, no question. Shields: Zhongli/Noelle/Layla/Cryo/Geo. Nefer runs Dendro Lunar DPS. Furina? Hydro Ousia off-field queen. Dodge spins, claws, openers. Bond of Life? Sustain it.
Common Mistakes & Fixes
Skipping Dendro pre-seeds? Bloom near Hermit Seeds instead. Ignoring 2m cores? Group precisely. Low levels/ascension? Push Lvl90. Energy drought? 180%+ ER, 15-20s cycles. Herra soaking everything? Go Lunar heavy (Flins/Nefer).
(Quick editor take: I've wiped more to energy issues than anything—ER is king here.)
6.2 Banner Preparation Guide

Durin: Skill 3x AoE Pyro, RES shred, +40% Vape/Melt, ATK/Crit DMG buffs. Jahoda: 4★ Anemo healer +100 EM (HP>70%). Xilonen: Geo RES shred beast. Varesa: Electro carry.
Priority? Xilonen (MUST-HAVE); Varesa (High); Durin (situational); Venti (skip unless C2+). Prep plan: 1. Grind Abyss/events. 2. 90 pulls for Phase 2. Weapons: Athame Artis (CRIT Rate/Burst); Daybreak (DMG buffs).
F2P & Low-Invest Strategies
9★ full stars? Totally doable. First: Kaveh/Yaoyao/Barbara/Aino. Second: Yanfei/Diona/Lynette/Xingqiu. Nail Lunar Zenith and reactions. Resin smart: Artifacts and CRIT sands.
Clear Benchmarks & Tools
Aim 40k+ raw DPS for those 5.21M/2.55M HP tanks. 36★ is realistic. Peek Abyss viewer streams for inspo.
FAQ
What are the best teams for Genshin Impact 6.1 Spiral Abyss Floor 12?
Lauma/Nefer/Aino/Kokomi (first half); Arlecchino/Yelan/Bennett/Zhongli (second)—maxing Bloom/Pyro buffs.
Can F2P players clear Genshin 6.1 Floor 12 full stars?
Yep: Kaveh/Yaoyao/Barbara/Aino up front; Yanfei/Diona/Lynette/Xingqiu back—reactions and shields carry.
What rotations work for top Abyss teams in 6.1?
Pre-burst iframes; 15-20s loops: Dendro/Hydro Bloom > Pyro ignites > Bond sustain.
Which characters shine in Genshin Spiral Abyss 6.1?
Lauma/Nefer (Lunar first half); Arlecchino/Furina/Zhongli (Pyro/Ousia second).
How much Primogems to save for 6.2 banners?
14,400 (90 pulls) targets Xilonen; F2P pulls ~5,700/month from Abyss/events.
Common mistakes in Genshin 6.1 Floor 12 clears?
No pre-seeds, low energy, skipped RES shreds—fix with Lvl90, 180% ER, tight Bloom grouping.