

This guide covers Firefly's optimal Super Break build for Version 3.7, featuring Iron Cavalry relics, signature light cone analysis, core team compositions with Harmony Trailblazer and Ruan Mei, Apocalyptic Shadow strategies, and detailed performance metrics.
Why Firefly's Super Break Build Dominates
Here's the thing about Firefly - she's not just another DPS character. She's basically Honkai Star Rail's answer to what if we made Break Effect actually terrifying? When she transforms into that SAM armor, everything changes. Her Trace A4 does something pretty wild: it converts 35-50% of your Break Effect directly into Super Break damage when you're sitting between 200-360% Break Effect. That's not a typo.
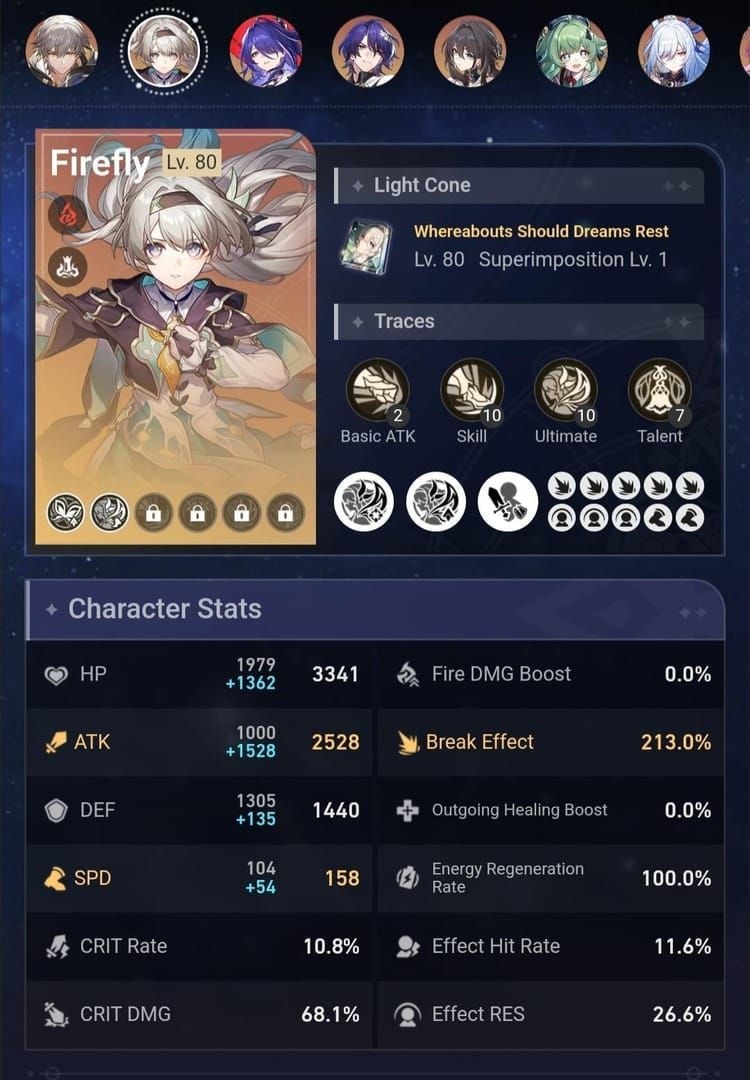
The numbers tell the story. At Level 80, she's packing 814 HP, 523 ATK, 776 DEF, and 104 SPD. But here's what caught my attention - she ranks #1 in DEF among all characters. That's not just for show; it keeps her alive while she's busy melting enemies. And once Complete Combustion kicks in? +60 SPD boost, bringing her to 210 SPD for optimal action economy.
Quick aside - if you're looking for cheap Honkai Star Rail top up, BitTopup's got solid value with competitive pricing and instant delivery. Just saying.
Iron Cavalry: The Relic Set That Changed Everything
Let me be blunt about this: Iron Cavalry Against the Scourge has a 99.6% usage rate in Memory of Chaos. That's not coincidence - it's dominance.
The 4-piece bonus is genuinely broken in the best way. You get +16% Break Effect (nice start), but then it ignores 10% DEF on Break DMG when you hit 150%+ Break Effect. Hit 250%+ Break Effect? Now it's ignoring 15% DEF on Super Break DMG too. With proper substats, Firefly laughs at that 250% threshold.

Thief of Shooting Meteor exists as an alternative. Sure, it gives +32% total Break Effect and tosses you +3 Energy when Breaking enemies. But without that DEF penetration? It's like bringing a knife to a gunfight.
Your main stat priorities are straightforward: Body (ATK%), Feet (SPD), Planar Sphere (ATK%), Link Rope (Break Effect%). Here's where it gets interesting - Trace A6 grants +0.8% Break Effect per 10 ATK above 1800. Do the math: that's potentially 48% Break Effect at 2400+ ATK.
Substat hunting? Break Effect (★★★), ATK% (★★★), SPD (★★), Flat ATK (★). And here's something that trips up new players - CRIT stats are worthless for Super Break builds. Completely worthless.
Light Cone Rankings: Signature vs F2P Reality
Whereabouts Should Dreams Rest sits at 78% usage rate for good reason. S1 delivers +60% Break Effect plus that Routed debuff (+24% Break DMG taken, -20% SPD for 2 turns). S5 cranks it up to +100% Break Effect and +40% Break DMG taken. We're talking 18-20% damage increase over F2P options.

But let's talk about the elephant in the room - not everyone's pulling for signature light cones.
On the Fall of an Aeon from Herta's Store is your best friend here. Completely free, and it performs at 82-90% of signature effectiveness. The stacking mechanism (+8-16% ATK stacks, maximum 4) plus +12-24% DMG when Breaking enemies makes this surprisingly competitive.
Need more discount Honkai Star Rail recharge options? BitTopup's got fast processing and secure payments covered.
Something Irreplaceable S5 hits 75-85% signature performance with +28-56% Break Effect. Indelible Promise S5 matches maxed On the Fall of an Aeon. The Moles Welcome You leverages that ATK-to-Break Effect conversion with +12% ATK per stack.
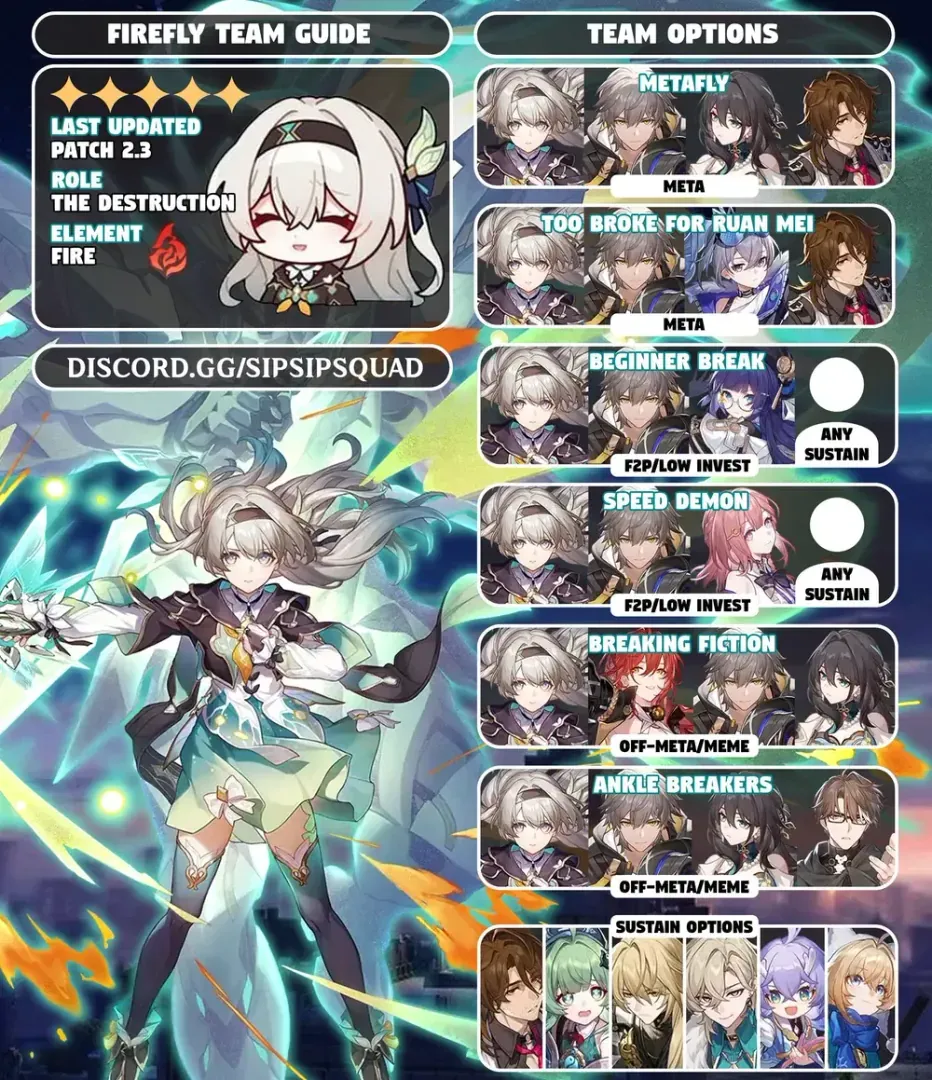
Team Compositions That Actually Work
Core team composition isn't really up for debate: Firefly, Harmony Trailblazer, Ruan Mei, Lingsha. Let me explain why each slot matters.
Harmony Trailblazer isn't just recommended - they're irreplaceable. That 160% Super Break DMG boost and Toughness delay at E6? You can't replicate that anywhere else. Period.
Ruan Mei elevates everything. Break Effect buffs, Weakness Break extension, +50% Break Efficiency, RES PEN - she's the support that makes Firefly truly shine. Her SPD buff helps hit optimal thresholds while that extended Broken state maximizes your Super Break windows.
Lingsha rounds out the team with AoE healing and +25% Break DMG received debuff. Perfect synergy.
F2P players aren't left out, though. Firefly + Harmony Trailblazer + Asta + Gallagher works surprisingly well. Gallagher brings Break-scaling heals and Fire weakness synergy. Asta provides ATK and SPD buffs that convert to Break Effect through Firefly's traces.
For Apocalyptic Shadow? Firefly + Fugue + Ruan Mei + Lingsha absolutely destroys Node 2. Grab that Stunning Remark axiom (+15% Weakness Break DMG, +20% Super Break DMG) and watch the Opportunistic Provocateur boss melt.
Trace Priorities and Eidolon Investment
Ultimate gets maximum priority (★★★★★). That +60 SPD and +20% enemy Break DMG taken isn't negotiable.
Major Traces breakdown:
A2: 55% Toughness reduction against non-Fire enemies (★★★★★)
A4: Converts 35-50% Break Effect to Super Break (★★★★★)
A6: +0.8% Break Effect per 10 ATK above 1800 (★★★★☆)
Eidolon priority is E1 > E2 > E6, and here's why:
E1 makes Enhanced Skills ignore 15% DEF and cost 0 SP. This solves SP management completely (★★★★★). E2 grants extra turns when defeating enemies or triggering Break with 1-turn cooldown. We're talking extended damage phases that can completely change fights (★★★★★). E6 provides +20% Fire RES PEN and +50% Break Efficiency (★★★★★).
Apocalyptic Shadow Mastery
Firefly absolutely dominates the Opportunistic Provocateur boss in Node 2. Fire, Lightning, Wind, and Imaginary weaknesses? That's her playground.
The boss mechanics revolve around Lotuses. Abundance Lotus grants +All-Type DMG when defeated. Destruction Lotus provides +Break Effect. Phase 1 is about clearing the right Lotuses for weaknesses and buffs. Phase 2? Defeat summons before Eternal Condemnation hits.
Boss traits include Steadfast Safeguard (50% less damage pre-break, +100% post-break) and Flower by Another Name (Toughness Protection on summons). Withered Tree's Revival restores 25% HP on form changes - plan accordingly.
Combat Rotations and Mechanics Deep Dive
The optimal rotation flows like this: Skill (40% HP cost, 60% Energy) > Ultimate (enter Combustion) > Enhanced Skill x2 (implant weakness, deal Super Break) > Enhanced Basic if needed > Exit > Repeat.
Normal Skill delivers 200% ATK Fire DMG, +25% action advance, and Energy regeneration. Complete Combustion grants +100% action advance, +60 SPD, lasting 3 turns. Enhanced Skill restores 25% Max HP, applies Fire Weakness for 2 turns, and deals (0.2 × Break Effect + 200%) ATK Fire DMG - capped at 360% Break Effect.
Pro tip: Her Technique provides 5 seconds of air mobility. That AoE plunge with 200% ATK Fire DMG applies Fire Weakness for 2 turns and grants permanent +5.3% Break Effect. Use it.
Build Variations for Different Scenarios
High Break Effect builds target that 360% cap through Iron Cavalry, Talia ornaments, and Break Effect substats. You'll need 360%+ Break Effect in combat, 150+ base SPD, and 2600+ ATK.
F2P builds use Thief of Shooting Meteor with On the Fall of an Aeon S1, targeting 200-250% pre-combat Break Effect. Still effective, just requires more team support.
Speed-tuned variations matter for optimization. 165 base SPD for 0-cycle strategies, 140 with Ruan Mei for efficiency. ATK Conversion builds stack 2400+ ATK for that 48% extra Break Effect through Trace A6.
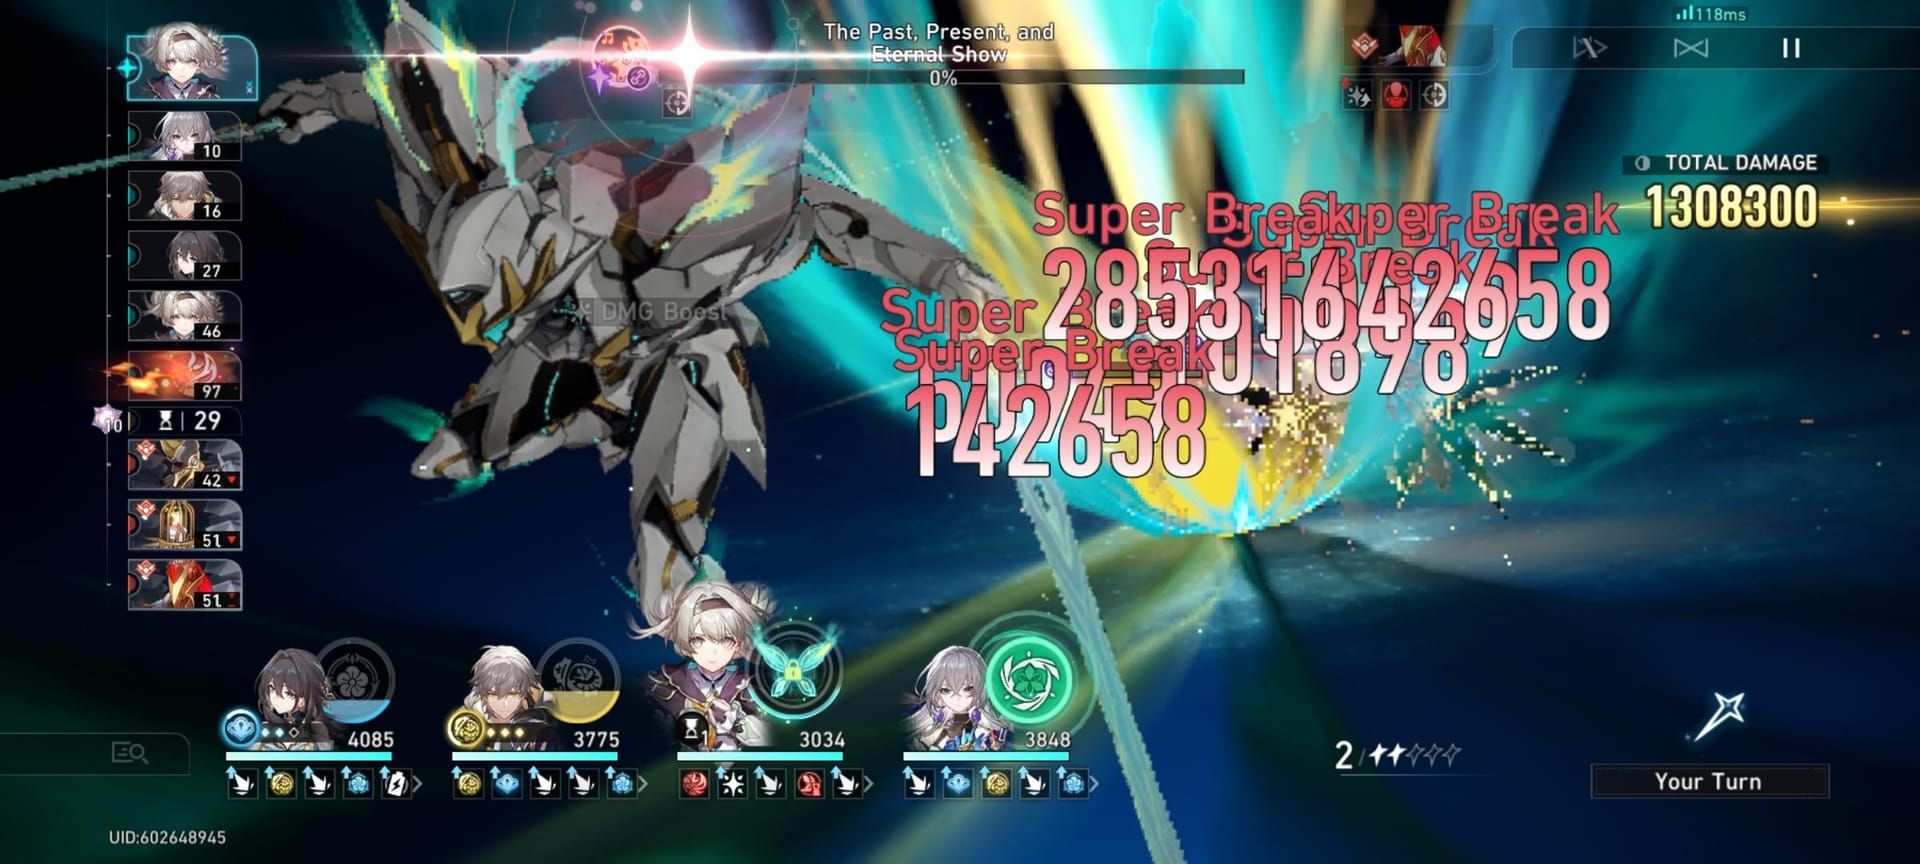
Performance Analysis: The Numbers Don't Lie
Damage calculations against Level 95 enemies over 5 cycles tell the story:
E0 baseline: 1.46M single-target
E2: 2.24M (154% increase)
E6: 3.59M (246% increase)
Multi-target gets even more impressive. E0 deals 2.80M against 3 targets, while E6 reaches 6.70M (240% increase).
Memory of Chaos average stats show HP 2988, ATK 2514, SPD 158, Break Effect 250%. Eidolon distribution reveals E0 (18%, 9 cycles), E1 (12%, 9 cycles), E2 (55%, 6.5 cycles).
Tier positioning? SS Overall/Endgame as premier Break DPS, S+ in Apocalyptic Shadow. She excels in breakable content but struggles against Toughness-locked enemies.
FAQ: Your Burning Questions Answered
How much Break Effect does Firefly actually need? 360% Break Effect in combat caps Enhanced Skill damage. Target 200-250% pre-combat through relics, then reach cap through team buffs from Ruan Mei, Harmony Trailblazer, and Forge of the Kalpagni Lantern.
Is her signature light cone worth the pull? 18-20% damage increase over F2P alternatives plus easier Break Effect requirements. Worth it with Ruan Mei and E1/E2 investment, but On the Fall of an Aeon S1 stays competitive.
What's the absolute best team comp? Firefly, Harmony Trailblazer, Ruan Mei, Lingsha/Gallagher. Harmony Trailblazer enables Super Break, Ruan Mei provides buffs and Break Effect, sustain offers healing and Break synergy.
Eidolons or signature first? E1 and E2 provide greater value. E1 solves SP management and adds DEF ignore, E2 enables extra turns for massive damage spikes. Consider signature after securing key Eidolons.
How's she performing in current endgame? Dominates Memory of Chaos and Apocalyptic Shadow with proper team support, achieving T1.5 single-target ratings. Absolutely destroys breakable content but struggles against Toughness-locked enemies.
Most important traces to max? Ultimate (★★★★★) for SPD and Break DMG buffs first. Then A2 (Toughness reduction), A4 (Super Break conversion), and A6 (ATK to Break Effect conversion) for core mechanics.