

Quick Answer: The ER-Until-Requirements strategy prioritizes Energy Recharge substats until your character can use their Elemental Burst consistently every rotation, then focuses on offensive stats. This approach ensures optimal team performance by guaranteeing burst uptime before maximizing damage output.
Understanding the ER-Until-Requirements Philosophy
What Makes This Strategy Essential
Here's the thing that'll change how you think about artifacts forever: that shiny 40 CV (crit value) piece sitting in your inventory? It's probably worse than the mediocre artifact with decent ER and ATK% substats.
The ER-Until-Requirements strategy flips conventional wisdom on its head. Instead of chasing those dopamine-hit crit rolls, you prioritize Energy Recharge until your characters can actually use their Elemental Bursts when they're supposed to. Only then do you worry about CRIT Rate, CRIT DMG, ATK%, and Elemental Mastery.
I've seen too many players showcase their Hu Tao with 90/200 crit ratios who can't burst every rotation. Meanwhile, the worse 70/140 build that actually functions? That's doing more damage over time. The math doesn't lie here—consistent rotations beat perfect screenshots every single time.
Common Misconceptions About Substats
Let me be blunt: the community's obsession with Crit Value is killing your DPS.
That formula everyone throws around (CV = CRIT DMG + CRIT Rate × 2) completely ignores context. An artifact with one crit line plus ER%, ATK%, and EM can absolutely demolish a double-crit piece loaded with DEF and HP substats. But somehow we've convinced ourselves that two crit lines automatically equals good.
The damage formula is multiplicative. This means balanced investment across different stats gives you way better returns than stacking everything into crits. High substat efficiency—where most or all substats actually help your character—should be your real goal.
Why Energy Management Trumps Raw Damage
Energy Recharge isn't just about convenience. It's about damage.
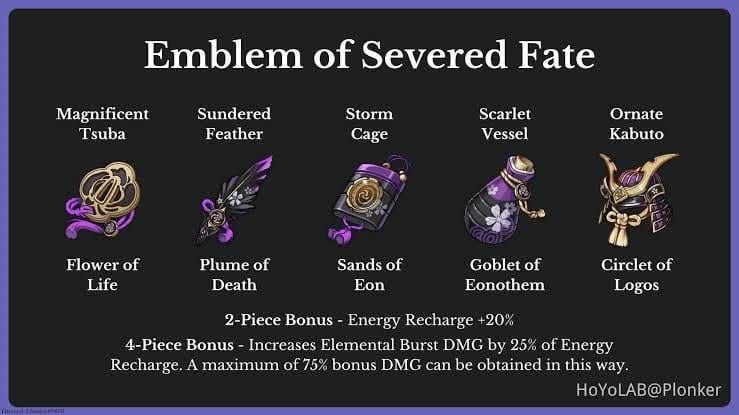
Every missed burst is lost DPS. Period. And for characters running 4-piece Emblem of Severed Fate (which is half the meta at this point), ER directly converts to damage—25% of your Energy Recharge becomes DMG Bonus%, capped at 75% bonus when you hit 300% ER.
Think about it this way: would you rather have a character who hits like a truck once every two rotations, or one who hits consistently every rotation? The consistent character wins every time, especially in Spiral Abyss where every second counts.
Energy Recharge Requirements by Character Role
Main DPS ER Thresholds
Low-cost burst characters (40-60 Energy): 120-140% ER
High-cost burst characters (80 Energy): 160-200% ER
But here's where it gets tricky—these numbers shift dramatically based on your team setup. Characters with ER% Ascension Stats (Bennett, Kaeya, Mona, Venti, Raiden) get a head start and need less ER from artifacts.
Sub-DPS and Burst Support Requirements
Off-field characters are where ER requirements get nasty. We're talking 180-220% ER because they're not on-field collecting particles like your main DPS.
Characters pulling double duty as batteries? They often need 200%+ ER just to keep everyone fed while maintaining their own energy needs. This is where Favonius weapons become game-changers—those clear particles on crit hits can drop requirements by 50+ ER%.
Pure Support Character Considerations
Bennett perfectly illustrates why supports follow different rules entirely. His priority list: ER > HP% > CRIT Rate (if using Favonius Sword) > Flat HP. Notice how crit stats barely matter unless they're enabling Favonius procs?
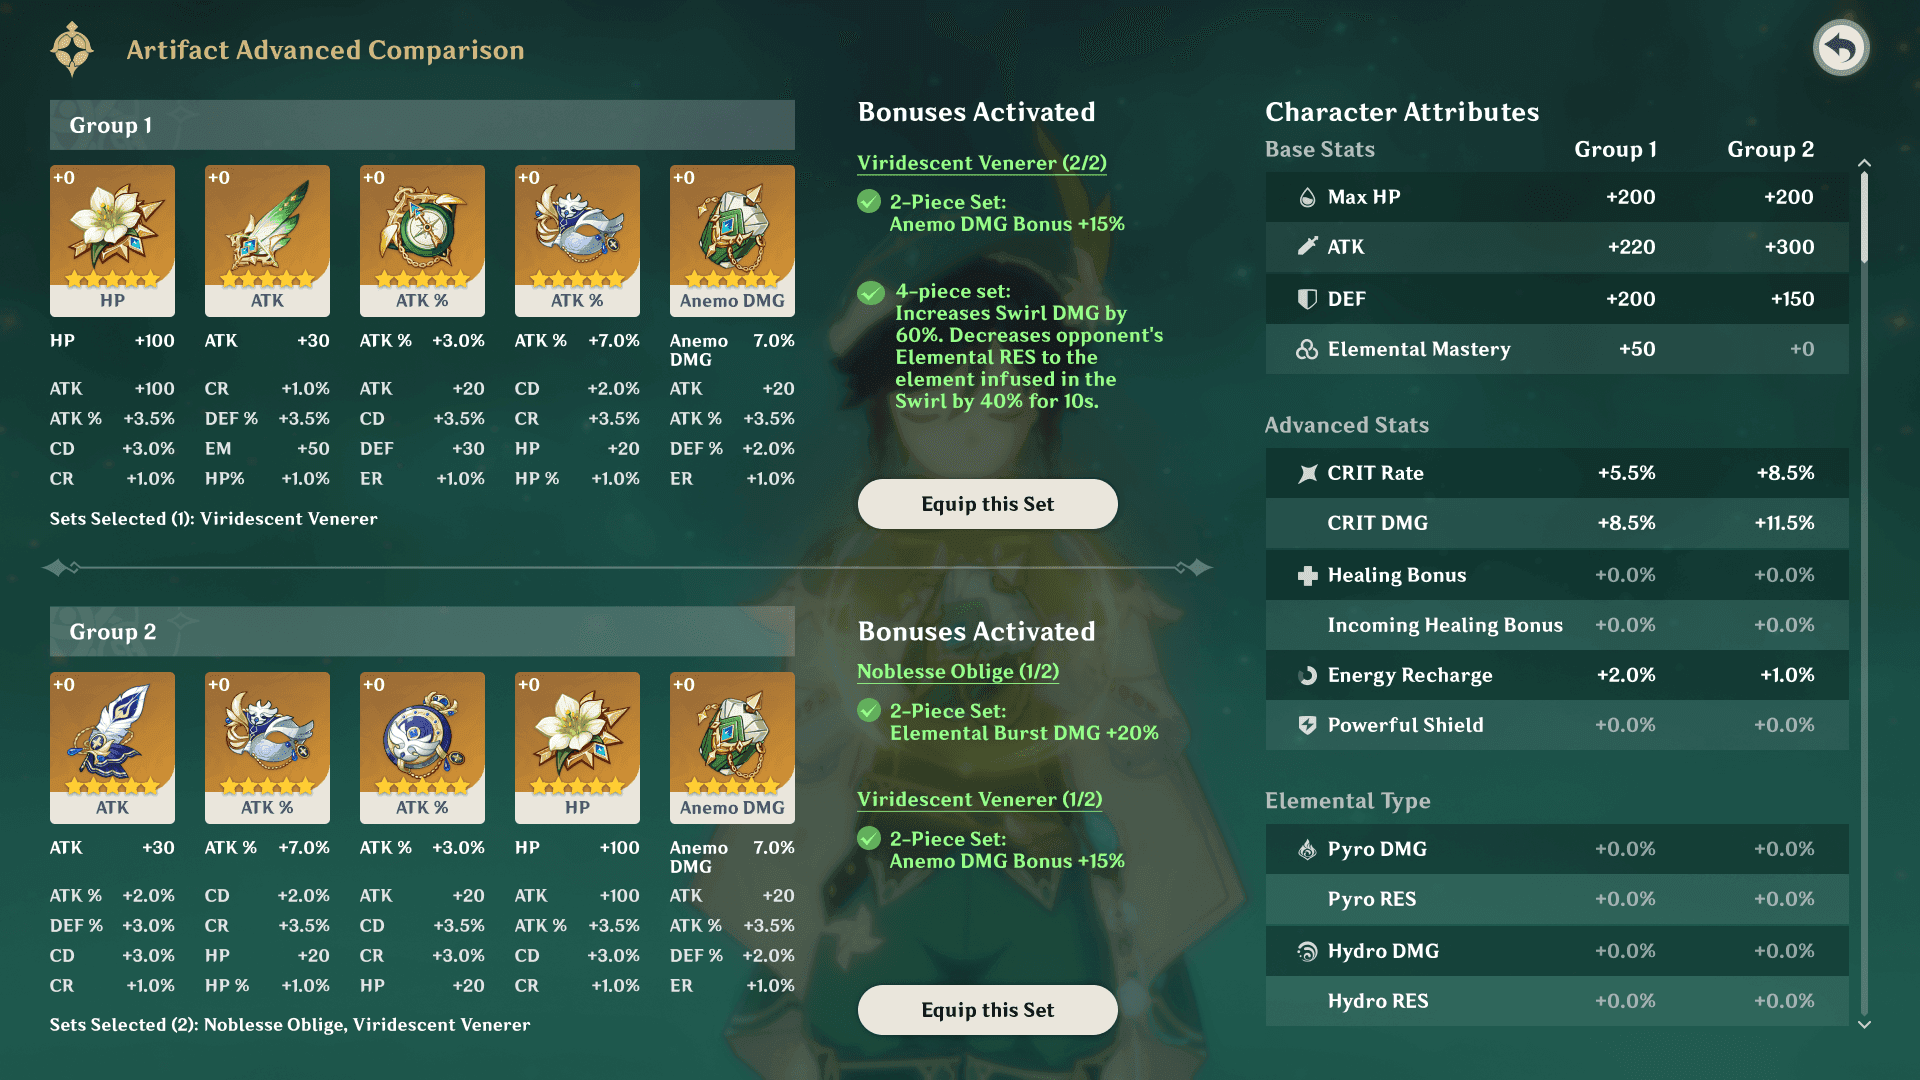
For supports, powerful 4-piece set bonuses like Viridescent Venerer or Noblesse Oblige matter more than perfect substats. A VV support with mediocre substats but consistent uptime outperforms a perfectly rolled support who can't maintain their buff cycles.
Step-by-Step Substat Prioritization Process
Phase 1: Meeting ER Requirements
First things first—figure out what your character actually needs. Use the Energy Recharge Calculator or community spreadsheets (I'll link the good ones later). Don't guess. The difference between 180% and 200% ER can make or break your rotations.
If you need more than 160% ER, you're probably looking at an ER weapon or ER Sands. Trying to hit 200%+ through substats alone? That's a Resin black hole you don't want to fall into.
ER% Sands gives you 51.8% at Level 20 for 5-star pieces. Substats? You're looking at 4.53% to 6.48% per roll. Do the math—you'd need perfect substat luck to replace an ER Sands.
Phase 2: Optimizing Damage Substats
Once your ER is sorted, now we can talk about the fun stuff: CRIT Rate/DMG > ATK% > Elemental Mastery.
Here's some theorycrafting that might surprise you: optimal substat distribution suggests 7 ATK% rolls, 14 CRIT Rate rolls, and 17 CRIT DMG rolls across your total 38 available substat rolls. That gives you roughly 87% ATK bonus, 91% CRIT Rate, and 183% CRIT DMG—hitting that sweet 1:2 crit ratio everyone talks about.
Notice how much ATK% is in there? Yet players constantly skip ATK% substats for more crit rolls.
Phase 3: Fine-tuning for Team Synergy
This is where team knowledge separates good players from great ones.
Running Bennett? Those extra ATK% substats become less valuable since you're already swimming in ATK buffs. Playing reaction teams? Elemental Mastery might outweigh traditional damage stats entirely.
Ask yourself: Is the main stat correct? How many substats are actually useful? Does this piece help me hit my ER breakpoint? These questions matter more than raw crit value.
Team Composition Impact on Individual ER Needs
Battery Characters and Energy Generation
Not all batteries are created equal. Here's what different characters actually generate:
Xingqiu (Skill): 5 Hydro particles
Bennett (Press Skill): 2.25 Pyro particles
Kaeya (Skill): 2.67 Cryo particles
Fischl (Oz per attack): 0.67 Electro particles
Noelle (Skill): 0 Geo particles (yes, zero)
See the problem? Characters like Noelle have sky-high ER requirements because they generate nothing for themselves.
Elemental Resonance Effects
Element matching matters huge for energy efficiency. Same-element particles give 2.7 energy to on-field characters and 2.4 to off-field ones. Different elements? You're getting 0.9 on-field or 0.8 off-field.
That's a 3x difference in energy efficiency just from element matching.
Multi-Element vs Mono-Element Teams
The scaling here is dramatic:
1 Cryo (Solo): 200%+ ER needed
2 Cryo: 155-175% ER needed
3 Cryo: 120-130% ER needed
Mono Cryo (4 Cryo): ~100% ER needed
Each additional same-element character exponentially improves energy sharing. This is why mono-element teams feel so smooth to play.
Character-Specific ER Breakpoints and Examples
Popular Meta DPS Characters
Yelan's a perfect case study because her ER requirements swing wildly based on team setup:

Solo Hydro (1 Skill use): 260-270% ER without Favonius, 210-220% with Favonius Warbow
Duo Hydro (1 Skill use): 170-180% ER without Favonius, 150-155% with Favonius
Solo Hydro (2 Skills with C1/Sacrificial): 175-185% ER without Fav, 150-160% with Favonius
Duo Hydro (2 Skills): 130-140% ER without Fav, 115-125% with Favonius
That's a 150% ER swing depending on your setup. This is why cookie-cutter builds don't work.
Essential Support Characters
Venti needs 160-180% ER for consistent burst uptime. Favonius Warbow isn't just good on him—it's often his best weapon because it solves his energy needs while feeding the team.
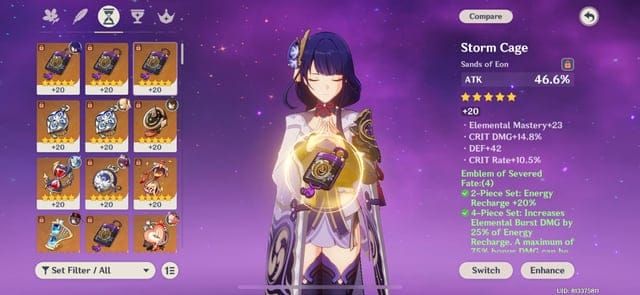
Raiden typically builds 250-270% ER to maximize her passive converting ER into Electro DMG. She's one of the few characters where you actually want to overcap on ER because it directly translates to damage.
Flexible Sub-DPS Options
Xiangling in National teams still needs 180%+ ER despite having Raiden as a battery. I see players constantly underestimate her ER needs and wonder why their rotations feel clunky.
Meeting these ER requirements isn't negotiable in endgame content. Your rotation either works or it doesn't—there's no middle ground.
For players looking to optimize character builds efficiently, Genshin Top Up Deals can help acquire resources for extensive artifact farming and character development.
Tools and Calculators for Substat Optimization
Genshin Optimizer Setup Guide
Genshin Optimizer (GO) is hands-down the best tool for this stuff. Here's how to use it properly:
Scan and upload your artifacts, characters, and weapons
Set 'Minimum Build Constraint' for Energy Recharge to your required value
The tool shows only builds meeting your ER threshold, sorted by damage optimization
Use the graph feature to visualize damage vs ER trade-offs
GO supports advanced configurations where you can weight different damage sources. Want to optimize for both burst and skill damage? It'll handle that.
Manual Calculation Methods
Energy Recharge Calculator (by Zakharov): The gold standard for determining exact ER requirements
Artifact Farming Calculator (by grumd): Shows you the brutal odds of getting specific stats over time
Artifact Roll Probability Spreadsheet (by Vidmilo): Helps you understand what's realistic to expect
These tools will humble you real quick about artifact expectations.
In-Game Testing Strategies
Theory is great, but practical testing matters more. Run your teams through multiple rotations in controlled environments. If characters can't reliably burst every rotation, increase ER first—ER% Sands or ER weapons before chasing better substats.
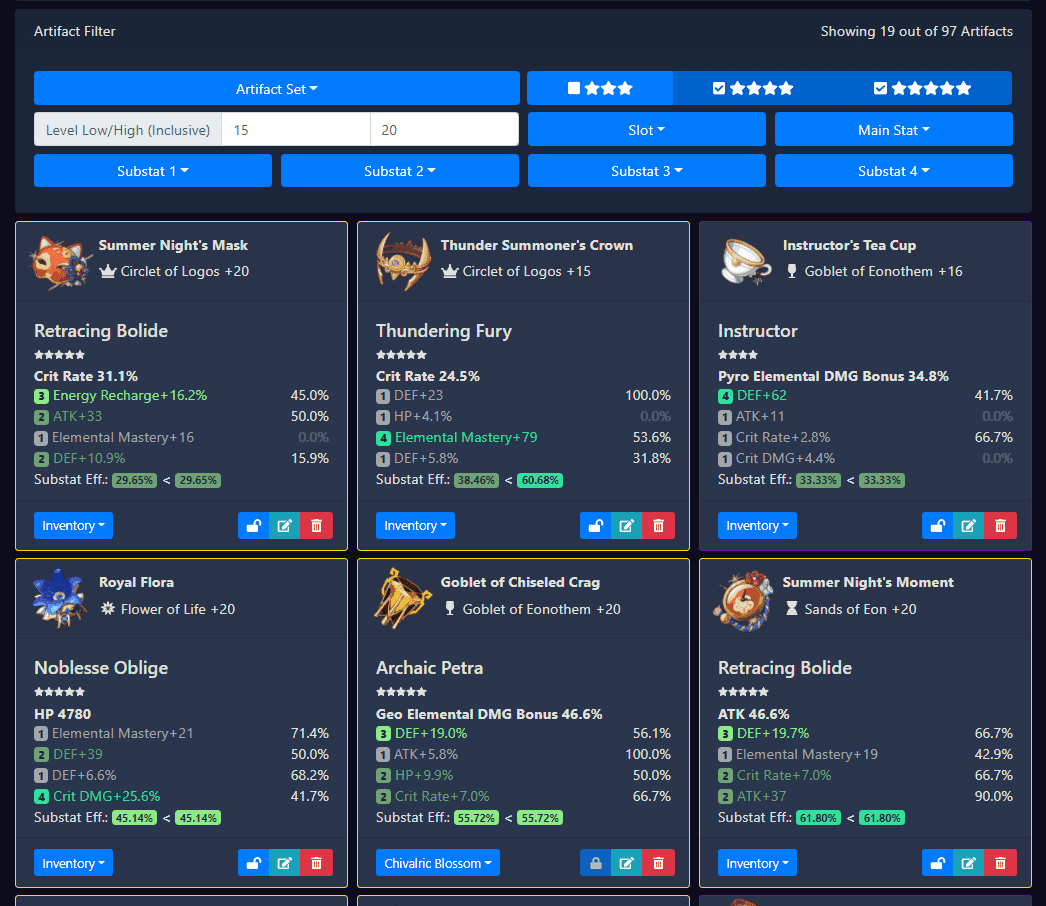
Level promising artifacts to +4, +8, or +12 to check substat rolls before committing full resources. Don't go to +20 unless you're sure.
Common Substat Mistakes and How to Avoid Them
Over-investing in Damage Before ER
This is the big one. Players chase those satisfying damage screenshots while building characters that can't function in actual gameplay.
In Spiral Abyss, every second counts. A character with moderate crit stats but consistent burst uptime will clear faster than one with god-tier ratios who can't maintain rotations. It's not even close.
Ignoring Team Energy Dynamics
Too many players evaluate characters in isolation. Yelan's C1 drops her ER requirement from ~225% to ~160% in solo Hydro teams. That's the difference between ER% Sands and HP% Sands—a completely different build path.
Misunderstanding Substat Value Ratios
For DPS characters, 2pc/2pc combinations with superior substats can beat 4-piece sets with mediocre stats. But support characters? They often need those 4-piece bonuses like VV RES shred, even with suboptimal individual stats.
Context matters more than raw numbers.
Advanced Optimization Strategies
Weapon Passive Integration
Favonius weapons are game-changers for energy management. Those clear particles on crit hits often let you run offensive Sands instead of ER% Sands. The DPS gain from that swap usually outweighs the weapon's lower base ATK.
Sacrificial weapons offer different energy solutions through skill cooldown resets. Particularly valuable for characters like Xingqiu who generate tons of particles per skill use.
Artifact Set Bonus Synergy
4-piece Emblem uniquely ties ER to damage output. ER +20% from 2-piece, plus up to 75% burst damage bonus at 300% ER. Characters like Raiden, Xiangling, Xingqiu, and Yelan are perfect users because they need high ER anyway.
It's the rare case where defensive stats (ER) directly convert to offense.
Constellation-Dependent Adjustments
Constellations can completely flip optimal builds. Gaming's C4 provides energy restoration from plunging attacks, reducing his ER requirements significantly. A C0 character might need ER% Sands while the same character at C1 performs better with offensive main stats.
Always check how constellations affect energy generation before finalizing builds.
For players seeking to unlock powerful constellation effects, Buy Genesis Crystals through reliable platforms ensures access to character upgrades that significantly impact building strategies.
Practical Application in Spiral Abyss
Floor-Specific Considerations
Spiral Abyss is where ER requirements get tested for real. Floors with fewer enemies provide less particle generation, making you more dependent on character-generated particles. Floors with swarms of weak enemies? You might get away with lower ER builds.
Rotation Timing Optimization
National Team compositions perfectly illustrate this. Even with Raiden as battery, Xiangling and Xingqiu need significant ER investment. Skimp on their ER and watch your team DPS crater as rotations break down.
Adapting to Enemy Mechanics
Some floors feature energy drain or shields that mess with particle generation. These scenarios need higher ER thresholds than standard calculations suggest. Build comfortable margins, not minimum requirements.
Characters facing energy-draining enemies might need 20-30% additional ER beyond normal recommendations. Better safe than sorry.
Artifact Farming Strategy for ER-First Builds
Domain Priority and Resin Allocation
Don't farm artifacts seriously until AR45 when you're guaranteed at least one 5-star per 20 Resin. Before that, focus on character ascension, talent levels, and weapon materials.
Farm domains where both sets are useful. Emblem/Shimenawa domain is perfect because almost everyone can use one of those sets.
Strongbox Optimization
The Artifact Strongbox is clutch for targeting specific sets like Emblem. ER% Sands only appear 10% of the time compared to 26.68% for HP% Sands, making them particularly valuable to keep even with imperfect substats.
When to Stop Farming
Stop once characters meet ER requirements and have reasonable offensive stats. Focus on building multiple characters to functional levels rather than perfecting single characters.
Level artifacts to +16 until your whole team is geared, then selectively upgrade to +20. The +16 to +20 upgrade is expensive and should be reserved for your best pieces.
For players looking to accelerate artifact farming progress, Genshin Impact Top Up services provide resources for extensive domain runs and character development.
FAQ
What is the ER-until-requirements strategy and why is it important?
It prioritizes Energy Recharge until characters can use their Elemental Burst consistently every rotation, then focuses on offensive stats. This ensures optimal team performance by guaranteeing burst uptime before maximizing damage—leading to higher overall DPS than builds that prioritize crit stats but can't maintain rotations.
How do I calculate exact Energy Recharge requirements for my characters?
Use the Energy Recharge Calculator by Zakharov or Genshin Optimizer with ER constraints. General guidelines: 120-140% ER for low-cost bursts (40-60 energy), 160-200% for high-cost bursts (80 energy), 180-220% for off-field sub-DPS. Actual needs vary significantly based on team dynamics.
Which substats should I prioritize after meeting Energy Recharge requirements?
For most DPS characters: CRIT Rate/DMG > ATK% > Elemental Mastery. Optimal distribution suggests 7 ATK% rolls, 14 CRIT Rate rolls, 17 CRIT DMG rolls across 38 total substat rolls. This challenges the always roll crit mindset by showing significant ATK% investment is mathematically optimal.
How does team composition affect individual character ER needs?
Dramatically. Same-element batteries can reduce ER needs by 50-100%. Yelan needs 260-270% ER solo but only 130-140% with Hydro battery and double skill usage. Mono-element teams provide the most efficient energy sharing.
What are the most common mistakes when prioritizing substats?
Hyper-focusing on crit stats while neglecting Energy Recharge, leading to impressive damage screenshots but poor practical performance. Other errors include ignoring team energy dynamics and using 'Crit Value' as the sole metric without considering the character's full kit and team needs.
When should I use Energy Recharge main stat artifacts versus substats?
Use ER% Sands for characters requiring more than 160% Energy Recharge. ER% main stat provides 51.8% at level 20, while substat rolls only provide 4.53-6.48% per roll. Characters with requirements below 140% can typically meet needs through substats and ER weapons.