

Master Delta Force Mobile's Season 7 meta with S-tier weapon builds, zero-recoil sensitivity settings, and operator synergies. This comprehensive guide covers CI-19, M4A1, SMG-45, and AWM loadouts with proven codes, plus Gizmo strategies for November 2025's competitive landscape.
Current Meta Overview: Season 7's Game-Changing Shift
Here's the thing about Delta Force Mobile right now – everything changed when Gizmo dropped on November 18th. And I mean everything.
This engineer operator didn't just shake up the meta; he completely flipped the script with those crawler nests and exploding spiders. Suddenly, area denial became king. Gone are the days when you could just rush objectives mindlessly (thank goodness, honestly – that was getting old).
But let's back up a second. Season 6's suppressor rework on September 23rd already had us rethinking loadouts. That +9% range bonus? The enhanced recoil reduction? It boosted survival rates by 15-20% in Operations Mode alone. As someone who's been tracking these numbers obsessively, I can tell you that's not just statistical noise – that's a fundamental shift.
The current S-tier weapons tell the story: CI-19 sitting pretty at 9.5% pick rate, M4A1 dominating at 10.1%. These aren't just popular because they're shiny – they excel across Havoc Warfare's massive battlefields and Hazard Operations' tense extraction gameplay.

What really gets me excited about the current meta? It rewards smart play. Tactical positioning over mindless rushing. Recoil control and range optimization matter more than ever.
Delta Force mobile recharge online through BitTopup provides instant access to premium attachments and operators. BitTopup's competitive pricing and secure transactions ensure quick arsenal upgrades without delays.
S-Tier Assault Rifle Builds: The Meta Kings
CI-19 Assault Rifle: Your Long-Range Best Friend
Let me be blunt – if you're not running CI-19 for long-range engagements, you're doing it wrong. That 9.5% pick rate isn't an accident.
This beast delivers everything you need for sustained fire: 60-round drum magazine (because running dry mid-fight is embarrassing), 55-meter effective range that keeps you relevant at distance, and surprisingly manageable recoil for its damage output.
Optimal CI-19 Build Code: 6HLOANO09MFFCME3G7LT2
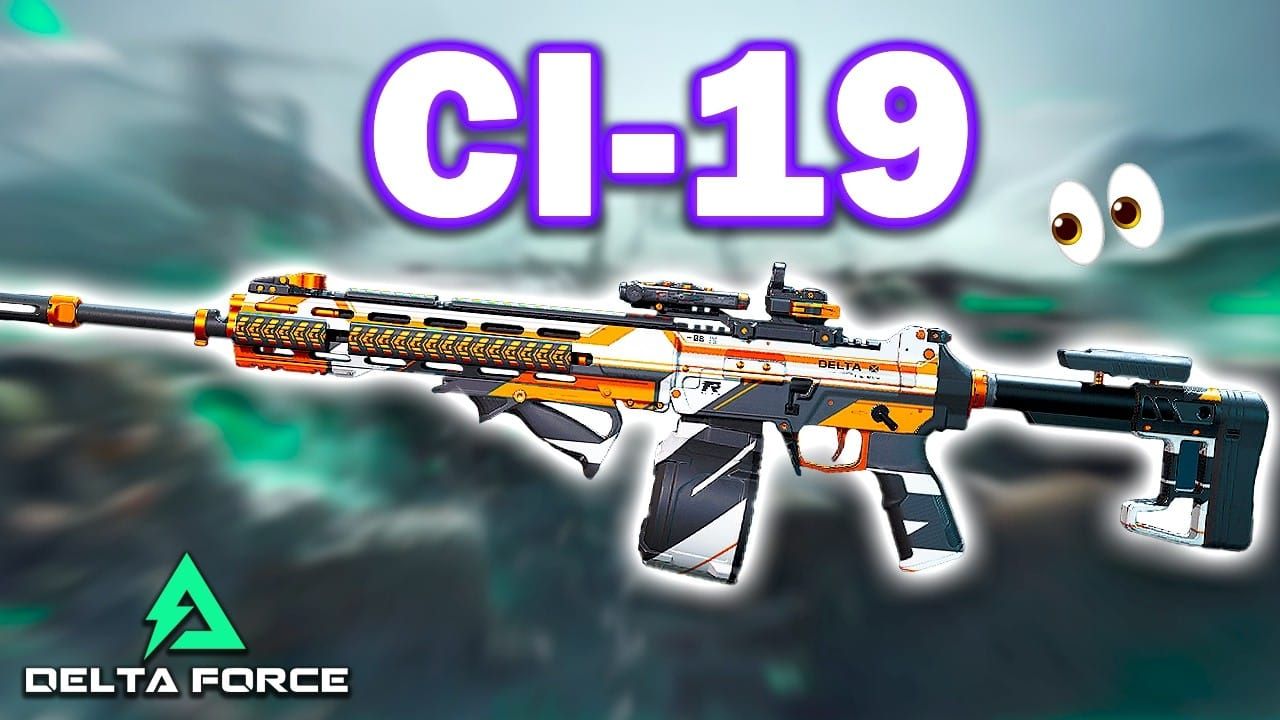
Here's what makes this build sing:
New Leviathan Barrel – extends that 55m range even further
CI-19 Newtype Stable Gas Block – because recoil control is life
Sandstorm Vertical Compensator (+9 control) – the difference between hitting shots and spraying walls
60-round drum magazine – never apologize for having enough ammo
DBAL-X2 laser for those sweet Tactical Stance benefits
Pro tip from my testing: pair this with D-Wolf operator. That enhanced repositioning during sustained engagements? Chef's kiss.
M4A1: The Reliable Workhorse (And Beginner's Dream)
Look, I get it. Everyone wants the flashy meta weapons. But M4A1's 10.1% pick rate exists for a reason – this thing just works.
25 damage per round at 672 RPM with genuinely forgiving recoil. It's the foundation weapon that teaches you proper mechanics while staying competitive in high-tier ranked. I've seen diamond players still running M4A1 builds because sometimes reliability beats complexity.
Proven M4A1 Build Code: 6FINC4G0CQTV1IBVCBQVT
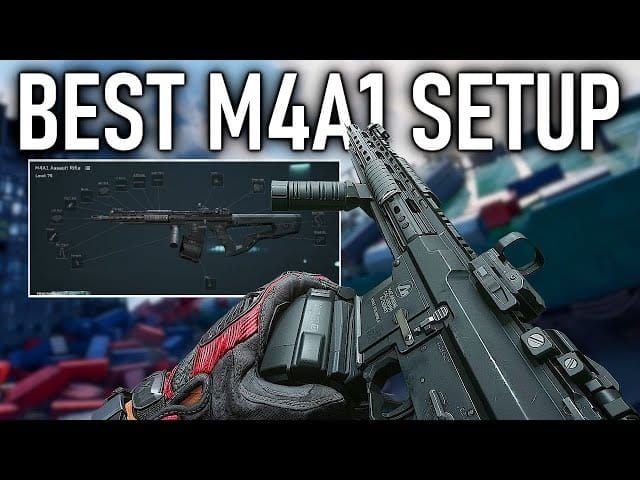
The magic happens with these attachments:
Sandstorm Vertical Compensator (+9 control) – consistency is king
45-round extended magazine – because 30 rounds disappear fast
Resonant Ergonomic Grip (+16% moving stability) – game-changer for mobile play
Gabriel Long Barrel for that extra range
UR Spec Ops Stock for rock-solid stability
Here's what I love about this build: 15 minutes of daily aim practice and you'll master the recoil pattern. The mid-range versatility works on Havoc Warfare's open maps and Hazard Operations' varied engagement distances. It's honest work.
Top SMG & Sniper Builds for Specialized Roles
SMG-45: When You Need Things Dead Up Close
SMG-45 owns the close-quarters game with a 6.1% pick rate that doesn't tell the whole story. In the right hands, at the right range, this thing is absolutely devastating.
40-meter effective range with exceptional mobility makes it perfect for Support roles. You're the squad's guardian angel at 10-15 meter distances, with escape routes always mapped out (because positioning is everything).
SMG-45 Build Code: 6HLOBLC09MFFCME3G7LT2
These attachments make it work:
SMG Echo Suppressor – stealth plus recoil reduction (two birds, one stone)
Secret Order Bevel Foregrip – stability you can feel
SMG-45 Fission Barrel – optimized for close-range carnage
OSIGHT Red Dot for precise close-range work
40-round magazine because sustained fights happen
Strategy note: Position yourself 10-15 meters from objective zones with clear escape routes. That SMG Echo Suppressor gives you stealth benefits while maintaining damage output for those beautiful flanking maneuvers.
AWM Sniper: The One-Shot Solution
AWM is patience incarnate. 100 damage with 200-meter range, enabling one-shot chest kills under 30 meters. It requires map knowledge and positioning sense, but the elimination potential is unmatched.
AWM Build Code: 6F50VEC0CH8TK2MI8PG7U
Essential components that make this build lethal:
AWM Skyline Long Barrel (unlocks at Level 35 – worth the wait)
Resonant Sniper Rifle Suppressor – because giving away your position is amateur hour
8X Scope for those long-range precision shots
Perst-7 Blue Laser – stability when it counts
M-Lok Kit for additional stability
Pair this with Luna operator for intel gathering and ambush setups. Luna's Detection Arrows plus AWM's one-shot potential? I've seen extraction success rates jump 20-30% with this combo.
Operator Synergy: Maximizing Team Composition
Gizmo Engineer: The Area Denial Revolution
Gizmo's November 18th introduction didn't just add another operator – it revolutionized defensive strategies. Those Crawler Nest deployments? Game-changing.
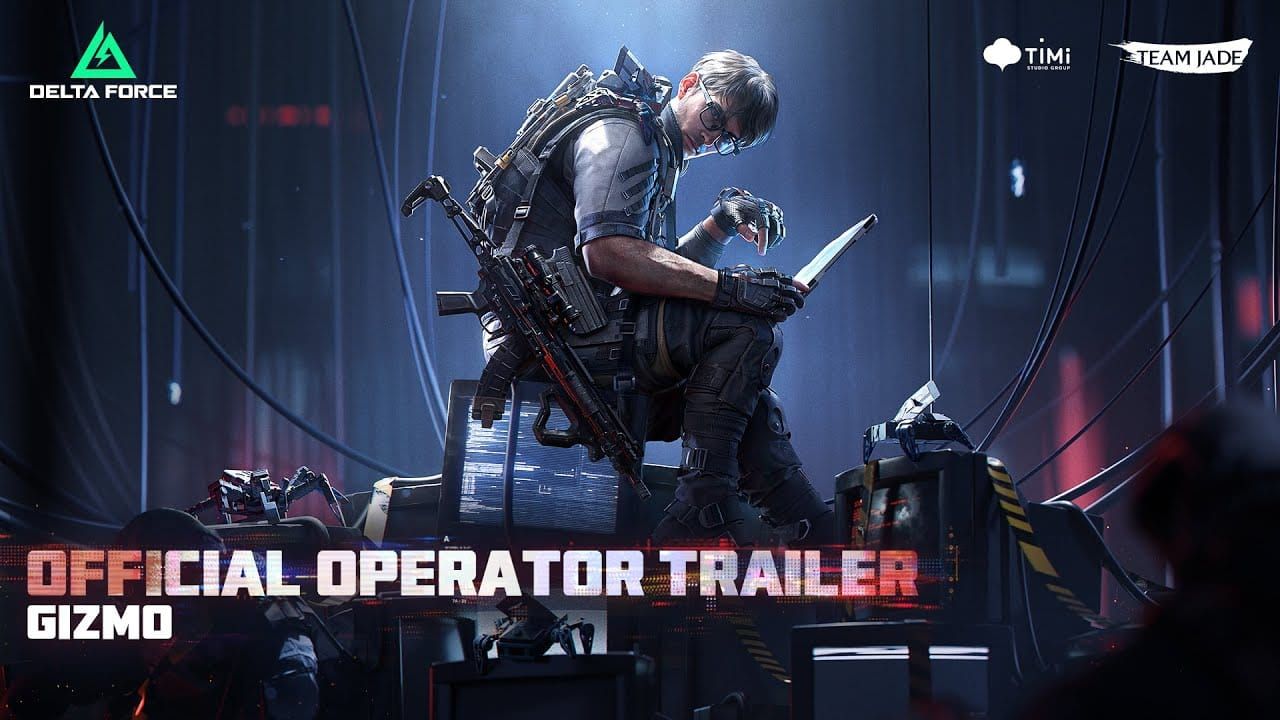
The gadgets release three exploding spiders that apply Corrosion debuffs, creating vulnerability windows for coordinated eliminations. It's area denial with style.
Gizmo Optimal Loadout - M250 LMG Code: 6FIAPV406L5PA4U76HE30
Attachments for sustained suppression:
AR Heavy Tower Rear Grip – control under pressure
75-Round Belt for extended fire – because suppression takes time
M250 Sentinel Short Barrel – mobility without sacrificing power
Resonant MKII Foregrip – stability for sustained fire
Perst-7 Blue Laser – precision when needed
Deploy those Crawler Nests at chokepoints for maximum area denial. M250's 550 RPM and 125-round capacity provide the sustained suppression corroded targets need to feel.
Luna Recon: Information is Power
Luna maintains SS-Tier status through Detection Arrow utility. Those persistent sensor trails in fog-heavy maps? That's intelligence dominance.
Volt Arrow delivers shock damage while marking targets for team coordination. It's not just about damage – it's about information warfare.
Luna Sniper Build - AWM Code: 6HLOCT009MFFCME3G7LT2
Specialized attachments for intel gathering:
Skyline Long Barrel for maximum range coverage
Resonant Suppressor for stealth operations
ACOG 6x for versatile magnification options
DBAL-X2 laser for stability under pressure
M-Lok Kit for precision shots
Position on elevated terrain to maximize Detection Arrow coverage. Luna's intel gathering plus AWM's elimination potential creates information advantages that win ranked matches.
Cheap Delta Force game top up services through BitTopup offer immediate access to Battle Pass levels and operator unlocks. BitTopup's reliable service ensures Gizmo access at Level 15 without grinding delays.
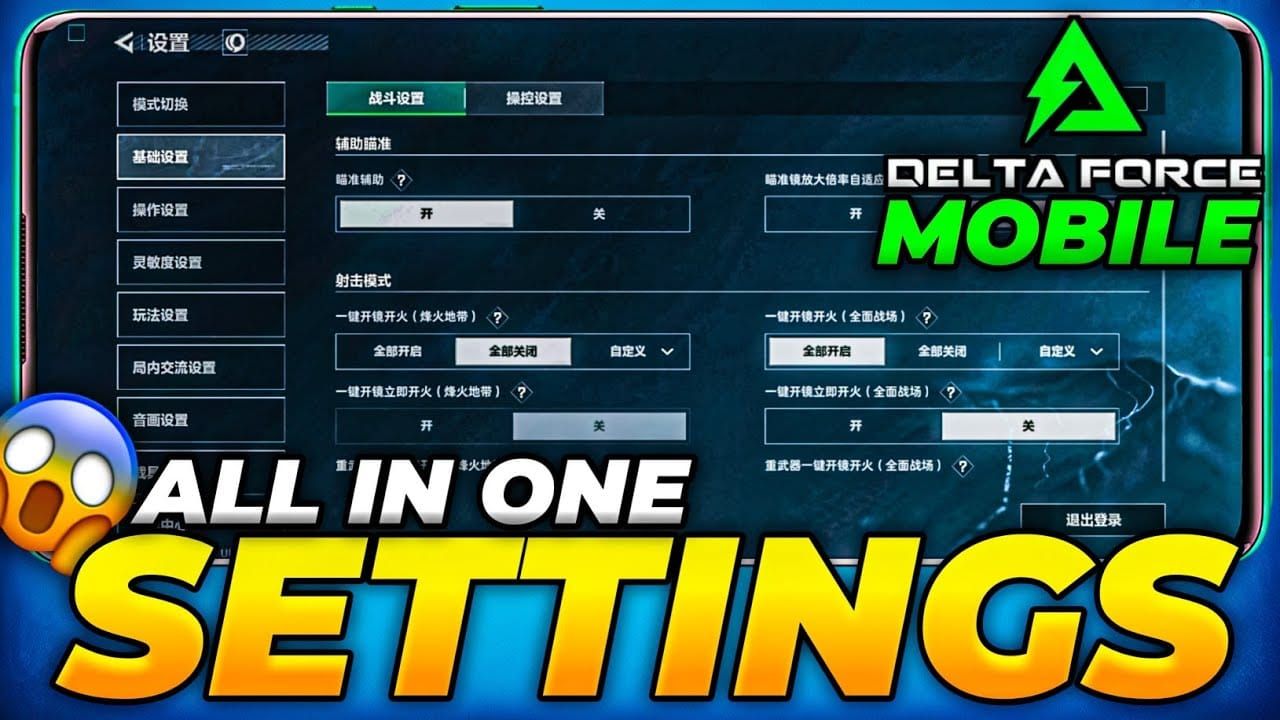
Zero Recoil Sensitivity Settings for Mobile
The Foundation: Optimal Control Configuration
Let's talk about something that separates good players from great ones – sensitivity settings. I've spent countless hours testing these configurations, and precision calibration across all input methods provides maximum accuracy for ranked mobile play.
Core Sensitivity Settings:
Hip Fire Horizontal: 450
Hip Fire Vertical: 300
ADS Horizontal: 200
ADS Vertical: 150
Red Dot/Holographic: 200
3x Scope: 120
Sniper Scopes (8x): 60-80
Right Stick Deadzone: 10
Enable Sensitivity Per Zoom for scope-specific adjustments. Here's the key: set Camera Sensitivity so one full screen swipe achieves exactly 180 degrees rotation. Use Fixed Speed acceleration for consistent muscle memory development.
Gyroscope Integration: The Secret Weapon
Gyroscope settings provide vertical recoil compensation, freeing your thumbs for horizontal tracking. Start with ADS Only for beginners, progress to Always On for advanced play.
Gyroscope Configuration:
ADS Gyro: 100-150%
Firing Gyro: 80-100%
Tilt phone top forward during fire for optimal control
This setup uses wrist tilt for vertical recoil management while maintaining thumb precision for target tracking. It's a game-changer once you adapt.
Advanced Team Composition Strategies
The Balanced Four-Player Setup That Actually Works
Optimal ranked teams require role distribution covering intel, sustainability, control, and aggression. After analyzing hundreds of matches, this composition maximizes win rates across both modes.
Recommended Team Structure:
Recon (Luna): Detection Arrows for spotting, elevated positioning mastery
Support (Stinger): Stim Pistol healing, Smokescreen for safe revives
Engineer (Gizmo): Crawler Nests for area denial, chokepoint control
Assault (D-Wolf): Motorized Exoskeleton for flanking, Triple Blaster utility
The synergy is beautiful: Luna reveals enemy positions, Stinger maintains team health, Gizmo controls territory, D-Wolf executes aggressive plays with enhanced mobility.
Counter-Strategy Implementation
Key Counter Tactics:
Counter AWM: Deploy smoke grenades, multi-angle repositioning, EMP pushes to disrupt positioning
Counter SMG-45: Maintain 10+ meter distance, use M250 LMG for suppression with overlapping team fire
Counter Hip-Fire Builds: Raptor's EMP grenades disable Tactical Stance and lasers, removing those 8-10 meter accuracy advantages
SR-3M serves as an effective budget stealth alternative for surprise engagements when facing superior firepower.
Weapon Progression and Training Methodology
The Four-Phase Development System (That Actually Works)
Phase 1 (Weeks 1-2): Foundation Building Complete all tutorials for basic mechanics. Seriously, don't skip these. 15-minute daily aim practice sessions. Master M4A1 (code 6FINC4G0CQTV1IBVCBQVT) for movement and recoil control fundamentals.
Phase 2 (Weeks 3-4): Advanced Mechanics Practice sprint-slide combinations until they're muscle memory. Master recoil patterns in Hot Zone (3v3v3 no-loss mode – perfect for experimentation). Experiment with A-tier weapons like M7 and SCAR-H.
Phase 3 (Weeks 5-6): Team Coordination Use concise callouts for team communication. Practice operator coordination with friends. Learn map-specific positioning for Monument and competitive maps.
Phase 4 (Weeks 7+): Competitive Optimization Analyze professional player content and strategies. Track K/D ratio and win rate improvements. Participate in ranked matches with confidence.
Training Drill Specifications
180-Degree Test: In firing range, swipe from screen center to edge for exact 180-degree turn. Adjust Camera Sensitivity until consistent.
Spray Transfer: Fire at 20-meter left target, then snap to right target with M4A1. Tweak Firing Sensitivity for smooth transitions.
Wall Spray: Empty magazine at 15-meter wall to observe pattern. Practice controlling grouping for tight clusters.
FAQ
What's the best weapon in Delta Force Mobile for beginners? M4A1 with build code 6FINC4G0CQTV1IBVCBQVT, hands down. Predictable recoil pattern, solid 25 damage per round, and versatile range make it perfect for learning fundamentals while staying competitive in ranked play.
How do I import weapon build codes in Delta Force? Go to Gun Customization Station, select your weapon, choose Preset, then Import. Paste the build code (like 6HLOANO09MFFCME3G7LT2 for CI-19) and confirm to save the loadout.
Which operator should I unlock first for ranked play? Luna (Recon) provides the highest impact for new players through Detection Arrows and intel gathering. That SS-Tier ranking comes from persistent sensor trails that benefit your entire team.
What are the optimal gyroscope settings for mobile? Set ADS Gyro to 100-150% and Firing Gyro to 80-100%. Enable ADS Only for beginners, progressing to Always On. Tilt phone top forward during fire for vertical recoil control.
How do I counter SMG-45 users in close quarters? Maintain 10+ meter distance and use M250 LMG for suppression with overlapping team fire. SMG-45's 40-meter effective range drops significantly beyond close quarters.
When does Delta Force Season 8 launch? Based on the quarterly update schedule, Season 8 should launch around February 2026, approximately three months after Season 7's November 18, 2025 release.