

Squads that control elevation win gunfights. That's the defining truth of the April 2026 Blood Strike MENA meta — and ALONDRA's Jetpack combined with the Grappling Hook's repositioning speed creates a vertical pressure system no ground-based squad can reliably answer.
The three best 4-player comps right now: Volt + ALONDRA + Ran + Nacho (S-tier ranked), Volt + ALONDRA + Kraken + Ash Lord (S-tier Hot Zone aggro), and Volt + ALONDRA + Ran + Nova (late-circle defensive hold). Here's exactly how to run all three.
Why April 2026 Is the Vertical Meta's Defining Moment
The March 12, 2026 patch added ALONDRA, refined KATYA's sprint braking, and — most importantly — enabled the Wildcard Grappling Hook as a loadout option. That last change is what most players underestimate. Before this patch, vertical repositioning was opportunistic. Now it's a designed, loadout-integrated system with its own cooldown economy.
The Starship Cruise Strike Pass launched March 15, locking ALONDRA at Elite tier for 520 Gold. Within days, MENA Platinum+ lobbies showed a measurable shift: community testing consistently reports ~+20% squad efficiency at map peripheries when running vertical comps in Platinum+ BE/BR formats.
Ground-level squads face a geometry problem. When ALONDRA hooks to a rooftop, activates Jetpack for additional vertical separation, then drops an Arc Snare below — the defending team is simultaneously dealing with elevation disadvantage, a slowing zone, and an operator who can re-ascend if the initial exchange goes poorly. Three compounding problems from a single ability sequence.
The Grappling Hook replaces your tactical slot — a real cost. But when your squad provides zone control through Ran's Ice Barrier or Nacho's Hellfire wall, that trade becomes heavily favorable. The hook isn't a solo tool. It's a squad multiplier.
ALONDRA Deep Dive: The Engine of the Vertical Meta
ALONDRA is a Striker-class operator. Her active ability throws an Arc Snare — a spherical zone that damages and slows enemies inside. Her passive, Jetpack, lets her hold jump to ascend mid-air, with fuel resetting on every landing.
That fuel reset is the hidden mechanic most players miss. Jetpack fuel resets on any surface contact, including mid-air obstacles like window ledges. In building-dense Hot Zones, a skilled ALONDRA can chain multiple short ascents by deliberately grazing ledges between floors — effectively achieving continuous vertical mobility that the fuel bar alone wouldn't allow. It's not a bug; it's a designed interaction that rewards map knowledge.

One settings-level optimization worth knowing: disabling firearms in the Options menu reduces skill cooldowns, enabling faster Arc Snare cycles. Community testing confirms this is legitimate for players who want maximum Snare uptime in close-quarters scenarios.
The weakness column is why pairing ALONDRA with Ran or Nacho isn't optional — it's structural.
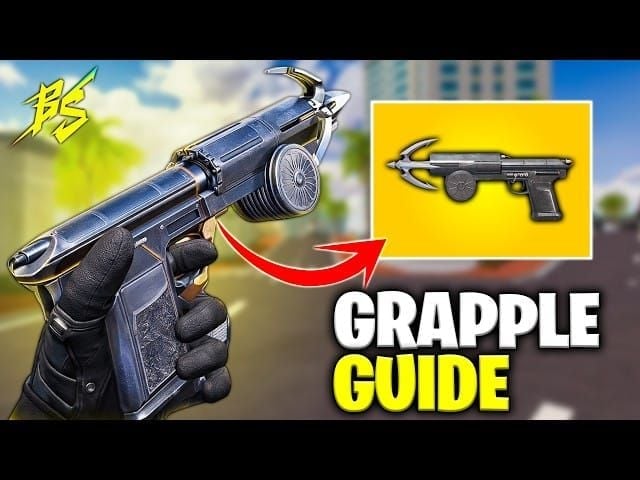
Grappling Hook Mechanics: What Every Squad Must Know
Setup requirement that trips up new players: the Wildcard Grappling Hook must be enabled in the Options menu before it appears as a loadout option. It's not available by default — confirmed in the March 12 patch notes.
The core sequencing rule: don't hook until Volt's EMP or Nacho's Hellfire is active. Descending from a hook puts ALONDRA in a predictable trajectory. Full-armor enemies punish that descent reliably. Volt's EMP strips 40 armor in a 40-meter radius; Nacho's Hellfire blinds for 1.5 seconds and disrupts vision for 20. Either condition means ALONDRA lands against compromised opponents.
The full aggression loop:
Volt activates EMP (or Nacho throws Hellfire)
ALONDRA fires Grappling Hook to rooftop
Jetpack extends vertical separation above the roofline
Arc Snare drops into the engagement zone below
Thompson SMG engages from elevation at 10–15m optimal range
On landing, Jetpack fuel resets — re-ascend if needed
Two mistakes that get squads wiped:
Lateral hooks are almost always wrong. The hook's value is vertical displacement — it puts you above the enemy's natural aim plane. Using it to reposition horizontally wastes the cooldown and surrenders the elevation advantage the entire comp is built around.
Hooking into a building without Arc Snare ready is the second. You arrive at elevation, enemies rush the stairs, and you have no zone denial. The Snare is what makes the rooftop defensible after you land.
The 3 Best 4-Player Squad Comps
Comp #1 — Sky Hammer: Full Vertical Aggression
Best for: Coordinated pre-made squads, Hot Zone formats
Win condition: Volt EMP strips armor → ALONDRA hooks in and drops Snare → Kraken pushes ground level → Ash Lord executes weakened targets. The Volt + Ash Lord synergy is the backbone: strip armor with EMP, Ash Lord's passive activates on every target below 50% HP. S-tier for Hot Zone high-kill formats.
The trade-off: Zero defensive utility. This comp wins fast or loses fast. Don't run it in late-circle ranked scenarios where zone damage and sustained fights favor defensive operators.
Comp #2 — Elevated Control: Hybrid Vertical-Ground Dominance
Best for: Ranked solo/duo queue, Platinum+ lobbies
S-tier ranked/tournament composition per community consensus. Ran's Ice Barrier solves ALONDRA's biggest weakness — it gives the squad a defensive anchor when vertical entries fail or when the zone forces ground-level holds. Nacho's Hellfire creates the push window while denying enemy vision of your vertical approach.
Why this beats Sky Hammer in ranked: Tournament play punishes all-in aggression. When an entry fails in Sky Hammer, the squad has no recovery tool. Elevated Control resets behind Ran's barrier, recovers shields via Cryomancy (+30% shield recovery within 30m), and re-initiates.
Comp #3 — High Ground Siege: Defensive Vertical Hold
Best for: Zone-camping playstyles, late-circle specialists
Swaps Kraken for Nova: Volt + ALONDRA + Ran + Nova. Nova's Toxic Grenade creates a 7-meter persistent poison zone; her Poison Master passive grants DoT immunity and a damage boost inside her own zone. The play pattern shifts from aggressive vertical entry to establishing a fortified elevated position — Ran's barrier blocks the approach, Nova's toxic zone punishes anyone who pushes through, ALONDRA's Snare covers remaining entry points.
Less explosive than Sky Hammer, but significantly more resilient in final circles. The weakness: you need to reach elevation before the final circle closes. This comp struggles when forced to rotate late.
Quick Comparison
Role-by-Role Breakdown
Hook Leader (ALONDRA): Initiates every vertical engagement. Arc Snare placement is where most squads underperform — drop it at chokepoints: doorways, stairwells, narrow corridors. An open-area Snare is easy to walk around. A stairwell Snare forces enemies to either take damage and slow, or find an alternate route that costs them time and position.
Armor Stripper (Volt): Creates the engagement window, doesn't lead the push. EMP fires before ALONDRA hooks. The Coursing Currents passive (+50% ADS speed, +10% movement) is always active — Volt is the enabler, not the star.
Ground Anchor (Ran or Nacho): Keeps the squad from being flanked while ALONDRA operates vertically. Ran's Ice Barrier (1,000 HP, 25-second duration) blocks the most obvious ground approach. Nacho's Hellfire handles vision denial for the push window. In Elevated Control, split these roles — one blocks, one blinds.
Finisher (Kraken or Ash Lord): Ash Lord's passive activates the moment Volt's EMP drops targets below 50% HP — which happens fast with 40 armor stripped. The +25% damage bonus turns every post-EMP engagement into an execute scenario. Kraken applies secondary ground pressure, preventing enemies from simply retreating from ALONDRA's vertical angle.
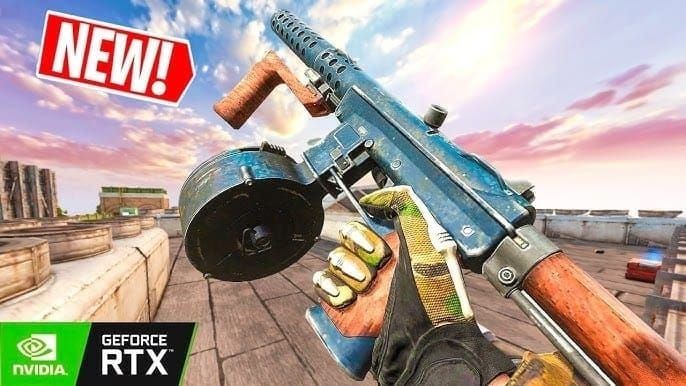
Thompson SMG: ALONDRA's Primary
The Thompson SMG with its 100-round drum magazine is the confirmed optimal primary for post-hook engagements. Effective range sits at 10–15 meters — exactly where you're engaging after landing from a rooftop hook. The large magazine means you can engage multiple targets without reloading, which matters because ALONDRA's reload window is her most vulnerable moment.
Thompson build priority order:
Hip-fire accuracy — you're often landing and immediately firing before ADS
ADS speed — Volt's passive amplifies this, making it doubly valuable
Recoil control — for sustained bursts at 10–15m
Mobility — keep movement speed up for post-hook repositioning
Avoid range barrels — they slow handling at the range where Thompson excels
That last point trips up a lot of players. Extending range at the cost of handling defeats the purpose of the vertical entry play entirely.
For players spending Gold on loadout upgrades, Blood Strike MENA cheap Gold recharge April 2026 options can help you kit out your Thompson build without burning through your resource stockpile.
How to Counter Vertical Meta Squads
Counter 1: Pre-emptive rooftop Ice Barrier. If enemy Ran places her barrier on the rooftop before ALONDRA hooks up, the landing zone is blocked. Counter-counter: scout rooftops before committing to a hook. If a barrier is already there, redirect to adjacent elevation.
Counter 2: Spread entries. ALONDRA's Arc Snare is powerful at chokepoints because it catches multiple enemies in a single zone. Opponents who spread their approach reduce the Snare's multi-target value. When you see enemies splitting wide, adjust Snare placement to the most likely convergence point.
Counter 3: Hellfire on rooftops. An enemy Nacho who anticipates your hook route can pre-place Hellfire on the rooftop, turning your landing zone into a vision-denied kill box. Vary your hook attachment points — predictability is the vertical meta's biggest vulnerability.
When to abandon the vertical approach mid-match: When the zone forces a ground-level final circle with nothing to hook to, the tactical slot cost becomes a pure liability. Also when your squad has lost Volt — without the EMP creating the engagement window, ALONDRA is hooking into full-armor enemies with no setup. That's a losing trade in Platinum+ lobbies.
Squad Callout System for Vertical Plays
Vertical play fails silently. The hook leader goes up, the ground team doesn't know when to push, and the timing window closes. Standardize these:
Hook out — ALONDRA has fired, ground team prepares to push
Snare down — Arc Snare placed, engagement window open
Up — ALONDRA at elevation and engaging, ground team pushes now
Hold — entry failed or Snare on cooldown, ground team waits
Drop — ALONDRA descending, ground team provides cover fire
The Hold callout is the most important and least used. Pushing when ALONDRA calls Hold — without Ran or Nacho anchor coverage — is the primary cause of squad wipes in this meta. Community testing is explicit on this.
For MENA squads using ping systems, assign specific ping colors to these states. Danger ping on a rooftop means Hellfire/Barrier detected, redirect. Go ping from ALONDRA's position means Snare is down, push now.
Unlocking ALONDRA & Managing Resources
Primary path: Starship Cruise Strike Pass (launched March 15, 2026) — ALONDRA unlocks at Elite tier for 520 Gold. This is the most resource-efficient route.
Avoid Gacha for ALONDRA specifically. Community reports put the pity threshold at 9,000–15,000 Gold with no Tier 50 refund mechanism. The Strike Pass at 520 Gold isn't close — it's the obvious play.
F2P Gold sources:
Redeem all active codes immediately — they expire without notice. At the high end, codes alone can cover a significant portion of the 520 Gold needed. Players who want to accelerate squad readiness can buy Blood Strike MENA Gold top up discount deal to get ALONDRA and the Thompson loadout sorted before the meta window closes.
The One Thing Most Vertical Meta Guides Get Wrong
Most content treats ALONDRA and the Grappling Hook as parallel topics. They're not — they're a single system, and it only functions when the squad is structured around it.
The specific insight missing from nearly every existing guide: the Arc Snare cooldown is your squad's push timer, not ALONDRA's personal ability timer. When the Snare is on cooldown, the entire squad holds. When it's ready, the entire squad prepares to push. Snare ready → Volt EMP fires → ALONDRA hooks → ground team advances. That synchronization is what separates squads that win with this meta from squads that just have ALONDRA on their roster.
FAQ: Blood Strike MENA Vertical Meta April 2026
What is the single best 4-player squad for ranked in April 2026? Volt + ALONDRA + Ran + Nacho. It covers all four functional requirements: vertical aggression (ALONDRA), engagement window creation (Volt EMP), defensive anchoring (Ran Ice Barrier), and vision denial (Nacho Hellfire).
Do I need the Grappling Hook to make ALONDRA viable? No, but her ceiling drops significantly without it. The Jetpack alone provides vertical mobility, but the hook creates the speed of displacement that makes her dangerous. In coordinated squad play, it's effectively mandatory.
Why wait for Volt EMP or Nacho Hellfire before hooking? Descending from a hook puts ALONDRA in a predictable trajectory. Volt's EMP strips 40 armor before she lands; Nacho's Hellfire blinds for 1.5 seconds. Either means she lands against compromised opponents rather than full-strength ones.
Is ALONDRA worth running in solo queue? Yes — community consensus rates her as the #1 solo queue priority over Volt because her aggression loop is self-contained. She doesn't need teammates to capitalize on her setup the way Volt does. Her effectiveness scales dramatically with coordination, but she's viable alone.
How do I counter an ALONDRA-based vertical squad? Pre-place Ran's Ice Barrier on likely landing rooftops, use Nacho Hellfire on rooftop landing zones, and spread your squad's entry points to reduce Arc Snare multi-target efficiency. Controlling the highest available elevation point preemptively is the most reliable counter.
Fastest way to unlock ALONDRA from zero Gold? Redeem all active codes (BSREWARD10K, BLOODSTRIKFB, TYSTRIKERS, MARCH21ST) immediately for 200–500 Gold each, then combine with daily missions (150–250 Gold/day) and Hot Zone wins (150–200 Gold). Target the Strike Pass at 520 Gold — avoid Gacha pulls for ALONDRA specifically given the 9,000–15,000 Gold pity threshold.