

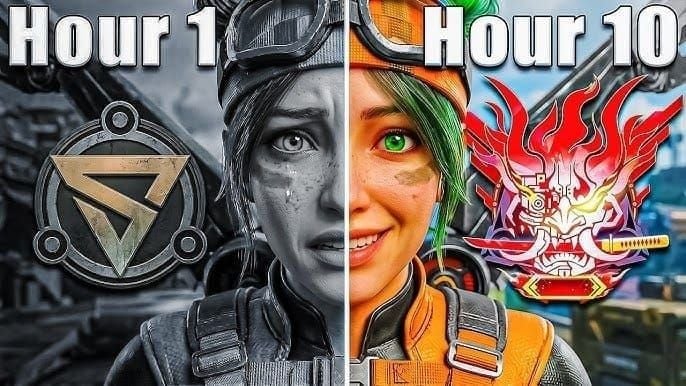
The March 2026 meta in Blood Strike MENA has a clear answer: ALONDRA + Grappling Hook is the most disruptive mobility pairing in the current patch. Best aggressive squad is Volt + ALONDRA + Kraken. Best ranked/tournament squad is Volt + Ran + Nacho. ALONDRA's Jetpack passive and Arc Snare create a vertical threat most opponents aren't built to answer — and Grappling Hook removes the one counterplay of pre-positioning.
Why ALONDRA + Grappling Hook Is Dominating in March 2026
No other operator-equipment pairing generates the same combination of elevation access, zone denial, and escape velocity. ALONDRA doesn't just move fast — she moves up. That distinction is breaking the MENA ranked ladder right now.
What Changed in the March 2026 Meta
The March 12 update and March 15 Starship Cruise Strike Pass introduced ALONDRA into the active roster. Before her, MENA competitive was settled around Volt + Ran + Nacho — passive uptime, armor stripping, wall denial. That comp still works. Community testing confirms it's S-tier for tournament formats.
What ALONDRA added is a second viable meta lane: vertical aggression. The MENA ranked environment already favored ability uptime and burst over sustained damage, which turned out to be the perfect ecosystem for her kit. KATYA also received refined Sprint braking in the same patch, improving her flanker viability — but ALONDRA's ceiling is higher for players willing to invest in the mobility loop.
Why Vertical Mobility Is Winning
Most MENA squads are optimized for horizontal engagements. Cover usage, rotation reads, zone timing — all calibrated for ground-level play. Grappling Hook breaks that by reaching rooftops, ledges, and second-floor windows in under two seconds, positions most opponents haven't pre-aimed.
The Dirt Bike is faster on flat terrain. In any map with meaningful vertical geometry, Grappling Hook outpaces it for repositioning value. ALONDRA's Jetpack passive then extends that advantage: once airborne from a hook, hold jump to keep ascending using fuel that fully replenishes on landing. The result is rooftop-to-rooftop movement no other operator can replicate.
The Aggression Loop (What Most Guides Skip)
Grappling Hook gets you to a position. ALONDRA's Jetpack gets you above it. Arc Snare locks down the space below her. In practice:
Hook onto a rooftop or elevated ledge
Ascend further with Jetpack fuel for additional height advantage
Drop Arc Snare into the chokepoint or doorway below — damages and slows enemies inside
Engage from elevation while enemies are slowed and repositioning is compromised
This loop doesn't require teammate coordination. It's self-contained. Community consensus places ALONDRA as the #1 solo queue priority over even Volt — she generates advantages independently.
ALONDRA Full Ability Breakdown
ALONDRA is a Striker-class operator, officially available via the March 15 Starship Cruise Strike Pass.
Passive: Jetpack

Hold jump while airborne and ALONDRA ascends using a fuel reserve that resets fully on landing. Every ground contact — including rooftop landings after a hook pull — is a refuel point for the next ascent. She creates her own high ground without pre-built structures, teammate boosts, or map-specific exploits.
Don't burn Jetpack fuel before the Grappling Hook lands. Let the hook complete, land briefly to refuel, then ascend. Chaining them without the refuel step leaves you mid-air with no fuel and no cover.
Active: Arc Snare
Throws an arc device that forms a spherical snare zone — damages enemies inside and slows movement. Spherical means vertical coverage: it catches players on stairs, in windows, and on low ledges, not just flat ground. Late-circle chokepoints are where it swings fights most dramatically. Community experience confirms it can convert a 1v2 into a manageable 1v1 by slowing one target long enough to eliminate the other.
Don't throw it into open ground. The slow effect is wasted when enemies can simply walk out of the radius. Confined spaces and chokepoints are where it multiplies.
Advanced setting worth testing: disabling firearms in the Options menu reduces skill cooldowns. Faster Arc Snare cycling in ranked means more zone deployments per match — it compounds over a full game.
Common Mistakes
Spending timed Gold on Gacha instead of the Strike Pass. Gacha pity runs 9,000–15,000 Gold. The Starship Cruise Strike Pass unlocks ALONDRA for 520 Gold. Not close. There's no free unlock route and no refund at tier 50 — commit intentionally.
Wasting Arc Snare in open areas. Enemies walk out. Save it for doorways and late-circle chokes.
Chaining Jetpack before the hook lands. Always let the hook complete and land first to reset fuel.
Grappling Hook: Everything You Need to Know
You must enable Wildcard Grappling Hook in the Options menu before it appears in your loadout. It's not active by default. This trips up a surprising number of players.
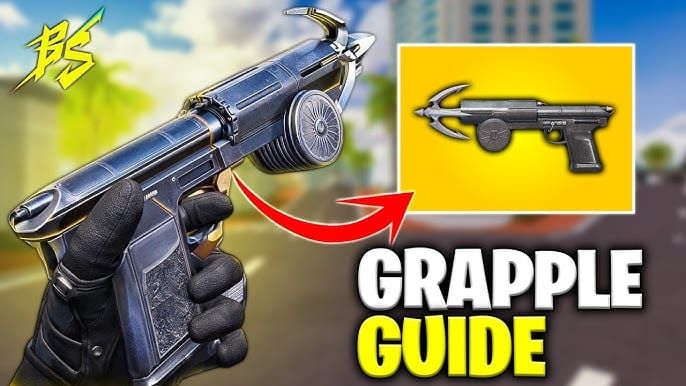
Range, Cooldown, Attachment Points
The hook fires to a target location and pulls you there rapidly. It attaches to rooftops, walls, elevated ledges, and environmental structures — not open sky or flat ground. You need surface geometry.
Cooldown management is the skill gap between average and good Grappling Hook users. Burning it for a lateral reposition when a vertical one was available is the most common waste. Treat it as a vertical investment, not a panic button.
Advanced Techniques
Swing-Cancel: Initiate the hook, cancel mid-pull to stop at an intermediate position rather than overshooting to the full destination. Useful for landing on ledges.
Peek-Hook: Hook to a rooftop edge, peek the angle below, drop back. Combines with ALONDRA's Jetpack for a hover-peek that's extremely difficult to track.
Roof Rush: Full squad coordinates simultaneous hooks onto a defended rooftop. Requires callouts but creates multi-angle entry that most defending squads can't cover.
Equipment Slot Trade-offs
Grappling Hook replaces another tactical option. Worth it when your squad already has zone control covered by other operators (Ran's Ice Barrier, Nacho's Hellfire). If your squad lacks utility, ALONDRA runs Grappling Hook while teammates cover control — that's the correct role division.
Top Squad Compositions
Volt + ALONDRA + Kraken (Full Aggression)
Community-confirmed best squad for high-kill formats. The sequence: Volt opens with EMP — 40 armor damage in a 40-meter radius — while his Coursing Currents passive grants the squad +50% ADS speed and +10% movement speed. Armor-stripped enemies then face ALONDRA's hook entry from above, Arc Snare slowing their retreat, and Kraken closing from a third angle.
The Volt passive is what makes this work even when EMP is on cooldown. Passives have no cooldown — MENA tournament consensus confirms this is why passive-heavy operators dominate competitive formats.
Volt + Ran + Nacho (Ranked Domination)
The S-tier tournament composition. Ran's Ice Barrier (1,000 HP wall, 25-second duration) combined with Nacho's Hellfire (30-meter wall, 1.5-second blind, 20-second vision disruption) creates layered zone denial that forces opponents into predictable positions. Volt's EMP punishes the forced movement.
ALONDRA doesn't fit here. This comp wants static control, not mobile initiation. Run it when your squad has strong rotation reads and wants to dictate pace rather than hunt engagements.
Volt + Nova (Armor Strip + Poison Denial)
Nova's Toxic Grenade creates a 7-meter radius persistent poison zone. Her Poison Master passive grants DoT immunity and a damage boost inside her own zone. Combined with Volt's armor strip, this punishes any squad trying to hold position after losing armor. Solid flex option for duos or filling a three-player squad — not the meta ceiling, but self-sufficient.
ALONDRA as Solo Queue Primary Carry
Solo queue is a different game. You can't guarantee Volt's EMP timing or Ran's wall placement from randoms. ALONDRA is the #1 solo queue pick above Volt because her loop is self-contained. Prioritize Arc Snare at late-circle chokepoints, don't rely on teammates to create entry windows, and use every landing as a fuel reset to stay mobile. The Jetpack means you're always one ground contact away from full vertical potential.
Best Operator Pairings
Slot 2 — Volt (Non-Negotiable)
His EMP creates the armor vulnerability window ALONDRA's entry exploits. His passive movement bonuses apply to the whole squad during the hook approach. No other operator generates this combination of setup utility and passive value. The trade-off: Volt rewards aggression. In the ALONDRA meta, you're not playing passive.
Slot 3 — Ran or Nacho
Ran covers ALONDRA's primary weakness — she has zero defensive utility. Ice Barrier (1,000 HP) protects the squad during hook approaches or provides a fallback after an Arc Snare play. The Cryomancy passive (+30% shield recovery for teammates within 30 meters) compensates for the health attrition aggressive play generates.
Nacho is the alternative when you need vision denial over physical cover. His Hellfire wall's 20-second disruption is devastating in late-circle. Caveat: high skill ceiling. Community experience is consistent — he's mid-tier without strong rotation reads. Don't run him if your squad isn't communicating.
Slot 4 — Emma or Nova
Emma is essential for squad sustain in four-player formats. Her value drops in solo queue, but in a premade running ALONDRA's aggressive style, her healing prevents the comp from bleeding out between engagements.
Nova fits when you want a second zone-denial tool alongside Arc Snare. Poison Master's DoT immunity inside her own zone also makes her a strong anchor for holding positions after ALONDRA creates the entry.
What to Avoid
Don't stack ALONDRA with purely passive, defensive operators that have no aggressive trigger. A squad of ALONDRA + Ran + Emma + Nova has sustain and utility but no armor-stripping initiation — you'll win defensive exchanges and lose the aggressive ones that define this meta.
Weapon Loadouts for This Meta
SMGs post-hook: After a Grappling Hook entry you're typically within 10–15 meters. The Thompson SMG with 100-round drum is specifically relevant — no reload mid-engagement means you don't waste the Arc Snare slow window.
ARs for elevation sightlines: Before dropping into close range, ALONDRA often has mid-range angles. The BAS Helix Cooling Barrel tightens Hip Fire Accuracy over time — useful when firing from elevation without a full ADS setup.
Attachment priority: ADS speed and hip fire accuracy over stability and recoil control. You're moving constantly. Attachments that reward stationary play actively hurt the Grappling Hook style.
How to Counter This Meta
Pre-emptive zone control is the primary counter. ALONDRA needs an attachment point — usually a rooftop or elevated ledge. Control those positions before she can hook to them and her entire loop collapses. Ran's Ice Barrier at rooftop access points forces her to hook into a wall. Nacho's Hellfire at ground-level chokepoints denies the Arc Snare deployment zone.
Timing matters too. ALONDRA is most dangerous during the hook pull and the first two seconds after landing. Pressure her ground position during hook initiation — she's vulnerable before the pull completes. Aggressive forward positioning that denies her the initiation space is more effective than reactive shooting after she's airborne.
Against an airborne ALONDRA, high-fire-rate SMGs tracking the Jetpack ascent work better than slow-firing weapons. She's mobile but not invulnerable in the air — the Jetpack ascent is predictable vertical movement.
Ranked Mode: Running This Comp Competitively
Callout Sequence
The comp lives and dies on timing. Volt's EMP must land before ALONDRA hooks in. The sequence: EMP out → wait for armor confirmation → hooking → Arc Snare deployment. Short, sequential callouts prevent the overlap that wastes both abilities.
When to Commit vs. Pull Back
Commit when Volt's EMP has confirmed armor damage and ALONDRA has a clear hook attachment point. Pull back when the hook destination is contested or Arc Snare is on cooldown. The composition has no recovery tool — hooking into a defended position without Arc Snare available leaves ALONDRA exposed with no zone control and no escape beyond the Jetpack.
F2P Path to This Meta
Daily missions yield 150–250 Gold. Hot Zone wins add 150–200 Gold per win. Redemption codes BSREWARD10K, BLOODSTRIKFB, TYSTRIKERS, and MARCH21ST each yield 200–500 Gold. The March 20–22 daily login event rewards Gold equal to your registered account days — long-standing accounts accumulate meaningful amounts.
Community advice is consistent: prioritize the Starship Cruise Strike Pass over skins and Gacha. At 520 Gold for ALONDRA versus 9,000–15,000 Gold for Gacha pity, the Pass is the only rational choice for players trying to access the meta. If you need Gold faster to catch the March window before the meta shifts, Blood Strike MENA cheap Gold recharge to unlock ALONDRA 2026 is worth checking for competitive pricing.
Free value worth completing: March 12 missions for the AR97 Ascendant skin, March 18 Fight with Friends event for KAINDA Apex Runner, March 20 relay challenges for the Ascendant Limited Title and permanent Butterfly Knife. None require Gold investment and all build roster depth for future meta shifts.
The Options Menu Advantage Most Players Miss
Two settings directly affect ability performance:
Disable Firearms — reduces skill cooldowns. For ALONDRA, faster Arc Snare cycling means more deployments per match. Test it in practice before running it in ranked — the trade-off suits her kit specifically since she's not a weapon-primary operator.
Enable Wildcard Grappling Hook — required to use the hook at all. Not enabled by default. If you can't find the Grappling Hook in your loadout, this is why.
Frequently Asked Questions
What does ALONDRA do and why is she meta in March 2026? Striker-class operator with Arc Snare (spherical zone that damages and slows enemies) and a Jetpack passive (hold jump while airborne to ascend; fuel resets on landing). She's meta because the March 2026 MENA environment rewards vertical mobility and burst ability uptime — both of which she provides independently, making her the top solo carry in the current patch.
How do you enable Grappling Hook in Blood Strike MENA? Options menu → enable Wildcard Grappling Hook. Not active by default. Without this toggle, the equipment won't appear in your loadout.
Best squad composition in Blood Strike MENA right now? Aggressive/high-kill: Volt + ALONDRA + Kraken. Ranked domination/tournament: Volt + Ran + Nacho. Both are community-confirmed top-tier for the current patch.
Is ALONDRA worth 520 Gold from the Strike Pass? Yes — and it's the only way to unlock her. No free path, no refund at tier 50. At 520 Gold versus 9,000–15,000 Gold for Gacha pity, the Pass is the only rational choice. The March 20–22 daily login event and redemption codes can close the Gold gap. For players who want to secure the pass quickly, the Blood Strike MENA top up Gold discount for Starship Cruise Strike Pass offers a fast top-up option worth considering.
How do you counter ALONDRA + Grappling Hook? Control the elevation before she hooks to it. Ran's Ice Barrier at rooftop access points and Nacho's Hellfire at chokepoints deny her entry positions. Pressure her ground position during hook initiation. Against an airborne ALONDRA, high-fire-rate SMGs tracking the Jetpack ascent are more effective than slow-firing weapons.
Does ALONDRA work in solo queue? She's the #1 solo queue pick in MENA ranked for March 2026, rated above Volt because her loop requires no teammate coordination. Arc Snare + Grappling Hook + Jetpack is a self-contained aggression cycle.
What changed in the March 2026 meta? The March 12 update and March 15 Strike Pass introduced ALONDRA, creating a vertical aggression lane alongside the established Volt + Ran + Nacho zone-control meta. KATYA received refined Sprint braking, improving flanker viability. The Ash Lord remains S-tier in ranked (Lava Realm Strike Pass, available through March 30) with +25% damage against enemies below 50% HP — a passive that synergizes directly with Volt's armor stripping.
Meta data sourced from official Blood Strike patch notes (March 12, 2026) and community testing across MENA ranked sessions. Tier placements reflect community consensus as of March 2026 and should be re-evaluated each patch cycle.