

The March 2026 meta has a clear answer at the top: ALONDRA-led vertical squads running the Thompson SMG dominate Hot Zone right now. The two strongest templates are Volt + ALONDRA + Kraken for high-kill aggressive play and Volt + ALONDRA + Ran + Nacho for ranked zone control. No other operator replicates ALONDRA's two-phase entry loop — Jetpack ascent into Arc Snare — and the Thompson's 100-round drum means you never reload mid-fight after a hook.
Why the ALONDRA Vertical Meta Is Reshaping Blood Strike MENA
Vertical meta isn't just go high. It forces enemies into a decision they can't win: look up and expose themselves, or hold ground and eat an Arc Snare through the door.
Hot Zone hardpoints are fixed, predictable structures — normally a defender's advantage. ALONDRA breaks that. She attacks from the Z-axis, invalidating pre-aimed horizontal defensive setups. Community testing confirms she outpaces even Dirt Bike rotations in elevation-heavy Hot Zones, reaching rooftop positions before opponents can counter-rotate.
ALONDRA's Kit: What Actually Makes It Work
Active — Arc Snare: A spherical zone that damages and slows enemies inside. Not a grenade — a denial tool. At late-circle chokepoints, a well-placed Arc Snare converts a 1v2 into a 1v1 by neutralizing one target's ability to reposition.
Passive — Jetpack: Hold jump while airborne to ascend. Fuel resets fully on every landing — meaning each rooftop or ledge you touch is a full reset. You're managing fuel per-engagement, not across a whole match. That distinction matters enormously for cooldown planning.
The entry loop:
Grappling Hook to rooftop
Jetpack ascend for additional height
Drop Arc Snare into the room or chokepoint below
Engage from elevation with Thompson SMG
Two settings most players miss:
Enable Wildcard Grappling Hook in Options (required for loadout availability)
Disable firearms in Options — reduces skill cooldowns, enabling faster Arc Snare cycling
That second one is huge. More Arc Snare cycles per match means more chokepoint denials, which compounds over a full Hot Zone session.
The Hidden Mechanic Most Guides Skip
Jetpack fuel resets per surface, not per engagement. Mid-air obstacles — window ledges, partial rooftops, protruding structures — each count as a landing and reset your fuel. An experienced ALONDRA player can chain three or four Jetpack bursts in a single entry by deliberately touching intermediate surfaces. This extends vertical range dramatically. It's not a glitch; it's intended, and it's the difference between reaching a rooftop and reaching the floor above it.
March 2026 Patch Context
The March 12 update introduced both ALONDRA and the Thompson simultaneously. ALONDRA unlocks via the Starship Cruise Strike Pass (520 Gold, releasing March 15). Community consensus places her A-tier on the MENA Ranked Tier List, just below Ash Lord at S-tier — but for solo queue, she's widely considered the #1 pick over Volt because her aggression loop doesn't require teammate setup. Ash Lord's +25% damage vs. sub-50% HP enemies synergizes with Volt's armor strip, which is why Ash Lord edges her in pure ranked tier. ALONDRA doesn't need that setup.
One thing to factor in: the Starship Cruise Strike Pass has no Tier 50 refund, unlike the previous Lava Realm Pass. Plan your Gold accordingly.
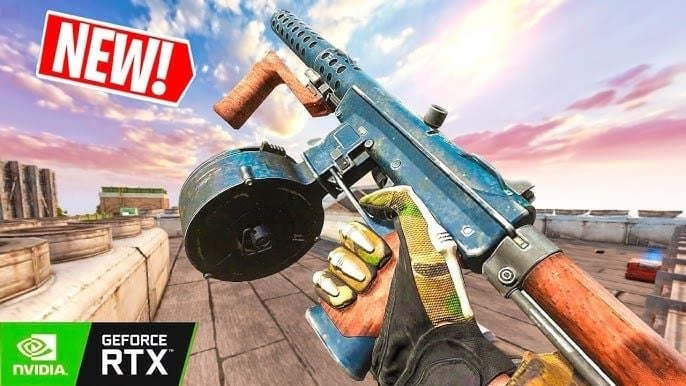
Why Thompson SMG Pairs Perfectly
The Thompson's 100-round drum eliminates the reload vulnerability every other SMG creates post-hook. When you land from a Hook + Jetpack sequence, you're in a 10–15m engagement immediately. Any reload animation at that moment is a death sentence. The math is simple: 100 rounds outlasts any close-range fight without pausing.
Thompson Build Philosophy
Because ALONDRA's entries are fast and close, build for handling and hip-fire accuracy — not range. You want the gun ready the moment you land.
Avoid range-extending barrels. They add weight and slow handling without benefiting the engagement distances ALONDRA creates.
The 4 Best Squad Compositions
Composition #1: Full-Aggro Vertical Stack
Volt + ALONDRA + Kraken + Ash Lord — high-kill format, maximum Hot Zone pressure.
Volt opens with EMP (40 armor damage, 40m radius). ALONDRA hooks in from above and drops Arc Snare on the slowed, armor-stripped cluster. Kraken and Ash Lord clean up. Volt's passive (+50% ADS speed, +10% movement speed squad-wide) benefits every teammate — including ALONDRA mid-descent. Enemies who survive EMP + Arc Snare are almost always below 50% HP, making Ash Lord's passive permanently active in these exchanges.
Best for: Casual Hot Zone, high-kill lobbies, fast aggressive play.
Composition #2: Balanced Domination (Ranked Meta)
Volt + ALONDRA + Ran + Nacho — community's top zone control template for March 2026 MENA.
ALONDRA's critical weakness is zero defensive utility. Ran's Ice Barrier (1000 HP, 25 seconds) provides the cover she needs when a fight extends. Nacho's Hellfire creates a 30m vision disruption wall that prevents enemies from tracking ALONDRA's descent path. The Grappling Hook replaces ALONDRA's tactical slot here because Ran and Nacho handle zone control entirely.
Best for: Ranked mode, tournament play, teams prioritizing round wins over kill count.
Composition #3: Anti-Sniper Disruptor
ALONDRA + Ran + Nacho + Volt — same operators, reactive priority.
Here, ALONDRA's vertical mobility counters enemy snipers rather than initiating offensive entries. When snipers lock down a Hot Zone approach, ALONDRA hooks to a flanking rooftop, Jetpacks to their level or above, and drops Arc Snare on their position. Ran's Ice Barrier cuts the sightline simultaneously. Nacho's vision disruption prevents the sniper team from coordinating a response.
Best for: Heavy sniper lobbies, defensive Hot Zone maps, teams struggling with long-range suppression.
Composition #4: Solo-Carry Enabler
ALONDRA + any three support operators — for when you can't rely on coordinated teammates.
ALONDRA is the #1 solo queue ranked pick in the MENA community over Volt. Her loop — Hook, Jetpack, Snare, Thompson — doesn't require teammate coordination. She can swing a 1v2 to a 1v1 at late-circle chokepoints with Arc Snare alone. Your three teammates run whatever they're comfortable with. ALONDRA carries the entry burden.
Best for: Solo queue ranked grind.
Composition Tier Summary
Squad Role Breakdown
Entry Fragger: Timing Your Vertical Drops
Don't hook until Volt's EMP has landed or Nacho's Hellfire is active. Entering before armor is stripped or vision is disrupted means ALONDRA absorbs full damage on descent — and she has no defensive ability to absorb it. Give enemies a problem at ground level first, then arrive from above.
ALONDRA's Arc Snare cooldown is your squad's push timer. When it's available, push. When it's on cooldown, hold and let Ran's Ice Barrier or Nacho's Hellfire cover the gap. Build squad communication around ALONDRA's cooldown state, not the other way around.
Anchor/Support: Ran and Nacho
Ran's Ice Barrier (1000 HP, 25 seconds) is the composition's safety net — cover for ALONDRA to reload, reposition, or retreat when a fight extends. Ran's Cryomancy passive (+30% shield recovery within 30m) also accelerates squad shield regeneration between engagements.
Nacho's Hellfire is underrated as an ALONDRA enabler. The 1.5-second blind and 20-second disruption on a 30m wall means enemies can't track ALONDRA's descent during the entry window.
Hot Zone Tactical Guide
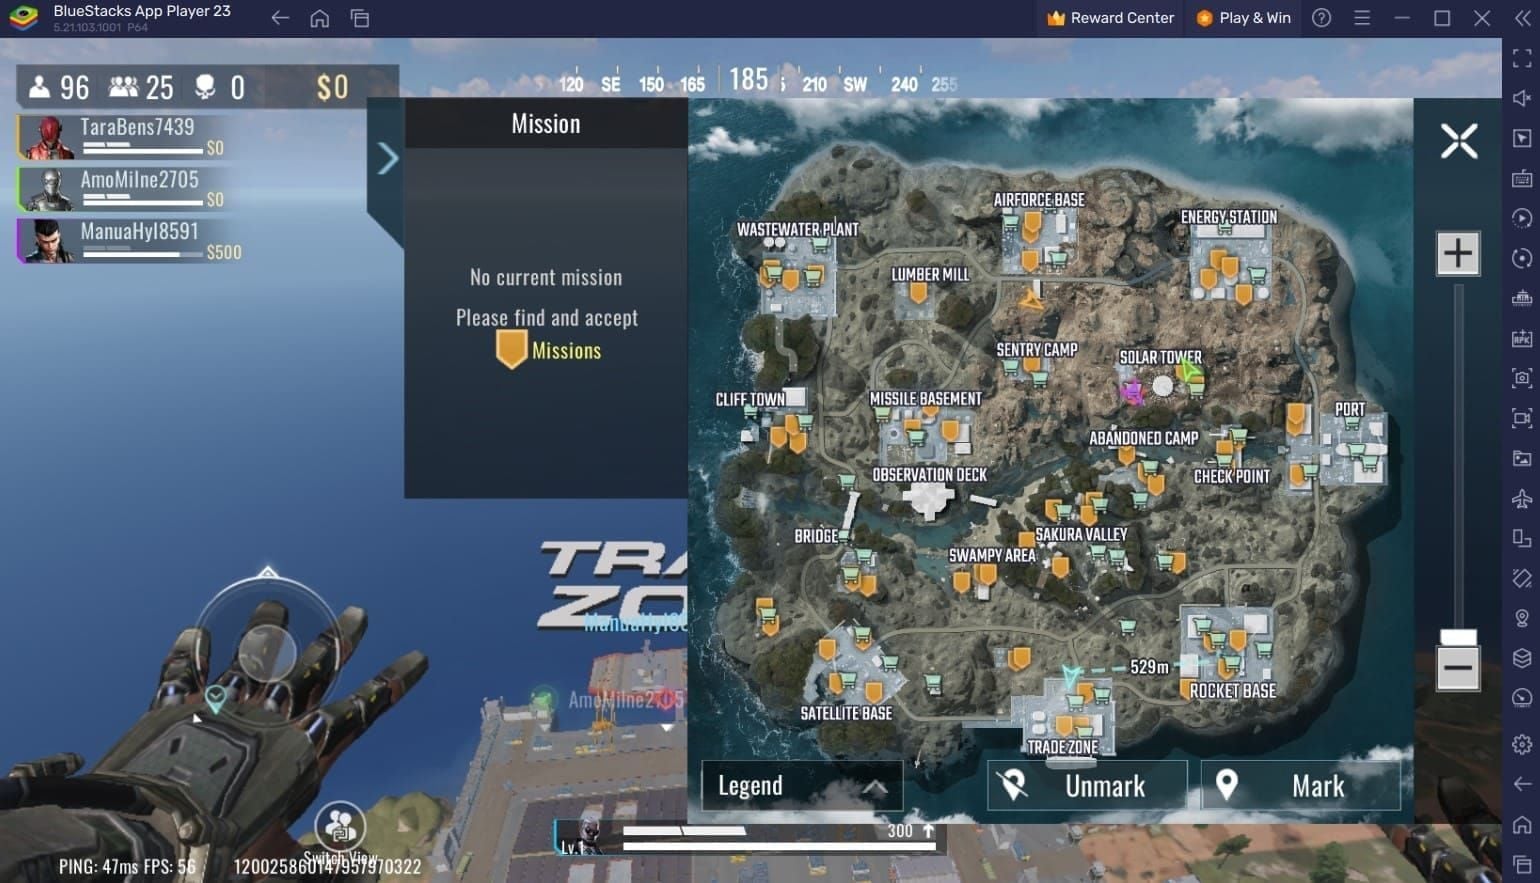
The biggest mistake ALONDRA players make: wasting Arc Snare in open areas. Open areas have no chokepoint geometry to amplify the slow — enemies just walk out. Save it for doorways, stairwells, and hardpoint entry points where the slow traps enemies against walls or cover.
Use vertical movement for initial hardpoint capture and late-circle chokepoints. Use ground-level rotation for mid-match repositioning between hardpoints — burning your hook on a lateral reposition means it's unavailable when you reach the next hardpoint and need to go up.
Hot Zone awards 1 point per second for weapon mastery and requires Platinum rank in BE or BR. Squad play boosts efficiency approximately 20% when you position at hardpoint peripheries and monitor spawn waves rather than camping center.
Countering the ALONDRA Vertical Meta
Don't try to out-aim her mid-descent. Deny the rooftop positions before she reaches them.
Pre-emptive rooftop zone control with Ran's Ice Barrier or Nacho's Hellfire is the community-confirmed counter. An Ice Barrier on a rooftop landing zone forces ALONDRA to land elsewhere, breaking her entry angle. Nacho's vision disruption prevents her from identifying safe landing spots during descent.
Don't cluster at chokepoints. Arc Snare's power comes from trapping multiple enemies in a confined space. Spread across multiple entry points so a single Snare can't neutralize two players simultaneously.
If the enemy is running dedicated anti-air positioning and your ALONDRA dies on every hook, switch to the Balanced Domination comp's ground-level variant — Ran + Nacho zone control with Volt EMP pushes. When rooftop access is consistently denied, forcing it is a losing strategy.
Common Mistakes to Avoid
Over-stacking vertical operators without ground coverage. Two mobility operators and no anchor means when ALONDRA's entry fails, the whole squad is exposed. Always have at least one Ran or Nacho.
Misusing Arc Snare. Open areas, lateral hooks when vertical repositioning is available — both waste her defining abilities. Arc Snare belongs at chokepoints. The hook belongs on vertical lines.
Wrong Thompson attachments. Building for range kills handling at the 10–15m distances ALONDRA creates. Build for hip-fire and ADS speed instead.
F2P Gold Strategy for Unlocking ALONDRA
ALONDRA costs 520 Gold via the Starship Cruise Strike Pass. F2P players can accumulate through daily missions (150–250 Gold) and Hot Zone wins (150–200 Gold per session). These redemption codes each yield 200–500 Gold once per account: BSREWARD10K, BLOODSTRIKFB, TYSTRIKERS, MARCH21ST.
If you're close to the 520 threshold and don't want to miss the Pass window, Blood Strike MENA cheap gold top up for squad builds 2026 is worth checking — especially for MENA players looking to minimize spend while maximizing roster coverage.
Frequently Asked Questions
Is ALONDRA worth unlocking for casual Hot Zone players? Yes, with one caveat. Her self-contained loop makes her the strongest solo queue operator in the March 2026 meta — no coordinated teammates required. The 520 Gold cost is significant, and the Pass has no Tier 50 refund, so commit only if you'll actively play the Pass content.
Does Volt + ALONDRA + Ran + Nacho work in Ranked? This is specifically the ranked and tournament composition. Community consensus rates it S-tier for ranked. Ran and Nacho's zone control compensates for ALONDRA's zero defensive utility, and Volt's squad-wide buffs raise everyone's performance floor.
How does Arc Snare actually swing a 1v2? The slow traps one enemy at the chokepoint while you engage the second at full speed. It's a tempo ability, not a kill ability — it turns a disadvantaged fight into a fair one. Community testing confirms it consistently converts 1v2 scenarios to 1v1 at late-circle chokepoints.
Best counter if enemies run ALONDRA against us? Pre-emptive rooftop control with Ran's Ice Barrier or Nacho's Hellfire. Spread your entry points so a single Arc Snare can't catch multiple teammates. If you have Nacho, deploy Hellfire on rooftop landing zones before she reaches them.
Does Thompson work outside ALONDRA compositions? The 100-round drum has value in any close-range aggressive comp. But its specific advantage — eliminating reload vulnerability post-hook — is most pronounced in ALONDRA's entry style. Without a vertical entry operator, other SMGs with better range profiles may serve you better.
How much Gold do I need for the full Balanced Domination comp? ALONDRA is the primary investment at 520 Gold via the Strike Pass. Volt, Ran, and Nacho have separate unlock costs depending on your current roster. For MENA players bridging the gap efficiently, Blood Strike MENA recharge gold discount March 2026 options are available to minimize spend while completing your roster.
Last verified: March 2026. ALONDRA ability stats and Thompson SMG data subject to change with mid-month balance patches. Check official Blood Strike patch notes for updates after March 12.